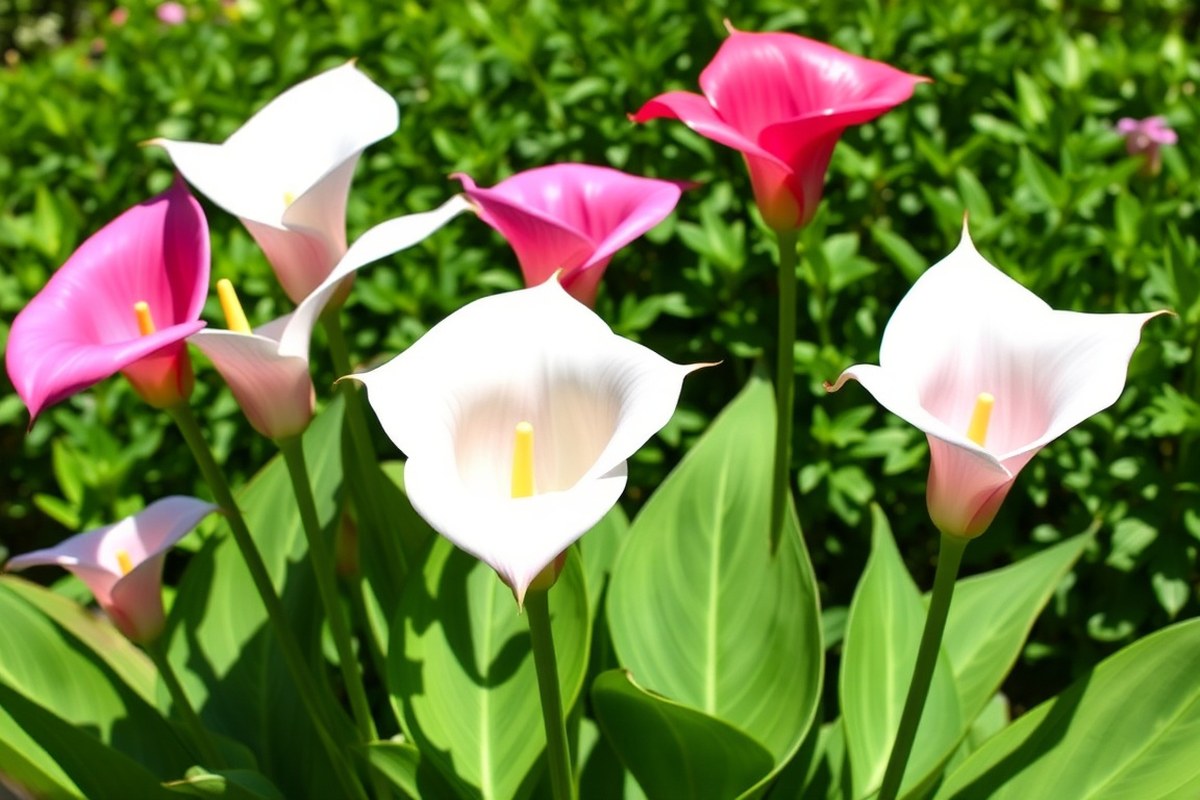
Can Calla Lilies Be Planted Outside? A Complete Guide with Proven Tips
Can calla lilies be planted outside? Yes, but only in warm climates where winter rarely drops below 20°F. They thrive as perennials in USDA zones 8 to 10. Growing calla lilies outdoors year-round only works in specific zones.
Planting outside works best after the last frost when soil temperatures reach at least 55°F. Calla lily bulbs need about 4 inches of soil cover and room to spread. Crowding them leads to poor growth and more disease risk.
Keep an eye on soil temperature before planting. Calla roots won’t grow below 55°F. Planting too early can cause rot and stunt growth, especially in cooler soils.
Key Takeaways
- Plant calla lilies outdoors only in USDA zones 8 through 10.
- Wait until soil reaches 55°F before planting bulbs outside.
- Place bulbs at a depth of 4 inches and keep 12-inch gaps between them.
- Protect container-grown calla lilies from frost in colder zones.
- Calla lily roots won’t grow in soil cooler than 55°F.
- Overcrowding bulbs leads to weaker plants and more disease.
Can Calla Lilies Be Planted Outside in Your Climate?

Calla lilies do best outdoors in USDA hardiness zones 8 through 10. These zones usually have mild winters where temperatures rarely drop below 20°F (-6°C).
Your area is in these zones. So you can plant calla lilies outdoors to survive as perennials.
You live in colder zones, especially below 8. So calla lilies won’t survive winter outside. Instead, treat them as annuals or bring them inside during cold months.
In zones 7 or cooler, heavy mulching might protect bulbs. But this is not a reliable long-term option.
Calla lilies also need warm climates with temperatures consistently above freezing to thrive outside. They prefer full sun to partial shade and soil that drains well.
Your climate fits these conditions between zones 8 and 10. So planting outdoors makes bigger blooms.
To decide if you can plant calla lilies outside, check your USDA zone first. Find it by entering your zip code on the USDA website or garden resources.
Next, confirm your winter lows rarely fall below 20°F. Yes means plant calla lilies directly in your garden soil. No means keep calla lilies in pots or bring them indoors before frost comes.
When and How to Plant Calla Lilies Outdoors for Best Growth

Plant calla lilies outside after the last frost in spring. Wait until soil temperature is 55°F or warmer. This helps the bulbs grow well.
Space the bulbs 12 inches apart and plant them 4 inches deep to ensure healthy growth. Timing depends on your USDA zone and local soil conditions.
Best Planting Window by USDA Zone
Spring is the ideal planting time for most regions. In USDA zones 4 to 6, wait until mid-May after the last frost before planting. Soils warm up slowly in these zones, so delaying planting helps prevent damage.
Zones 7 and 8 allow planting earlier, from March to April. These areas have milder winters, so soil often stays warm enough sooner.
Tropical zones 9 to 11 can plant year-round if frost is absent. Adjust planting time based on your frost dates and zone tables.
Check your last frost date and plan to plant only after it passes. Soil temperature should consistently reach 55°F, signaling a good time to begin. Warmer climates give you longer planting windows than colder ones.
Depth and Spacing Guidelines
Plant rhizomes or bulbs 4 inches deep in the soil. This depth protects bulbs from temperature swings and helps root development. Ensure the planting hole is gently loosened for easier root growth.
Space bulbs about 12 inches apart. This distance prevents crowding and allows air circulation. Crowded plants may have poor growth or disease risks.
Give calla lilies room to spread and receive full light. Overcrowding can stunt blooms and cause foliage problems.
Preparing Soil Temperature for Planting
Warm soil is key to successful calla lily growth. Aim for consistent soil temperatures between 55°F and 65°F before planting. Cooler soil delays sprouting and may cause bulbs to rot.
Use a soil thermometer to check temperature in several spots at planting depth. Soil warmed by direct sunlight may reach target temp earlier. Cover soil with black plastic mulch one week before planting.
This warms the soil on cooler nights. It helps prepare the ground for the lilies.
Wait to plant bulbs until soil maintains warmth over several days. This reduces risks of frost damage and poor growth. Follow these steps to plant calla lilies outdoors:
- Check your local last frost date using a USDA zone map or gardening calendar.
- Measure soil temperature 2 to 4 inches deep with a soil thermometer.
- Prepare planting holes 4 inches deep spaced 12 inches apart.
- Place each bulb flat with the growing points facing up inside the hole.
- Cover bulbs gently with soil and firm lightly.
- Water thoroughly after planting to settle soil and start growth.
- Apply mulch if soil needs insulation from temperature drops or weeds.
- Monitor soil temperature and plant health regularly during early weeks.
Wait until soil stays above 55°F before planting. Cold soil slows growth and risks rot.
Preparing Soil and Location for Successful Outdoor Calla Lilies
Calla lilies grow best in soil that drains well and retains some moisture. Aim for loamy or sandy loam soil with 20 to 30 percent organic matter. Clay soil holds too much water.
It can rot roots quickly. Add compost or sand to improve drainage first.
Test your soil’s pH with a home kit. Calla lilies prefer a pH between 6.0 and 6.5, which is slightly acidic to neutral. Your soil may be too acidic or alkaline.
Add garden lime or sulfur as the package says. Do this before planting.
Prepare the soil by clearing weeds and loosening it to about 12 inches deep. Mix in plenty of compost or aged manure to feed your lilies. You can also add perlite or coarse sand if the soil feels dense or sticky.
- Clear weeds and debris from the planting area
- Loosen soil to 12 inches deep with a shovel or tiller
- Mix in 2 to 4 inches of compost for nutrients
- Add perlite or coarse sand for better drainage, if needed
- Test soil pH and adjust to 6.0, 6.5 with lime or sulfur
- Let soil settle for a few days before planting
Choose a spot that gets at least six hours of direct sunlight each day. Morning sun with afternoon shade works well in hot climates to protect leaves from scorching. In cooler areas, full sun helps the lilies grow strong and bloom better.
Avoid low spots where water tends to collect. Standing water invites root rot. Slightly raised beds or mounded soil encourage good drainage.
Drainage may be poor in your yard. Try planting calla lilies in pots using well-draining potting soil.
How to Transition Indoor Calla Lilies to Outdoor Planting
Start hardening off your indoor calla lilies about 7 to 10 days before planting them outside. This process helps your plants adjust to outdoor conditions smoothly and lowers transplant shock risk. Gradual exposure to sun and weather toughens up the leaves and roots.
Hardening Off Timeline
Begin by moving your calla lilies to a shaded outdoor spot for a few hours daily. Increase the outdoor time a little each day while keeping them out of direct midday sun. This 7 to 10 day plan lets the plant build resilience without stressing it.
- Day 1: Take the calla lilies outside for 2 hours in light shade.
- Day 2, 3: Extend outdoor time to 4 hours, still in shade.
- Day 4, 5: Move them where they receive morning sun for 3 hours.
- Day 6, 7: Give plants 5 to 6 hours of morning sun. Then, provide late afternoon sun. Avoid sun at midday.
- Day 8, 9: Let callas get 6 to 8 hours of sun. Include some filtered shade too.
- Day 10: Place them outdoors all day if weather stays above 50°F.
Sunlight Exposure Recommendations
Start with indirect light to protect the plants’ delicate leaves and prevent sunburn. Slowly add more direct sun, especially morning light, which is gentler than afternoon rays. Avoid full midday sun on young outdoor calla lilies during hardening off.
Watch for leaf fading or curling, which shows too much sun too soon. Move the plant back to shade.
Cut down on direct sun time. The goal is to build tolerance gradually without causing damage.
Monitoring Plant Response
Check your calla lilies daily for signs they’re stressed or adjusting well. Wilting, yellow leaves, or crispy leaf edges indicate transplant shock and too much sun or wind. On the other hand, firm green leaves mean they’re adapting nicely.
Water the soil lightly to keep it moist but not soggy throughout the hardening off. Avoid letting the plants dry out or flood in rain. Proper moisture helps the callas maintain carbohydrate reserves, essential for strong outdoor growth.
Watering and Fertilizing Outdoor Calla Lilies for Healthy Growth
Calla lilies need consistently moist soil but not soaking wet. Water them about once or twice a week, depending on the weather.
Increase watering during hot, dry spells. Let the soil dry out slightly before the next watering to avoid root rot.
Start watering calla lilies in spring once you see new growth. Use slow-release fertilizer then, so nutrients feed the plants gradually. Reapply fertilizer every 6 to 8 weeks during the growing season.
This helps keep blooms vibrant. It also keeps leaves healthy.
Choosing the right fertilizer is key. A balanced fertilizer with equal parts nitrogen, phosphorus, and potassium (like a 10-10-10) works well.
It supports leaves, roots, and blossoms equally. Avoid high-nitrogen fertilizers, or the plant may make more leaves than flowers.
- Water deeply to soak the root zone each time you water.
- Check soil moisture 1 to 2 inches below the surface before watering.
- Apply slow-release fertilizer in spring as new shoots appear.
- Feed again every 6 to 8 weeks during active growth.
- Use well-draining soil to help prevent overwatering issues.
- Stop watering gradually as the plant goes dormant in fall.
Overwatering is the most common mistake; soggy soil invites root diseases.
Watch the leaves for clues: yellowing or wilting may signal overwatering or nutrient problems. Improve drainage if water stands after watering. Use a balanced fertilizer to fix any nutrient deficiency rather than guess which nutrient is missing.
Feeding and watering outdoors takes some attention but keeps your calla lilies blooming strong. You’ll avoid common problems by keeping a consistent schedule.
Also, watch soil moisture carefully. That means more flowers and glossy foliage all season.
Protecting Calla Lilies from Pests, Diseases, and Weather Outdoors
Calla lilies outdoors can attract pests like aphids, spider mites, slugs, and snails. These bugs suck sap or chew on leaves and flowers, causing damage and stress. Keeping an eye out early helps you catch infestations before they spread.
Fungal diseases show up as white dots on leaves or brown spots on petals. Too much moisture and poor air flow worsen fungal problems. Good airflow and avoiding wetting leaves during watering are your first defense.
- Check plants weekly for pests or disease symptoms.
- Spray with insecticidal soap or neem oil at first sign of bugs.
- Remove dead or infected leaves immediately to prevent spread.
- Use well-draining soil and avoid overhead watering to reduce fungus.
- Apply fungicide if spots spread despite other steps.
- Handpick slugs and snails or use bait traps at night.
- Keep garden free of debris that shelters pests.
In cooler zones, frost can kill calla lilies outside. Nights below 28 °F need protection. Cover plants with frost cloths that seal edges well to keep cold air out.
Remove covers in the sun so lilies get light and warmth. Heavy mulch helps insulate roots in marginal areas near freezing.
Watch weather forecasts every evening during spring and fall for cold snaps. This way, you can cover plants before temperatures drop.
Winter Care and Storage Options for Outdoor Calla Lilies
Calla lilies generally cannot survive harsh winter conditions in the ground in cold zones. You should dig up their rhizomes after the leaves dry out, usually in late fall. Store them properly to keep them alive and ready for replanting next spring.
Determining If Rhizomes Should Be Dug Up
Calla lilies survive winter outdoors only if your climate stays above freezing. In frost-prone areas, rhizomes must be dug up before the ground freezes. Wait for the leaves to turn yellow and die on their own.
This shows the growing season has ended. Do not cut the foliage early.
Leaving rhizomes in soil that freezes below 32°F (0°C) risks damage. They may rot or freeze solid, ruining them.
In warmer zones, where winter temps remain above 50°F (10°C), you can leave rhizomes planted. Check your local frost dates to decide.
Proper Rhizome Harvesting and Cleaning
Dig up the rhizomes about three months after blooming, once the leaves fully dry. Use a garden fork or shovel carefully to avoid cutting the tubers. Gently remove soil from the rhizomes but avoid washing them with water.
Cleaning keeps the rhizomes dry and prevents rot during storage. Cut back any dead leaf stems and inspect each rhizome for soft spots or damage. Discard any that show signs of disease or decay.
- Wait until leaves are dry and yellow before digging.
- Loosen soil around the rhizomes with a fork or shovel.
- Lift rhizomes carefully from the ground.
- Remove excess soil by brushing or wiping gently.
- Trim dead leaves and damaged parts.
- Check rhizomes for softness or rot, discard bad ones.
Ideal Storage Conditions
Store clean rhizomes in slightly moist peat moss or vermiculite. Keep them in a breathable container, like a paper bag or cardboard box. Avoid plastic bags unless they have holes for airflow.
Store rhizomes in a dark, cool spot around 50 to 60°F (10 to 15°C). Basements or garages with insulation work well. Check them each month and toss any that start to rot.
Common Mistakes When Planting Calla Lilies Outdoors and How to Fix Them
One common mistake is planting calla lilies too early in the season. Calla lilies need warm soil to grow well, usually 60°F or warmer. Planting before this can stunt growth or cause rot during cold snaps.
Poor drainage is another big problem. Calla lilies like moist soil but not soggy or waterlogged conditions. Standing water around roots often leads to rotting and wilting plants.
Spacing is often overlooked. Crowding calla lilies reduces airflow and increases disease risk.
They need 8 to 12 inches between plants to grow strong. This space helps air flow and prevents mold or mildew.
- Check soil temperature before planting; aim for 60°F or more.
- Amend soil with compost to improve drainage and nutrition.
- Plant bulbs 3 to 4 inches deep for best root anchoring.
- Space plants 8 to 12 inches apart to prevent overcrowding.
- Water deeply but allow soil to dry slightly between waterings.
- Mulch to keep roots cool and maintain soil moisture balance.
Water problems show in leaf color and texture. Yellowing leaves can mean overwatering; dry, brown edges often indicate underwatering. Check soil moisture before watering.
Stick your finger about two inches deep to see if it feels damp. Adjust watering based on this.
Check soil drainage by digging a small hole and filling it with water. It should drain within an hour.
Fix heavy clay soils by mixing in coarse sand or fine gravel with organic matter. This mix helps excess water drain away while keeping roots moist. Avoid planting calla lilies downhill from areas where runoff collects, as this increases flooding risk.
Step-by-Step Action Plan for Planting Calla Lilies Outdoors
Use this plan to plant your calla lilies outside and help them grow strong. Follow each step to get the best results in your garden.
- Two weeks before planting: Place your indoor calla lilies outside each day. Increase their time outside gradually. Do this for about two weeks to harden them off. Check that leaves look healthy and firm.
- One week before planting: Prepare well-draining soil mixed with compost in your chosen sunny spot. Soil should feel loose and moist but not soggy.
- Planting day: Dig holes about 4 inches deep and 8 inches apart. Place bulbs with roots down, cover with soil, and water lightly.
- First week after planting: Water plants every 2 to 3 days, keeping soil evenly moist. Look for new shoots as a sign of growth.
- After 3 weeks: Apply a balanced liquid fertilizer every 2 weeks. Watch leaves for deeper green color and steady growth.
- Mid-season check: Inspect plants for snails or aphid damage. Remove pests by hand or use safe insecticidal soap if needed.
- Late season before frost: Cut back foliage after it yellows. Dig up bulbs if you have cold winters. Store indoors in dry peat or sand.
Frequently Asked Questions
Can Calla Lilies Survive Frost If Planted Outside?
Calla lilies do not tolerate frost well. They need protection or to be dug up before freezing temperatures arrive to avoid damage.
Do Calla Lilies Require Full Sun or Shade Outdoors?
Calla lilies prefer full sun to partial shade. Too much shade can stop blooms.
Find a spot with 6 hours of sun. More light helps your calla lilies grow well.
How Deep Should I Plant Calla Lily Bulbs Outside?
Plant calla lily bulbs about 3 to 4 inches deep in the soil. This depth protects bulbs while allowing shoots to break through easily.
How Often Do I Need to Water Calla Lilies Outdoors?
Water calla lilies when the top inch of soil feels dry. Overwatering can cause root rot. So let the soil dry a bit before the next watering.
Can Calla Lilies Grow Year-Round Outside in Warm Climates?
Yes, in zones 8 to 10, calla lilies can grow year-round. They thrive without the risk of frost, maintaining blooms across multiple seasons.
Are Calla Lilies Deer Resistant When Planted Outside?
Calla lilies are generally deer resistant. Deer like to eat calla lilies sometimes.
You might need extra guards in areas with many deer. Protecting your plants keeps them safe.
Wrapping Up
Calla lilies can thrive outdoors with proper care and timing. Start by choosing a spot with good soil and sun. Try planting a few bulbs this season to see how they do in your garden.