How to Lay Brick Edgers: A Complete Guide with Tips and Troubleshooting
How to lay brick edgers is easier than it looks with the right steps. Start by marking the flower bed’s width, usually 24 inches from your reference point. Next, dig a trench about 6 inches deep and wide enough to fit all bricks tightly.
Adding a layer of gravel at the bottom helps drainage and keeps the bricks stable. Use regular bricks for your garden edging project. Dig a trench wide enough for the bricks.
The trench should also be deep enough to hold them securely. Next, pour paver sand into the trench.
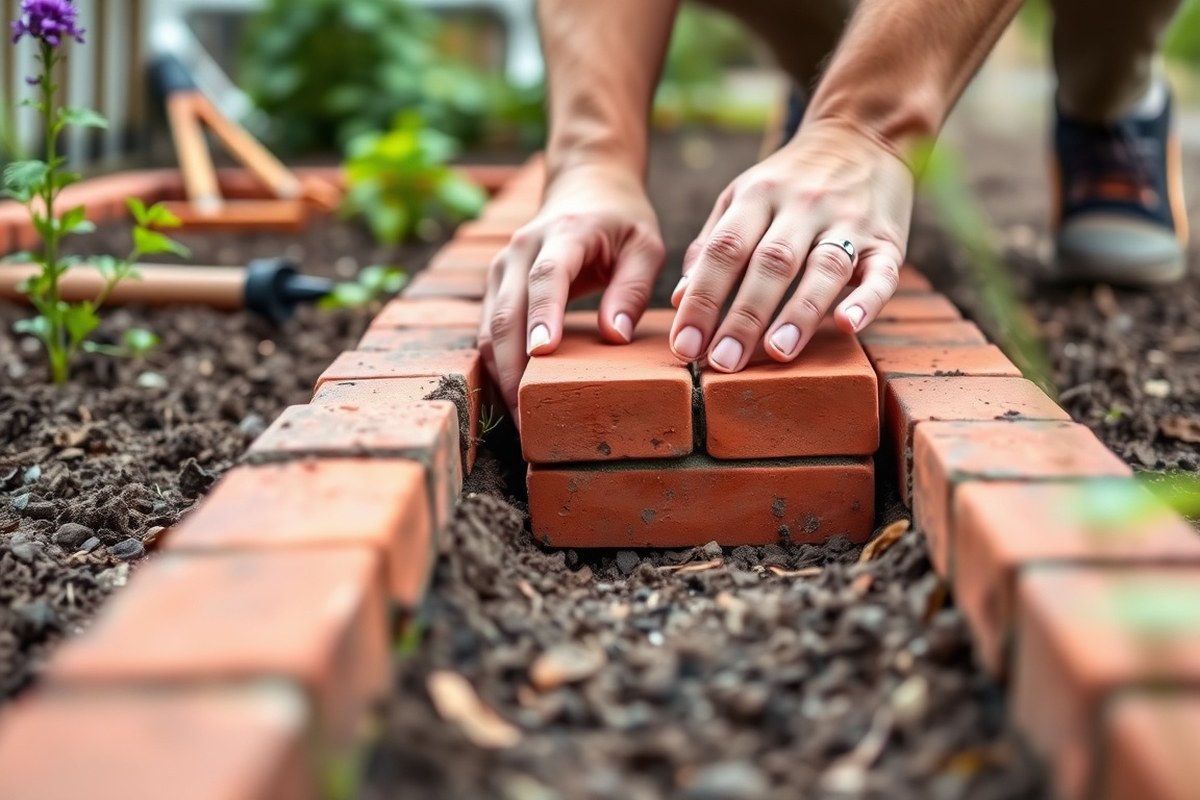
Tamp the sand down firmly to create a solid base. Place each brick carefully, tapping it with a rubber mallet.
Check that the bricks line up evenly and adjust as you go. Preparing the base well prevents shifting and ensures your brick edging lasts.
Key Takeaways
- Measure 24 inches from a fixed point to mark your flower bed edge.
- Dig a trench 6 inches deep for a sturdy brick foundation.
- Fill the trench with 2 inches of gravel for proper drainage.
- Use standard bricks about 8 x 2.25 x 3.75 inches for a uniform look.
- Add paver sand under the bricks and tamp it firmly before laying.
- Check brick placement regularly to keep the edging straight and level.
How to Lay Brick Edgers Step-by-Step

Laying brick edgers needs careful digging, placing, and securing. Start by digging a trench wide and deep enough to hold the bricks firmly.
Dig a trench about 6 inches deep. Make it wide enough for the brick thickness plus some room for a base.
Next, prepare the base by adding gravel or crushed stone in the trench. This helps with drainage and stabilizes the bricks to keep them level over time. You should compact this base layer well before placing any bricks.
After setting the base, you place bricks carefully, tapping each one to settle it. Use a spirit level often to make sure every brick stays aligned and level. Keeping the bricks even is key to a neat border that lasts without shifting.
- Mark and dig a trench at least 6 inches deep along your edging line.
- Add 2 to 3 inches of compacted gravel or crushed stone into the trench.
- Arrange bricks dry to visualize the layout and confirm spacing.
- Start at one end and press the first brick into the base using a rubber mallet.
- Use a 24-inch level to keep each brick perfectly level as you proceed.
- Place each brick closely, tapping it down and adjusting alignment consistently.
- Fill gaps with sand or mortar, depending on your choice, to secure the bricks.
- Check the entire border one last time for evenness and make small adjustments.
For curved or sloped areas, take extra time to shape the trench and adjust brick placement. You may need a deeper trench for sideways bricks.
These form a border half as wide but taller. Avoid placing bricks directly on soil; that causes faster erosion and shifting.
Loose bricks shift easily. Bricks on a proper base stay stable and need less work.
Right depth and base stop sinking or tilting. This keeps edging neat and saves repair time.
Tools, Materials, and Bricks Needed for Edging
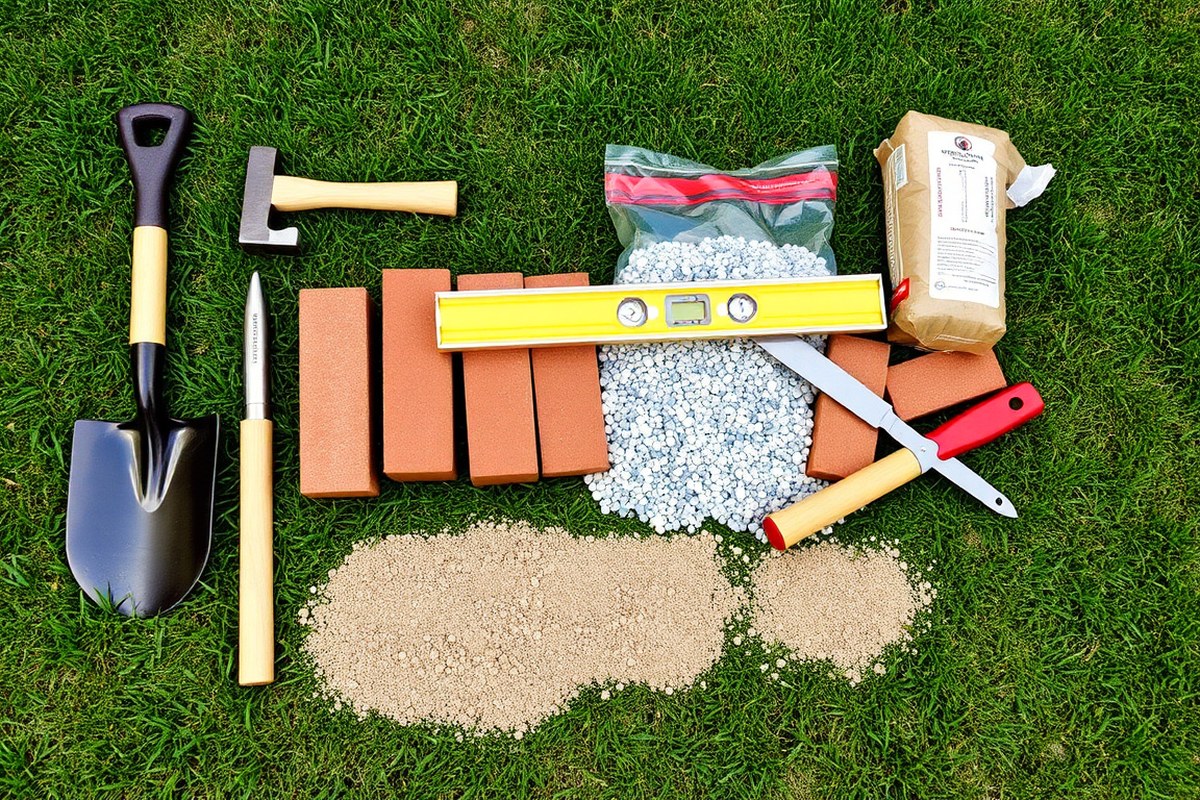
Start by gathering the right tools and materials to avoid delays. You’ll need a shovel, a rubber mallet and a tape measure. Use a level to keep your bricks even as you build.
These tools help make your garden edging neat and straight. A trowel helps spread sand or mortar. A broom cleans up excess material quickly.
Choose standard bricks about 8 inches long, 2.25 inches wide, and 3.75 inches thick for a neat, uniform edge. New bricks work best because they don’t have cracks or dirt that can weaken the edging. Avoid reclaimed bricks unless they’re in perfect condition with no visible damage.
- Standard bricks (8 x 2.25 x 3.75 inches), preferably new
- Shovel for digging the trench
- Rubber mallet to set bricks without breaking
- Tape measure to mark your bed’s length
- Level to keep bricks straight
- Trowel for moving sand or mortar
- Broom to clean the bricks after installation
Buy enough bricks by measuring your garden bed’s total length. Divide that length by the brick length to get a rough count. Order a few extra bricks to cover any breakage or mistakes during installation.
Using sand basement under bricks helps keep them stable and prevents shifting. Mortar gives a stronger hold but takes longer to apply. Select materials based on how permanent and sturdy you want your edging to be.
Make sure your trench is deep enough to hold the bricks half-buried; this prevents movement.
What to Put Under Brick Edging for Stability?
Start by digging a trench where you want to lay the brick edging. The trench should be deep enough to hold base layers plus the bricks themselves. Aim for a total depth of about 4 to 6 inches.
The depth depends on brick height and soil type. Adjust according to your soil conditions.
Put about 2 to 4 inches of compacted gravel or crushed stone at the bottom first. This layer helps water drain away from the bricks.
Good drainage stops soil from washing out and prevents bricks from shifting or sinking over time. Compact the gravel using a tamper or by pressing it down firmly.
Next, spread a 1-inch layer of coarse sand on top of the gravel. This sand layer levels the base and gives the bricks a solid surface to rest on. Coarse sand lets water drain and doesn’t get muddy like fine sand.
After spreading sand, use a rubber mallet’s flat end. Tap down the sand to pack it tightly. Make sure the sand layer feels firm.
- Dig trench 4 to 6 inches deep for brick and base
- Fill trench with 2 to 4 inches of compacted gravel or crushed stone
- Spread a 1-inch layer of coarse sand over gravel
- Use a rubber mallet to tamp down gravel and sand firmly
- Add a weed barrier fabric under gravel for extra weed control (optional)
- Lay bricks directly on tamped sand base
- Adjust brick height by adding or removing sand with the mallet
This layered base provides a firm, stable foundation. Your soil’s water retention or drainage issues need fixing. A thicker gravel layer can improve drainage and reduce water problems.
Add more gravel for wet soils. With poor drainage, bricks might shift or crack as soil moves. Compacting each layer ensures the base won’t settle unevenly later, making your edging last longer.
Gravel and sand cost around $5 per bag at garden centers. These prices cover paver base materials. Check prices locally as they may vary.
This cost is small compared to fixing sinking or broken bricks later. Preparing a good base usually takes about an hour. This is for a small edging project.
Good prep makes installation easier later on. Proper drainage keeps your garden neat and tidy.
It also helps bricks stay firmly in place. Your edging lasts longer with good drainage.
How to Lay Brick Edgers on Slopes and Curves
To lay brick edgers on slopes and curves, raise each brick’s height bit by bit. Cut bricks to make smooth bends that look natural.
Keep the bricks sloping slightly away from garden beds for proper drainage. This approach prevents water pooling and keeps your garden healthy.
Adjusting Brick Height on Slopes
On sloped ground, use the stair-step method to keep the bricks level and stable. Dig the base so each brick sits slightly lower than the last, matching the slope’s angle. This prevents gaps and keeps the brick edging secure.
Check each brick’s height with a level to ensure a consistent slope. Use a rubber mallet to tap bricks into place. Fill gaps with compacted soil or sand to lock them in.
Aligning Bricks Around Curves
For curves, lay out bricks along the edge first to visualize the shape. Cut some bricks in half or thirds using a masonry saw for tight curves. This avoids awkward gaps or sharp bends.
Leave gaps about ⅛ to ¼ inch wide to allow for brick movement. Use things like spacers or coins as temporary guides between bricks. Fit the edges tight for a neat and clean finish.
Ensuring Adequate Drainage Slope
Make sure the brick edging slopes away from your garden bed. The slope should be around 1/8 inch for every foot of edging. This helps water drain away from plants.
This small incline guides water off the bricks and prevents it from pooling inside the bed. Proper drainage protects plant roots from excess moisture.
Use a level with a slope measure to check the angle. Or mark where the slope drops on a string line along the edging. This keeps the slope even and consistent.
Check frequently while installing to keep the slope consistent. Avoid flat brick surfaces that trap water against your plants.
Follow these steps to install bricks on slopes and curves with the right drainage:
- Clear and level the ground along the desired edge.
- Mark the line and set a string guide to maintain alignment and slope.
- Dig trenches to the correct depths for stair-step or gradual slope adjustments.
- Lay bricks, adjusting height for slopes or cutting bricks to fit curves.
- Use a level often to check slope and alignment.
- Tap bricks with a rubber mallet to secure and level.
- Fill gaps between bricks with sand or soil for stability and drainage.
- Double-check that the edge slopes slightly away from the garden bed.
Mortar vs Sand: Choosing How to Secure Brick Edging
You can choose either mortar or sand to hold your brick edging in place. Mortar creates a strong, permanent bond between bricks. Sand allows for easier adjustments and drainage.
The right choice depends on your soil and climate. Also, consider how long your edging should last.
Mortar Installation Pros and Cons
Mortar binds the bricks tightly, creating a solid, long-lasting edge. It stops bricks from shifting and blocks out weeds growing between cracks. This method suits formal garden designs and areas with heavy rain or erosion.
Mortar takes more time to apply. It also needs proper curing. Curing can take several days.
Repairing mortar-edged bricks is tougher and may require a professional. Mortar might crack in freeze-thaw cycles. You need the right type for your climate.
The upfront cost is higher due to mortar materials and more preparation. However, it reduces maintenance because the brick layout stays firm, saving effort in the long run.
Sand Installation Pros and Cons
Setting bricks directly on a firm sand bed is quicker and cheaper. Sand allows some flexibility, which helps bricks adjust on shifting soil or slopes without cracking.
Press the bricks into coarse sand. Tap them level with a rubber mallet.
One big downside is that sand edges aren’t as strong as mortared ones. Bricks can move over time, especially in heavy rain or freeze-thaw areas. You’ll need to refill sand and reposition bricks occasionally to keep the line neat.
Sand edges drain well, reducing water buildup under bricks. This suits mild climates and areas with stable soil better than mortar. Still, you should avoid laying bricks directly on soil because that invites sinking and instability.
When to Choose Mortar or Sand
Mortar is better if you live in a wet or freezing climate. It keeps bricks tightly joined despite shrinking and swelling from weather changes. Mortar also suits heavy clay or sandy soil that tends to wash away or settle unevenly.
Sand works well on gentle slopes or flat ground with stable, well-draining soil. It lets you create curves and adjust bricks easily without the mess of mortar.
You want a less permanent edge. Sand works well and is more DIY-friendly.
Cost and maintenance are part of the choice. Mortar installation is pricier and more involved but demands less upkeep later. Sand needs occasional attention but costs less and requires fewer tools.
Here’s a quick comparison of mortar and sand for brick garden edging:
| Feature | Mortar | Sand |
|---|---|---|
| Installation time | Longer, with curing time | Faster, bricks pressed into sand |
| Cost of materials | Higher, needs mortar mix | Lower, just coarse sand |
| Durability | Strong, permanent bond | Less stable, bricks can shift |
| Maintenance | Low, occasional cleaning only | Medium, refill sand and adjust bricks |
| Climate suitability | Good for cold, wet areas | Better for mild, stable soil |
| Weed resistance | Better, mortar fills gaps | Weeds may grow between bricks |
| Flexibility | Low, rigid installation | High, bricks can shift slightly |
Consider this table to match your garden’s needs on cost, climate, and upkeep. This helps you pick the method that suits your soil and design goals.
Make sure to compact the sand bed well before setting bricks. Loose sand can cause bricks to sink or tilt over time.
Common Mistakes When Laying Brick Edging and How to Fix Them
One common mistake is digging the trench too shallow or too deep. The trench depth should match the thickness of the bricks. It also needs to fit the height of the soil or concrete.
This helps the edging stay stable and level. Too shallow, and the bricks won’t sit flush. Too deep, and they may sink or tilt over time.
Another issue is poor alignment, especially on curved beds. Using a garden hose as a flexible guide helps create smooth, even arcs. Mark the hose position clearly as a guide before placing bricks.
This helps keep the spacing even. It also maintains the shape of your border.
Bricks that shift after installation often mean the base isn’t stable enough. Lay a stone or gravel base about 2 to 3 inches thick for drainage and stability. This step prevents frost heaves in cold weather.
Frost heaves can push bricks out of place quickly. Doing this helps your edging last through the seasons.
- Dig a trench matching the brick height plus base depth
- Use a garden hose to outline curves and keep lines smooth
- Lay a 2-3 inch stone base for drainage and stability
- Check brick level frequently during installation
- Use sand or mortar to fill gaps and lock bricks in place
- Keep the trench edges straight for proper brick alignment
- Remove weeds and apply pre-emergent herbicide to protect the base
Fix uneven lines by lifting the bricks gently and repositioning them. Add or remove base material to adjust height and improve level. For curves, adjust the brick angle gradually, keeping the hose guide in sight.
Prevent shifting by compacting the stone base before placing bricks. After setting them, fill the joints with sand or mortar and compact the surface again. This locks bricks firmly and resists movement from weather or foot traffic in your garden.
Calculating Bricks Needed and Project Timeframe
First, measure the total length of your garden border. This helps you know how many bricks to get. Write down your measurement for a smooth process.
Divide that length by the length of one brick to get a rough count of bricks. Factoring in curves and corners helps you avoid running short. A realistic schedule keeps you on track.
Measuring Your Garden Bed Edging Length
Tracing the exact border shape before measuring helps a lot. Use a garden hose to lay out your desired edging curve or straight line. This gives a clear path to measure along, including any corners or curves.
Measure along the hose or border line with a tape measure. Take the tape from one end to the other, following every curve carefully. Write down this total length to use when calculating bricks.
- Lay your garden hose along the edge where bricks will go.
- Adjust the hose to shape all corners and curves accurately.
- Use a tape measure to follow the hose’s entire length precisely.
- Record this measurement in feet or inches.
- Double-check measurements especially around sharp turns.
Calculating Bricks Based on Size
Common brick length is about 8 inches. Convert your garden bed length to inches for easy calculation. Divide the border length by the brick length to get the number of bricks.
For example, if your garden edging is 20 feet long: 20 feet equals 240 inches. Divide 240 inches by 8 inches per brick, which equals 30 bricks needed. Always add 5-10% extra bricks to cover cuts and breakage.
- Convert your border length from feet to inches (1 foot = 12 inches).
- Find the brick length, usually around 8 inches for a standard brick.
- Divide total edging length (in inches) by brick length.
- Round up to the nearest whole number to get bricks needed.
- Add 5-10% extra bricks for cuts and mistakes.
Estimating Time for Each Installation Phase
Laying brick edging takes about a full day. This is for a border around 20 to 30 feet long. Plan your time accordingly.
Preparing includes clearing soil and setting the base. It also means marking the line for your bricks.
This usually takes 2 to 3 hours. Placing bricks carefully and securing them usually takes 4 to 5 hours.
Add 1 to 2 hours for finishing touches. Fill gaps with sand or mortar and clean up afterward. This makes your border look complete and neat.
Sharp curves, slopes, or uneven ground slow down progress, often doubling time. Having a helper and proper tools can speed things up significantly.
- Clear and prepare the garden bed area, allow 2 to 3 hours.
- Lay the base material and mark the edging line carefully.
- Place bricks along the marked line, take 4 to 5 hours for 20-30 feet.
- Fill gaps with sand or mortar, spend about 1 to 2 hours on this.
- Clean up and inspect your work to finish.
Maintaining and Repairing Brick Garden Edging
Keep brick garden edging weed-free by pulling weeds regularly. Use a weed barrier fabric beneath the bricks to reduce growth between gaps. Applying a natural herbicide once a season can help prevent stubborn weeds without harming nearby plants.
Brick edges can suffer frost damage, especially in areas with freeze-thaw cycles. Cracks and shifting are common signs your edging needs repair. Watch for bricks that tilt or sink unevenly after winter.
To fix loose or shifting bricks, first remove the affected bricks carefully. Clean out old mortar or sand under them. Then, reset the bricks on fresh sand or mortar.
Make sure they line up flush with the rest. Check each brick to keep the edge straight. Lightly tamp with a rubber mallet for stability.
- Pull weeds every 2 to 4 weeks during growing season
- Clear debris and dirt from between bricks to stop moss buildup
- Inspect edging in early spring and late fall for cracks or signs of shifting
- Use joint sand or mortar to fill gaps after repositioning bricks
- Replace cracked bricks with matching styles for a uniform look
- Consider sealing bricks every few years to protect against moisture
- Maintain proper drainage near edging to avoid water pooling and frost damage
Restoring a brick edge’s look after damage often means cleaning and replacing parts. Use a stiff brush and water or mild detergent to remove dirt and moss. Avoid power washing as it can erode mortar or sand joints.
Older brick edging might need partial rebuilds, especially if damage covers large sections. Cost depends on materials and how much you do yourself. Expect to spend $2 to $5 per brick.
Add extra for mortar or sand used. Taking time to maintain yearly can save you bigger repairs later.
Check your brick edging after every harsh winter. Catching small damage early keeps repairs easier and cheaper.
Step-by-Step Action Plan for Laying Brick Edgers
Follow this simple plan to lay your brick edgers with confidence. Each step helps you check your progress and fix any issues early.
- Day 1: Mark your edging line using string and stakes. Check the layout matches your design.
- Day 2: Dig the trench 4 to 6 inches deep and wide. The trench should hold bricks without gaps.
- Day 3: Add a 2-inch layer of crushed gravel, then compact it firmly. The base should feel solid and level.
- Day 4: Lay bricks on the compacted base or mortar bed. Tap each brick gently to level it as you go. Bricks must be flush and evenly spaced.
- Day 5: Fill gaps with sand or mortar, depending on your choice. Allow the filler to set fully before walking on it.
- After 1 week: Inspect your edging for any loose bricks or shifting. Reset and re-level any bricks that moved.
- Ongoing: Regularly clear debris and replace any cracked bricks. Keeping your edging clean stops damage.
Frequently Asked Questions
What to Put Under Brick Edging?
Use a layer of paver gravel under brick edging. It improves drainage and keeps bricks level over time. Adding paver sand on top lets you tamp the bricks firmly in place.
How Do I Lay Lawn Edging Bricks?
Start by marking your border and digging a shallow trench. Add gravel and sand layers, then set bricks tightly side-by-side. Use a rubber mallet to tap bricks level and firm.
How to Lay Brick Edging Without Concrete?
You can lay brick edging using paver sand and gravel instead of concrete. These create a stable base while allowing water drainage. Tamp each brick tightly to hold it firmly in place.
How to Hold Brick Edging in Place?
A gravel and sand base helps firmly lock the bricks in place. Tamping each brick down with a rubber mallet makes sure they don’t shift. Edge bricks tightly to prevent gaps and soil movement.
How to Lay Brick Edgers?
Dig a trench and place gravel for drainage beneath the bricks. Add a layer of paver sand and tamp it down before laying bricks. Set each brick firmly, then check they stay level and straight.
Can Brick Edging Be Moved After Installation?
Yes, bricks can be removed and repositioned if needed. Carefully pry them up to avoid breaking and reset on fresh sand. This is easier if mortar wasn’t used during installation.
Key Points to Remember
Laying brick edgers well takes careful prep and steady work. Start your project with a clear plan and check your work often. Grab your tools and set your first string line to begin your garden makeover.