How to Grow Potatoes at Home Without Seeds: A Complete Guide for Beginners
How to grow potatoes at home without seeds is a common question. You can use regular potatoes from the store or your kitchen instead of seed potatoes. Just pick ones that are healthy and have eyes or sprouts.
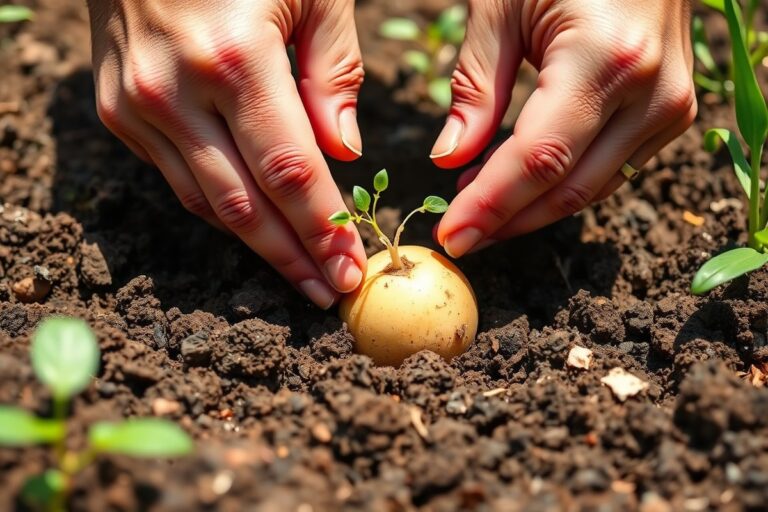
Start by cutting the potatoes into pieces with at least one eye each. Let these pieces dry for a day to form a protective skin. This step helps prevent rot and encourages good growth.
Plant the pieces in containers or garden soil that is at least 12 inches deep. Make sure the containers have good drainage to keep the potatoes from getting soggy. Keep the soil moist but not soaked for best results.
Key Takeaways
- Choose potatoes with visible eyes or small sprouts for planting.
- Cut potatoes into pieces with at least one eye per piece.
- Let cut pieces dry for 24 hours before planting to reduce rot risk.
- Use containers at least 12 inches deep with proper drainage.
- Plant pieces 12-18 inches apart, eyes facing up, buried 4-6 inches deep.
- Keep soil moist but avoid soggy conditions to prevent rot.
Can You Grow Potatoes at Home Without Seed Potatoes?

| Feature | Certified Seed Tubers | Store-Bought Potatoes |
|---|---|---|
| Disease Risk | Very Low (Screened) | Moderate to High |
| Sprout Success | High & Uniform | Unpredictable |
| Growth Vigor | Optimized for planting | Variable/Potentially stunted |
| Cost | Higher initial investment | Lower/Convenient |
| Predictability | High (True to variety) | Low (May vary) |
You can grow potatoes at home without traditional seed potatoes. Instead of seed tubers, use store-bought potatoes that have sprouted eyes.
These eyes are the buds that will grow into new plants. Look for potatoes with small green sprouts or “eyes” before planting.
Store-bought potatoes are a cheaper and more convenient option but come with risks. They may carry diseases and often produce weaker sprouts. Their growth can be unpredictable.
Certified seed potatoes cost more. They give a healthier, stronger crop. This is because they get checked for disease.
To get started with store-bought potatoes, cut them into pieces with at least one eye each. Let the pieces dry for a day to prevent rot. Plant them in soil about 3 to 4 inches deep, with eyes facing up.
Water consistently and watch for sprouts in 2 to 4 weeks. Avoid potatoes treated with sprout inhibitors.
Choose potatoes that sprouted well when growing in containers. Containers should be at least 12 inches deep and have good drainage to support growth.
You’ll save space and keep soil conditions controlled. Growing potatoes this way fits even small urban gardens.
Using seed potatoes generally yields better results and reduces problems. However, using store-bought potatoes is possible if you accept some unpredictability and extra care.
Test a few and pick the most vigorous sprouts for planting. This helps improve chances of a good harvest at home.
Selecting and Preparing Potatoes for Planting Without Seeds

Choose healthy seed potatoes or ones with visible eyes for planting. Avoid grocery store potatoes because they often have sprout inhibitors and diseases. Prepare cut pieces by drying the slices before planting to prevent rot.
Choosing Potatoes Suitable for Planting
Seed potatoes are specially grown for planting, not eating. Certified seed potatoes are disease-free and resistant to common problems like late blight. Avoid grocery store potatoes since they may carry sprout inhibitors or disease risks.
Select potatoes that are firm and show several healthy eyes or sprouts. Each potato or piece should have at least one or two eyes for strong growth. Larger potatoes can be cut into 1-2 ounce pieces for easier planting.
Sprouted potatoes are a good option if you can’t get certified seed potatoes. These sprouts will grow faster and better than ungerminated tubers. Check for firm flesh under sprouts to make sure the potato is healthy.
How to Cut and Dry Potato Pieces Safely
Cut large seed potatoes into pieces with 2 or 3 eyes each. Each piece should weigh 1 to 2 ounces. Too small, it dries out.
Too big, it can rot. Use a clean, sharp knife to make smooth cuts without crushing the potato.
After cutting, let the pieces dry in a cool, dark, and well-ventilated space. Wait for 24 to 48 hours until the cut surfaces develop a dry, corky callus. This callus helps prevent rot and disease once planted in soil.
- Wash potatoes gently under cool water to remove dirt.
- Dry them with a clean towel before cutting.
- Cut potatoes into 1-2 ounce pieces, each with 1-2 eyes.
- Place cut pieces on a tray in a cool, dry area with indirect light.
- Leave pieces for 1 to 2 days until callus forms.
- Discard any pieces that look soft or diseased before planting.
Do not plant freshly cut potatoes without drying; wet cuts invite rot.
Chitting: Encouraging Sprouts Before Planting
Chitting means letting seed potatoes sprout before planting. This jumpstarts growth and improves early development in cooler soil. Set potatoes in a cool, bright space around 50-60°F (10-16°C).
Place potatoes with the eyes facing up on a tray with indirect sunlight. Sprouts typically appear within 2 to 4 weeks. Stop chitting when sprouts reach about 1 inch long to avoid damage while planting.
This method lowers frost risk by giving potatoes a growth head start. Monitor sprouts carefully and avoid letting them grow too long or fall off. Short, sturdy sprouts lead to better yields in the garden.
Growing Potatoes Without Soil: Container, Bag, and Alternative Methods
You can easily grow potatoes without soil by using containers, grow bags, or straw. These methods suit small spaces like balconies or patios and avoid heavy digging. They also control moisture and reduce disease risks compared to soil beds.
Growing Potatoes in Containers and Grow Bags
Containers and grow bags offer a simple way to grow potatoes if you lack garden space. Use pots that are at least 12 inches deep and wide. Choose grow bags made from breathable fabric.
These options help with proper drainage. They keep soil loose and well-drained, which potatoes need to grow well.
Start by filling the container or bag halfway with loose potting mix. Plant your prepared seedless potatoes about 4 inches deep. Add more soil or mix as the plants grow to cover stems and encourage tubers.
- Choose a container or grow bag with drainage holes, at least 12 inches deep.
- Fill it halfway with loose, well-drained potting soil mixed with compost.
- Plant seedless potato pieces about 4 inches deep, eyes facing up.
- Cover with 2-3 inches of soil or potting mix initially.
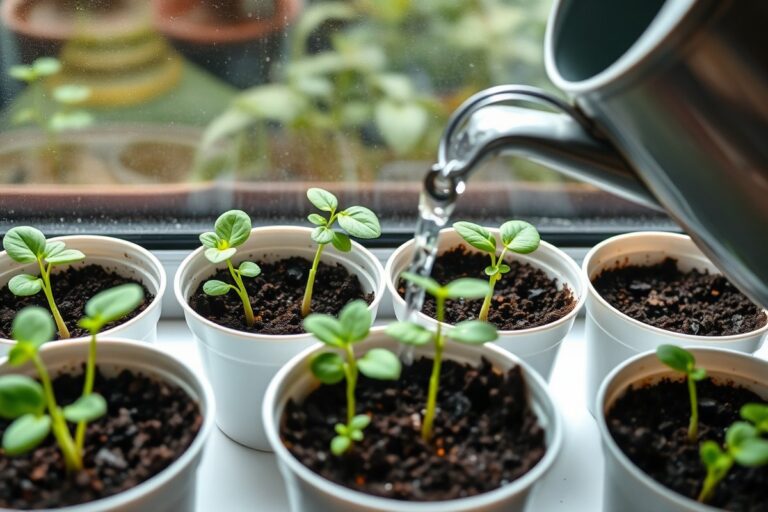
- Water gently to moisten the soil without soaking it.
- Add more soil as your plants grow to cover the stems.
- Place the container in a spot getting 6-8 hours of sunlight daily.
- Water regularly, keeping soil moist but not soggy.
Using Straw or No-Soil Growing Systems
Straw is an excellent, lightweight alternative to soil for growing potatoes. It helps retain moisture and breaks down to improve soil quality later. This method works well in tight spots or over poor ground.
Layer straw about 12 inches deep on a flat surface. Place seedless potatoes on top, then cover them with more straw. Keep the straw moist so potatoes develop within the layers.
You can also experiment with hydroponic or water-based methods indoors. But they need more equipment and attention. Straw beds are low-cost and easy for beginners.
Setting Up Indoor or Balcony Planting
Indoor and balcony growing means controlling temperature and light carefully. Potatoes need 60 to 70°F for best growth. Use containers, grow bags, or straw piles placed near a sunny window or on a balcony.
Limit temperatures and water carefully to avoid rot. Use supplemental light if natural sun is limited. Make sure your container drains well and water consistently to keep soil or straw moist.
Ideal Environmental Conditions for Growing Seedless Potatoes
Potatoes need loose, well-drained soil rich in organic matter to grow well without seed potatoes. A mix of garden soil and compost works best.
The soil should be slightly acidic to neutral, with a pH of about 5.5 to 7. Use containers with high-quality potting mix that has added compost.
Plant potatoes 4 to 6 inches deep to keep them safe from frost. This helps tubers grow underground. Space each potato piece 12 to 18 inches apart in the row.
Leave 24 to 36 inches between rows. This spacing prevents competition for nutrients and gives air circulation to reduce disease risk.
Potatoes grow best at soil temperatures between 59°F and 68°F (15°C to 20°C). Cooler or hotter soil slows growth or can cause tuber problems.
Aim for full sun exposure, around 6 to 8 hours daily. So plants get enough energy to produce good tubers.
Adding extra soil or compost around early stems helps strengthen roots and supports young plants. Check light levels and soil temperature if plants look weak or slow. Poor light or soil too cold can stunt growth and lower yield.
For container gardeners, place containers where they get plenty of sun and monitor soil temperature. In hot climates, shading during the hottest part of the day can prevent soil from overheating. Closer plant spacing can work in tight spaces, but potatoes will be smaller.
Watering, Fertilizing, and Caring for Potatoes Without Seeds
Growing potatoes without seed potatoes still needs regular watering and feeding. You should water your plants when the soil feels dry but avoid waterlogging. Use balanced fertilizer every 4 to 6 weeks.
Hill soil around potato stems. This protects tubers and stops green skin forming.
Watering Frequency and Best Practices
Potatoes need consistent moisture as they grow, especially during dry spells. Water deeply about once or twice a week depending on rainfall and soil type. Sandy soils dry faster, so you might water more often than clay soils.
It’s best to water early in the day. This helps plants dry before nightfall, lowering disease risk. Let the top few inches of soil dry out before watering again to avoid root rot.
Use a gentle spray or drip irrigation if possible. Avoid soaking leaves which can cause fungal problems.
Check soil moisture by sticking a finger 2 inches deep. Water if it feels dry.
Fertilizer Types and Application Timing
Choose a balanced fertilizer with equal nitrogen, phosphorus, and potassium like 10-10-10. Fertilize every 4 to 6 weeks for steady growth.
You can add diluted liquid fertilizer as a supplement. Do this every couple of weeks.
Apply fertilizer when plants have a few inches of growth. Avoid over-fertilizing, which causes lush leaves but fewer potatoes. Spread fertilizer evenly around the base but not directly on stems to protect roots.
Besides fertilizer, adding compost or well-rotted manure before planting boosts nutrients. This improves soil structure and water retention, helping your potatoes grow better.
Identifying and Managing Pests and Diseases
Watch leaves and stems for aphids and Colorado potato beetles. Aphids cluster under leaves and feed on sap, while beetles chew leaves aggressively. Remove pests by hand or spray with insecticidal soap if you spot infestations early.
Late blight shows as dark, wet spots on leaves and stems. It spreads quickly when it’s wet outside.
Avoid overhead watering and improve air circulation by spacing plants properly. Remove infected parts immediately to prevent spread.
Use hilling to keep potatoes covered and shielded from sunlight and pests. Healthy plants resist problems better, so follow good watering and feeding steps. Dispose of crop debris after harvest to remove pest hiding spots.
Keep an eye on your plants weekly. Early action stops pests and disease from spreading fast.
- Check soil moisture 2 inches deep before watering to avoid overwatering.
- Water early in the morning for better absorption and disease control.
- Add a balanced fertilizer like 10-10-10 every 4 to 6 weeks during growth.
- Supplement with diluted liquid fertilizer every couple of weeks if desired.
- Hill soil around plant stems carefully as plants grow taller.
- Inspect plants weekly for aphids, beetles, and signs of late blight.
- Remove pests by hand or spray insecticidal soap early to prevent damage.
- Snip off and safely discard any diseased foliage right away.
How Long Does It Take to Grow Potatoes Without Seeds?
Growing potatoes without seed potatoes takes about 90 to 120 days from planting to harvest. Sprouts usually appear within 2 to 4 weeks if the conditions are right.
Warmth and light help speed up sprouting. So keep your potatoes in a bright, warm spot before planting.
You’ll see small green shoots break the soil after planting. These shoots mean tuber formation is starting beneath the soil. Potatoes grow underground, and this stage usually begins around 30 days after sprouting.
Look for the potato plants’ tops to mature before harvesting. The leaves will start to yellow and die back between 90 and 120 days.
This die-back means tubers are ready to dig up. Your potatoes have reached full size.
Plants staying green too long can mean tubers aren’t mature yet. Adding enough phosphorus helps tuber growth.
Potassium supports healthy stems to avoid weak plants during this period. Nitrogen boosts leaf growth but too much keeps plants green and delays maturity.
Potatoes grown without seed potatoes may face slower or uneven sprouting. That can stretch out the timeline, sometimes adding 1 to 2 weeks.
Watch for sprouts and leaf growth to see how your crop is doing. This helps you know if your plants need extra care.
Harvesting and Curing Potatoes Grown Without Seed Potatoes
Potatoes are harvest-ready once the vines have yellowed and died off. To get new potatoes, dig some about two to three weeks after flowers appear.
Maincrop potatoes require full maturity. So harvest only after the entire plant turns brown and falls over.
After harvesting, curing potatoes is important for good storage. Curing toughens their skin and heals small cuts. It helps keep them fresh for months by reducing moisture loss and decay.
Follow these steps to harvest and cure your potatoes properly:
- Check the vines daily for yellowing or wilting to time your harvest.
- Carefully dig around the plant without damaging tubers using a garden fork.
- Gently lift potatoes from soil and brush off dirt; avoid washing them.
- Place potatoes in a cool, dark, and humid spot for curing.
- Keep the temperature about 50-60°F (10-15°C) and humidity near 85-90%.
- Cure the potatoes for 1 to 2 weeks to allow skin hardening and healing.
- After curing, move potatoes to a dark, cool storage area around 40°F (4-5°C).
- Check stored potatoes regularly, removing any that show soft spots or mold.
Curing in a humid place prevents potatoes from shriveling. It usually takes one to two weeks to get a tough skin.
Cooler spots with higher humidity work best, like basements or unheated garages. Avoid direct sunlight to stop greening and bitterness.
Once cured, store the potatoes in a dark, well-ventilated space around 40°F. This slows sprouting and extends storage from a few weeks to several months. Don’t store them near onions, as gases from onions cause sprouting faster.
Storing and Using Your Homegrown Potatoes Safely
Store your potatoes in a cool, dark, and well-ventilated place to keep them fresh. Aim for a temperature between 45 and 55 degrees Fahrenheit. Storing them in a paper bag helps prevent moisture buildup.
A cardboard box with holes works well too. Both allow air to circulate around potatoes.
Keep potatoes away from light to stop them turning green and bitter. Light causes solanine to build up, which makes potatoes taste bad and can be toxic. Cover any exposed potatoes you have to block sunlight completely.
Check your stored potatoes regularly. Remove any that sprout or turn green promptly. Small sprouts can sometimes be cut away from potatoes.
Avoid the green skin on potatoes. That skin contains a toxin called solanine. Using these potatoes can cause stomach upset or worse.
Sprouted potatoes still often taste fine if you remove the sprouts before cooking. But if the potato feels soft or shriveled, toss it out. These signs show the potato is past its prime and may carry bacteria.
To slow sprouting, store potatoes away from onions and fruits like apples. These release gases that speed up sprouting. Maintaining a cool temperature and darkness is your best bet to keep potatoes usable for months.
Keep potatoes in a cool, dark place for storage. Check them every week for sprouts or green spots. This helps keep your potatoes safe to eat.
Common Mistakes and Troubleshooting Growing Potatoes Without Seeds
One common mistake is planting whole store-bought potatoes without checking for disease. These potatoes often carry viruses or bacteria that can ruin your crop. Cut potatoes into pieces with at least one sprout each.
Let them dry for 2-3 days. This helps prevent rotting before planting. This step helps reduce disease risk and encourages strong sprouts.
Many gardeners forget to choose potatoes with firm, healthy sprouts. Sprouts that look weak or shriveled mean the potato may not grow well. Pick seed pieces with plump, green sprouts about 1 inch long for the best start.
You can force sprouting indoors. Place potatoes in a cool, bright spot for 2-4 weeks. This helps sprout growth before planting.
Poor sprouting can also result from planting in soil that’s too cold. Potatoes grow best at soil temperatures between 45°F and 70°F. Planting too early in cold soil slows sprout growth and invites rot. Test soil with a thermometer and wait until it reaches at least 45°F before planting.
Overwatering is another frequent problem. Too much moisture causes rot and fungal diseases. Water deeply but only when the top 1-2 inches of soil feel dry.
Don’t water every day. Aim for about 1 inch of water weekly. Adjust based on rain and container drainage.
Using store-bought potatoes increases the chance of diseases like scab or blight. They might look fine but carry unseen pathogens. To lower this risk, use certified seed potatoes when possible.
Soak grocery potatoes in 1 tablespoon hydrogen peroxide per cup of water. Soak for 10 minutes, then dry before planting.
“Chitting” or pre-sprouting potatoes helps identify poor quality tubers early. Remove any pieces with black spots, soft areas, or mold.
These issues can spread in the soil and ruin your crop. Healthy seed pieces produce strong, green sprouts, signaling a good chance of success.
Not hilling soil around growing plants can limit tuber development. As sprouts grow, pile soil up around stems to protect tubers. This keeps tubers from turning green and bitter from light.
Add 2-4 inches of loose soil every week until the plant flowers. This promotes more tuber formation and prevents green potatoes.
Checking plants regularly helps catch problems fast. Look for yellowing leaves, spots, or wilting, signs of pests or disease.
Remove any affected parts quickly to keep your potatoes healthy. Using organic fungicides or insecticidal soaps early can protect your potato patch without harsh chemicals.
Step-by-Step Action Plan for Growing Potatoes Without Seed Potatoes
Follow these steps to get your potatoes growing without traditional seed potatoes. Watch for signs that your potatoes are sprouting and thriving.
- Before planting: Choose healthy store-bought potatoes with visible eyes or sprouting. Check for firm skin and no rot.
- Week 1: Cut potatoes into pieces with at least one eye each. Let them dry for 2-3 days to form a protective layer.
- Week 2: Plant potato pieces in loose soil or a container. The container should be at least 12 inches deep. Make sure soil is loose for easy root growth. Cover with 3-4 inches of soil and keep moist.
- After 2 weeks: Check for sprouting stems above soil. Keep soil moist and warm between 60-70°F for another week. Watch carefully for any sprouts to appear.
- Week 3-6: As plants grow, add more soil around the base (hilling) to cover stems. This encourages more potatoes to form underground.
- Week 6-10: Water regularly but avoid soggy soil. Add balanced fertilizer every 2-3 weeks to support growth.
- After 10 weeks: Watch for yellowing leaves, a sign potatoes are ready to harvest. Gently dig around plants to find tubers.
- Post-harvest: Cure potatoes in a cool, dark, and dry place. Leave them there for about one week. After curing, store potatoes for later use.
Frequently Asked Questions
Can I Use Any Potato to Grow Potatoes at Home Without Seeds?
Not all potatoes work well for growing at home without seeds. Choose ones with visible “eyes” or small sprouts, as these are ready to grow. Avoid store potatoes treated to prevent sprouting.
How Do I Prevent Disease When Growing Potatoes Without Seeds?
Use healthy, disease-free potatoes and clean containers or soil. Rotate crops yearly to stop disease buildup. Inspect plants regularly and remove any with signs of disease.
Can I Grow Potatoes Indoors Without Seeds?
Yes, you can grow potatoes indoors using containers or grow bags with good light. Keep the temperature between 60°F and 70°F. Remember to water regularly but avoid waterlogging.
What Size Container Is Best for Growing Potatoes Without Seeds?
A container at least 12 inches deep works well for potato growth. It provides enough space for tubers to develop. Make sure the container has drainage holes to prevent root rot.
Do Potatoes Need Direct Sunlight to Grow Without Seeds?
Potatoes grow best with 6 to 8 hours of sunlight daily. Partial shade reduces yield and tuber size. If growing indoors, place them near a sunny window or use grow lights.
Can I Reuse Soil When Growing Potatoes Without Seeds?
Reusing soil is possible but increases disease risks. Add fresh compost or sterilize it between uses. Rotating with other crops also helps keep soil healthy.
Final Thoughts
You can grow good potatoes at home without using traditional seed potatoes. Start with healthy potatoes, care for them well, and watch them grow. Grab some potatoes today and give it a try in a container or garden bed.