How to Sharpen a Shovel: Simple Steps and Pro Tips for Long-Lasting Edges
Knowing how to sharpen a shovel keeps it cutting cleanly and working longer. Sharpening improves digging speed and reduces effort. You only need a file and a steady hand to do it right.
Start by cleaning rust and dirt off the blade with steel wool or a wire brush. A clean surface helps the file work better and prevents damage. Secure the shovel firmly so it won’t move while you sharpen.
Follow the shovel’s original angle to keep the edge correct. Use moderate, even pressure when filing the blade’s leading edge. Move the file in one direction for a consistent edge.
Stop when you feel a burr form on the back side, meaning the edge is sharp. Check for dull spots and repeat filing as needed. Regular touch-ups keep your shovel ready for hard ground and reduce strain on your arms.
Key Takeaways
- Sharpen shovel blades between 30 to 45 degrees for best cutting.
- Use a 10- or 12-inch mill bastard file for effective sharpening.
- Clean rust and debris before you begin sharpening.
- Secure the shovel firmly using clamps or a vice to avoid slips.
- Follow the existing blade angle as a guide for filing.
- File evenly with moderate pressure until you feel a burr.
How to Sharpen a Shovel Blade Step-by-Step
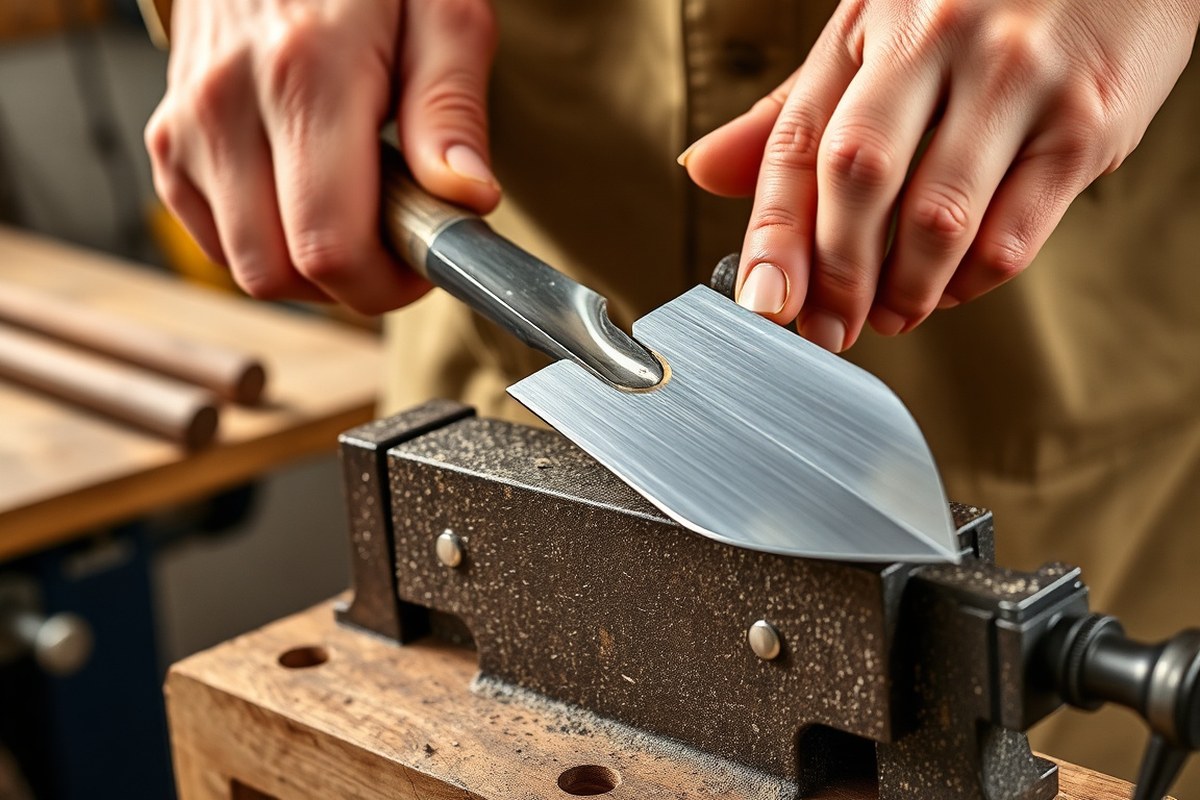
Sharpening a shovel blade makes digging easier by cutting cleaner through soil. You’ll need a few tools before starting. Gather a wire brush, a file or angle grinder, safety gloves, eye protection, and 300-grit sandpaper.
Clear dirt and rust off the blade using the wire brush. Then follow this step-by-step process carefully. Take your time to avoid injuries and get the sharpest edge possible.
- Secure the shovel by clamping the blade into a vise. This holds it steady while you work safely.
- File the blade edge at a 30 to 45-degree angle. Use a tapered triangular file or a coarse hand file. Keep steady pressure as you file along the edge. Move the file in one direction along the edge. Keep strokes even and consistent for a smooth, sharp bevel.
- Check for burrs on the back side of the blade as you file. A burr is a tiny raised edge that forms opposite your filing side. It shows you’ve sharpened enough.
- Remove burrs by gently sanding the back side with 300-grit sandpaper. This step smooths the blade and prevents rough edges that catch soil or skin.
- Use an angle grinder if the blade is very dull. Attach an 80-grit flap disc to the grinder. Carefully grind the blade to remove nicks and rust. Grind carefully and only a few passes at a time. Avoid overheating the metal, which weakens the blade.
- Finish by wiping down the blade with a clean, dry cloth. You can apply a light coat of oil to stop rust from forming after sharpening.
This method works for most flat-bladed shovels. The key is the filing angle and removing burrs afterward.
A sharp shovel blade should feel smooth but have a distinct cutting edge. Avoid over-sharpening, which can thin the metal and cause damage during use.
Choosing the Right Tools for Sharpening Your Shovel
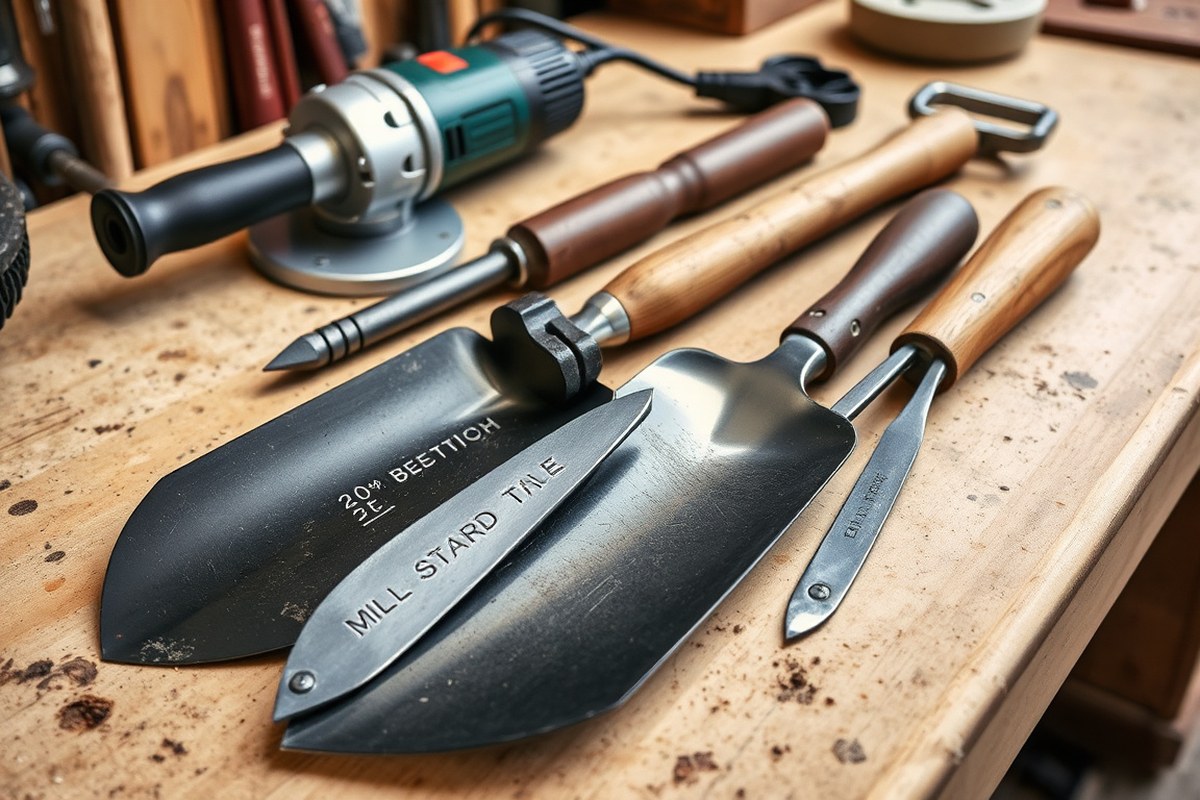
Manual files and power grinders are the main tools for sharpening shovels. A mill bastard file is the best manual option. It has coarse teeth that remove metal quickly and smooth the edge well.
Files measure 10 to 12 inches, perfect for shovel blades. You’ll also need a vice or clamps to hold your shovel steady while you work.
Power grinders, like a 4-inch angle grinder or bench grinder, speed up the sharpening process. These tools remove metal faster than files, great for very dull or blunted blades.
You use the grinder first, then smooth the edge with a file for better control. But grinders need more caution because they can easily overheat the metal and damage it.
| Tool | Pros | Cons | Best for Blade Condition |
|---|---|---|---|
| Mill Bastard File (10-12 inch) | Affordable, precise, widely available | Requires more elbow grease, slower | Light sharpening, regular maintenance |
| Angle Grinder (handheld, 4-inch) | Fast metal removal, good for very dull edges | Can overheat or damage blade if misused | Very blunt or rusty blades, quick reshaping |
| Bench Grinder | Stable, consistent grinding | Less portable, needs workbench | Severe dulling, major sharpening jobs |
| Rust Remover or Steel Wool | Cleans blade before sharpening | Not for sharpening but essential prep | All blade conditions before filing or grinding |
You can sharpen your shovel just with a file if you don’t have a grinder. It just takes more time and effort. Keep the file at about a 45° angle.
Push it away from your body. Hold the shovel firmly in place. Grinders speed up sharpening very dull blades.
They need care to prevent overheating. Use grinders carefully.
You need a mill bastard file and clamps or a vise. Also get steel wool or rust remover. These help clean and sharpen.
The angle grinder is an optional tool that can save time on badly worn blades. Clean the shovel before sharpening.
This gets the best edge. It also protects your files or grinder disks.
Always clamp the shovel before filing or grinding. This keeps the blade steady. It also prevents injury.
What’s the Correct Sharpening Angle for Different Shovels?
The correct sharpening angle depends on the shovel type and how you use it. You want the angle to suit the task for better cutting and digging. Keeping a consistent angle maintains the tool’s durability and performance.
Garden Shovels and General Use
For regular garden shovels, the edge stays effective around 30 to 35 degrees. This angle balances ease of digging and durability for many tasks, like moving soil or compost.
When you sharpen at this angle, the shovel cuts through dirt without dulling too quickly. It’s a good fit for general digging and moving loose materials.
Spades and Heavy-Duty Shovels
Spades and heavy-duty shovels benefit from a sharper edge between 40 and 45 degrees. This angle works best for chopping roots or breaking tough soil.
You will feel more control with a steeper edge for demanding jobs. However, a sharper angle can dull faster. So check the edge regularly and sharpen more often.
Specialized Shovels and Exceptions
Specialty shovels for precise work might use a lower angle around 20 to 25 degrees. This makes the blades slice cleaner but can reduce strength on hard materials.
For older shovels, follow the existing bevel angle to keep the shape intact. It keeps the edge consistent and avoids removing too much metal.
| Shovel Type | Recommended Angle |
|---|---|
| Garden Shovel | 30°, 35° |
| Spade | 40°, 45° |
| Specialized Shovel | 20°, 25° |
Measuring the sharpening angle is simple with a protractor or angle gauge. Hold the tool steady and check the bevel side for an accurate reading. Keeping the angle steady while filing protects the edge and improves digging performance.
How to Prepare Your Shovel for Sharpening
Start by removing any dirt or mud stuck on your shovel blade. Use a stiff wire brush to scrub off dry dirt. Hold the shovel steady and work the brush along the blade’s surface until it looks clean.
Rust is the main enemy of a sharp shovel blade. Heavy rust can eat away metal, making sharpening harder or useless. For small rust spots, try scrubbing with steel wool or an emery cloth.
For bigger rust patches, use a wire brush attached to a drill or rotary tool. It cuts through rust fast and helps clear the blade.
- Scrub dirt with a wire brush until the blade looks clean
- Use steel wool or emery cloth on light rust spots
- Attach a wire brush to a drill for heavy rust
- Rub until you see clean steel underneath any rust
- Wipe the blade with an oily rag to prevent rust
- Check the blade for deep pits or cracks
- Dry the blade completely after cleaning
Look closely at the blade edges for warping, cracks, or holes. Deep rust pits might weaken the shovel so much it’s unsafe or not worth sharpening. When the metal bends easily or blade shape is off, replace it to save effort.
After rust removal, spray or wipe vegetable oil or 3-in-1 oil on the blade. This stops new rust from forming before you sharpen. Dry the shovel well after cleaning.
This stops rust from coming back fast. Taking these steps saves you work later and keeps the blade ready for sharpening.
Power Tools vs Hand Files: Which Sharpening Method Works Best?
You choose power tools or hand files based on blade dullness. Think about how dull the blade feels. Also, consider how comfortable you are using each tool.
Power grinders speed up the process but need careful handling. Hand files offer greater control and safety, especially for minor touch-ups.
Benefits of Hand Filing
Hand filing gives you precise control over the blade’s edge. You work slowly and feel the metal soften under the file. This method is safer because it reduces the risk of overheating or removing too much metal.
Files are inexpensive and easy to use without needing electricity. They suit light sharpening or maintaining the edge between major sharpenings. You avoid the sparks and noise of power tools.
Using a Bench or Angle Grinder
Grinders quickly remove rust and reshape dull or damaged edges. Use a bench grinder with an 80-grit flap disc for sharpening. It shapes a 25° bevel on the shovel blade.
This helps restore the blade edge efficiently. Hold the shovel firmly in a vise for stability during grinding.
Power tools risk overheating the metal, which can weaken the edge. You must wear eye protection and move the blade steadily to avoid unevenness. Angle grinders require special care because they spin fast and can catch the shovel edge.
Always wear eye protection when using grinders or files to prevent injury.
When to Combine Both Methods
Start with a grinder if your shovel blade has deep dullness or chips. Use it to remove heavy wear and shape the bevel quickly. Then switch to a hand file for smoothing and sharpening the edge.
This combo saves time and results in a sharp, clean edge without overheating the metal. The hand file finishes the job by removing rough spots the grinder leaves behind. Use this approach when your shovel needs a thorough sharpening.
Common Mistakes When Sharpening and How to Fix Them
Sharpening a shovel may seem simple. But a few common mistakes can ruin your edge. Filing at the wrong angle is the top error.
It happens when you don’t keep a steady bevel, often too steep or too flat. Use a guide or clamp the shovel to keep your file steady. This helps prevent slipping.
Steady filing creates a safer, cleaner edge. A good bevel angle is about 70 degrees for most shovels.
This angle makes the edge sharp but still strong. It balances cutting and durability.
Over-sharpening wears down the metal quickly and can leave you with a thin, weak edge. Stop immediately if the edge looks uneven or too thin. This prevents damage and unsafe use.
Check your progress often while filing. Restore the edge by filing gently at about 45 degrees. Keep filing until the edge feels solid and even.
Take your time to avoid over-thinning. Always sharpen away from the edge to avoid injury. Pause often to check the edge by touch.
- Sharpening at random angles, use a clamp and stick to 70 degrees
- Applying too much pressure, moderate pressure works best
- Sharpening toward the edge, always push the file away
- Ignoring burr buildup, remove burrs by gentle strokes on the opposite side
- Using a dull file, switch to a sharp, quality file or stone
- Sharpening an already sharp edge, can cause metal wear; stop at a shiny bevel
- Not securing the shovel, clamp it to a vice or hold firmly between knees
Damage like chips or bent edges requires light hammering or professional repair. Filing alone won’t fix significant dents. When machining edges, check the back side for burrs.
Remove burrs with gentle strokes on the opposite side. This creates a smooth, clean edge. This prevents jagged edges that can catch in soil.
Spend 5 to 10 minutes filing with steady motions and light pressure. This method creates the best edge with less wear. Avoid rushing to protect the tool.
Maintaining Your Shovel Edge Between Sharpenings
Sharpen your shovel after every few heavy uses to keep the edge working well. Check the blade regularly during work and touch up any dull spots. A secondary bevel helps keep the edge sharp longer between full sharpenings.
Cleaning off dirt, mud, and grass prevents dulling and rust. After using your shovel, scrape off soil and wash the blade with water. Dry it thoroughly before storage to stop moisture from causing rust.
Applying oil or rust-preventative spray protects the metal. Use a light coat of machine oil on the blade. You can also use WD-40 or a garden tool spray.
Apply it to all metal parts for best results. This helps keep rust from forming and improves the shovel’s lifespan.
- Clean the blade with a wire brush or rag after every use
- Dry the shovel completely before storing it inside
- Spray the blade lightly with rust-preventative oil or WD-40
- Hang the shovel on a wall or rack to keep the edge off the ground
- Use a clamp or vise to hold the shovel if sharpening at home
- Check the edge before each job to spot dulling early
Store your shovel in a dry, covered spot to avoid rust. Avoid leaning it against wet surfaces or leaving it outside overnight. Hanging it by its handle on a nail or rack keeps the blade sharp and ready.
Regular maintenance costs little but saves time in the garden. Rust removers or steel wool can clear off early rust spots before they worsen. Proper upkeep means your shovel stays sharper, works easier, and lasts longer.
When to Call a Professional for Sharpening or Repairs
Calling a professional makes sense for serious blade damage. You also need their help if you lack the skills. They can sharpen or repair the shovel properly.
A pro can handle cracks, severe rust, or bent blades better than DIY sharpening. This helps you avoid wasting time and potentially harming your shovel.
Signs Your Shovel Needs Expert Attention
Look for cracks anywhere on the blade or near the handle joint. Cracks weaken the shovel’s strength and can spread if ignored. Severe rust that flakes off needs a professional’s attention.
Deep pits in the metal are also a sign to call one. These issues require expert skills to fix.
A bent blade that won’t straighten easily is another sign. Bending metal back by hand usually isn’t enough and can cause more damage. The edge beyond saving with normal sharpening needs expert help.
Professionals have tools to restore badly damaged blades. This avoids ruining your shovel further.
Choosing a Professional Sharpening Service
Find a sharpening service with experience in garden tools rather than industrial blades. They’ll understand the right angle to sharpen and how much metal to remove. Ask if they treat the blade with a protective coating after sharpening to prevent rust.
Your service provider should be clear about the process and show you the results. Quality experts sharpen about 1/8 inch of the blade to a shiny, keen edge. They should show clear proof they can sharpen well.
Without a demo, it is best to find someone else. Reliable service means you see their skill first.
Cost Expectations and Value
Professional sharpening usually costs between $15 and $40 per shovel. Higher prices often cover rust removal, blade straightening, or protective coatings. This cost equals a few hours of your time and protects your tool’s lifespan.
It’s worth paying for expert service if your shovel is expensive or a favorite tool. For cheap, heavily worn shovels, replacement might be better. Saving time and avoiding damage to your shovel often justifies the sharpening fee.
Don’t delay repairs if you see deep rust or cracks, these worsen quickly.
Step-by-Step Action Plan for Sharpening Your Shovel
Follow this quick plan to sharpen your shovel blade safely and keep it working well.
- Before you start: Clean the shovel blade with water and a brush. Dry it fully to avoid rust.
- Day 1: Choose the right tool, file or power grinder. Test it on a small area to check control.
- Day 1: Clamp the shovel in a vise for steady sharpening. A loose blade makes uneven edges.
- Day 1: File the blade edge at the proper angle (around 45 degrees). Check the sharpness by sight and touch.
- Day 1: Wipe down the blade and apply a rust inhibitor. This keeps the edge sharp longer.
- After 2 weeks: Inspect the blade edge for dull spots or nicks. Touch up with a quick file pass if needed.
- Monthly: Clean and oil your shovel. Regular maintenance lowers the need for full sharpening.
Frequently Asked Questions
How Often Should I Sharpen My Shovel for Best Results?
Sharpen your shovel whenever the edge looks dull or struggles in soil. Regular sharpening reduces effort and keeps the tool working well.
How often depends on use and soil conditions. But checking monthly in active seasons helps.
Can I Sharpen a Rusty Shovel Blade Without Damaging It?
Yes, you can remove rust with steel wool or rust remover before sharpening. Rust can eat away metal if left, so cleaning first protects the blade. Afterward, sharpen as usual to restore a clean edge.
Is It Safe to Use an Angle Grinder for Sharpening a Shovel?
Yes, but only if you wear protective gear and work slowly. Angle grinders can heat the metal, risking damage or burns. Keep the metal cool by pausing often and grip the tool firmly.
Why Do Some Shovels Have One Beveled Edge for Sharpening?
Shovels typically have one beveled edge to cut soil efficiently on one side. Sharpen that beveled edge, usually the inside edge, to maintain a proper cutting edge. Sharpening the flat side can damage the blade shape.
Can Sharpening a Shovel Make Digging Harder in Rocky Soil?
Sharpening usually helps cut through soil easier, even in rocks. But very sharp edges may chip when hitting hard rocks often. Balance sharpening with caution if your soil has many stones.
Does Sharpening a Shovel Improve Garden Tool Longevity?
Yes, a sharp shovel blade reduces force needed, lowering wear on the tool and your body. Keeping edges sharp prevents damage and extends tool life. Neglecting sharpening can cause more frequent replacements.
Wrapping Up
Sharpening your shovel right keeps your work easier and safer. Start by cleaning your blade and choosing a good tool. Keep an eye on your shovel’s edge and sharpen it as soon as it feels dull.