How to Prepare Soil for Planting: 8 Essential Steps for Healthy Gardens
Knowing how to prepare soil for planting means giving your garden a strong start. You need loose, nutrient-rich soil that drains well and stays healthy. Start by removing rocks and weeds, then add organic matter to improve soil texture and nutrients.
Test your soil’s pH and nutrient levels before planting. This helps you add the right amendments, like lime for acidity or compost for nutrients. Let amended soil rest for 1 to 2 weeks to settle before putting in plants.
Loosen compacted dirt to around 8 to 12 inches deep so roots can grow deeply. Healthy soil needs air too, so mix in organic matter that boosts air pockets. These simple steps make a big difference in how well your garden grows.
Key Takeaways
- Remove weeds and rocks before working in the soil to prevent root problems.
- Test your soil pH and nutrients every 2 to 3 years for best results.
- Blend 2 to 3 inches of compost into the top 6 to 8 inches of soil before planting.
- Loosen soil at least 8 inches deep to promote healthy root growth.
- Use a 10-10-10 fertilizer at 1 to 1.5 pounds per 100 square feet if unsure about nutrients.
- Let amended soil rest 1 to 2 weeks before planting to stabilize nutrients and structure.
1. Essential Steps to Prepare Soil for Planting
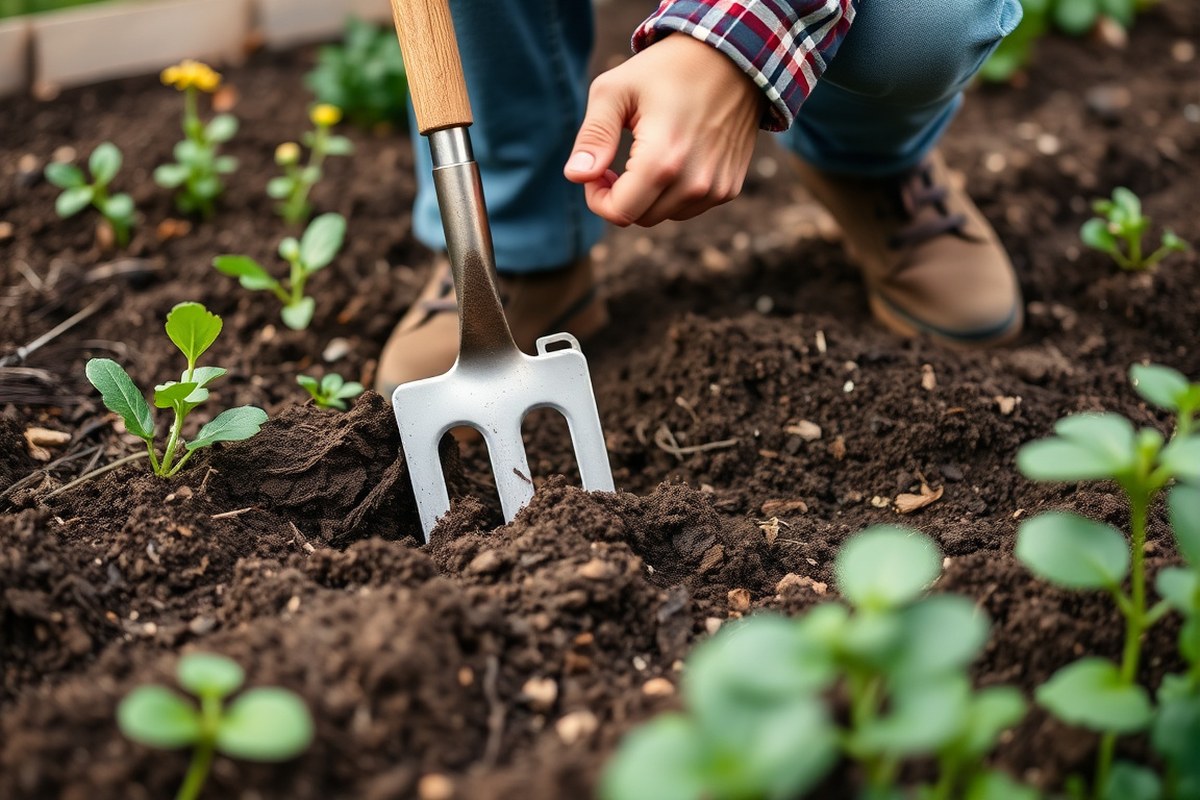
- Clear the area. Remove weeds, rocks, and debris by hand or with a rake. This stops competition for nutrients and helps new plants grow better.
- Check soil texture. Dig a small scoop and feel if it’s sandy, clay, or loam. Sandy soil drains fast, clay holds water, and loam is ideal for most plants.
- Loosen the soil. Use a garden fork or tiller to break it up to 8, 12 inches deep. Loose soil lets roots grow deep and access nutrients easily.
- Add organic matter. Mix in compost or aged manure to improve texture and fertility. Spread a 2, 3 inch layer over the soil, then dig it in well.
- Use a balanced fertilizer like 10-10-10 to feed your soil. Spread between 1 and 1.5 pounds over 100 square feet. Mix it well into the top few inches of soil for best results.
- Water the soil. Moist soil helps settle amendments and prepares the ground for seeds or transplants. Water it deeply after working in organic matter and fertilizer.
- Let the soil rest. Wait 1 to 2 weeks before planting to allow nutrients to integrate. During this time, keep soil moist but not soaking wet.
This process works best for spring planting and gives your garden a strong start. Planting cover crops the fall before helps protect and boost soil naturally.
Good soil feels crumbly, not hard or dusty. Too dry or compacted soil makes it tough for roots to grow well. Taking these steps helps you avoid those problems and lays the groundwork for healthy plants.
2. How to Test and Interpret Your Soil’s pH and Nutrients
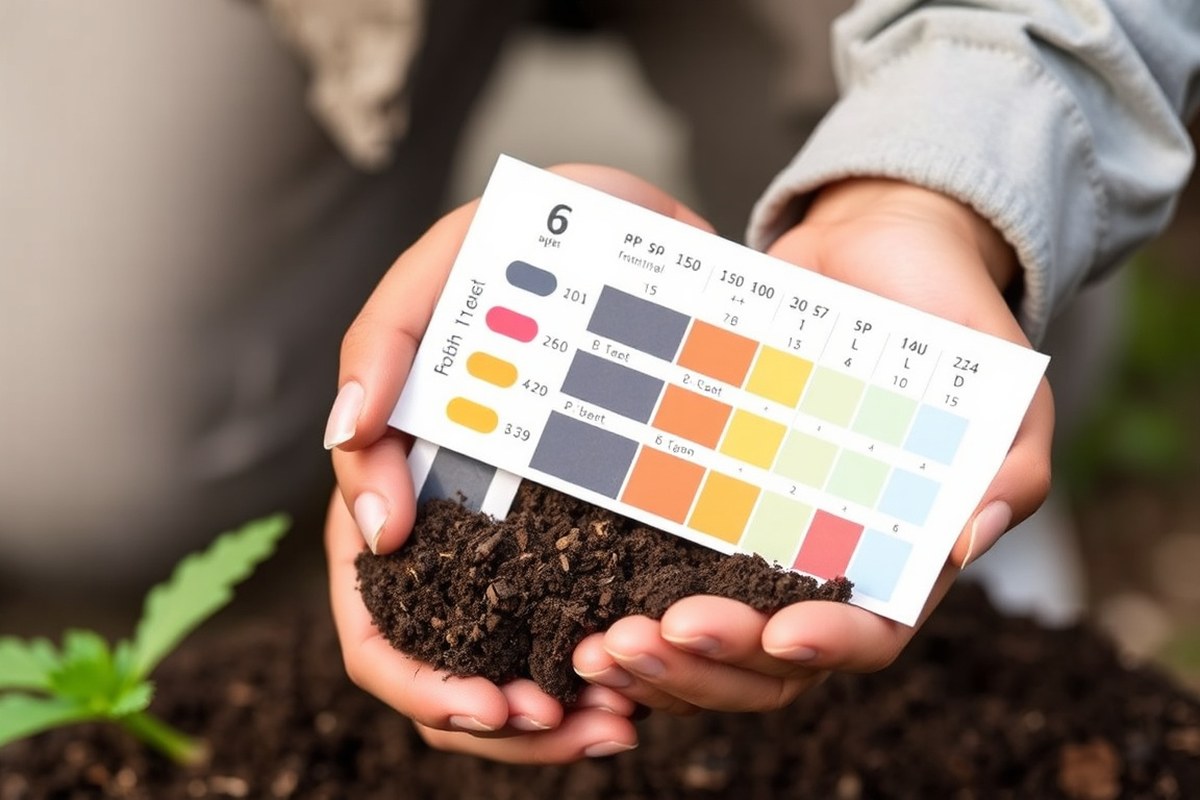
Testing soil pH at home is fast with a DIY soil test kit. You can get one, like the Rapitest Soil Test Kit, for about $18. These kits give quick results for pH and basic nutrients like nitrogen, phosphorus, and potassium.
Mix soil from a 6-inch depth with water. Add the test solution. Watch for color changes and compare them.
Electronic testers also work fast. But they usually cost more and need batteries or calibration.
Most garden plants thrive when soil pH is between 6.0 and 7.0. A pH below 5.5 makes soil acidic, hiding some nutrients from plants. Above 7.5, soil becomes alkaline and limits nutrient use too.
Your test shows pH outside this range. Add lime to raise it or sulfur to lower it. Don’t add too much.
Use small amounts, wait 1 to 2 weeks, then test again. Don’t plant until pH is right.
Soil nutrients fall into categories like low, medium, high, or excessive. These levels directly affect plant health by controlling growth speed, leaf color, and fruit production. Low nutrients mean plants may look weak or grow slowly.
Excessive nutrients can cause leaf burn or harm beneficial soil life. A professional lab test costs more but tells you detailed nutrient levels and recommendations. You send a soil sample by mail and usually get results in 1 to 2 weeks.
Decide your testing method based on your needs and budget. DIY kits work well for quick checks in spring or before planting. Labs suit new gardens or problem spots needing detailed info.
Remember, soil is a living system with microbes that help plants absorb nutrients. Testing helps confirm if your soil supports this life.
Test again after any pH or nutrient changes. Keep soil healthy and ready for planting.
Use soil from 6 inches deep for testing to get an accurate pH and nutrient reading.
3. Choosing and Adding the Right Organic Matter
Add organic matter like compost, manure, mulch, and leaf mold to improve soil. These amendments boost fertility, soil structure, and moisture retention. Match the type and amount to your soil for best results.
Compost: Benefits and Usage Tips
Compost supports tiny soil organisms and gradually gives plants nutrients they need. It also improves soil aeration, targeting around 25% air space for roots. Start by mixing 2 to 4 inches of compost into the top 6 to 8 inches of soil.
Sandy soil needs 2 to 3 inches of compost and some coconut coir. Add half to one inch of coir to help hold water better.
Put compost on in fall so it breaks down during winter months. Don’t add more than 4 inches at once to protect plants.
Manure: Types and Safety Considerations
Manure adds nitrogen and organic matter but varies by animal source. Cow, horse, and chicken manure are common choices. Well-aged or composted manure is safer and reduces weed seeds and pathogens.
Use about 3 to 4 inches of manure mixed into clay soils to loosen them. Avoid fresh manure since it can burn plants or introduce harmful microbes. Wear gloves and wash hands after handling manure.
Mulch and Leaf Mold: Improving Moisture and Structure
Mulch like straw or bark helps keep soil damp and cooler. It also adds organic matter as it slowly breaks down in the soil.
Leaf mold provides a fibrous, crumbly material that improves water retention and loose soil texture. Both work well in clay and sandy soils.
Spread 3 to 4 inches of mulch or leaf mold on clay soils first. Add compost or manure together to improve soil texture and nutrients.
This mix helps create air pockets and reduces compaction in heavy soil. Mulch also controls weeds and stabilizes temperature.
Special Amendments for Clay and Sandy Soils
Clay soil benefits from compost, manure, bark, leaf mold, and fibrous materials like straw. These improve drainage and reduce stickiness. Mix in 3 to 4 inches thoroughly before planting.
Sandy soil needs organic matter to hold water and nutrients better. Use 3 to 4 inches of compost and mulch, plus 2 inches mixed in each fall. Adding half inch to 1 inch of coconut coir also helps retain moisture.
| Organic Amendment | Nutrient Content | Best For Soil Type | Recommended Amount |
|---|---|---|---|
| Compost | Balanced nutrients, feeds microbes | Clay, Sandy, Silty | 2-4 inches worked into soil |
| Manure (aged) | High nitrogen, organic matter | Clay (best), Loamy | 3-4 inches worked into soil |
| Mulch (straw, bark) | Improves moisture, structure | Clay, Sandy | 3-4 inches on soil surface |
| Leaf Mold | Fibrous, retains water | Clay, Sandy | 3-4 inches mixed or on surface |
| Coconut Coir | Raises water holding | Sandy | 0.5-1 inch mixed in |
Adding organic matter gradually each season builds healthy soil. Avoid dumping too much at once to prevent nutrient imbalances. Work amendments into soil for better contact and faster breakdown.
4. Removing Weeds, Rocks, and Debris Safely and Efficiently
Clear your garden bed by removing all weeds, roots, rocks, and debris. Digging out the entire root system stops weeds from growing back. Rocks and large debris can block root growth and disrupt your soil’s structure.
Start by watering the soil a day before you work. Moist soil is easier to dig and reduces the chance of compacting. Use a garden fork or hand trowel to loosen roots gently.
Lift roots carefully to avoid breaking them. Work slowly to protect the plants.
Some plant material, like roots from previous plants, can stay in the soil. These add organic matter slowly as they break down. Removing only the living weeds and their roots prevents disturbing beneficial soil life.
Follow these steps to safely clear your garden bed:
- Water your planting area a day before you start digging.
- Use a rake to clear surface debris like sticks and loose stones.
- Pull weeds out by hand for best results. Dig about 2 to 4 inches deep. Make sure you get the roots out.
- Dig gently with a garden fork to loosen soil and lift stubborn weed roots.
- Remove rocks larger than 1 inch in diameter by hand or with a small shovel.
- Leave small roots and dead plant parts in the soil to decompose naturally.
- Level the soil by raking it smooth to avoid future holes or mounds.
Use hand tools to avoid soil compaction and getting rid of more soil than needed. Large tillers and heavy machines can crush soil.
This damages soil structure and tiny organisms. These organisms help plants grow healthy.
Clearing your bed in this way takes time but sets up a healthy start for plants. Good soil feels loose and crumbly after you finish. Weeds that come back fast may still have roots left.
Some seeds might have stayed in the soil too. Keep pulling to reduce new growth. Check regularly and remove new weeds early to keep soil strong for your plants.
5. Techniques for Loosening and Aerating Compacted Soil
Using a Garden Fork to Hand Loosen Soil
A garden fork works well to loosen compacted soil without damaging it. Aim to loosen the soil to about 6 to 8 inches deep. This depth is enough to improve root growth and drainage in most garden beds.
Insert the fork tines straight down and wiggle to break up the soil clumps. Lift and turn the soil gently, breaking lumps as you go. Adding a bucket of organic matter helps improve the soil structure while you loosen it.
Follow these steps to loosen soil using a garden fork:
- Water the soil a day before to soften it slightly.
- Push the fork tines deep, about 6 to 8 inches.
- Wiggle the fork to break up compacted soil.
- Lift and turn the soil carefully.
- Break large clumps with the fork tines.
- Mix in organic matter while loosening.
- Rake the surface smooth after loosening.
Don’t force the fork too hard in dry, hard soil to avoid breaking tines.
When and How to Use a Rototiller Properly
A rototiller works best on large garden areas with serious compaction. Set it to till about 6 to 8 inches deep, avoiding going deeper than 10 inches. Over-tilling deeper can destroy natural soil layers and air pockets.
Loosen the soil once in the spring or fall before adding compost or fertilizer. Till dry soil, not when it’s soggy, to prevent clumping and compaction. After tilling, avoid working the soil again until plants are growing well.
Use this method to till with a rototiller:
- Clear debris and large rocks from the soil.
- Check soil moisture; it should be damp, not wet.
- Set the tiller to 6 to 8 inches depth.
- Make one pass across the planting area.
- Mix in any added compost or nutrients.
- Rake the tilled soil lightly before planting.
Repeated tilling after the initial pass can harm soil structure and reduce aeration.
Balancing Between Aeration and Soil Structure Preservation
Good soil has air pockets that help roots grow and water drain well. Too much tilling breaks these pockets and compacts the soil again. Limiting loosening to the top 6 to 8 inches keeps soil structure intact deeper down.
Hand loosening with a fork avoids disturbing beneficial microbes and fungi. Tilling only when necessary saves time and protects your soil layers. Let natural processes and deep-rooted plants improve soil beneath the loosened zone.
Check your soil yearly for compaction by probing it with a fork or rod. If the soil stays hard and dry after loosening, add organic matter and avoid walking on beds. This protects the fragile soil structure you carefully created.
6. Adjusting Soil pH for Optimal Nutrient Availability
Soil pH affects how well plants absorb nutrients like nitrogen, phosphorus, and potassium. Most crops prefer a slightly acidic pH between 6 and 7. Outside this range, nutrients become less available, causing weaker growth and lower yields.
Correcting soil pH depends on your soil type and how acidic or alkaline it is. You can raise pH by adding garden lime, which contains calcium and other nutrients.
To lower pH, elemental sulfur works by acidifying the soil. Both need to be mixed into the soil for best results.
Apply lime or sulfur several weeks before planting. This timing lets the amendments react fully with the soil.
Fall is best, so the materials break down before spring planting starts. You can also combine these with organic fertilizers during soil preparation.
| Goal | Amendment | Sandy Soil (lbs/100 sq ft) | Loam (lbs/100 sq ft) | Clay (lbs/100 sq ft) |
|---|---|---|---|---|
| Raise pH (too acidic) | Garden lime | ~5 | ~8 | ~10 |
| Lower pH (too alkaline) | Elemental sulfur | ~1 | 1.5 to 2 | ~2 |
Start by testing your soil pH to decide which amendment you need and how much. Clay soils need more lime or sulfur because they hold acidity or alkalinity strongly. Mix the amendments evenly and water them in to activate.
Too much lime can cause nutrient lockout and poor growth. Overapplying sulfur may harm beneficial soil microbes. Using the correct amount based on soil type avoids these problems and promotes healthy plant roots.
7. Using Cover Crops and Mulching to Improve Soil Health
Using cover crops and mulch improves your soil by adding organic matter. These methods stop erosion, keep moisture, and reduce weeds before planting. You can start cover crops after the harvest and mulch anytime to protect and enrich soil.
Popular Cover Crops for Garden Soil
Cover crops are plants grown to improve soil health between regular crops. Common types include clover, rye, vetch, and buckwheat. Clover adds nitrogen, while rye grows quickly to protect soil from erosion.
You can plant cover crops in late summer or early fall. This timing lets roots build organic matter before soil freezes. For warmer areas, you may sow cover crops during the winter to keep soil covered year-round.
Incorporating Cover Crops Ahead of Planting
Cut or mow cover crops before they go to seed. Then till or dig them into the soil two to four weeks before planting. This allows plants to decompose and release nutrients.
Cover crops improve soil by adding organic matter and feeding helpful microbes. Their roots also break up compacted soil and hold it in place during rains. Avoid waiting too long; old cover crops can rob nitrogen from the soil.
Choosing and Applying Mulch Types
Mulch hides soil from sun, traps moisture, and reduces weeds around plants. Common mulches include straw, wood chips, grass clippings, and shredded leaves. Organic mulches slowly break down and feed the soil.
Apply mulch in 2 to 4 inch layers around plants or beds, leaving space near stems. Avoid pile-ups that trap moisture against stems to prevent rot. You can also use black plastic or cardboard to block weeds and warm soil before planting.
8. Common Soil Preparation Mistakes and How to Fix Them
Over-amending soil is a common mistake that can harm plant growth. Adding too much compost or fertilizer disrupts the balance of nutrients and soil texture. Your soil feels soggy or sticky.
Flush it with water. Use fewer amendments next season.
Failing to clear old roots, rocks, and debris hampers root development and water flow. Take time to dig out all remnants before planting. Leaving bits behind leads to uneven soil and can invite pests or disease.
Wrong pH adjustment is another frequent error. Adding lime without testing might raise soil pH too much, making nutrients unavailable. Correct this by rechecking pH in several spots.
Your soil is too alkaline. Add elemental sulfur in small amounts. Do this slowly over months.
- Don’t use fast-acting synthetic fertilizer; it harms beneficial soil life.
- Avoid compacting soil by walking on beds before plants establish.
- Watch out for microplastics in soil; avoid plastic mulches not designed for gardening.
- Recheck soil pH yearly and adjust lightly as plants grow.
- Keep adding organic matter yearly for steady nutrient supply and fluffy texture.
Compacted soil recovers slowly but you can help by aerating with a garden fork every fall. Your soil is very dense. Try double digging.
Or use a broadfork to loosen two feet deep. Adding organic matter during this process prevents re-compacting and encourages earthworms.
Never mix lime or sulfur directly with fertilizers. Spread separately to avoid chemical burns on roots.
Keep your soil healthy by not using heavy machinery on wet beds. Plant cover crops regularly to protect the soil. Rotate cover crops each season for best results.
These steps keep soil alive and ready for planting without extra fixes. You’ll notice better root growth and easier watering as your soil improves.
Step-by-Step Action Plan for Preparing Your Soil
Follow these clear steps to get your soil ready for planting. Each one helps the soil support healthy plant growth.
- Before you start: Clear your garden bed of weeds, rocks, and debris. Check that the surface is clean and free of obstacles.
- Day 1: Test your soil’s pH and nutrient levels using a home kit or lab service. Use the results to plan your amendments.
- Day 2: Add organic matter like compost or aged manure based on the test results. Mix it well with the top 6, 8 inches of soil until evenly distributed.
- Day 3: Use lime to raise soil pH or sulfur to lower it. Test soil pH first to know which treatment you need. Follow package instructions for how much to apply. Wait a few days and recheck pH if possible before planting.
- Week 1: Loosen compacted soil using a garden fork or tiller. Make sure the soil crumbles easily and drains well.
- Week 2: Plant cover crops like clover or rye to improve soil. These crops add nutrients and protect your soil before planting. Sow them evenly and water lightly to help growth. Mow or turn them under after they grow to add nutrients.
- Right before planting: Apply mulch around the planting area. Mulch keeps moisture, reduces weeds, and protects soil structure.
Frequently Asked Questions
How Long Should I Wait After Amending Soil Before Planting?
Let the soil rest for 1 to 2 weeks after adding amendments. This helps nutrients settle and improves planting conditions.
Can I Prepare Soil for Planting in the Fall Instead of Spring?
Yes, working in amendments during fall helps them break down well by spring. Fall is ideal for adding organic matter and amendments.
What Is Sheet Mulching and How Does It Help Prepare Soil?
Sheet mulching uses layers of organic material to improve soil over time. It’s best added a season before planting for great results.
Can I Prepare Garden Soil Without a Soil Test?
A balanced fertilizer such as 10-10-10 applied at 1 to 1.5 pounds per 100 square feet provides essential nutrients safely.
How Do Cover Crops Improve Soil for Planting?
They protect soil from erosion and add organic matter when tilled in before planting. Plant cover crops in fall and till 2 to 3 weeks before spring planting.
Why Should I Moisten Soil Before Planting Seeds or Seedlings?
Moist soil makes planting easier and supports seed germination and root growth. Water after raking for the best start.
Wrapping Up
Good soil prep sets your garden up for success. Start testing your soil and adding organic matter this weekend. Watch your plants grow stronger with every step you take.