How to Make Raised Plant Beds: Complete Guide with Tools, Materials & Tips
Knowing how to make raised plant beds gives you control over soil quality and drainage. You start by picking the right materials, tools, and location for your bed. Keep in mind that bed size and soil depth affect plant health and growth.
Raised beds warm faster in spring, which helps extend your growing season. It’ll save time and improve harvests, especially for vegetables. Build garden beds no wider than 4 feet for easy reach.
Keep beds 8 to 10 feet long to make them easy to manage. This size helps you care for your plants smoothly.
Keep the soil inside the bed at least 6 inches deep for shallow beds. For vegetables, aim for 14 to 18 inches deep soil to give plants space to grow. Avoid making planting beds too tall if you aren’t prepared to add good soil regularly.
Key Takeaways
- Use rot-resistant wood like cedar or fir for longer-lasting raised beds.
- Keep bed widths no more than 4 feet to reach the center easily.
- Build beds 16 to 18 inches tall for best vegetable root growth.
- Place beds where they get at least six hours of sun daily.
- Allow 3-foot-wide paths between beds for easy movement and wheelbarrows.
- Use a drill and screws to quickly assemble 4×8 foot bed frames.
What Are Raised Plant Beds and Why Use Them?
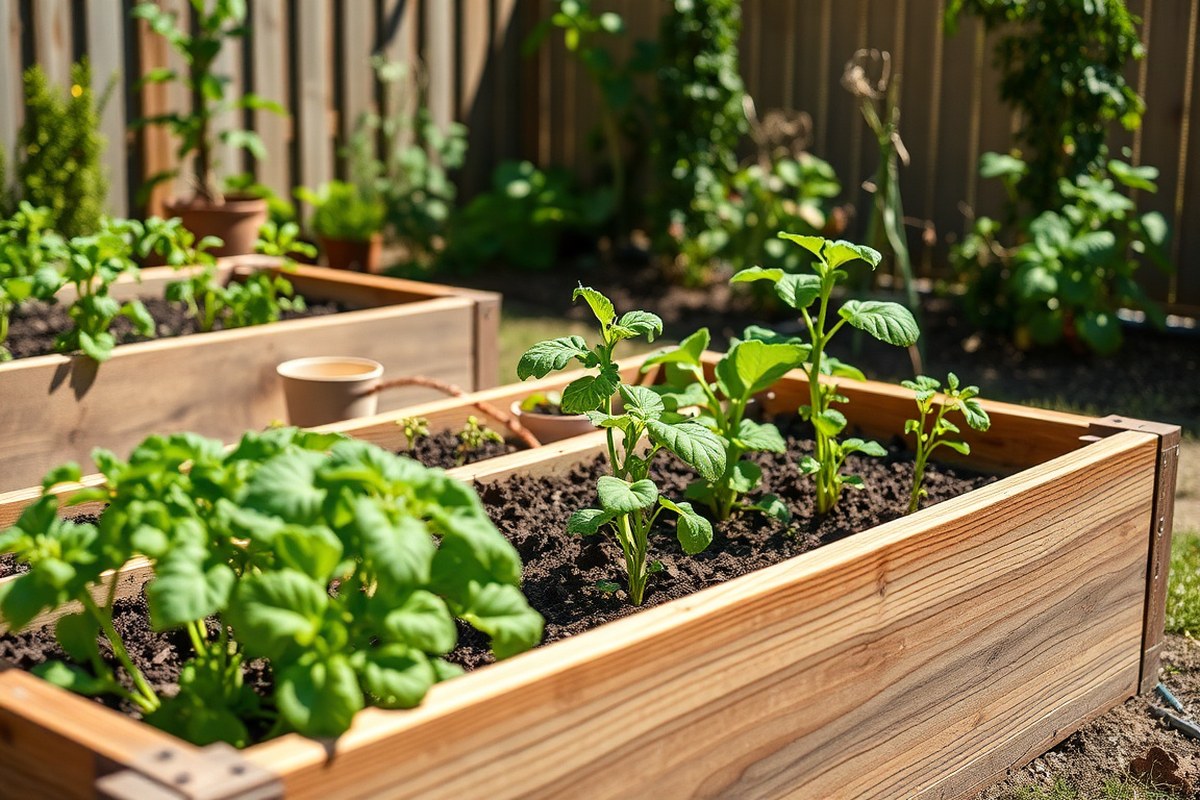
A raised plant bed is a garden bed built above ground level. It’s usually enclosed by wood or another material and filled with soil. These beds let you control the soil better and avoid many problems of in-ground gardening.
They help if your yard has poor drainage or floods sometimes. Raised beds drain water well, which stops roots from rotting. The soil warms up 2 to 4 weeks earlier in spring.
This helps plants grow sooner. They also grow longer with warmer soil.
Most raised beds stand 16 to 18 inches tall. This gives roots plenty of space. It also stops soil from getting packed down.
Keep bed width at 4 feet or less. This lets you reach the center easily.
Avoid stepping inside the bed to protect the soil. Keep the length around 8 feet or less to handle building and watering easily.
The soil in raised beds tends to dry faster because of good drainage. You need to check watering more often than in-ground beds, especially in hot weather. However, they reduce weeds and make planting, pruning, and harvesting easier on your back and knees.
Raised beds let you start small and expand later, which is good if you’re new. You can build beds cheaply with cedar or pine wood. Fill them with a good soil mix.
This gives plants the nutrients they need. Beds deeper than 20 inches need a proper base layer.
Use rubble or subsoil for good drainage. Then add your garden soil on top.
By raising your garden, you solve common issues like poor soil quality, drainage problems, and accessibility. You avoid soil compaction caused by walking on plant roots. Also, raised beds keep your garden tidier and make managing nutrients simpler.
Choosing Materials and Tools for Your Raised Plant Bed

Materials for raised plant beds vary widely in cost, durability, and ease of installation. Wood like pine or fir costs less. It lasts about 3 to 7 years.
Your climate affects how long it holds up. Masonry options like stone or brick can last decades.
They need precise footing for support. Mortar is also required for stability.
Metal options like corrugated steel panels provide a modern look and good durability. Repurposed materials, including pallets, offer a cheap solution but be sure to avoid chemically treated wood. Your choice will depend on budget, style, and how long you want the bed to last.
Essential tools make building easier and more accurate. Expect to use a saw and a drill with screwdriver bits. You’ll need a level and measuring tape too.
Use galvanized deck screws for wood. Using masonry means you also need mortar and a trowel.
Concrete is required for footings as well. Here is a clear comparison of common materials:
| Material | Lifespan | Cost (Approx.) | Advantages | Disadvantages |
|---|---|---|---|---|
| Pine or Fir Wood | 3 to 7 years | $50 to $100 per 4×8 bed | Affordable, easy to work with | Susceptible to rot, needs replacement |
| Masonry (Stone or Brick) | 20+ years | $200 to $300 per 4×8 bed | Very durable, attractive | Requires mortar, concrete footings |
| Corrugated Steel Panels | 10+ years | $150 to $250 per 4×8 bed | Rust resistant, modern look | Can be hard to cut or shape |
| Repurposed Wood (Pallets) | 2 to 5 years | Very low or free | Budget-friendly, eco-friendly | May have chemical treatments, less stable |
For building wooden raised beds, deck screws hold boards better than nails. It helps avoid loosening as the wood expands and contracts. Choose masonry and prepare footings about 6 inches deep.
Footings should be 12 inches wide for strength. This prevents shifting and keeps the bed stable.
Check pallets for heat treatment stamps. Avoid chemical treatments that could harm plants.
Planning your tools in advance prevents headaches mid-build. Measure twice and cut once to reduce waste. Having a level ensures your bed sits flat, which helps with water drainage and plant health.
How to Pick the Best Location and Size for Raised Beds
Place your raised beds in a sunny spot getting 6 to 8 hours of direct light. Choose bed sizes you can easily reach from both sides, usually 4 feet wide. Leave at least 28 to 36 inches around beds for walking and wheelbarrow access.
Sunlight Requirements for Different Plants
Most vegetables and herbs need 6 to 8 hours of direct sunlight daily. Pick a flat, open area that isn’t shaded by trees or buildings. South-facing spots usually get the most sun throughout the day.
Some leafy greens tolerate a bit less light. But flowering plants like tomatoes need full sun.
Morning sun is best to dry dew and reduce fungal problems later. Avoid locations with tall fences or walls blocking sunlight in the afternoon.
Standard Raised Bed Dimensions and Why They Matter
A common raised bed size is 4 feet wide and 8 feet long. Height usually ranges from 12 to 24 inches. This size fits most home garden spaces.
This width lets you reach the middle from either side without stepping in the bed. Gardeners can comfortably reach about 24 inches into the bed.
Lengths can vary depending on your block setup. Use multiples of 16 inches plus one board’s width. This keeps block construction neat and strong.
The height allows good soil drainage and helps warming soil. Don’t make it too tall.
Filling taller beds can cost more and be very heavy. Adjust height based on your mobility or crop needs.
Planning Pathways and Spacing Around Beds
Keep pathways between beds at least 28 inches wide for easy movement. Leave a gap of 36 to 48 inches for wider spacing. This helps if you use a wheelbarrow in the garden.
It gives better maneuvering room. Narrow paths can cause tripping and block airflow, raising disease risk.
Spacing also stops plants from shading each other. Plan where beds and paths go before you build anything. This avoids overcrowding and lets you water and harvest easily.
- Minimum 28 inches for walking paths
- 36 to 48 inches for wheelbarrow access
- Consider wider paths if you use gardening carts
- Leave space for mulch and drip irrigation setup
- Avoid paths narrower than 18 inches to prevent damage
- Plan for easy access to all sides of every bed
After setting beds and paths, add mulch and define walkways clearly. This helps keep weeds down and makes your garden easier to maintain over time.
Step-by-Step Guide to Building a Raised Plant Bed
Building a raised plant bed starts with getting the ground ready. Next, you cut and join the lumber into a sturdy frame. Finally, add corner posts for strength and use screws to hold everything in place.
Preparing and Leveling the Site
Clear the area of grass, weeds, or roots to stop plants competing with your garden. Use a spade or garden fork to loosen and turn the soil about 6 inches deep. Level the ground with a rake.
Check for evenness. This helps your raised bed drain and sit firmly.
Flatten the surface as much as possible. You can use a carpenter’s level across the site to spot dips or bumps.
Fix these by adding or removing soil until the whole area is flat. This step keeps your frame steady and prevents soil from washing out.
Cutting and Assembling the Lumber Frame
Measure carefully to cut your boards before you build to save time later. Standard raised beds are often 4 by 8 feet with boards 12 inches tall. Use 2×12 boards for each side.
This gives enough soil depth. It works well for most vegetables and flowers.
Lay out your cut boards on the ground like a rectangle. Attach opposite boards first, then connect them at the corners using three-inch exterior screws. Use a power drill to drive screws.
Space holes about every 12 inches. This holds the boards tightly.
Installing Corner Posts and Fasteners
Use 4×4 posts cut slightly longer than the bed height for corner supports. For a 12-inch bed, cut posts 16 inches long.
Put 4 inches underground for stability. Drive these posts into the soil at each corner before attaching the frame around them.
Attach the frame boards to the corner posts with deck screws for extra strength. Adding metal corner brackets helps resist twisting and keeps the bed square. For beds taller than 12 inches, stack more boards.
Secure each layer to the posts. This prevents bowing or leaning.
- Clear the planting site thoroughly and remove all vegetation.
- Dig and loosen soil to about 6 inches depth, then level the ground.
- Measure and cut lumber for all sides and corner posts before assembly.
- Arrange frame boards on the ground, forming a rectangle for your bed.
- Connect boards at corners with 3” exterior screws, spacing screws 12 inches apart.
- Drive 4×4 corner posts into the ground for beds taller than 12 inches.
- Attach frame boards securely to corner posts with deck screws.
- Add corner brackets or metal fasteners if desired for extra reinforcement.
What Soil Mix and Drainage Work Best in Raised Beds?
Use a soil mix with 40% topsoil and 40% compost. Add 20% aeration material like perlite or coarse sand. This mix helps roots grow well.
This blend holds nutrients, drains well, and lets roots breathe. Fill a 10-gallon raised bed with 4 gallons topsoil and 4 gallons compost. Add 2 gallons coarse sand or perlite to the mix.
Raised beds usually don’t need a thick drainage layer at the bottom. This changes if placed on concrete or very compacted ground. Drainage can be improved by spreading 1 to 2 inches of gravel or small rocks at the bottom.
This helps water flow out easily. Then cover it with landscape fabric to stop soil from mixing into the stones. This helps water flow out without clogging the space.
Layering starts with the drainage material, if needed, then add your soil mix. The bed should be at least 12 inches deep for most plants, more for root vegetables.
Keep the soil loose and fluffy by mixing new compost or aeration materials yearly. Add a 2- to 3-inch mulch layer on top to keep moisture steady and reduce evaporation.
Watch your soil moisture daily, especially in hot or dry weather. Raised beds dry faster than ground soil, so plan to water more often. Mulch helps but doesn’t replace watering.
Fertility lasts best when you add compost or organic fertilizer every season. Avoid soil that compacts or stays soggy; roots need air to grow healthy.
Use landscape fabric over gravel layers to prevent soil loss and improve drainage.
Building Raised Beds on Different Surfaces: Soil, Grass, or Concrete
You can build raised beds on soil, grass, or hard surfaces like concrete. Each surface needs different preparation to keep your bed stable and your plants healthy. Depth and barriers vary depending on what’s beneath your bed.
Building on Soil or Grass
Raised beds on soil or grass need a good base to prevent weeds and improve drainage. Clear grass or weeds before placing the bed frame. You might dig down 6 to 12 inches to loosen soil.
This helps roots grow better. Loose soil lets water and air reach roots well.
Adding compost or organic matter at the base improves soil health. Beds built over grass need at least 12 inches depth. This holds enough soil for your plants.
It also stops the plants from drying out. This depth also stops roots from hitting hard ground quickly.
Raising Beds on Concrete or Hard Surfaces
Concrete or pavement under raised beds requires a different approach to drainage and pest control. Use a hardware cloth bottom to block rodents and let water escape below. Avoid solid wood bottoms because trapped moisture can cause rot over time.
Raised beds on hard surfaces need a minimum depth of 12 inches. This gives enough space for plant roots and soil moisture.
Keep in mind soil weight. Saturated soil pushes outward so reinforce bed walls as needed for stability.
Surface Preparation and Barriers
Take time to prepare where you want to build your raised bed. Setting barriers or liners prevents weeds, pests, and moisture issues. The right prep matches what lies underneath and what plants you grow.
- Remove grass or weeds before bed installation on soil or grass.
- Lay hardware cloth on concrete to stop rodents under beds.
- Place a weed barrier fabric on soil or grass to reduce weeds.
- Add gravel or coarse sand for extra drainage if soil is heavy clay.
- Ensure bed walls are sturdy enough to hold wet soil pressure.
- Choose topsoil over potting soil for beds on hard surfaces.
Good preparation saves you headaches from pests and poor drainage later. It also helps plants grow stronger roots with less competition and stress.
Common Mistakes to Avoid When Making Raised Plant Beds
One common mistake is using treated wood or cheaper, soft wood. Treated wood can leach chemicals into your soil, harming plants. Untreated wood like heart redwood lasts longer.
It keeps soil safe. It costs more, often $50 to $100 for lumber per bed.
Another error is poor soil drainage inside the bed. Raised beds can dry out fast, especially early on. Adding a layer of gravel or coarse stuff helps water flow.
It keeps roots healthy. Avoid compacting soil tightly during filling to maintain good air pockets.
Some gardeners build raised beds that are too deep or too wide. Beds wider than 4 feet make reaching the center tough and strain your back. Aim for 3 or 4 feet wide.
So you can easily reach inside without stepping on the soil. Depth around 12 inches suits root vegetables and most annual plants well.
- Buying untreated wood like heart redwood to avoid soil toxins
- Adding gravel for proper drainage at the bed’s base
- Limiting width to about 3 to 4 feet for easy access
- Using 1¼ inch deck screws plus wood glue for strong joints
- Placing raised beds near partial shade to prevent soil drying
- Building on legs no taller than 24 inches to avoid instability
- Planning for easy repairs by leaving screws accessible
Building raised beds on legs can cause wobbling if the legs are too tall or thin. Keep legs under 24 inches and sturdy.
Attach bottom slats well using deck screws and a bit of wood glue. This setup holds the soil solidly and lasts longer.
You may also overlook location issues. Too much sun dries soil quickly. So placing beds where they get morning sun and afternoon shade helps maintain moisture.
Avoid spots with heavy foot traffic near the bed. This stops soil compaction. It also prevents damage to the frame.
Maintenance and Longevity Tips for Raised Plant Beds
Maintaining your raised plant bed keeps it sturdy and healthy for years. Check the frame quarterly for loose screws, cracks, or rotting wood. Tighten or replace fasteners as needed, focusing on corners where stress builds up most.
Apply a non-toxic wood stain or sealant every 1 to 2 years. This protects the wood from weather damage. Do it regularly to keep your bed strong.
Linseed oil is a cheap, natural option that soaks in to slow rot. Brush the stain or sealant on dry wood.
Do this in spring or fall. Let it dry at least 24 hours before adding soil.
Soil loses nutrients over time. Add 2 to 4 inches of fresh compost or balanced organic fertilizer each spring. Top off the bed yearly to keep soil healthy.
This keeps plants thriving without disturbing roots. Replace the soil mix every 3 to 5 years if drainage clogs or plants grow poorly. Changing soil helps keep plants healthy and growing well.
For longer bed life, line the bottom and sides with weed barrier fabric. This blocks weeds from growing up and stops moisture from soaking wood directly.
Boards on wood beds in full sun or wet places might need replacing every 4 to 6 years. Focus on the lower boards touching the soil.
When rebuilding, use corner posts and stagger the joints of the wood boards. This technique adds strength and prevents the frame from shifting as soil settles. Raised beds taller than 12 inches benefit most from these extra supports.
Don’t wait for wood to rot before fixing it. Early staining saves you from costly repairs later.
Step-by-Step Action Plan
Follow these clear steps to build your raised plant bed and get it growing well. Each step shows what to do and how to check your success.
- Day 1: Choose the best spot for sunlight and easy access. The area should get at least six hours of sun. Be level or easy to level.
- Day 2: Gather materials like untreated wood or composite boards and basic tools. Have a tape measure, drill, screws, and a saw ready.
- Day 3: Measure and mark your bed size on the ground. A common size is 4 feet by 8 feet to reach the center easily.
- Day 4: Cut and assemble your frame. Use screws for strength and check all corners are square.
- Day 5: Prepare the bed base by removing grass or weeds if on soil or grass. Add a layer of cardboard to block weeds if needed.
- Day 6: Fill your bed with a soil mix. Use 60% topsoil, 30% compost, and 10% coarse sand for drainage. The soil should be loose and moist but not soggy.
- After 1 week: Plant your seeds or seedlings. Check the soil moisture daily and water as needed to keep it damp.
- After 2 weeks: Inspect your bed for any signs of pest damage or poor drainage. Amend soil or cover with mulch to fix issues.
Frequently Asked Questions
What Do I Put in the Bottom of a Raised Garden Bed?
Line the bottom with landscape fabric to block weeds. It also helps drainage and keeps soil from washing out.
What’s the Cheapest Way to Make Raised Beds?
Use untreated pine or fir lumber, but expect 3 to 7 years of use. These woods are affordable and easy to work with.
What Are Some Common Mistakes People Make When Using Raised Garden Beds?
Filling beds with cheap topsoil or native dirt is the biggest mistake. Use a mix of compost and good garden soil instead.
How to Make a Raised Garden Bed for Beginners?
Build a 4×8-foot frame with treated wood or cedar. Fill it with a mix of compost and topsoil for best growth.
How Deep Should Raised Beds Be for Most Plants?
Aim for at least 12 inches deep to support roots well. Some vegetables may need deeper beds.
Can I Build Raised Beds on Concrete or Pavement?
Yes, but use a raised bed frame and fill it with quality soil. Make sure there’s good drainage to avoid waterlogging.
Final Thoughts
Building your raised plant bed lets you control soil and growing conditions. Start with good planning and quality materials to save work later. Now, pick your location and order materials to get started this weekend.