How to Wire Irrigation System: A Complete Guide for Reliable Setup
How to wire irrigation system starts with picking the right wire type and gauge. Use 14-gauge wire for most residential setups; thicker wire works for longer runs. This ensures strong signals to all valves without losing power or causing damage.
Choose wires rated for outdoor use and resistant to moisture and sunlight. Running wires underground needs cables designed to handle soil conditions. This prevents deterioration and avoids frequent repairs.
Next, plan your wiring layout carefully by marking zones and valve locations clearly. Group valves by irrigation zones and map out the shortest wiring paths. This prevents confusion and helps avoid costly rewiring later.
Always use waterproof connectors to seal wire joints tightly. Exposed connections can cause short circuits or system failures over time. Taking these steps keeps your system running reliably and saves water.
Key Takeaways
- Use 14-gauge wire for typical residential irrigation systems.
- Choose 12-gauge wire for longer distances to avoid voltage drop.
- Plan wiring layout by grouping valves into logical irrigation zones.
- Dig trenches 6-8 inches deep to protect wires and keep things tidy.
- Seal all wire connections with waterproof connectors to prevent shorts.
- Connect the controller to a 120-volt outlet for proper power supply.
Choosing the Right Wire Type and Gauge

Choosing the right wire type and gauge starts with knowing your system size. Most residential irrigation controllers run on 24 volts. So the wire must handle that without dropping power.
Thinner wires like 18-gauge work fine for short runs up to 200 feet. But longer distances need thicker wire to keep the voltage steady at the valves.
Direct burial wire is your go-to here. It has a tough jacket to resist moisture and soil damage over time.
Using anything less means you risk corrosion or shorts that cause valve failure. Wire connections also need waterproof, direct burial-rated connectors for lasting reliability.
Distance affects wire choice the most. Voltage drops over long wire runs, so thicker wire keeps your valves powered correctly. Here’s a quick table to match wire gauge to run length for a 24-volt system:
| Distance (feet) | Recommended Wire Gauge |
|---|---|
| 0-200 | 18-gauge |
| 200-300 | 16-gauge |
| 300-500 | 14-gauge |
| 500+ | 12-gauge |
Choose 18-gauge wire if your valves are close to the controller. It’s cheaper and easier to work with. Use 14 or 16-gauge wire for distances from 200 to 500 feet.
This helps stop signals from getting weak. Thicker wire works better for longer runs in your irrigation system. Over 500 feet, 12-gauge is necessary but harder to bend and more costly.
Using the right wire gauge means your valves open and close on time without random failures. It also avoids wasted water from valves not activating fully. Thicker wire costs more, so expect a higher price.
You also need bigger connectors for thicker gauges. This adds to the overall cost of installing your irrigation system. Still, investing in good wire prevents frustrating troubleshooting and replacement later.
Planning the Wiring Layout for Zones and Valves
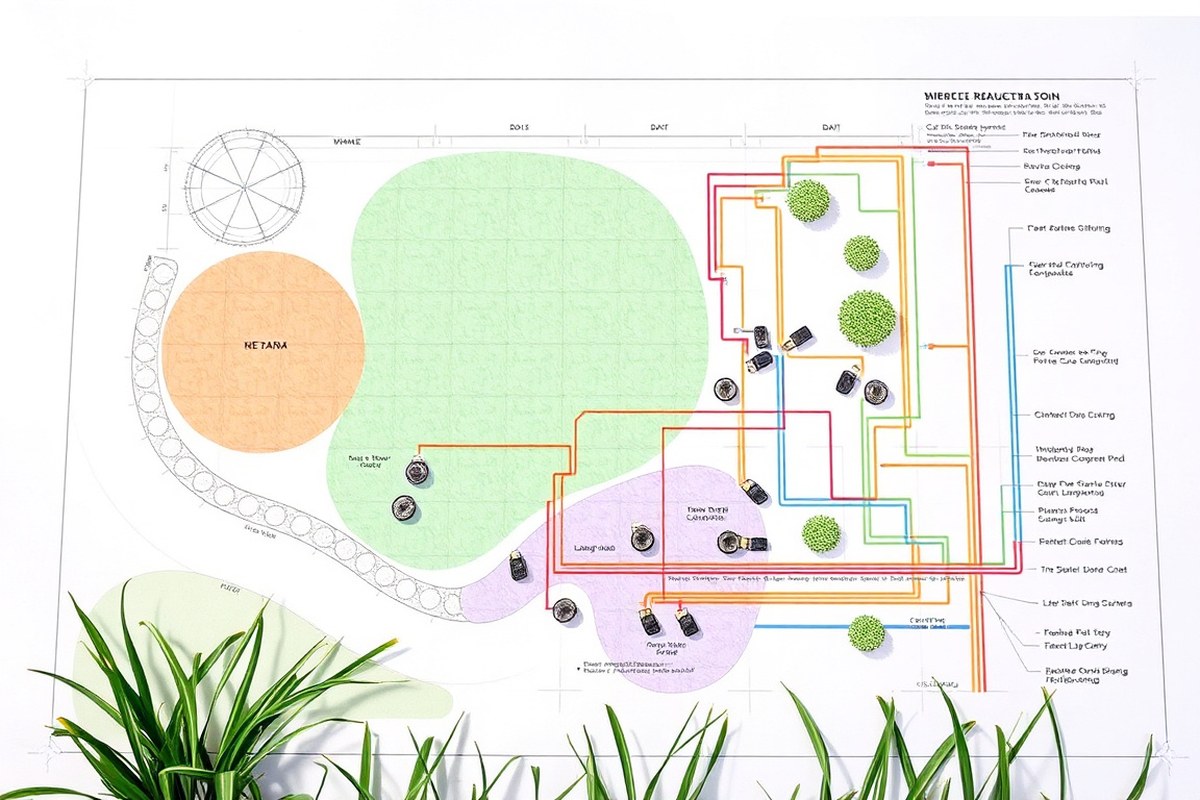
An efficient wiring layout pairs each irrigation zone with a valve. It groups wires to cut costs. This setup saves money and simplifies installation.
Use one common wire shared by all zones and one hot wire per valve zone. Planning routes that avoid extra turns saves wire and reduces failures.
Mapping Zones on Landscape Plans
Start with a clear plan showing your landscape divided by watering needs. Mark areas like flower beds, turf, or shrubs that will each get their own zone. This helps you know exactly how many valves and wires you need.
Draw on your plan the location of water valves relative to each zone’s plants. Valves usually sit near the start of a pipeline. Sometimes, they are in valve boxes around your yard.
These spots make them easy to access. Identifying these spots before wiring prevents running wire unnecessarily far.
Grouping Valves by Zone
Each irrigation zone gets one valve controlled by a hot wire from the controller. The valves share a common wire returning to the controller. So, you only need one common wire but several hot wires, one per valve.
Group valves physically close to one another to run fewer long wires. Plan wires to run the shortest safe path to each valve. Spread out valves need careful wire routing.
This keeps your layout neat and cost-effective. This reduces material costs and future troubleshooting headaches.
Routing Wires for Efficiency and Safety
Plot wire routes that keep the wiring as direct as possible with few turns. Use landscape edges, along fences, or beside walkways to keep wires organized and protected.
Plan wiring paths away from sharp objects, heat, and standing water to prevent damage. Bury wires 6 to 12 inches deep for protection.
Use conduit to run wires under driveways or hard surfaces. This prevents damage and keeps wires safe.
- Draw your landscape with zones clearly marked.
- Identify valve locations for each zone on the plan.
- Determine the shortest routes from controller to each valve.
- Assign one hot wire to each valve zone.
- Plan one common wire shared by all valves.
- Group valves and route wires along safe, accessible paths.
- Mark your wiring plan for easy reference during installation.
Label wires at both the controller and valves before burying to ease future fixes or upgrades.
Tools and Materials Needed to Wire Irrigation Systems
To wire irrigation valves and controllers, get essential tools first. Use waterproof connectors and wear safety gear when working.
These help you make solid, protected connections that last in wet conditions. Preparing wires right and using the right components prevents valve failure and electrical problems.
Essential Hand Tools for Wiring
You’ll use basic tools to strip, cut, and connect the wires safely and cleanly. A good wire stripper removes the right amount of insulation.
It won’t damage the wire inside. Sharp wire cutters will give you a clean, straight cut for neat connections.
Needle-nose pliers come in handy for twisting wires or holding small connectors steady. You should also have a screwdriver set to attach wire terminals to valves or controllers. Having a voltage tester is wise to check power flow before touching wires.
- Wire strippers sized for 14-gauge wire
- Sharp wire cutters or scissors
- Needle-nose pliers
- Small flathead and Phillips screwdrivers
- Voltage tester or multimeter
These tools cost around $15 to $40 at hardware stores. Buying tools with comfortable grips saves your hands during long wiring sessions.
Recommended Waterproof Connectors and Tape
Waterproof wire connectors protect your electrical joints from moisture and corrosion. Using these keeps valves functioning and avoids shorts or failures.
Avoid regular wire nuts or electrical tape for valve boxes. They don’t hold up well in damp spots.
Choose gel-filled, waterproof wire connectors designed for outdoor irrigation. Add another wire piece with connectors when your wires are too short. Wrap all spliced or connected points well for long-term protection.
- Gel-filled waterproof wire connectors (wire nuts)
- 14-gauge common and zone wires
- Electrical tape for securing wires to pipes, not connections
- Heat shrink tubing optional for extra protection
Waterproof connectors cost about $10 for a pack of 10. Adding extra tape to attach wires to irrigation pipes keeps wiring organized and safe from damage.
Safety Equipment for Electrical Work
Working with irrigation wiring means handling low-voltage electricity, but safety still matters. Use insulated gloves to avoid shocks and protect your hands from wire cuts. Safety glasses guard against wire ends or debris during stripping and cutting.
Make sure the irrigation controller power is off when you work on wiring. A voltage tester helps confirm no current flows. Wearing closed-toe shoes and working in dry conditions helps prevent electrical accidents.
- Insulated electrical gloves
- Protective safety glasses
- Voltage tester to check wires
- Rubber-soled shoes
Keeping safety gear on hand costs about $20 to $40 but protects you from avoidable injuries. Stop work immediately if you see frayed wires or sparks. Call a professional if unsure.
Running Wire from Controller to Valves Safely
Run irrigation wires at least 6 inches deep to avoid damage. This depth protects wires from lawn tools and everyday digging. Keep wires neat and secure to ensure your system lasts.
Trenching to Protect Pipes and Wires
Dig trenches about 6 to 8 inches deep for irrigation wires and pipes. This depth shields wires from damage and keeps your yard looking clean. Avoid making trenches deeper than needed, as this complicates repair access later.
Fill trenches carefully after laying wires, firming soil without pressing directly on wires. Avoid sharp rocks or debris that might cut insulation. Take your time to keep wires neat and prevent future problems.
Hand Digging Near Utilities
Always hand-dig near utility lines, no matter how deep they appear. Power, gas, and water lines may shift over time, so careful digging avoids accidents. Use a probe or a spade to gently expose the utilities before digging further.
Never use power tools to dig near known pipes or cables. Mark location of utilities with spray paint or flags to remind yourself. This careful approach prevents costly underground damage and safety risks.
Extending and Splicing Wires in the Field
You can extend irrigation wires if they fall short, but do it carefully. Use waterproof wire connectors designed for irrigation systems. Proper splicing keeps wires protected from moisture and corrosion.
Plan to bury splices at least 6 inches deep, the same as wires. Wrap splices with waterproof tape after using connectors for extra security. Regularly inspect splices during system checks to catch any issues early.
- Locate the route from the controller to each valve box.
- Check for underground utilities and mark their positions clearly.
- Dig trenches 6 to 8 inches deep along the planned route.
- Lay wires in the trenches, keeping them flat and untangled.
- Use waterproof wire connectors when splicing or extending wires.
- Cover wires carefully, avoiding sharp rocks or debris.
- Firm soil over the wires without pressing directly on them.
- Test the wiring system before finalizing soil coverage.
Connecting Common and Zone Wires to Valves
Identifying the common and zone wires is the first step in wiring valves correctly. The common wire usually has one color, like white. It runs from the controller to all valves.
Zone wires come in different colors. Each wire connects to a valve’s terminal on the controller.
Each solenoid on a valve has two wires, typically red or black. One solenoid wire connects to the common wire.
The other connects to a zone wire that controls that valve. This setup lets your controller open and close each valve independently.
- Turn off power at the controller to prevent shocks while working.
- Strip about ½ inch of insulation from the zone and common wires and the solenoid wires.
- Connect one solenoid wire to the common wire. Use a gel-filled wire nut or waterproof crimp sleeve.
- Attach the other solenoid wire to the valve’s zone wire. Use the same waterproof method.
- Wrap all connections with self-amalgamating or silicone tape for extra seal protection.
- Repeat these steps for each valve, matching zone wires to their controller terminals.
- Restore power and manually activate each zone from the controller. Check valves open and close as expected.
Proper sealing of wire connections prevents moisture-related corrosion and short circuits. Using gel-filled nuts or crimp sleeves reduces wires touching inside the connection box. A well-sealed splice should last many years without service.
A bad connection shows when a valve won’t respond. It can also cause a short circuit with almost zero Ohms resistance. This usually happens when wires cross or lack a waterproof seal.
Seal every connection with waterproof kits to avoid corrosion that shorts your irrigation system.
Testing, Troubleshooting, and Labeling Irrigation Wiring
Start checking your irrigation wiring with a continuity test. Set your multimeter to continuity mode. Check each wire for breaks.
Test from the controller end to the valve end. Touch one probe to the wire’s start and the other at the end.
A beep or zero reading means the wire is good. No sound or an open reading means the wire is broken somewhere.
Next, measure the resistance of each valve’s solenoid using the ohms setting on the multimeter. Normal resistance is between 20 and 60 ohms. A value below 20 might indicate a short circuit.
Above 60 may mean the solenoid is damaged. Replace any solenoid outside these numbers to avoid valve malfunctions.
Common wiring issues include loose connections, wire corrosion, and damaged insulation. Rodents chewing wires or moisture creeping into junction boxes can cause shorts or breaks.
Always inspect these areas if your system isn’t working properly. To troubleshoot, use this simple script:
- Confirm power is on at the controller and outlet.
- Test wire continuity from controller to each valve.
- Measure solenoid resistance for each valve.
- Check water pressure at the system for proper flow.
- Verify controller programming matches valve zones.
- Look for visible wire damage or loose terminal screws.
Mark each wire with a unique code. Label both ends clearly. Use the zone or valve number for the code.
Use waterproof tags or colored tape and permanent markers. This simple step helps you quickly identify wires during repairs or upgrades. Without labels, finding which wire controls which valve can take a lot of guesswork and time.
Testing wiring early saves time and frustration. Running tests before finishing installation catches problems when they’re easier and cheaper to fix.
Take time to label your wires today to avoid headaches later. These steps protect your irrigation system from unexpected failures and keep your garden watered reliably year-round.
Protecting Irrigation Wiring from Damage and Environmental Factors
Use waterproof connectors to keep irrigation wiring safe from moisture. Strip wires cleanly and twist them firmly before sealing in the connector. This stops water from getting in and causing shorts inside valve boxes.
Digging the wires at least 6 inches underground helps shield them from physical damage. This depth prevents impacts from lawn tools or foot traffic. In sandy soil, go deeper for protection.
Aim for 8 to 10 inches. This helps guard the irrigation system well.
Avoid running wires near sprinkler heads or garden beds where digging often happens. These spots increase the chance of accidental cuts or scrapes. Instead, route wires along paths or edges less disturbed.
Rodents can chew through irrigation wires, causing shorts or failure. Wrap the wiring in a metal conduit or use wire with rodent-resistant insulation for added protection. You can also place copper mesh near entry points to keep mice away.
UV rays from the sun degrade exposed wires quickly. So never leave wires above ground without shielding.
Use a UV-resistant conduit if you must run wire on the surface. Paint or tape won’t block UV damage well enough.
The cost of burying wire is low if you dig by hand with a trenching shovel. It takes a few hours for a typical home system. Renting a small trencher can speed the work but costs around $50 to $100 per day.
Your wiring stays reliable longer when installed below the frost line in cold areas. This prevents freezing and cracking from seasonal changes. Winterize valves and wiring by draining water first.
Use compressed air to blow out moisture. Do this during cold months.
During splicing, a common mistake is leaving tiny wire strands loose before twisting. These strands quickly corrode and cause failure. Use a waterproof wire nut designed for low voltage and test connections for tightness before sealing.
You’ll know the protection works when wires stay dry and undamaged through seasons and gardening tasks. Check connections pocketed inside valve boxes yearly. Replace any worn parts to keep water flowing without shorts or leaks.
Essential Safety Precautions When Wiring Irrigation Systems
Handling electrical wiring on irrigation systems demands careful safety habits. Power must be off when you work on any wires. This prevents shocks or short circuits from stray current or faulty connections.
Even the controller’s low-voltage wires can carry electrical charge. This happens if the main power stays on. Be careful when handling these wires.
Wiring a controller safely includes some key steps to protect you and your home. Disconnect its power at the breaker before you open it, especially around the input terminals.
Use tools with insulated handles to avoid accidental shocks. A properly grounded controller also reduces risk in wet or damp weather.
Follow these steps every time you wire or maintain irrigation wiring. They keep you safe and help avoid costly damage or electrical fires.
- Switch off the circuit breaker supplying power to the irrigation controller before starting any wiring work.
- Use a non-contact voltage tester to confirm all power is off at the controller terminals.
- Wear insulated gloves and use insulated tools to handle wires and terminals.
- Connect the controller’s power lines to a properly grounded outlet or power source, following local codes.
- Double-check all connections are tight and free of exposed wire before restoring power.
- After wiring, turn the breaker back on. Run a quick test to check the controller box. Make sure no sparks, sounds, or smells happen.
Never touch irrigation wiring or controller terminals if the power is live. You risk a serious shock.
Step-by-Step Action Plan for Wiring Your Irrigation System
This plan helps you wire your irrigation system easily and correctly. Follow each step to ensure your setup works well.
- Before you start: Gather all tools and materials listed in the guide. Check that you have the right wire gauge and connectors.
- Day 1: Plan your wiring layout based on valve locations. Mark where wires will run to avoid confusion during installation.
- Day 2: Run the main common wire from the controller to each valve. Secure wires to prevent movement or damage.
- Day 3: Connect zone wires to valves, matching controller zones. Test connections by running a valve cycle to see if it opens properly.
- Day 4: Label each wire and valve clearly. Use weatherproof tags to keep labels readable over time.
- Day 5: Protect all wiring with conduit or bury wires where possible. Inspect your work for exposed or loose sections.
- Day 6: Test the full system for leaks and proper operation. Watch each zone cycle through to confirm all valves respond correctly.
- After one week: Review wiring setup and labels. Fix any areas with poor connections or unclear markings.
Frequently Asked Questions
Can I Use Waterproof Wire Connectors for Irrigation Wiring?
Yes, waterproof connectors protect wire joints from moisture and corrosion. Using them boosts your system’s durability and prevents shorts caused by water exposure. They are easy to install and save time on future repairs.
Can I Extend Irrigation Wires If They Are Too Short?
You can extend wires using proper waterproof splice kits. Ensure the connection is sealed well to avoid water damage and electrical failures. Do not twist wires together without protection.
Should Irrigation Wires Be Buried Underground?
Yes, wires must be buried at least 6 inches deep to avoid damage. Proper burial protects them from lawn tools and weather changes. Use conduit if burial depth is shallow or soil is rocky.
Is It Okay to Mix Different Gauge Wires in My Irrigation System?
It’s best to use consistent wire gauge, like 16 or 18 gauge. Mixing gauges can cause voltage drop and erratic valve operation. If you must mix, keep the total wire length short.
Can I Connect Irrigation Wires Directly to the Controller Terminals?
Yes, but make sure wire ends are clean and connections tight. Poor contact can cause valve malfunctions. Use wire nuts or terminal strips designed for irrigation systems.
How Do I Prevent Rodents from Chewing on Irrigation Wires?
Use conduit or wire mesh sleeves to protect wires from rodents. Rodents are attracted to wire insulation and can cause shorts or breaks. Regular inspections can spot damage early.
Key Points to Remember
Wiring your irrigation system right first saves time and water. Take the initial step today by planning your wiring layout. Once you start, you’ll keep everything organized and working as it should.