Where to Plant Potatoes: A Complete Guide for Best Growth and Yield
Wondering where to plant potatoes for the best growth and yield? Choose a sunny spot with loose, well-drained soil. Potatoes need space to grow their tubers underground.
They grow best between 65°F and 80°F during daytime. Keep temperatures steady to help them develop well.
Plant seed potatoes about 6 inches deep in soil that’s loose and rich in organic matter. Keep the soil just moist for healthy potato growth.
Potatoes contain a lot of water and need it. Dry soil causes tubers to shrivel and reduces yield.
Start by picking a spot that gets at least six hours of sun daily. Avoid places with heavy clay or soggy spots to prevent rotting and poor tuber development.
Key Takeaways
- Plant seed potatoes around 6 inches deep in soil. Use soil rich in organic matter and loose texture. This helps tubers spread and grow properly underground.
- Choose a sunny spot with at least six hours of daily sunlight.
- Keep soil evenly moist to prevent potatoes from drying or rotting.
- Space seed potatoes 12 to 15 inches apart depending on the variety.
- Hill potatoes by adding 2 to 4 inches of soil once tubers emerge.
- Start chitting seed potatoes 6 to 8 weeks before planting outdoors.
Best Location in Your Garden for Planting Potatoes
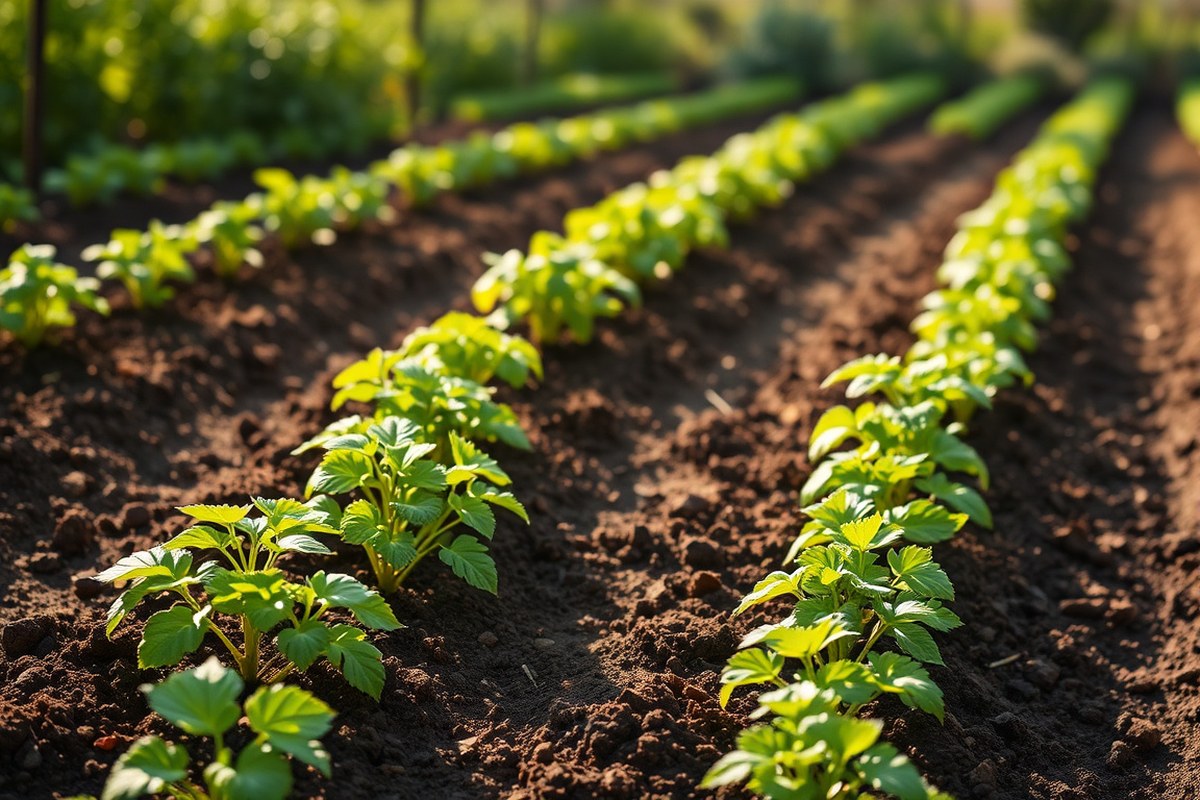
Potatoes need a sunny spot that gets at least 6 hours of direct sunlight daily. You can plant them in partial shade.
But yields will be smaller and tubers may develop poorly. Choose a location with open sky and avoid spots shaded by large trees or buildings.
The soil should be loose and well drained. So avoid low-lying areas where water puddles. Plant potatoes where air circulation is good to reduce fungal disease risk.
Avoid garden corners or tight spots where soil stays wet. Plants crowding each other weaken growth. Choose open areas for planting potatoes.
Space is another factor. Pick an area at least 3 feet wide for each potato row. This space helps tubers spread underground.
Crowded rows limit growth and yield. This helps tubers grow big and healthy without competition for nutrients.
Avoid planting potatoes where you grew tomatoes, peppers, or eggplants last year. Potato family plants share pests and diseases that survive in soil. Change your potato planting spot every year.
Wait 3 to 4 years before planting there again. This prevents disease build-up and soil problems.
Add a 4-inch layer of well-rotted manure or compost after planting. Use this method especially with no-dig gardening. It helps keep soil fertile and moist.
This provides nutrients and keeps soil loose. Digging isn’t essential but loosen soil if it’s compact.
Make sure soil temperature stays above 55°F by day and 45°F by night before planting. Cool soil delays sprouting and raises the risk of rot. Plant your potatoes 2 to 4 weeks before your usual last frost in spring.
Use large containers or raised beds when garden space is tight or soil is poor. Place them in full sun for best potato growth. This helps you grow potatoes anywhere.
Containers must be at least 16 inches deep to grow potatoes well. Fill them with loose, rich soil. This gives tubers plenty of room to develop underground.
Before planting, clear garden debris and weeds from the spot to avoid pests and diseases. Avoid places where water pools after rain or irrigation. Potatoes hate soggy soil, which can rot the tubers.
Optimal Soil Conditions for Potato Planting

Potatoes grow best in loose, well-drained soil with a sandy loam texture. This type of soil holds enough moisture but drains excess water quickly, preventing tuber rot. Heavy clay or waterlogged soils can cause poor growth or disease.
The soil’s pH should be slightly acidic, around 5.0 to 6.0. This acidity helps nutrient absorption and reduces common potato diseases.
Use a soil test kit to check pH before planting. Add sulfur to lower it or lime to raise it if needed.
To prepare soil for potatoes, clear all weeds first. Then, loosen the soil to about 12 inches deep. This will help roots grow better.
Mix in plenty of organic matter like compost or well-rotted manure. This improves soil fertility and drainage. Avoid fresh manure because it can burn young plants and promote disease.
Start by tilling the soil and removing rocks. Next, spread 2 to 3 inches of compost evenly over the soil. This step improves soil quality.
Work it in gently to avoid compacting. Adding a balanced fertilizer with nitrogen, phosphorus, and potassium will help. But too much nitrogen causes leafy growth instead of tubers.
Potatoes need consistent moisture but dislike sitting in wet soil. Water about 1 inch per week, more during dry spells. Raised beds or mounds often create better drainage in wetter climates.
Notice green spots on potatoes above the soil? Cover them quickly with soil to protect taste and safety.
Check soil drainage before planting. Dig a hole and fill it with water. Observe how fast the water drains out. Slow drainage means soil needs improving.
How Deep and How Far Apart to Plant Potatoes
Plant seed potatoes about 4 to 6 inches deep, with 10 to 15 inches between pieces. Spacing depends on the potato type and your growing method. Depth affects tuber size and yield by allowing enough soil cover and moisture retention.
Recommended Planting Depths
Dig trenches or holes 4 to 6 inches deep for planting. Use 10 to 15 cm for metric measure. Plant your seed potatoes inside these holes.
Cover seed potatoes well to keep them cool and moist. Don’t bury them too deep or sprouts won’t reach sunlight.
Keep soil shallow enough for sprout growth. Shallow planting may cause green potatoes, while too deep delays growth.
In some cases, like light sandy soil, plant a bit deeper to prevent drying out. Heavier soils need shallower depth to avoid waterlogging. Adjust the depth to maintain good soil contact without burying the seed too far.
Spacing Guidelines for Different Potato Types
Space smaller early potato seed pieces 10 to 12 inches apart. That’s 25 to 30 cm between each piece in a row. This helps plants grow better.
Maincrop potatoes, which grow larger, need 12 to 15 inches of spacing. Set rows about 2 to 3 feet apart for room.
This equals 60 to 90 cm for hilling and growth. It makes tending easier.
Early varieties usually do well with 12-inch spacing and 2-foot row distance. Maincrop or storage types require 15-inch spacing and roughly 3-foot rows. Denser planting reduces tuber size but can increase total yield slightly.
Adjusting Depth and Spacing for Containers Versus Ground
In containers, plant seed potatoes about 4 inches deep. This prevents waterlogging and helps sprouts come up. Keep soil shallow enough for good drainage.
Space seed potatoes about 12 inches apart to give roots room. Use a large container, at least 16 inches deep and wide.
Raised beds or garden rows allow deeper planting and wider spacing for more yield. Rows at 2 to 3 feet apart let you hill soil to support stems. Container growing suits early potatoes or smaller yields but requires careful watering and drainage.
Follow these steps for successful planting depth and spacing:
- Choose seed potatoes that weigh at least 1 to 2 ounces for good growth.
- Chit them in a bright, cool spot for 1 to 2 weeks before planting.
- Dig a trench or hole 4 to 6 inches deep in your soil or container.
- Place seed potatoes with eyes facing up along the trench, spaced properly.
- Cover seed pieces with soil, firm gently to ensure contact.
- Water the area lightly to settle the soil around the seed potatoes.
- Space rows 2 to 3 feet apart in the garden or use adequate container sizes.
Choosing Between Ground, Raised Beds, and Containers
You can grow potatoes in the ground, raised beds, or containers. Each method fits different spaces, goals, and care levels. Choosing depends on your garden’s space, soil quality, and how much effort you want to spend.
Ground planting suits those with enough outdoor garden space and well-drained soil. Raised beds provide better soil control and drainage. Containers work well if you have limited space or poor garden soil.
Growing potatoes in containers needs some extra feeding. You should mix organic fertilizer into the soil before planting.
After about six weeks, use liquid feed to keep nutrient levels up. Containers and raised beds warm faster in spring, which can help early growth.
Spacing stays important no matter how you grow. Main-crop potatoes need about 18 inches between plants. As the plants grow, cover the stems with soil or compost.
Do this when the leaves reach about 7mm tall. This helps protect the stems and supports growth.
| Planting Environment | Key Benefits | Main Drawbacks | Best For |
|---|---|---|---|
| Ground | Large space, natural soil, easy watering | Needs well-drained soil, can have pests | Larger gardens with healthy soil |
| Raised Beds | Improved drainage, soil control, warmer soil | More soil needed, can dry out faster | Moderate space, gardeners wanting better soil |
| Containers | Space-saving, portable, easy pest control | Need regular feeding, limited size, water often | Balconies, patios, poor soil, small gardens |
Use raised beds if your soil is poor or compacted. They give you control over soil quality and moisture.
Choose containers if your garden space is tight or soil is bad. Big containers or fabric grow bags that hold at least 10 gallons work well.
Fill containers with peat-free multi-purpose compost mixed with fertilizer. Plant 2-inch seed potato pieces that have 1 or 2 eyes. Cover with soil as the plant grows, hilling soil up when leaves reach 7mm.
Choose ground planting only if you have enough well-drained garden space. Raised beds suit gardeners wanting better soil and drainage. Go for containers if space is limited or soil quality prevents in-ground planting.
Preparing Soil and Site Before Planting
Preparing soil well before planting potatoes helps you get bigger, healthier tubers. You want loose, fertile soil with good drainage and the right pH. Adding organic matter and testing soil tools will set you up for success.
Testing and Adjusting Soil pH
Potatoes grow best in slightly acidic soil, around pH 6. Testing helps you know if you need to adjust your garden’s pH first. You can buy simple soil test kits at garden centers or send samples to a lab.
When the pH rises above 7, add elemental sulfur to lower it. Use about 0.2 pounds per 10-foot row.
Spread the sulfur a few weeks before planting, then water it in. Avoid aluminum sulfate because it may harm plants.
When soil is very acidic, add lime. This is rare for potatoes. Testing each year before planting keeps your soil balanced for a good harvest.
Adding Organic Matter and Fertilizers
Mixing compost or well-rotted manure improves soil fertility and water retention. Add this in the fall or just before planting. This gives nutrients and helps air reach roots better.
You can also add slow-release organic fertilizer like chicken manure pellets when planting seed potatoes. Besides compost, use an all-purpose fertilizer if you didn’t test your soil. Apply 1 to 2 pounds of 10-10-10 fertilizer per 100 square feet.
Don’t add too much fresh manure or nitrogen fertilizer at once. Excess nitrogen can cause too much leaf growth and fewer tubers. Compost or aged manure is generally safer and slow-release.
Loosening and Aerating Soil Properly
Potatoes need loose, crumbly soil so their tubers can grow easily. Avoid compacted or heavy clay soils without amending them first. Loosen soil 8 to 12 inches deep.
Use a garden fork or tiller to break up clumps and remove stones. This also creates air pockets for roots. Mix in organic matter while loosening.
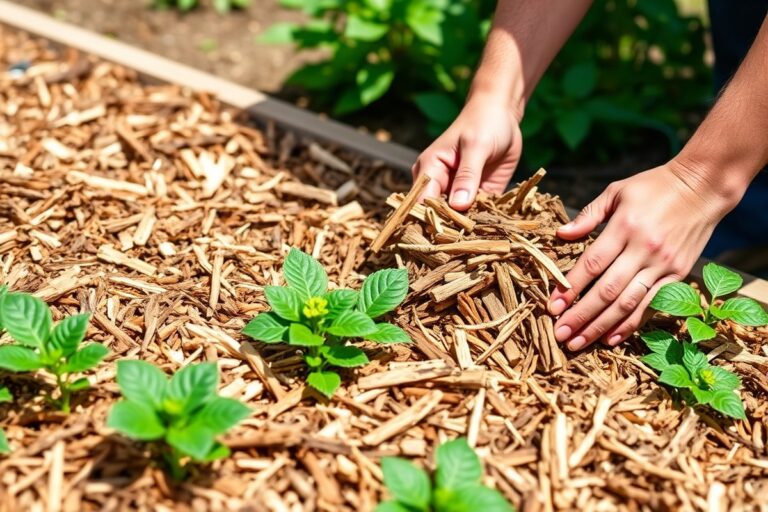
Avoid deep tilling if you use no-dig methods. Instead, add a thick layer of organic mulch over planted seed potatoes. This keeps soil loose and moist.
- Test soil pH using a kit or local lab service.
- Spread elemental sulfur if pH is too high, and water it in well.
- Mix 2 to 3 inches of compost or aged manure thoroughly into soil.
- Use all-purpose fertilizer at 1 to 2 pounds per 100 square feet. You can also apply slow-release pellets when planting.
- Use a garden fork or tiller to loosen soil 8 to 12 inches deep.
- Remove stones and debris to prevent tuber damage.
- Level soil surface and create mounds or rows ready for planting.
- Soil solarization or cover crops can help, but not required for most home gardeners.
Prepare soil a few weeks before planting to let amendments settle in well.
Planting Techniques and Protecting Your Potatoes
Plant seed potatoes with the eyes facing up, about 3 to 4 inches deep. Protect them by hilling soil as they grow to avoid sun exposure and frost damage. Use straw or mulch to keep moisture balanced and shield from heat or cold.
Positioning Seed Potatoes Correctly
Cut large seed potatoes into pieces with 1 or 2 eyes each. Do this at least two days before you plant them. This helps the pieces heal before you plant.
Small potatoes less than a hen’s egg should be planted whole. Placing the eyes facing up helps sprouts grow straight and strong.
Handle seed potatoes gently to avoid bruising. Avoid using grocery store potatoes for seeds because of disease risk. Use certified seed potatoes designed for planting instead.
Timing and Technique for Earthing Up
Start hilling (earthing up) potatoes once the plants reach 6 to 8 inches tall. This covers the lower stems with soil, preventing green potatoes from sun exposure. Hilling also supports the plant and promotes more tuber growth.
Repeat earthing up every two weeks until the plants flower. Keep soil piles about 6 inches high around the stems. This keeps the potatoes dark and protected under the soil.
It helps them grow better. The timing helps avoid frost hitting tender sprouts too.
- Plant seed potatoes with eyes facing up, 3 to 4 inches deep.
- Space pieces about 12 inches apart to allow room for growth.
- Wait for sprouts to grow 6 to 8 inches tall before hilling.
- Push soil gently around lower stems to cover them, about 6 inches high.
- Repeat soil mounding every 1 to 2 weeks as plants grow.
- Use straw mulch after planting to keep soil moist and cool.
- Remove mulch carefully if you expect frost to check soil temperature.
Methods for Frost and Heat Protection
Potatoes grow best in cool weather but frost can kill seedlings. Cover young plants with frost cloths or lightweight row covers at night when frost is forecast. Straw mulch helps insulate soil and keeps roots warmer.
To avoid heat stress, plant potatoes in early spring to late summer depending on your zone. Provide afternoon shade in very hot climates. Hilling soil or adding straw around plants limits direct sun on tubers, preventing green skin.
Green potatoes contain solanine, a bitter chemical harmful to eat. Keep tubers covered throughout the season using soil or mulch. Check plants regularly to add soil after rain or wind erodes covers.
Moisture, Watering, and Fertilizing Guidelines
Potatoes need about 1 inch of water every week while growing. This equals roughly 0.6 gallons per square foot or 620 gallons for 100 square feet. Adjust how often you water depending on rainfall.
Heavy rain means you probably won’t need to water as much. During dry, hot weather, increase watering frequency to keep soil moist.
Check soil moisture by sticking your finger about 2 inches deep. Water your potatoes when the soil feels dry to the touch. Avoid soggy soil because overwatering leads to root rot or diseases like potato blight.
Water early in the day so leaves can dry before evening. This reduces disease risk.
Fertilize potatoes with a balanced fertilizer before planting, like 10-10-10. Side-dress with nitrogen fertilizer once plants grow about 6 inches tall.
Nitrogen supports leaf and stem growth, but too much can reduce tuber size. Use about 0.3 pounds of nitrogen per 100 square feet during this stage.
Potatoes growing in sandy soil usually need watering more often than those in clay or loam. Raised beds and containers dry out faster. So water these every 2 to 3 days in warm weather.
Ground soil can hold moisture longer, so check soil moisture before watering. Mulch around plants to keep soil moist and prevent weeds.
Overwatering causes yellowing leaves and mushy tubers. Underwatering leads to smaller potatoes and stunted plants. Monitor soil moisture daily in hot spells.
Water your potatoes when the top 2 inches of soil are dry. Try to give about 1 inch of water each week.
Stick to this simple watering plan for best results. Adjust based on weather and soil type to keep plants healthy and productive.
Signs of Healthy Growth and Knowing When to Harvest
Healthy potato plants have dark green leaves that look similar to tomato leaves. You’ll see sturdy stems and sometimes white or light purple flowers.
When your plants bloom, tubers grow underground. New potatoes will be ready soon.
New potatoes can be dug up about two weeks after flowering ends. These young potatoes are small and tender but won’t store long. Use a small trowel to dig carefully around one plant.
Harvest a few potatoes. Avoid disturbing the rest. Then cover the plants with soil and let the others grow.
Main crop potatoes need more time, about 75 to 90 days. Wait until plants yellow and die back. That yellowing means the potatoes have stopped growing and have matured enough to store for months.
When plants die back, dig gently with a garden fork. Work from the outside inward. Avoid bruising tubers.
Dig carefully to avoid stabbing tubers; loosen soil well before lifting potatoes.
After picking early potatoes, plant another crop in early summer. Let this second crop mature fully for longer storage. Change your potato planting spot every year to avoid diseases from old tubers.
Step-by-Step Action Plan for Planting Potatoes
Follow these steps to pick the right spot and plant your potatoes well. Check each point to make sure your potatoes grow strong and healthy.
- Before planting: Choose a sunny location with well-draining soil. Test the soil pH to stay between 5.0 and 6.5 for best growth.
- One week before planting: Loosen the soil well. Mix in compost or aged manure to improve it. Check the soil drains well without puddles forming.
- Planting day: Space seed potatoes 12 inches apart and bury them 4 inches deep. Cover them gently and water the soil evenly.
- Two weeks after planting: Check for emerging sprouts. When soil looks dry, water deeply to keep it moist. Avoid soggy soil.
- One month after planting: Hill soil around the plants. Pile it up to cover half the stems. This helps protect tubers from sun and encourages more potatoes.
- Throughout growing season: Water consistently, aiming for about 1 to 2 inches per week. Fertilize monthly with a balanced fertilizer, watching for healthy leaves and no yellowing.
- Two to three months after planting: Look for yellowing foliage signaling potatoes are ready to harvest. Test by digging a small potato near the plant.
Frequently Asked Questions
Can I Plant Potatoes Near Other Vegetables?
Yes, plant potatoes away from tomatoes and peppers to avoid disease spread. Planting near nasturtiums helps repel potato beetles and attracts good insects.
How Soon After Flowering Can I Harvest Potatoes?
Harvest usually starts 2 to 3 weeks after flowering finishes. The flowers show tubers are developing underground.
Can I Reuse Garden Soil from Last Year’s Potatoes?
Avoid planting potatoes where you grew them or tomatoes last year. Crop rotation helps stop diseases and soil depletion.
Should I Remove Potato Flowers for Better Tuber Growth?
No need to remove flowers; they show tubers are forming well. Flowers don’t reduce yield and signal healthy growth.
Is Partial Shade Okay for Growing Potatoes?
Potatoes do best in full sun but can tolerate light shade. Less sun may slow growth and reduce yield slightly.
Does Mulch Help Protect Potato Plants?
Yes, mulch keeps soil moist and cool, reducing weeds. Apply 2 to 3 inches around plants once shoots appear.
Wrapping Up
Plant potatoes in a sunny, well-prepared spot with loose soil. Keep soil moist and hill up soil as plants grow. Start digging when the leaves turn yellow to enjoy fresh potatoes.