How to Clean Garden Tools Properly with 8 Essential Maintenance Steps
Knowing how to clean garden tools properly keeps them working well and lasting longer. Start by removing dirt and debris right after you use them. This stops grime from drying and making cleaning harder later.
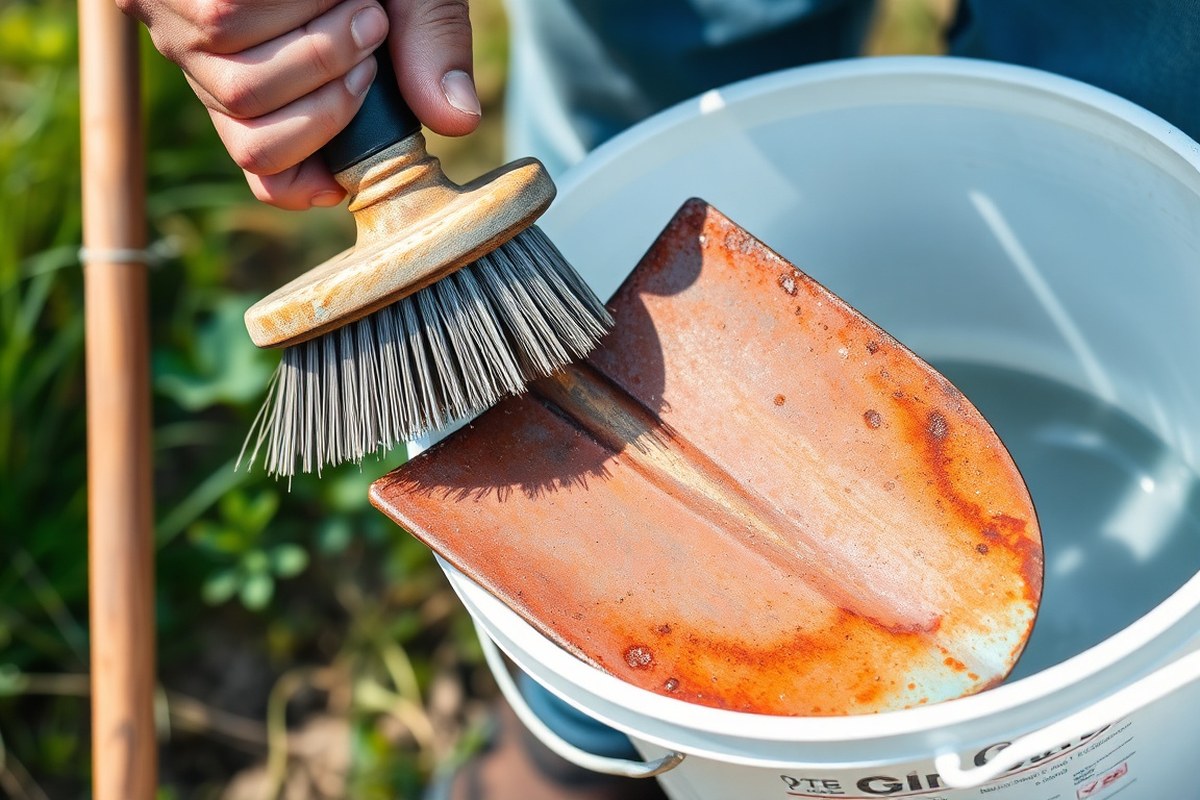
Use a stiff brush or put your tools under running water to get rid of soil. For tough mud, soak tools in water briefly before scrubbing.
Dry the tools fully before storing to prevent rust growth. Avoid letting moisture sit on metal parts as it speeds up rusting.
Remove sap and sticky residue with rubbing alcohol or a mild detergent. Wipe handles and metal with a rag or cloth during routine cleaning.
Inspect tools regularly for damage, rust spots, or loose parts to fix promptly. Staying on top of cleaning makes your tools safer and more effective.
Key Takeaways
- Remove soil and plant debris immediately after using your garden tools.
- Use a stiff brush or hose to clean dirt off tool surfaces.
- Dry tools thoroughly after washing to reduce rust risk.
- Wipe wooden or metal handles with a dry cloth after cleaning.
- Check for rust or damage before putting tools away.
- Address rust spots quickly to keep tools in good shape.
1. How to Clean Garden Tools After Every Use

- Remove loose soil and debris using a stiff hand brush.
- Wipe off sap and sticky residue with a rag dampened in warm water.
- Mix mild dish soap in a bucket with warm water, about one tablespoon per quart.
- Scrub the tools with a sponge or small brush dipped in the soapy water.
- Rinse tools under clean water to wash away soap and dirt.
- Dry tools immediately with a clean towel to stop rust from forming.
- Store tools in a dry place to keep them ready for the next use.
Cleaning garden tools right after use keeps dirt and sap from building up. Removing soil first is key because hardened dirt gets harder to remove later. A stiff brush works well for scrubbing off clumps.
Soap and water usually clean tools well enough. Stainless steel tools may only need a damp rag.
For sticky sap, soap helps break it down without harsh chemicals. Scrubbing with a sponge or brush loosens stuck-on grime effectively.
Rinsing after soaping ensures no dirt residue stays on the tools. Dry tools right away with a towel. This stops moisture from causing rust.
It is very important for steel blades and metal parts. Leaving tools wet can lead to rust or dull edges fast.
Use simple cleaning tools: a stiff brush, mild dish soap, and a sponge or rag. Have a towel ready too.
This basic kit costs under $15 and fits in a small bucket or caddy. Regular quick cleanings after each use save time and keep tools working well longer.
2. Best Methods to Remove Rust from Garden Tools

Soak your garden tools in vinegar or similar liquids first. Then gently scrub with steel wool or a stiff brush to remove rust safely.
For tougher rust, commercial rust removers work well but need careful handling. Follow clear steps to avoid damaging your tools and keep them working longer.
Soaking in Vinegar or Alternative Liquids
Soaking rusty garden tools in white vinegar for 12 to 24 hours helps loosen rust effectively. Vinegar acids dissolve rust without harming metal underneath. For lighter rust, shorter soaking times around 12 hours often work fine.
Some people use alternatives like beer or lemon juice. But white vinegar is the most common and affordable choice.
After soaking, rinse tools well to remove all acidic residue. Sap or sticky residue on your tools can be dissolved with turpentine before soaking.
Soaking works best when rusty sections are fully submerged. Avoid prolonged soaking exceeding 24 hours to prevent any metal damage, especially with thinner parts.
Scrubbing Techniques Using Steel Wool and Brushes
After soaking, rust should come off with steel wool or a stiff brush pretty quickly. Use fine-grade steel wool to avoid scratching or wearing down the metal. Scrub gently in circular motions to lift rust flakes.
For larger areas or heavy rust, start with a wire brush then finish with steel wool. Cleaning tools outdoors or over a tub helps catch rust debris. Rinse tools thoroughly after scrubbing.
Dry tools immediately to stop new rust forming. Using a scouring pad can help remove leftover rust spots on forged tools or hardened steel.
- Fill a bucket with white vinegar and water (or straight vinegar for heavy rust).
- Submerge rusty tool parts so they’re fully covered by the liquid.
- Let soak for 12 to 24 hours in a cool, dry place.
- Dump the soaking liquid and scrub the tools using fine steel wool or brush.
- Rinse tools thoroughly with clean water.
- Dry tools completely with a cloth or air dry in sunlight.
- Apply a light coat of oil to protect metal from future rust.
Avoid scrubbing too hard or using rough brushes, which can scratch or weaken tool metal.
Using Commercial Rust Removers Safely
Commercial rust removers are an option for heavy rust or quick cleaning. Many contain acids that dissolve rust quickly but can harm handles or paint if misused. Always follow label instructions carefully.
Choose rust removers labeled safe for garden tools. After applying, rinse tools well and dry immediately. Some products leave residue, so wipe tools clean before storing or oiling.
These removers cost $10 to $20 per bottle and work fast, minutes instead of hours soaking. Wear gloves and work in a well-ventilated area to avoid harsh chemical fumes.
3. When and How to Disinfect Garden Tools Safely
Disinfect garden tools a few times a year or after cutting sick plants. Use a bleach solution, rubbing alcohol, or a labeled garden disinfectant for best results. Proper disinfection stops disease spread without damaging tools or risking your health.
Comparing Common Disinfectants for Gardening Tools
Bleach, 70% isopropyl alcohol, and hydrogen peroxide are top choices. Bleach is strong and cheap but needs careful handling and rinsing. Alcohol works quickly and evaporates, so it dries fast without rust risk.
Hydrogen peroxide is less harsh and good for gentle cleaning. You can also find store-bought garden disinfectants labeled for plant tools. Avoid mixing bleach with vinegar or alcohol, as this creates harmful gases.
| Disinfectant | Strength/Concentration | Soak Time | Best For | Notes |
|---|---|---|---|---|
| Bleach | 10% solution (1 part bleach to 9 parts water) | 30 minutes | Heavy-duty disinfection | Rinse thoroughly after soaking |
| Isopropyl Alcohol | 70% | Wipe or soak 5-10 minutes | Fast drying, quick disinfection | Evaporates, less rust risk |
| Hydrogen Peroxide | 3% | Wipe or short soak | Gentle on tools, mild disinfectant | Less effective than bleach or alcohol |
| Commercial Garden Disinfectant | Follow label | Varies | Convenient and safe | Designed for plant tools |
Choosing the right disinfectant depends on your tool condition and how often you use them. Bleach suits deep cleaning a few times yearly. Alcohol works better for quick wiping between uses.
Step-By-Step Disinfection Procedures
- First, clean tools thoroughly to remove dirt and plant debris.
- Mix bleach solution: use 1 part bleach to 9 parts water in a plastic bucket.
- Soak tools in bleach for 30 minutes for full disinfection.
- If using rubbing alcohol, wipe or soak tools for 5 to 10 minutes.
- Remove tools and rinse well under running water, especially after bleach.
- Dry tools completely using a clean cloth to avoid rust.
For pruners and shears used on infected plants, wipe with bleach before and after every use. Avoid soaking these often to protect the blades. Use alcohol wipes or sprays between jobs instead.
Safety Guidelines During Chemical Use
Wear gloves and protective eyewear when handling bleach or alcohol. Use bleach only in a well-ventilated area to avoid inhaling fumes. Never mix bleach with vinegar or alcohol; this creates toxic gas.
After soaking tools, rinse them thoroughly to remove chemical residues. Store bleach and alcohol out of children’s reach. Dispose of used solutions safely by pouring them down a drain with plenty of water.
Be cautious not to contaminate your skin or eyes with these chemicals. Washing hands immediately after disinfection helps protect your health and gardening safety.
4. Sharpening Garden Tools to Maintain Efficiency
Choosing the Right Sharpening Tools
Different garden tools call for different sharpening tools to work best. Pruners and loppers work well with a specialized pruner sharpener or a fine sharpening stone. For tools like shovels, hoes, and knives, use a sharpening file first.
This shapes the edge. Then smooth it with a sharpening stone.
Choosing the right tool depends on the blade’s size and shape. Smaller, curved blades need smaller sharpeners for precise work. Larger flat blades require files or stones with a flat surface to cover the edge evenly.
Sharpening Blades and Edges Step-By-Step
Sharpening garden tools keeps cuts clean and your plants healthy by reducing damage. Most tool edges sharpen best at an angle between 20 and 30 degrees. Maintaining this angle helps the blade cut efficiently without weakening it.
Follow these steps for a sharp, safe tool edge:
- Secure the tool on a bench or clamp to keep it still.
- Check the blade’s angle and choose the matching sharpener angle.
- Push the sharpener or file along the blade edge in one direction, following the angle.
- Use even, gentle strokes to avoid removing too much metal.
- Flip the tool over and lightly sharpen the opposite side to balance the edge.
- Wipe off metal filings from the tool. Check sharpness by carefully touching the edge. You can also test it on paper.
- Repeat if necessary until the edge feels sharp and smooth.
Maintaining Sharpness Throughout the Season
Sharpen tools at least once every few weeks during heavy use to keep them cutting well. Check pruners and hoes monthly when you work in the garden. The hub or blades feeling dull or rough means you need to sharpen them.
Do it right away. This stops strain and damage.
A quick touch-up with a sharpening tool after cleaning helps maintain edges longer. Don’t wait too long to sharpen your tools. Metal might chip or get rust spots.
These problems are harder to fix later. Keep your sharpening tools clean and stored in a dry place to stay effective over time.
5. Oiling and Lubricating Tools to Prevent Rust and Wear
Use mineral oil or 3-in-1 oil to protect metal parts from rust. These oils create a thin, non-slippery layer that blocks moisture. Wipe the metal with an oily cloth.
Put a drop or two on bolts. Focus on moving parts such as pruner bolts. Avoid heavy oiling to keep tools easy to handle.
Wooden handles need linseed oil to stay strong and avoid cracking. Your handles may feel rough. Lightly sand them first.
Use a cloth to apply a little linseed oil. Rub it evenly into the wood.
Let the oil soak for several hours or overnight before wiping off any extra. Doing this once or twice a year helps the wood last longer.
Oil your tools only when they are clean and fully dry. Moisture attracts rust and can spoil the finish. After cleaning, dry with an old bath towel and wait until no dampness remains.
Doing this right after each use, or after deep cleaning, gives the best protection. In fall or spring, oiling tools prepares them for heavy use or storage.
You can use household oils like mineral oil. But avoid cooking oils since they might go rancid. Special garden tool oils like 3-in-1 are inexpensive and designed for rust prevention and lubrication.
A small bottle lasts many seasons and costs around $5 to $10. Linseed oil for handles can be raw or boiled. Boiled linseed oil dries faster, but raw is safer for home use.
Don’t apply too much oil or let it pool on the metal. Excess oil can attract dirt and make tools slippery. Use a soft cloth or old rag to spread a thin, even layer.
For wooden handles, a light rubbing until the wood looks slightly shiny is enough. Wait a day or two after oiling before using the tools again to avoid slippery grips.
Wear gloves when handling oils and abrasive materials to protect your skin from irritation.
6. Proper Storage Techniques to Keep Tools Dry and Rust-Free
Store garden tools in a dry, well-ventilated place like a shed or garage. These spots prevent moisture buildup that leads to rust. Avoid leaving tools outside, even if covered, because humidity and rain can still cause damage.
Hang larger tools such as shovels and rakes to keep blades off the ground. Hanging stops the metal from sitting in moisture and prevents the blades from dulling. Smaller tools with wooden handles go well in racks or holders.
This method keeps them safe and stops physical damage. It also makes tools easy to find when you need them.
Before storing, dry each tool thoroughly with a clean rag. Any leftover moisture invites rust to form quickly. Keep a brush and old towel near your storage spot.
Use them to clean tools quickly before storing. This habit keeps your tools in good shape.
- Choose a dry, ventilated shed or garage for storage
- Hang large tools by their handles on wall hooks
- Keep smaller tools in racks or buckets off the floor
- Dry and wipe tools completely before storing
- Place blades in sand mixed with oil for winter storage
- Keep a brush and old towel near storage for maintenance
When storing tools over winter, burying sharp blades in lightly oiled sand stops moisture damage. This method works well for protecting them without extra costs. Leave the handles exposed so you don’t lose or damage them while stored.
Tools left on damp floors or stored in enclosed plastic bins can trap moisture. This environment speed-ups rust and can cause wooden handles to warp or split. Make sure air circulates around stored tools to keep them dry and in good shape.
7. Troubleshooting Common Garden Tool Problems
- Apply penetrating oil to the stuck pivot joint. Use a clean rag to wipe off excess after 15 minutes. Work the joint back and forth gently until it loosens.
- Sand splintered or cracked wooden handles with medium-grit sandpaper. Smooth sharp edges by sanding in the direction of the grain. Wipe down with a damp cloth to remove dust.
- Use linseed oil on wooden handles after sanding. Let it soak in for 24 hours to restore moisture and prevent further cracking.
- Place bent metal parts in hot water at about 140°F. Soak them for 10 minutes to soften the metal a little. This helps make the metal easier to bend back into shape. Use adjustable pliers or a bench vise to gently bend the part back to shape.
- Check metal parts for cracks or deep damage after bending. The metal should feel strong. If it feels weak or breaks easily, replace it. Replacement is safer than trying a repair.
- Tighten or replace loose screws and bolts around pivots and joints. Worn hardware can cause wobbling or uneven cuts during use.
- Use steel wool or a wire brush to remove light rust around moving parts before lubricating. This ensures smoother operation and prevents further rusting.
- Replace handles that have deep cracks or splinters over an inch long. If you can’t fix them safely, swap them out. Badly damaged handles aren’t safe to use. Cheap replacement handles cost $10 to $20 at garden centers.
Stuck or rusted pivot joints prevent tools from opening and closing smoothly. Penetrating oil helps loosen these joints by breaking down rust inside. Avoid forcing the joint to stop damage to metal parts.
Splintered wooden handles can cause blisters or accidents. Sanding removes rough spots while linseed oil restores moisture. Dried or cracked wood may need a full replacement.
Bent metal parts often happen when tools get dropped or jammed. Heating then carefully bending prevents metal from breaking. Sharp bends or repeated damage weaken tools and may require buying new ones.
Regularly tighten screws and lubricate moving parts to keep tools working. Rust buildup around joints can stick and wear out tools fast. A good clean followed by oil keeps things smooth and safe.
Replacing tools makes sense when damage affects safety or function. Cracked handles or broken parts that go beyond repair put you at risk of injury. Look for deep splits or metal that can’t hold shape.
8. Creating a Seasonal Cleaning and Maintenance Routine
Set a daily habit of wiping your garden tools after use to stop dirt buildup. This takes just a few minutes and saves you time during deep cleanings. Rinsing blades and handles with water removes sap and soil before it hardens.
Disinfect tools after every use if you handle sick plants or invasive species. Otherwise, do it weekly to prevent spreading disease and pests. Use one part bleach to nine parts water for cleaning.
Rubbing alcohol works too and dries fast. Both help sanitize your gardening tools quickly.
Plan deep cleaning, sharpening, and oiling in fall or winter when your garden rests. Tools need thorough scrubbing to remove rust and sap. After cleaning, sharpen blades and oil metal parts to avoid corrosion during storage.
Seasonal changes affect how often you clean and care for tools. Warm, wet months cause faster rust and sap buildup.
You should inspect tools weekly in spring and summer. But every two to three weeks suffices in dry, cool seasons.
| Timing | Task | Frequency | Why |
|---|---|---|---|
| Daily | Wipe dirt and sap off tools | After each use | Prevents buildup and rust |
| Weekly | Disinfect tools | Weekly or after sick plants | Kills diseases and pests |
| Fall/Winter | Deep clean, sharpen, oil | Seasonally | Prepares tools for storage |
| Spring/Summer | Inspect and clean light rust | Every 1-2 weeks | Prevents corrosion and sap buildup |
Keep a checklist near your tools to mark when tasks are done. Checking off deep cleaning and sharpening in late fall helps you remember. Daily wiping feels easier with a visible reminder.
Expect sharper blades and smooth handles after seasonal care. Tools should look clean with no rust spots.
Metal that feels rough or dull needs more oiling. Sharpen your blades more often to keep them smooth.
Keep oil away from plant roots to avoid harming growth after tool use.
Step-by-Step Action Plan to Keep Your Garden Tools in Top Shape
Follow these steps to clean and maintain your garden tools regularly. Each action ensures your tools stay sharp, rust-free, and safe to use.
- After Every Use: Wipe off dirt and debris. Check if the tools look clean and dry.
- Weekly: Remove any rust spots with a wire brush or sandpaper. The metal should feel smooth, without flakes.
- Monthly: Disinfect blades using a 10% bleach solution or rubbing alcohol. Let them air dry and check no moisture remains.
- Every Two Months: Sharpen blades with a file or sharpening stone. The edges should look crisp and cut smoothly.
- Every Three Months: Oil all metal parts lightly with vegetable oil or machine oil. The metal should have a thin, even coating.
- Before Winter Storage: Clean thoroughly and store tools in a dry, sheltered spot. Tools should be rust-free and dry to touch.
Frequently Asked Questions
How Often Should I Deep Clean My Garden Tools?
Deep clean garden tools at least once a season, ideally in fall before storing. This prevents rust and keeps blades sharp for the next growing season.
Can I Use Household Bleach to Disinfect Garden Tools?
Household bleach works but diluting it is key, use one part bleach to nine parts water. Don’t soak tools longer than 10 minutes to avoid corrosion, then rinse and dry well.
What’s the Best Way to Clean Wooden Handles on Garden Tools?
Use warm soapy water and a soft brush on wooden handles to remove dirt. After drying, rub with linseed oil to keep the wood from cracking or drying out.
How Do I Clean Garden Tools with Sticky Sap or Resin?
Remove sticky sap by rubbing the tool with vegetable oil or rubbing alcohol. Wipe off residue with a cloth and wash the tool with soapy water afterward.
Should I Clean Garden Tools If I’ve Only Trimmed Healthy Plants?
Yes, always clean tools after use to prevent spreading unseen diseases. Dirt and sap can host pathogens even when plants look healthy.
Can Soaking Garden Tools in Vinegar Damage Their Metal Parts?
Short vinegar soaks help remove rust but avoid leaving tools soaking over an hour. Prolonged exposure can weaken metal or damage finishes. Rinse tools thoroughly afterward.
Before You Go
Keeping your garden tools clean and maintained helps them last longer and work better. Try cleaning and oiling your tools after your next gardening session. You’ll notice the difference in how smoothly they work and how long they stay sharp.