How to Clean Terracotta Pots: 8 Proven Methods for Best Results
Knowing how to clean terracotta pots helps your plants grow healthier. The best way is soaking them in special solutions to loosen stains and residues. This removes salts, mold, and old soil without damaging the porous clay material.
Start by rinsing the pots with plain water to clear loose dirt. Avoid high-pressure sprays since they can crack or wear down the pot surface. Letting pots soak for at least 10 minutes in cleaning mixes works well for tough buildup.
For safe cleaning, use gentle brushes with stiff bristles to scrub outdoor pots. Always rinse pots thoroughly after soaking and before reusing to protect your plants. Dry them fully under the sun to avoid mold regrowth and keep terracotta sturdy.
Key Takeaways
- Rinse off loose soil before cleaning terracotta pots with any solution.
- Avoid pressure washers which can damage clay pots easily.
- Soak pots in cleaning mixes for 10 to 30 minutes to loosen deposits.
- Use stiff-bristled brushes for scrubbing large outdoor pots carefully.
- Rinse pots thoroughly after soaking to remove residues and chemicals.
- Let terracotta pots dry in full sun for at least 24 hours.
1. How to Clean Terracotta Pots Safely and Effectively
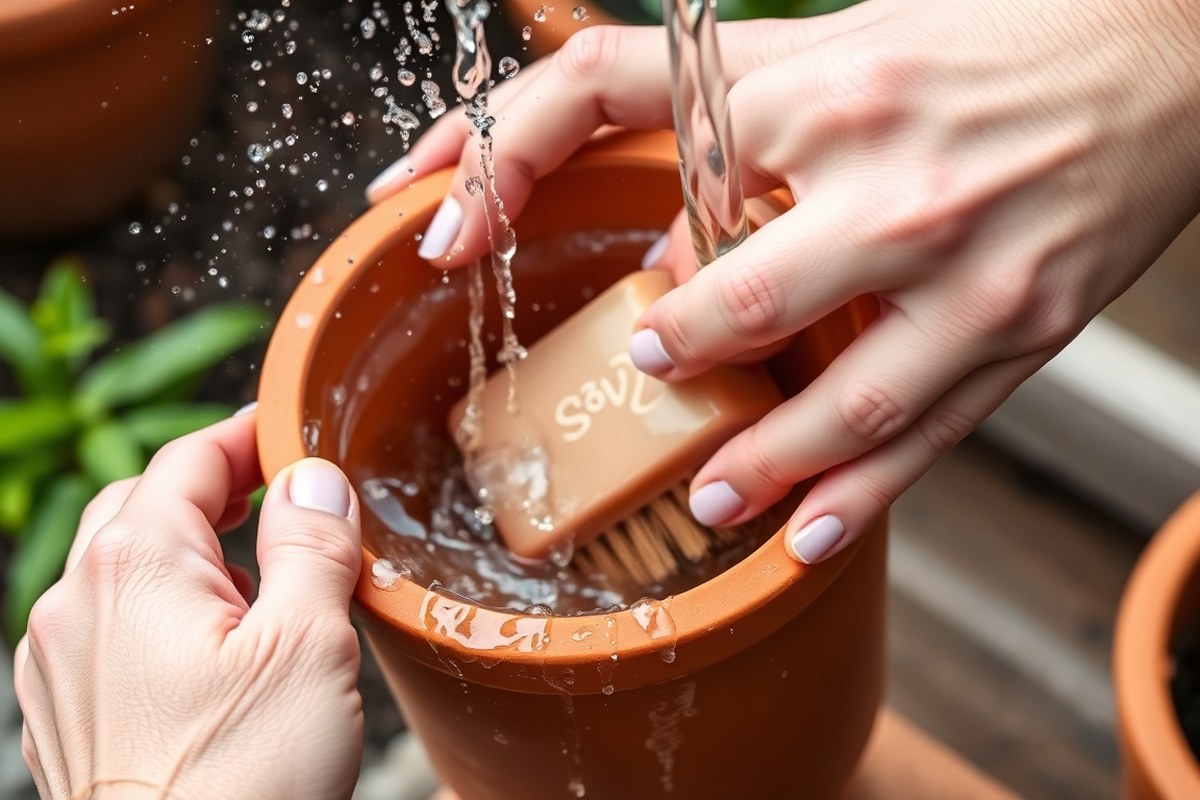
Cleaning terracotta pots means soaking, scrubbing, rinsing, and drying. This process removes dirt, salts, and stains without harming the porous clay. Soaking softens built-up grime, and scrubbing lifts it away gently.
Follow these steps to clean your pots properly. You’ll get pots ready for planting and avoid damage that comes from harsh cleaning. Take a little time for each step to protect your pots.
- Soak the pot in warm, soapy water for about 30 minutes. This loosens stuck dirt and old soil gently.
- Scrub the surface with a soft brush or sponge. Focus on stained or rough spots but avoid hard scraping to prevent cracks.
- Rinse the pot thoroughly with clean water. This removes soap and debris to avoid residue buildup inside the clay.
- For tough stains, soak the pot for 10 to 60 minutes. Use a diluted bleach solution. Longer soaking helps remove stubborn marks. Then rinse well to clear out any bleach left behind.
- Wipe any scrubbed areas with a damp cloth right after scrubbing. This stops acids or cleaners from soaking deeper into terracotta.
- Soak pots in clean water for about two hours after rinsing. This balances the clay’s pH and prevents future mineral deposits.
- Dry pots in a shaded, airy place for at least 24 hours. Sunlight and heat can cause cracking if they dry too fast.
Soaking pots mostly costs just time and mild dish soap. Add water to the soap for cleaning. This method is simple and cheap.
Bleach soaks help remove tough stains but are optional. Always rinse pots well after using bleach. This keeps your pots safe for plants.
Avoid pressure washers; they can damage fragile terracotta. Clean pots get rid of old salts and stains, helping your plants grow better.
2. What Supplies and Solutions You Need for Terracotta Pot Cleaning
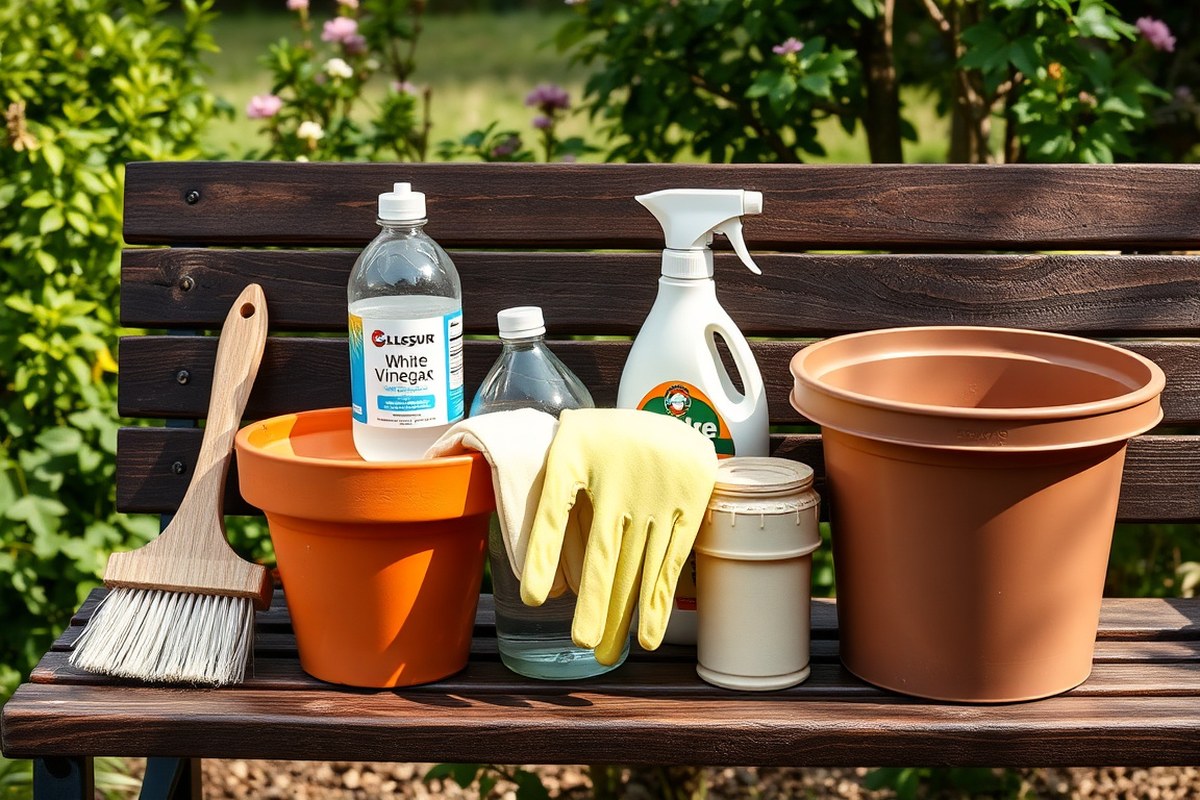
Choose your tools carefully to avoid damaging terracotta pots. Soft brushes or nonmetallic scrubbers work best to clean off dirt without scratching. A spray bottle helps apply cleaning solutions evenly on pots.
Good cleaning solutions include white vinegar diluted 1:1 with water. Vinegar’s natural acid removes mineral deposits and stains without harsh chemicals. For tougher grime, a diluted bleach solution can disinfect pots but rinse well afterward.
Protective gear like rubber gloves keeps your hands safe from vinegar or bleach irritation. Wearing eye protection is smart when spraying or scrubbing with strong solutions. These simple steps prevent accidental skin or eye contact.
- Soft nylon brush or sponge for scrubbing
- Spray bottle for applying vinegar solution
- White vinegar, mixed half water and half vinegar
- Diluted bleach solution for heavy disinfection (1 part bleach to 9 parts water)
- Rubber gloves to protect your hands
- Eye protection, such as safety glasses
- Bucket or basin for soaking smaller pots
Never use metal brushes or harsh abrasives; terracotta scratches easily.
For smaller pots, soaking them 20, 30 minutes in vinegar solution loosens stains. Larger pots need light scrubbing with a damp sponge soaked in vinegar. Rinse all pots completely after cleaning solutions to avoid chemical residue.
3. How to Remove White Mineral Deposits and Efflorescence
White mineral deposits on terracotta pots come from salt buildup called efflorescence. These crusty white stains happen when water moves through the clay and leaves minerals behind. The easiest way to get rid of them is soaking the pot.
Use diluted vinegar. It safely breaks down the mineral buildup.
Why Mineral Deposits Form
Terracotta is porous, so water seeps through it easily. This water carries minerals from soil or tap water to the surface of the pot.
When the water evaporates, it leaves behind mineral salts that create the white crust. This crust does not harm the pot but looks unsightly and can trap dirt.
Vinegar Soaking Method for Efflorescence
Diluted white vinegar is a gentle acid that breaks down mineral salts. Soaking your terracotta pot in vinegar softens the crust.
It helps remove it. This won’t hurt the clay.
For most pots, soak them in a 50:50 mix of white vinegar and warm water. Keeping the pot fully submerged for about 45 minutes works well to dissolve deposits. Here’s how to soak your pots:
- Fill a basin or sink with equal parts white vinegar and warm water.
- Submerge the terracotta pot completely in the solution.
- Let it soak for about 45 minutes, checking occasionally.
- Use a stiff brush to scrub away loosened mineral crust gently.
- Rinse the pot thoroughly with clean water to remove all vinegar.
- Let the pot air dry completely before planting or storing.
Vinegar soaks sometimes don’t clear tough spots fully. Try rubbing those spots with undiluted vinegar on a cloth.
Using Baking Soda and Water Paste
Baking soda is a safe, mild abrasive alternative for tough salt stains. Mixing it with water creates a paste to scrub off hard mineral deposits.
This works best if soaking doesn’t do the job. Also good for cleaning small areas with heavy buildup. It’s also chemical-free and easy to prepare.
Try this baking soda paste approach:
- Combine baking soda with just enough water. Stir until you get a thick paste.
- Apply the paste onto white mineral stains with a cloth or brush.
- Scrub gently using a stiff brush or sponge to lift deposits.
- Rinse the pot thoroughly with water to clear all residue.
- Dry the pot in a warm spot to avoid moisture buildup.
Baking soda paste offers a quick fix for spot treatment. Repeat as needed for heavy crusts. But avoid harsh scrubbing that may damage pot surfaces.
4. Effective Techniques for Removing Algae, Moss, and Mold
Algae, moss, and mold show up as green, black, or fuzzy patches on terracotta pots. You can remove them by soaking and scrubbing with gentle but effective solutions. Use diluted bleach, hydrogen peroxide, or vinegar depending on the growth.
Scrub the pot carefully. Repeat the process if needed.
Identifying Organic Growth on Pots
Green or blackish fuzzy patches signal algae, moss, or mold on terracotta pots. Algae often looks slimy and green, while mold appears fuzzy or blackish. Moss feels soft and spongy, typically growing in moist, shaded areas.
These growths thrive where dirt and moisture collect. Left untreated, they can stain and slowly damage terracotta clay. Identifying the type helps decide the safest cleaning method.
Soaking with Bleach Solution Safely
Bleach cleans tough mold and moss on outdoor pots well. Mix one part bleach with nine parts water for safety. Soak the pot or spots for up to 30 minutes only.
After soaking, scrub gently using a scrub brush with stiff bristles. This helps remove loosened growth without wearing down the pot. Rinse pots thoroughly with clean water afterward to remove bleach residue.
- Mix one part bleach with nine parts water in a bucket.
- Submerge the terracotta pot or targeted areas for up to 30 minutes.
- Use a stiff-bristled brush to scrub off softened moss or mold.
- Rinse the pot thoroughly under running water to remove bleach.
- Let the pot dry completely before reusing it for planting.
- Repeat soaking and scrubbing if stubborn spots remain after drying.
Using Hydrogen Peroxide for Mold
Hydrogen peroxide is a plant-safe option for removing algae and mold from terracotta. Use a 3% hydrogen peroxide solution.
You can apply it full strength or dilute one part peroxide with nine parts water. Apply it directly to the affected spots.
Let the peroxide sit on the growth for a few minutes to break it down. Then scrub with a soft brush and rinse well with water. You can repeat the process if the mold or algae return.
5. Sterilizing Terracotta Pots to Prevent Plant Diseases
Sterilizing terracotta pots with a bleach solution kills mold, bacteria and disease. Use a 1:10 bleach-to-water ratio for the soak. Soak pots about 6 to 10 minutes, then rinse well before drying.
Preparing the Bleach Soak Solution
Mix one part bleach with ten parts water to make the disinfecting solution. Use cool water to avoid splashing bleach fumes. Fill a container large enough to fully submerge the pot.
Wear gloves and work in a well-ventilated area. Avoid breathing bleach odors directly. Stir the solution gently before soaking your pots.
Safe Soaking Times and Procedures
Submerge the terracotta pot completely in the bleach solution. Keep it in the soak for about 6 to 10 minutes to kill spores and bacteria.
Remove the pot carefully to avoid bleach dripping onto skin or surfaces. Never soak longer than 15 minutes since terracotta is porous and could weaken. Always supervise this step, especially if you store bleach near children or pets.
Do not mix bleach with any other cleaning products; this can create toxic fumes.
Post-Bleach Rinsing and Drying
Rinse pots thoroughly under running water right after soaking. Make sure no bleach residue stays on the surface, as it can harm plants later.
Set pots upside down to air dry completely. Terracotta should dry fully before adding soil or plants to avoid trapping moisture. Dry time may take from several hours to a full day, depending on climate and airflow.
- Put on gloves and eye protection before handling bleach.
- Mix one part bleach with ten parts water in a large container.
- Submerge the terracotta pot fully into the solution.
- Soak the pot for 6 to 10 minutes, no longer than 15.
- Remove pot carefully and rinse thoroughly under running water.
- Place pot upside down to dry in a ventilated area.
- Wait until the pot is completely dry before using again.
6. Choosing the Right Cleaning Method by Stain Type and Pot Condition
How you clean your terracotta pot depends on the stain and pot condition. Use gentle methods for fragile pots to avoid damage. Strong stains need stronger cleaners but not at the cost of cracking or fading your pot.
Below is a simple guide to pick the right cleaning way. It matches dirt type and pot strength to the best products and steps. This helps you get cleaner pots safely and avoid common slip-ups like soaking or over-scrubbing.
| Stain or Condition | Cleaning Agent | How to Use | Notes |
|---|---|---|---|
| Light dirt and dust | Soft brush or toothbrush, water | Scrub gently with brush and water, then air dry | Quick and safe for all pots, no chemicals |
| White mineral deposits (efflorescence) | White vinegar | Apply vinegar with cloth or brush for 10 minutes, rinse well | Gently breaks down minerals without harsh chemicals |
| Algae, moss, or mold | Vinegar or diluted bleach (1 part bleach to 9 parts water) | Apply carefully to spots, scrub with toothbrush; rinse well | Dilution and gloves protect you and pot; avoid soaking |
| Stubborn stains and bacteria | Combination: vinegar first, then diluted bleach | Use vinegar, rinse, then wipe bleach; rinse and dry thoroughly | Stronger clean but only if pot is sturdy; avoid antique pots |
| Antique or fragile pots | Soft brush, water only | Light scrubbing without chemicals; dry carefully | Chemicals may damage old clay; be extra gentle |
Bleach should always be diluted and used with gloves for safety. Never soak the whole pot in bleach or vinegar as it can saturate the terracotta.
Instead, spot clean or apply with a brush or cloth. This also stops leftover residue that might harm future plants.
For tough stains, start with vinegar, it’s cheaper and gentle (£5.99 per bottle). Try diluted bleach next if that doesn’t remove the grime. Stubborn dirt may take 10 to 15 minutes of scrubbing with a toothbrush.
Fragile pots need the kindest care. Use no harsh chemicals and avoid scrubbing hard. Over time, weak pots can crack.
Rough cleaning or long soaking wears their finish. A light brush with water often works best here.
7. Drying and Storing Terracotta Pots to Maintain Quality
Allow terracotta pots to dry fully before putting them away. Drying usually lasts 24 to 48 hours based on moisture and air movement. Place pots upside down in a sunny or breezy spot for faster drying.
Moisture trapped inside pots can cause cracks or mold. Don’t stack pots until they are fully dry. Drying pots upside down lets water drain and air circulate inside.
- Place pots rim-side down on a flat surface outdoors or in a dry shed.
- Allow 1 to 2 days for pots to dry fully before storing.
- Store pots indoors or in a protected place during winter to avoid freeze damage.
- Don’t stack pots until completely dry to prevent mildew and cracking.
- Keep pots away from harsh weather and moisture when stored.
Cold weather can cause terracotta to expand and crack. Keep pots inside a garage, shed, or under a covered porch through winter. This avoids freezing and thawing cycles.
Store pots outdoors only under a tarp that allows air circulation. This prevents moisture buildup that can damage the clay material.
Avoid placing pots on damp ground when storing. Instead, put them on shelves or pallets to keep them dry. Check stored pots occasionally for dampness or fungus.
When pots seem wet, place them outside to air dry before using. This stops mold or mildew from forming inside the pots.
8. Common Mistakes When Cleaning Terracotta Pots and How to Avoid Them
Pressure washers can chip or crack terracotta pots due to the high water force. They also push dirt deeper into the porous surface, making stains worse. Use gentle scrubbing instead with a soft brush to protect your pots.
Harsh abrasives like steel wool or stiff brushes scratch the pot’s surface. These scratches trap dirt and make future cleaning harder. A soft brush or a damp microfibre cloth cleans well without damage.
Soaking terracotta pots too long weakens the clay and causes color loss. Avoid soaking pots for more than 30 minutes. Instead, rinse and scrub shortly, then air dry to keep pot integrity intact.
Never use a pressure washer or harsh scrubbers on terracotta pots, they cause lasting damage.
Here are some common mistakes to avoid when cleaning terracotta pots:
- Using a pressure washer or high-pressure hose
- Scrubbing with steel wool or stiff abrasive brushes
- Soaking pots for hours at a time
- Using harsh chemical cleaners that strip the surface
- Ignoring proper drying to prevent mold and cracks
Stains from over-soaking or rough cleaning often happen. You can fix them with gentle scrubbing. Use a mixture of vinegar and water for scrubbing.
Rub lightly with a soft brush, rinse well, and let the pot dry in the sun. Avoid strong bleach or acidic cleaners that might erode the pot.
A cleaning pro says to dry pots carefully. Use a dry microfibre cloth to wipe them. Or let them air out in a sunny spot.
Dry pots help prevent mold and keep their natural look. Taking these small steps protects your pots and keeps them looking great season after season.
Step-by-Step Action Plan for Cleaning Terracotta Pots
Follow these steps to clean your terracotta pots well and keep them in good shape.
- Before you start: Gather all cleaning supplies like brushes, vinegar, and bleach. Check the pot for cracks or damage to pick the best cleaning method.
- Day 1: Soak the pot in water for 30 minutes to loosen dirt and debris. This helps avoid scrubbing too hard and damaging the pot.
- Day 2: Use a stiff brush with white vinegar to scrub off mineral deposits and stains. Rinse with water and check if deposits are gone.
- Day 3: For algae or mold, scrub the pot with a bleach solution for 10 minutes. Rinse thoroughly to remove all bleach traces.
- Day 4: Let the pot air dry completely in the sun. Confirm it’s dry by checking if the pot feels light and dry to touch.
- After 1 week: Store pots in a dry, shaded place to prevent moisture buildup. Avoid stacking pots to keep them from chipping.
Frequently Asked Questions
Can Terracotta Pots Be Cleaned in a Dishwasher?
No, terracotta pots shouldn’t go in a dishwasher. The heat and detergent can crack or damage them. Hand washing is safer and more effective for cleaning.
Is Vinegar Safe for All Terracotta Pots?
Vinegar works well on white mineral deposits but can weaken older pots. Test on a small area first to avoid damage. Use diluted vinegar for gentler cleaning.
How Often Should Terracotta Pots Be Cleaned?
Clean pots before each new planting season to avoid disease build-up. Regular cleaning keeps pots looking good and plants healthy. Skip cleaning if they’re only lightly soiled.
Can I Use Soap to Clean Terracotta Pots?
Mild dish soap is okay but avoid harsh cleaners. Soap helps remove dirt and oils if rinsed thoroughly. Don’t leave soap residue which can harm plants.
Are Sealed Terracotta Pots Easier to Clean?
Yes, sealing pots prevents water absorption and stains. Sealed pots clean faster since dirt doesn’t soak in. However, unsealed pots allow better airflow for roots.
Can Old Paint Be Removed from Terracotta Pots?
Removing old paint needs gentle scrubbing with a soft brush and warm water. Harsh chemicals can damage the pot surface. Rinse well to avoid residues.
The Bottom Line
Regular cleaning helps your terracotta pots last longer and stay safe for plants. Start by checking each pot for damage before cleaning. Use gentle but thorough methods to keep your pots looking great.