How to Plant Flowers from Seeds: A Complete Guide for Beginners
Knowing how to plant flowers from seeds saves money and offers fresh blooms. It’s simple to start seeds indoors and transplant them outdoors later.
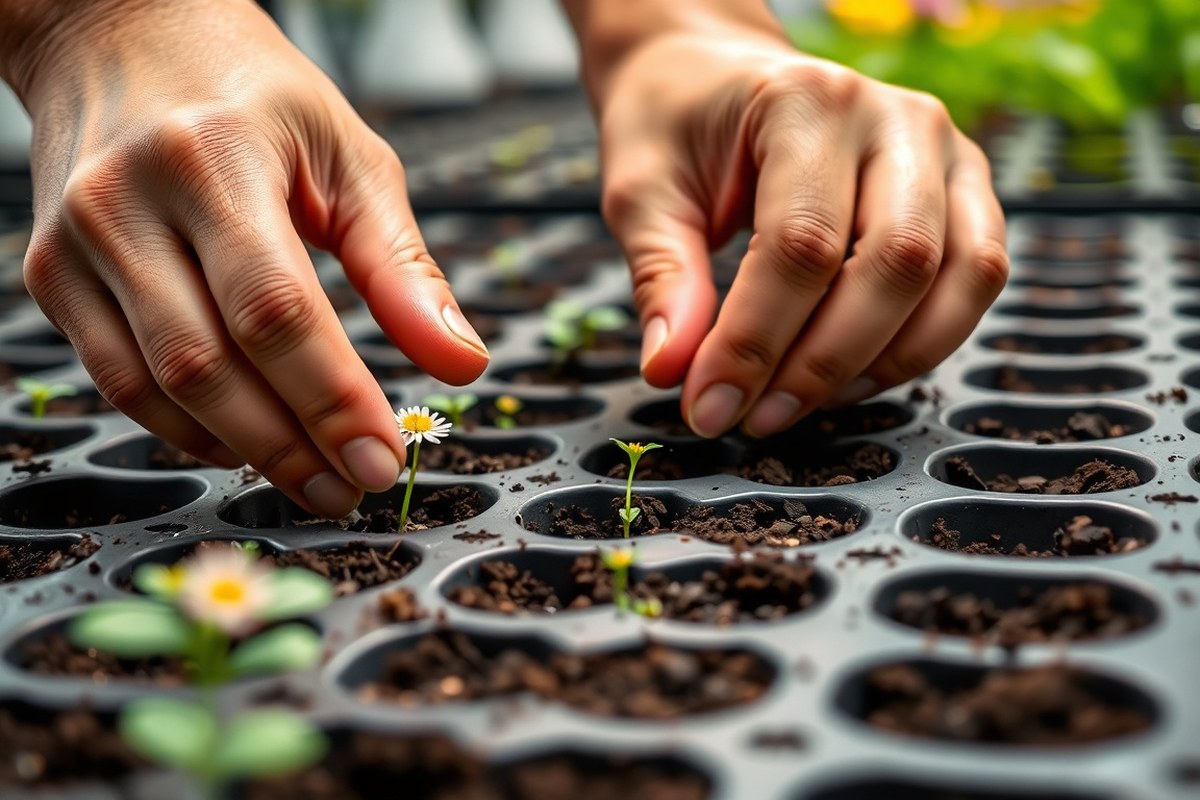
Choose quality seeds, prepare soil well, and provide enough light and water. Using a seed tray or small pots makes managing seedlings easier and keeps roots healthy.
Start by soaking some seeds for 6 to 12 hours if the packet recommends it. Keep soil moist but don’t overwater; check after 2 to 3 days.
Use a potting mix with about 35% compost for nutrients and good drainage. Avoid heavy garden soil in containers, as it can suffocate seeds.
Keep indoor temperatures between 65 and 75 degrees Fahrenheit for best growth. Once most seeds sprout, move them to a spot with bright light.
A south-facing window or grow lights work well to prevent leggy seedlings. These steps help seedlings grow strong before planting outside safely.
Key Takeaways
- Start slow growers indoors 8-10 weeks before the last frost date.
- Use pots 1-2 inches wider than seedlings’ current containers for transplanting.
- Transplant outdoors when nighttime temperatures stay above 40°F.
- Water garden flowers weekly with 1-2 inches of moisture or more as needed.
- Full sun exposure of 6-8 hours helps flowers bloom fully.
- Remove dome lids after 50-75% of seeds have sprouted to avoid mold.
Basic Steps to Plant Flowers from Seeds

Planting flower seeds is simple when you follow a clear set of steps. Handle your seeds carefully.
Watch how deep you plant them. Also, count how many seeds per spot.
Most flower seeds go in two to three times their width. Planting this deep helps them grow well.
Too deep, and they may not get enough light to sprout. Plant one or two seeds per spot so seedlings don’t crowd each other.
- Prepare your soil or container with loose, moist soil. Seeds need good contact with soil but not soggy conditions. So water lightly before planting.
- Check the seed packet for specific depth recommendations. A handy rule is about two to three times the seed’s width. Small seeds need a very shallow cover; some only a dusting of soil.
- Sow one to two seeds in each planting spot. This helps ensure at least one grows without overcrowding. Thin seedlings later if needed.
- Press the seeds gently into the soil. This improves contact and helps retain moisture. Don’t bury tiny seeds too deep as they might not sprout.
- Water the soil gently after planting. Use a spray bottle or gentle watering can to avoid displacing seeds. Keep soil moist but not soaked.
- Place containers or seed spots in warm, bright areas. Many seeds need warmth around 65 to 75°F plus good light to sprout quickly. Use a heat mat for indoor starts.
- Watch for germination over the next 1 to 3 weeks. Keep soil moist and remove any cover once most seedlings emerge to avoid mold.
- Thin seedlings if more than one grows per spot. Leave the strongest seedling to help healthy growth.
Starting seeds this way usually takes about 1 to 3 weeks to see sprouts. Starting indoors lets you control warmth and light, important for fast germination. For outdoor planting, check the last frost date and plant seeds when soil is warm enough.
Handling seeds gently and planting at the right depth ensures good germination and healthy seedlings. Overcrowding or planting too deep can stunt growth or prevent sprouting altogether.
Choosing Seeds and Understanding Seed Types

You need to pick flower seeds based on your climate and space. Think about how much time you want to spend growing them. These factors will help you choose right.
Annuals are the easiest for beginners because they bloom within 50 to 70 days after planting. Perennials take longer and may not flower the first year, which might test your patience.
Biennials flower only in their second year. So they’re best if you want flowers for the long haul.
Start with fast-growing annual seeds indoors four to twelve weeks before your frost-free date. This gives your seedlings a head start and a better chance to thrive.
Zinnias, calendulas, and sweet peas are good choices because they are forgiving and quick to bloom. These varieties also handle indoor growing conditions well.
Matching seeds to your climate matters to avoid plants that struggle or die early. Find your frost dates and choose seeds that note those timings on their packets. This lets you plant at the best moment, whether indoors or directly outside after the frost.
| Seed Type | Beginners | Growth Time | Flowering Season |
|---|---|---|---|
| Annuals (e.g., Zinnia, Calendula) | Easy | 50-70 days | Spring to Autumn |
| Perennials | Moderate | Longer (often 1 year+) | Multiple seasons after 1st year |
| Biennials | Harder | 2 years | Second year flower season |
Investing in high-quality seeds helps you avoid weak starts or poor germination. Also, keep seeds safe from birds and pests during germination to protect your investment. Your flowers will grow healthier, giving you a colourful, vibrant garden all season long.
Always plant flower seeds at a depth twice their diameter to improve germination rates.
Remember, fast-growing annuals work best for beginners who want a quick and rewarding experience. Choose your seeds based on your local climate and planting schedule for the best results. Picking the right seeds helps your garden bloom well.
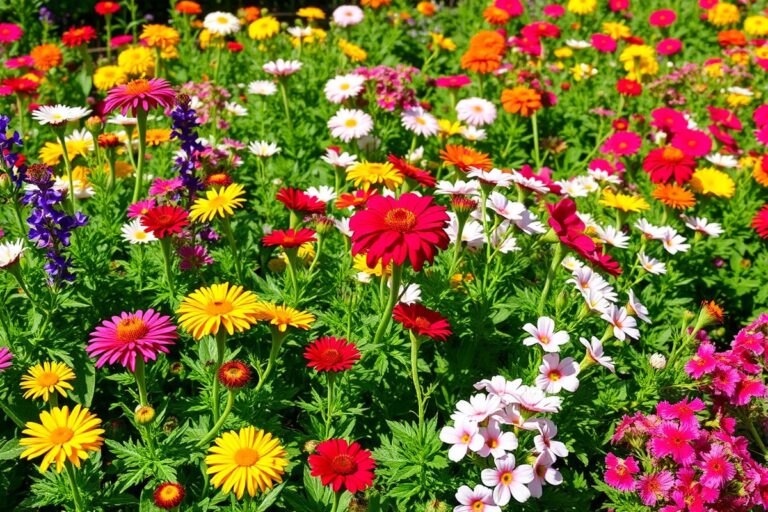
You’ll get flowers from early spring till late autumn. This choice guides your gardening success.
Preparing Soil, Containers, and Equipment
To start flowers from seeds, choose a light seed starting mix. Make sure your containers have drainage holes. Use well-draining soil to help seeds grow.
Have some essential tools ready, like seed trays, labels, and a humidity cover. These create the right environment for your seeds to sprout and grow strong.
Ideal Seed Starting Soil Mix
The best soil to start seeds is fine-textured. It is usually called seed starting mix. This mix is made especially for seeds.
It stays moist but not soggy and doesn’t have big chunks. This helps tiny roots grow easily without drowning or sticking in heavy dirt.
Pre-moisten the soil before filling your containers. It should feel damp like a wrung-out sponge. Too dry or soaking wet soil can stop seeds from growing well.
Choosing Containers and Trays
Pick containers with good drainage holes to avoid water buildup. Seed starting trays with individual cells are a popular choice. They keep seedlings separate, making transplanting easier later.
Use leakproof trays underneath to catch extra water and protect your surfaces. Clear plastic humidity domes can cover your trays to keep the air moist. Remove domes once green shoots appear to prevent mold.
- Seed starting trays with individual cells or flats
- Leakproof drip trays to catch runoff
- Pre-moistened seed starting mix
- Clear plastic humidity domes
- Waterproof markers and plant labels
- Fine vermiculite (optional for covering seeds)
Heat mats help keep soil warm, especially in cooler homes. Position your trays in a sunny window or under grow lights once seeds sprout.
Labeling and Organizing Seeds
Organizing your seeds can save you confusion later. Use waterproof markers on plastic sticks or plant tags. Write the flower name and date on them.
You can also tie string with tags around trays if you start many varieties at once. Keep a simple notebook listing seeds and their placements. This helps you track germination times and seed varieties.
When and How to Sow Seeds Indoors and Outdoors
Start flower seeds indoors four to six weeks before the last frost. This timing lets seedlings grow well before planting outside. Check your area’s last frost date to plan.
This gives plants a head start on the growing season and means blooms last longer. For example, if your last frost is April 15, start seeds indoors around early March.
Plant seeds outdoors only after the final frost to avoid cold damage. Your soil is dry enough to sow when it feels crumbly.
It should shatter easily when you press it. Warm soil encourages faster germination and stronger seedlings.
Plant most seeds at a depth twice their size. Tiny seeds like petunias need barely any covering, just press them lightly into moist soil.
Larger seeds like sunflowers should go about one inch deep. Planting too deep can delay or stop sprouting, while too shallow causes drying out.
Sow flower seeds thinly and follow spacing on the seed packet to avoid crowding. Overcrowded seedlings compete for light and nutrients and may become weak. For indoor sowing, cover seed trays with plastic wrap until sprouts appear to hold moisture.
You can direct sow outdoors flowers that don’t like root disturbance. Sunflowers and poppies fit this category because their roots grow deep and dislike transplanting. Sow seeds evenly and water gently to settle soil without washing seeds away.
Succession sowing helps keep blooms going by planting a new batch every two to three weeks. This works well with annuals like cosmos and marigold. Pick sunny spots for sowing, indoors and outdoors.
Most flowers need about six hours of sun daily. Sunlight helps flowers grow strong and healthy.
Watering and Lighting Requirements for Seedlings
Water seedlings gently to keep soil moist but not soggy. Avoid pouring water directly on seeds; use a spray bottle or bottom watering. Bottom watering lets roots soak up moisture without disturbing seeds or soil.
Place seedlings where they get plenty of light, ideally 14 to 16 hours a day. Keep grow lights just a few inches above young plants to stop them from stretching. Raise the lights as seedlings grow taller to keep that close distance.
Seedlings need warmth to sprout well. Germination usually happens best at 5 to 10 degrees warmer than their ideal growing temperature.
Most flower seeds sprout nicely around 65 to 75°F (18 to 24°C). Humidity should stay moderate to help seeds stay moist without causing mold.
You need LED or fluorescent grow lights without a sunny window. These create strong, full-spectrum light that mimics the sun. Sunlight from a typical window is often too dim.
This causes seedlings to grow weak and leggy. They won’t thrive well without brighter light.
Once seedlings appear, they handle temperatures down to about 25°F (-4°C). But keep them warmer to grow strong. Avoid overwatering by checking soil with your finger.
Water only if the top 1 inch feels dry. Overcrowding seedlings can block light and cause spindly growth, so space seeds thinly.
Keep grow lights a few inches above seedlings. Use a timer set for 14 to 16 hours daily. This helps prevent seedlings from getting leggy.
Caring for Seedlings and Preventing Common Issues
Keeping seedlings healthy means watching for signs of trouble early. Proper fertilizing supports growth, while pest and disease control protects young plants. You’ll need to check seedlings often to catch common issues fast.
Signs of Healthy Seedlings
Bright green leaves that stand upright show seedlings are strong and healthy. Stems should be firm, not thin or stretched out. Growth should be steady with new leaves appearing each week.
Watch soil moisture and light. Seedlings look droopy or yellow if they get too little water or light. Avoid overwatering, which can cause roots to rot and invite diseases like damping-off.
Common Seedling Diseases and Pests
Damping-off is a common fungal disease that kills seedlings quickly. It causes stems to weaken and collapse near the soil. This happens in damp, crowded conditions with poor air flow.
Keep seedlings spaced with good air circulation and avoid wetting leaves. Remove any plastic covers right after seeds sprout to prevent excess moisture buildup. Also, look for tiny insects like aphids or fungus gnats on leaves or soil.
- Damping-off causes wilting at soil level
- Yellow or spotted leaves may signal fungal infections
- Aphids cluster on new leaves and stir sticky residue
- Fungus gnats fly near soil and harm roots
- Use insecticidal soap or gentle sprays when needed
- Always isolate sick seedlings to stop spread
Remove affected seedlings immediately to protect others. Quarantine new seedlings before adding them to your main group.
Fertilizing Seedlings Safely
Start fertilizing once seedlings develop their first true leaves. Use a diluted liquid fertilizer at quarter strength to avoid burning roots. Feed every 7 to 10 days for best results.
Choose a balanced formula like 10-10-10 or one made for seedlings. Too much fertilizer can cause leaf burn or weak growth.
So less is better early on. Stop fertilizing a week before transplanting outdoors.
When and How to Transplant Seedlings Outdoors
Transplant seedlings outdoors after they have two or more sets of true leaves. Before planting, harden off seedlings by exposing them to outdoor conditions gradually. Choose a well-prepared spot with proper spacing to avoid overcrowding and damage.
Assessing When to Transplant
Seedlings usually need to move outside when they have at least two true leaves. The soil outside should be warm enough, generally above 50°F. Keep an eye on your local frost dates and avoid transplanting before the last frost day.
Healthy, stocky seedlings are ready for transplanting. Wilting, leggy, or pale seedlings should stay indoors longer. Check soil moisture and avoid planting when the ground is too wet.
Hardening Off Seedlings Safely
Hardening off takes 7 to 14 days to prepare seedlings for outdoor life. Start by putting seedlings outside for a few hours in a shaded, sheltered spot. Gradually increase time and sunlight each day.
Avoid windy or very cold days during hardening off. Bring seedlings indoors at night to protect from frost. This slow adjustment cuts transplant shock and helps seedlings grow strong outdoors.
Planting and Spacing Guidelines
Pick a sunny spot with loose, well-draining soil for planting. Remove weeds and loosen soil to a depth of about 6 inches. Fertilize lightly if the soil seems poor or depleted.
Space seedlings based on their mature size to prevent crowding. Small flowers need about 6 to 8 inches between plants. Larger flowers, like sunflowers, need 12 inches or more between plants.
Plant seedlings at the same soil depth as in their pots. Press soil gently around roots to hold plants upright. Water seedlings thoroughly after planting to settle the soil.
- Check seedlings for at least two sets of true leaves.
- Ensure outdoor soil temperature is consistently above 50°F.
- Begin hardening off by placing seedlings outdoors 2 to 3 hours in shade.
- Increase outdoor exposure by 1 to 2 hours daily, including sunlight.
- Pick a sunny, weed-free garden spot with loose soil.
- Dig holes spaced to match expected plant size (6-12 inches apart).
- Remove seedlings gently, keeping soil around roots intact.
- Plant seedlings at original soil depth and water immediately.
Maximizing Bloom and Success After Planting
Once your flowers mature, keep them blooming by deadheading regularly. Deadheading means removing spent flowers to encourage new buds. Use clean scissors to snip faded blooms just above the first set of leaves.
Water your flowers deeply but do it less often. Aim for about 1 inch of water a week. This helps roots grow strong and healthy.
Morning watering is best since it helps leaves dry and reduces disease risk. Adjust watering if rain is plentiful or during hot spells to avoid over- or under-watering.
Maintaining flower health involves more than watering and deadheading. Feed your plants every four to six weeks. Use a balanced fertilizer with equal parts nitrogen, phosphorus, and potassium.
This helps keep your flowers healthy and growing. This supports growth and blooming throughout the season. Also, keep an eye out for pests and remove damaged leaves to prevent spread.
- Check soil moisture by sticking your finger 1 to 2 inches deep before watering.
- Remove dead or yellowing leaves promptly to boost plant energy.
- Provide air circulation by spacing plants properly and thinning if crowded.
- Apply mulch around plants to retain moisture and reduce weeds.
- Inspect flowers early in the day for pests like aphids or spider mites.
Some flowers like marigolds and zinnias enjoy full sun and dry conditions, so avoid overwatering them. Shade-loving flowers like impatiens need regular moisture and protection from heat. Knowing your flowers’ preferences helps prevent stress and supports longer blooming periods.
Watering in the evening can cause fungus; stick to morning watering for best results.
Step-by-Step Action Plan for Planting Flowers from Seeds
Follow these steps to start your flower seeds and grow healthy seedlings ready to bloom.
- Before you plant: Choose seeds that match your climate and season. Check the packet for germination times to plan ahead.
- Day 1: Prepare containers with moist, well-draining seed-starting mix. It should feel damp but not soggy to the touch.
- Day 1 or 2: Sow seeds at the depth listed on the packet. Press them gently into the soil to ensure good contact.
- Days 2, 7: Keep soil evenly moist with a spray bottle and provide bright, indirect light. Seeds should start sprouting within the expected germination period.
- Week 2: Thin seedlings by snipping weaker ones to leave the strongest. This helps healthy growth and avoids crowding.
- Week 3 or when seedlings have true leaves: Begin feeding them every week. Use a half-strength liquid fertilizer for best results. Look for steady growth and vibrant color.
- 2 weeks before transplanting: Harden off seedlings by moving them outdoors a few hours daily. They will get tougher and adjust to outdoor conditions.
- Transplant day: Plant seedlings in prepared soil outside on a calm day. They should be firm, green, and well-rooted, showing ready to thrive.
Frequently Asked Questions
How Do I Label Flower Seeds to Avoid Confusion?
Use waterproof markers or tags with string to label your seeds. This helps you keep track of each flower variety as they grow. It’s easy to mix up seedlings without clear labels.
What Depth Should I Plant Tiny Flower Seeds?
Plant tiny seeds about 2 to 3 times their width deep. This helps them get enough soil coverage for moisture. Planting too deep can stop them from sprouting.
Can I Reuse Soil from Last Year’s Flower Pots?
Reusing soil is okay if you refresh it with new compost. Old soil can lose nutrients and hold diseases. Mixing fresh compost keeps seedlings healthy and growing strong.
How Soon Should I Thin Seedlings After Germination?
Thin seedlings when they develop their first set of true leaves. This reduces crowding and gives room for strong growth. Thin by snipping weaker seedlings at soil level.
Is It Better to Start Flower Seeds Indoors or Directly Outside?
Starting seeds indoors gives seedlings a head start on the season. It also protects young plants from harsh weather. Direct sowing works well for hardy flowers in warm climates.
What’s the Best Way to Harden Off Seedlings Before Planting Outside?
Gradually expose seedlings to outdoor conditions over 7 to 10 days. Start with a few hours outside, increasing sun and wind exposure daily. This toughens seedlings and reduces shock after transplanting.
Wrapping Up
Growing flowers from seeds takes patience but shows great rewards in your garden. Start with your chosen seeds now and follow the care steps carefully. Watch your seedlings grow and get ready to plant them outside for a bright, beautiful bloom.