How to Take Care of a Rubber Plant: 8 Essential Steps for Healthy Growth
Caring for a rubber plant means understanding how often to water it. During spring and summer, water the plant every 7 to 10 days. In fall and winter, cut back to watering every 10 to 14 days after checking soil dryness.
Only water when the top inch of soil is dry. Water enough to see drainage.
Maintain soil moisture without overwatering to avoid root rot. Use a pot with drainage holes so excess water can escape.
Avoid letting your rubber plant sit in standing water. It can harm the roots quickly.
Keeping the soil moist but not soggy helps the plant thrive. This balance supports growth and keeps leaves looking healthy. When your rubber plant droops, look at the soil moisture before adding water.
Key Takeaways
- Water rubber plants every 7-10 days in warmer months, less in cold seasons.
- Check soil moisture with your finger; water when the top inch is dry.
- Use pots with drainage holes to prevent water buildup and root rot.
- Water thoroughly so excess drains from the pot to keep roots healthy.
- Avoid leaving your rubber plant in standing water after watering.
- Adjust watering frequency based on your home’s temperature and humidity.
1. How to Water and Maintain Soil Moisture for Rubber Plants
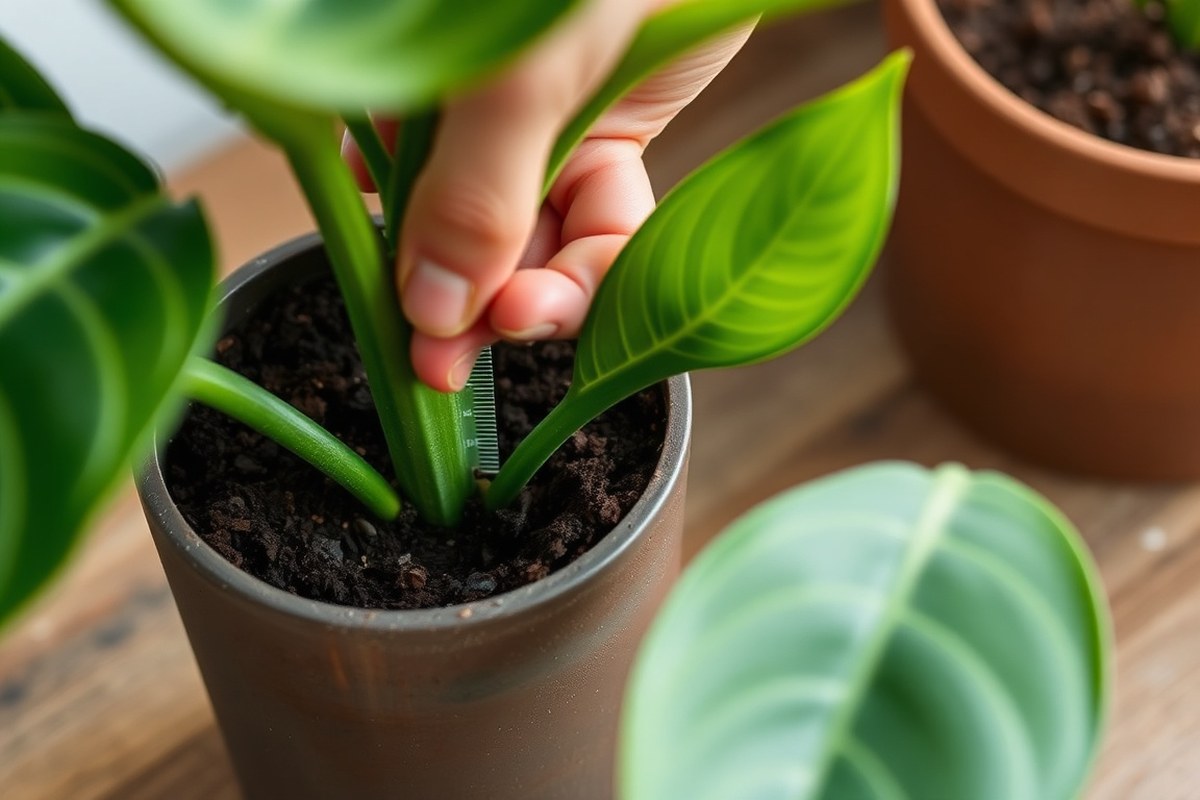
Water your rubber plant once every week to ten days in warmer months. In cooler months like fall and winter, water it every ten to fourteen days. Check the soil at about an inch deep to decide if it needs water.
When the soil around one inch deep feels dry, water your plant. Water until it drains out the bottom of the pot. This helps flush out excess salts and keeps the roots healthy.
Watch for brown, soft leaves as a sign of too much water. A sour smell in the soil also means the plant is overwatered.
These mean the roots are sitting in too much water. Underwatering shows up as droopy leaves or dry, crispy edges on leaves.
To keep the soil moisture right, use well-draining soil and a pot with drainage holes. Avoid letting the plant sit in a tray full of water.
Misting the leaves adds humidity in dry homes. Avoid watering the plant too much.
Different sizes and pot types can affect how often you water. Smaller pots dry out faster and need more frequent checks.
Bigger pots hold moisture longer. Also, indoor air temperature plays a role; warmer rooms dry the soil quicker.
Remember, the best rule is to water only when the top inch of soil feels dry. Too frequent watering means soggy roots and leaf damage. Too little dries out the plant and makes leaves droop.
2. Ideal Light, Temperature, and Humidity Conditions

Rubber plants like bright, indirect light and warm temperatures. Keep them between 65°F and 75°F. They also need moderate to high humidity. They grow best when placed near windows that don’t get harsh sunlight.
Low humidity can cause leaf drop. So boosting moisture around the plant helps it stay healthy.
Light Requirements and Placement Tips
Place your rubber plant where it gets bright, indirect light. It should have 6 to 8 hours of light each day.
Avoid direct sunlight, which can scorch the leaves. A north or east-facing window usually works well.
Put the plant no more than 5 feet from a bright window. This helps in spaces with low natural light.
Keep variegated rubber plants especially close to light sources to preserve their leaf colors. In darker spots, growth may slow and stems might get leggy.
Do not place your rubber plant more than 5 feet from light. This stops leaves from dropping off.
Temperature Range and Avoiding Fluctuations
Keep your rubber plant in a warm room with temperatures between 65°F and 75°F. Avoid letting it drop below 60°F, as cold drafts can cause stress and leaf loss. Consistent warmth is key to healthy growth.
Try to keep the plant away from air conditioners, heaters, and drafty windows. Kelly Dyer says pick the warmest room in your home.
Rubber plants like steady, comfortable heat. Sudden temperature changes can shock the plant.
Humidity Levels and Boosting Methods
Rubber plants grow best with humidity levels between 40% and 60%. Normal indoor humidity around 30% to 40% is tolerable but not ideal. Below 30% can cause leaf damage and stress your plant.
Mist the leaves every few days to raise humidity. Or put the pot on water and pebble trays.
Make sure the pot base sits above the water line, not in it. The evaporating water creates a humid microclimate around your plant.
You can also group your rubber plant with other plants or use a small humidifier nearby. These steps take just a few minutes daily. They keep your rubber plant lush and stop leaf drop.
3. Choosing the Best Soil and Pot for Growth
Choose a pot that has drainage holes and is ten to twelve inches across. Avoid pots that are too big since they hold too much water, causing root rot. The pot should be no more than one-third larger than the root ball for proper watering.
The right soil drains well but still holds some moisture and nutrients. Choose peat-free indoor plant compost or a mix labeled for ficus types.
These soils let air reach the roots and stop water buildup. This prevents decay and helps your plant absorb nutrients better.
| Pot Size/Type | Soil Mix | How to Ensure Drainage |
|---|---|---|
| 10-12 inches diameter, drainage holes | Peat-free, house plant or ficus compost | Use pots with holes; add a drainage layer if needed |
| No more than 1/3 bigger than root ball | Light, well-aerated mix to avoid waterlogging | Check soil moisture often; avoid overwatering |
| Consider plastic or terracotta for moisture needs | Pre-moisten soil before planting | Improve pot slightly to allow water to drain |
Plastic pots retain moisture longer, which may suit drier indoor air. Terracotta pots dry faster and let oxygen in, good for more humid spots.
You can add a 1 to 2 inch gravel layer at the pot’s bottom. This helps with drainage but is optional if your soil drains well.
Pre-moisten the soil before planting to prevent dry roots. Lukewarm water works best to avoid shocking roots and halting growth.
Check soil moisture at least weekly. Water your plant when the top 1 to 2 inches feel dry.
A pot too small will root-bind your plant. That slows growth and blocks nutrients.
Conversely, a pot too big holds extra water and risks root rot. Watch your rubber plant’s roots and repot every 1, 2 years or when root-bound.
4. Repotting Your Rubber Plant: When and How
Repot your rubber plant every 1 to 2 years or when roots crowd the pot. Water the plant a day before repotting to protect roots from shock. Use a pot 1 to 2 inches wider than the old one.
This helps avoid having too much extra soil around your plant. Keeping soil near the roots helps the plant grow well.
Signs Your Rubber Plant Needs Repotting
Look for roots poking out of drainage holes or circling the pot’s edge. This root binding limits growth and makes the plant unhappy. Slow growth or leaves wilting despite good care also show it’s time to repot.
Another hint is if the soil dries out too fast after watering. The dense root ball leaves little soil to hold moisture. Repotting gives roots room and refreshes the soil nutrient supply.
Step-by-Step Repotting Process
Use these steps to repot your rubber plant safely and reduce damage.
- Water the plant about 24 hours before repotting to ease root stress.
- Prepare a new pot with fresh houseplant compost suitable for rubber plants.
- Gently remove the plant from its old pot, loosening the root ball if tightly packed.
- Trim any overly long or damaged roots carefully with clean scissors.
- Place some soil in the new pot to raise the plant to its previous height.
- Set the root ball into the new pot, filling around it with fresh soil.
- Press soil lightly but firmly to remove air pockets around roots.
- Water the plant well to settle the soil and hydrate roots.
The new pot should be only 1 to 2 inches wider than the old. Bigger pots hold too much moisture and can rot roots.
Post-Repotting Care Tips
Keep your rubber plant in bright, indirect light after repotting. Avoid direct sun that can stress it further. Let the soil dry slightly between waterings to prevent root rot.
Expect some leaf drop or wilting in the first few weeks, that’s normal transplant shock. Don’t fertilize until you see new growth, usually after 4 to 6 weeks. This helps avoid burning fragile roots.
Keep the plant away from drafts and sudden temperature changes. Regular air humidity around 40-60% will aid recovery.
5. Pruning Techniques to Shape and Promote Healthy Growth
Pruning your rubber plant helps control its size and keeps it looking good. You should prune lightly anytime you see dead or damaged leaves. Major pruning works best in late winter or early spring to avoid stress during dormancy.
Best Time to Prune Rubber Plants
Cut back your rubber plant mostly in late winter or early spring. This timing helps the plant recover fast while it starts new growth. Avoid heavy pruning during winter because the plant grows slower then.
Light pruning like removing dead leaves can happen anytime to keep it healthy. Regular pruning also encourages your rubber plant to grow bushier branches. Cutting just above a leaf bud helps new shoots grow out from the right place.
Pruning Tools and Safety Tips
Use sharp, sterile pruning shears for small branches and sterile loppers for bigger stems. Clean your tools with rubbing alcohol before cutting to prevent disease. Sharp tools make clean cuts so the plant heals quicker with less chance of infection.
Wear gloves when pruning to protect your hands from sap, which can irritate skin. Always cut at a slight angle to avoid water settling on the cut and causing rot. Never tear or snap branches as this damages plant tissue.
- Inspect your rubber plant and pick branches or leaves to remove.
- Clean pruning tools with rubbing alcohol before starting.
- Cut dead or damaged leaves at the base near the stem.
- Trim long shoots just above a leaf to shape the plant.
- For size control, cut the central trunk or main stems with loppers.
- Wear gloves to protect your skin from sticky sap.
- Dispose of trimmed material to avoid pests or fungus nearby.
- After pruning, wipe leaves to keep the plant clean and healthy.
Major pruning during winter can slow recovery and harm the plant.
How to Clean Rubber Plant Leaves Correctly
Wipe your rubber plant’s broad leaves gently with a damp cloth to remove dust. This helps leaves breathe and photosynthesize better, keeping them shiny and healthy. Cleaning also lets you spot pests early, so you can fix issues fast.
Use just water or a mix with mild soap for stubborn dirt. Avoid harsh chemicals or soaking leaves to prevent damage. Regularly dusting leaves takes only a few minutes but improves your plant’s overall health greatly.
6. Propagating Rubber Plants: Step-by-Step Guide
Taking healthy rubber plant cuttings works best in spring or early summer. This season helps roots develop faster because the plant is actively growing. You can propagate using stem cuttings that include a few leaves and nodes.
Use a sharp, clean knife or scissors to avoid harming the plant. Remove a 4 to 6-inch section of stem just below a leaf node.
Take care to strip off the lower leaves, leaving two or three leaves on top. This reduces water loss while encouraging root growth.
Once you have your cutting, choose a rooting method that fits your space and patience. Water rooting is simple and good for watching progress. Planting directly in moist soil is another way, but it needs warmth and humidity.
- Cut a 4-6 inch stem with 2-3 leaves and at least one node.
- Remove leaves from the lower 1-2 inches of the stem.
- Dip the cut end in rooting hormone to boost root growth (optional).
- Place the cutting in a jar of water or a pot with well-draining soil.
- Keep your cutting where it gets bright, indirect light and steady warmth around 70°F (21°C).
- Change the water every few days if rooting in water to prevent rot.
- Wait 3 to 6 weeks for roots to grow about 1 to 2 inches long.
- Once roots develop, pot the cutting in a small container with rich, well-draining soil.
Roots usually start showing after about 3 weeks. But strong roots take up to 6 weeks. Your cutting is ready to transplant when roots are about 1 inch.
Roots between 1 and 2 inches long mean it’s good to go. Check that roots are healthy and not too short before transplanting. This length helps the plant absorb enough water and nutrients after potting.
Keep the new plant in stable warmth and indirect light after potting. Water it lightly, just enough to keep the soil moist but not soggy. Avoid direct sun on the young plant to prevent leaf burn while it gets established.
7. Fertilizing and Feeding Your Rubber Plant for Optimal Growth
Fertilize your rubber plant during the growing season, which lasts from spring through summer. Use a balanced, water-soluble fertilizer once a month to help the plant grow strong and healthy. Avoid fertilizing in fall and winter because the plant’s growth slows down then.
Pick a fertilizer with equal nitrogen, phosphorus, and potassium. For example, try 10-10-10 or 20-20-20 formulas. These balance the nutrients your rubber plant needs.
This balance supports leaf growth and overall health. You can add a foliar feed for slow-growing plants. It delivers nutrients directly through the leaves.
This helps boost growth when soil feeding isn’t enough. Spray the leaves lightly once a month for extra nutrients.
Be careful not to overfeed your rubber plant. Overfertilizing can cause leaf burn, brown tips, or yellowing leaves. To avoid this, dilute the fertilizer to half the strength recommended on the label.
For instance, the label might say, “one teaspoon per gallon.” Use just half a teaspoon instead. This keeps your fertilizer safe and gentle for your plant.
Pay attention to your plant’s response after feeding. New leaves that look healthy show your feeding schedule is right. Your plant gets enough nutrients without overload.
Keep following this routine for steady growth. Spots or drooping leaves mean your plant got too much fertilizer. Cut back on feeding or skip a month.
This prevents damage and lets the plant recover. Always water your plant well after fertilizing to flush the soil and prevent salt buildup.
Young or small potted rubber plants need less fertilizer. Using too much can harm their roots. Feed sparingly to keep them safe and healthy.
For mature plants in larger pots, a monthly feeding at the diluted strength is safe. Avoid changing your feeding routine too often, since steady care supports consistent growth.
8. Common Problems and How to Troubleshoot Them
Yellow leaves on your rubber plant often mean underwatering or low humidity. Check the soil moisture by sticking your finger 1 to 2 inches deep. When dry, water your rubber plant deeply and increase humidity by misting or using a humidifier nearby.
Dropping leaves also happen if the plant gets too cold or experiences sudden temperature changes. Keep your rubber plant away from drafts, heaters, or air conditioners. Stable temperatures around 60 to 75°F help prevent leaf loss.
Pests like spider mites, mealybugs, and scale bugs target rubber plants. Look for tiny webs, white cottony spots, or small brown bumps on leaves and stems. Control pests by wiping leaves with a damp cloth and applying insecticidal soap weekly until gone.
- Yellow leaves: Check soil moisture and increase humidity if dry.
- Leaf drop: Avoid drafts and sudden temperature changes.
- Spider mites: Wipe leaves and spray with insecticidal soap.
- Mealybugs: Remove with alcohol-dipped cotton swabs.
- Scale bugs: Scrape off carefully, then treat with soap.
- Sap irritation: Wear gloves when pruning or repotting.
Handle your rubber plant carefully because its milky sap irritates skin and pets. Wear gloves during pruning or repotting to avoid rashes. When sap gets on your skin, wash it promptly with soap and water to ease irritation.
Keep a damp cloth handy to wipe off sap immediately and prevent skin irritation.
Constant leaf yellowing and dropping mean revisit your watering schedule and humidity setup. Inspect plants weekly for pests and treat early before infestations spread. Regular, gentle care stops most problems before they worsen and keeps your rubber plant healthy.
Step-by-Step Action Plan for Your Rubber Plant
Follow this simple plan to keep your rubber plant healthy and happy. These steps help you get basics right fast.
- Day 1: Check your plant’s pot drainage. Water soaks through quickly shows good drainage.
- Week 1: Place your rubber plant where it gets bright, indirect light. Leaves staying bright green shows proper light.
- Week 2: Water your plant when the top 1 inch of soil feels dry. Soil moist but not soggy means right watering.
- Month 1: Prune any yellow or dead leaves. New healthy leaves will grow after pruning.
- Month 2: Feed with a balanced liquid fertilizer every 4 weeks. Look for steady growth and shiny leaves.
- Every 6-12 months: Repot if roots crowd the pot or soil looks tired. Repotting improves soil freshness and root space.
- Ongoing: Keep humidity moderate and avoid drafty spots. Leaf edges should stay smooth and not dry.
Frequently Asked Questions
Is the Sap of Rubber Plants Harmful?
Yes, the sap can irritate your skin. Wear gloves when pruning or repotting your rubber plant.
Avoid contact with the sap. Be careful not to get sap in your eyes.
Can Rubber Plants Be Kept Outdoors?
Rubber plants can stay outside in warm, humid climates. They need indirect sunlight and protection from strong wind or frost to stay healthy outdoors.
How Fast Do Rubber Plants Grow Indoors?
Rubber plants grow about 6 to 12 inches per year in good conditions. Growth slows in winter but picks up again when it warms and light improves.
Can Rubber Plants Remove Toxins from Indoor Air?
Yes, rubber plants help improve indoor air quality. They can remove pollutants like formaldehyde, making the air fresher in your home.
What Should I Do If My Rubber Plant’s Leaves Turn Yellow?
Yellow leaves usually mean overwatering or poor drainage. Check soil moisture, let it dry out a bit, and ensure your pot drains well.
Are Rubber Plants Toxic to Pets?
Rubber plants are mildly toxic to cats and dogs. Keep them out of reach to avoid stomach upset if pets chew on leaves.
Final Thoughts
Taking care of a rubber plant requires attention to water, light, and soil. Adjust your care gently as you watch your plant react. Start with one step today and see how your plant blossoms.