How to Pot Indoor House Plants: Simple Steps and Expert Tips for Healthy Growth
Knowing how to pot indoor house plants helps them thrive and stay healthy. Pick a pot a bit bigger than your current one. Make it 1 to 2 inches wider.
This size lets your plant grow without too much extra soil. A proper pot size prevents root crowding while giving enough space for growth.
Use potting mix made for indoor plants, not garden soil, to keep roots healthy. Water well so excess flows out the drainage hole to avoid water buildup. Let water sit 24 hours first if you use tap water, to remove chlorine.
Pick a pot material that fits your plant’s needs and your style. Choose a pot with depth the same as the root size. Avoid pots that are too deep or too shallow.
This helps your plant’s roots stay healthy. These steps set your plant up for strong, balanced growth indoors.
Key Takeaways
- Choose a pot 1, 2 inches larger in diameter than your current pot.
- Use fresh potting soil designed for indoor plants, not outdoor soil.
- Water enough to have 10% run out the drainage hole each time.
- Let tap water sit open for 24 hours to release chlorine before watering.
- Match pot depth closely to the size of your plant’s root ball.
- Repot every 12 to 18 months or when the plant stops growing well.
Step-By-Step Guide to Potting Indoor Houseplants
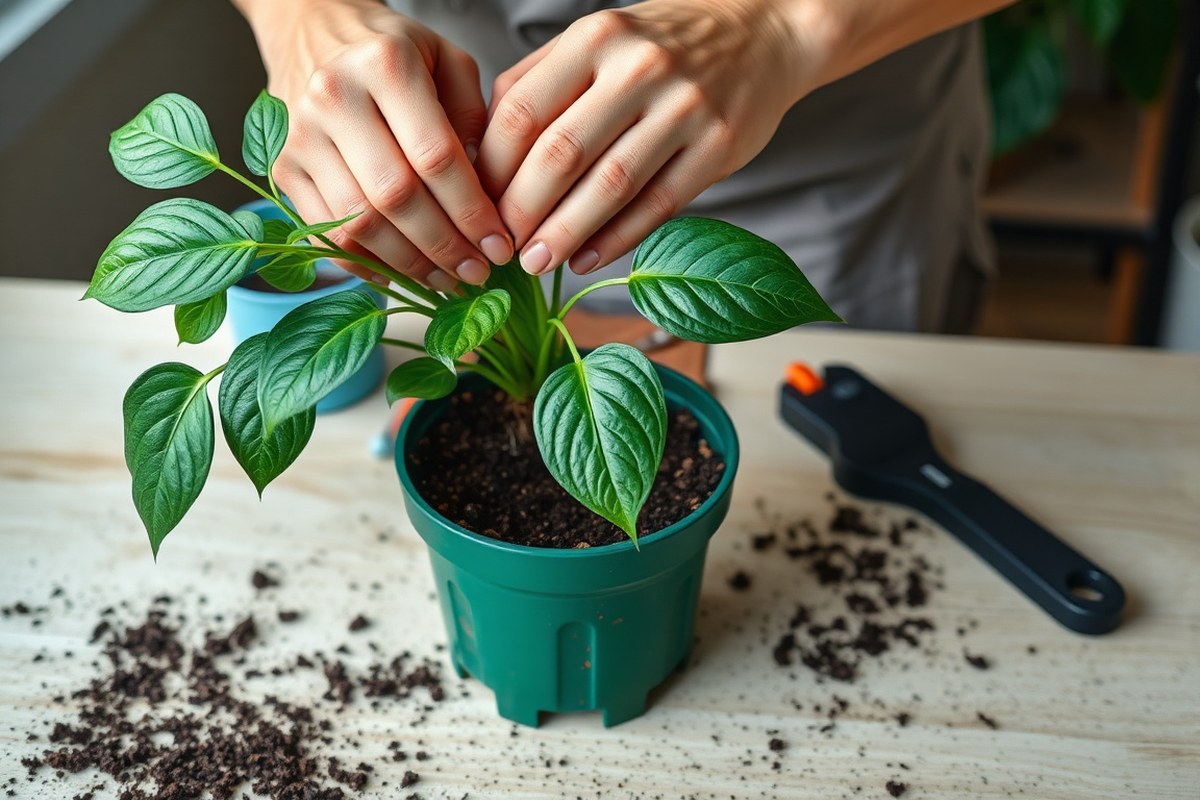
Potting your indoor houseplants right helps them thrive and grow. You’ll need a clean pot, fresh potting soil, and a gentle touch to avoid damage. Having everything ready before you start saves hassle, like a trowel, gloves, and water.
- Loosen the plant from its old pot. Lay it on its side and hold the stems gently. Tap the old pot’s bottom until the plant slides out without pulling hard on the roots.
- Remove excess old soil. Use your fingers or a small tool to brush off old soil from the roots. Check for circling roots and gently loosen them with your fingers to encourage growth.
- Fill the new pot’s bottom third with fresh soil. Pour in enough soil to cover the bottom well but leave room for the plant’s roots. This new layer helps support the plant and improves root health.
- Place the plant in the pot slightly below the rim.Hold the plant upright in the pot. The base of the stems should sit about 1/4 to 1/2 inch below the top. Check to make sure the plant sits evenly. This space lets you water properly without overflow.
- Fill around the roots with fresh soil. Add soil until the level is 1/2 to 1 inch below the pot lip. Press the soil down gently but firmly to secure the plant in place.
- Water lightly right after potting. This settles the soil and helps roots contact the new soil. Use a bit of water, just until it starts to drain from the bottom.
Handle roots with care to prevent breaks or bruises. Light watering hours before potting makes taking the plant out easier. Avoid filling soil to the very top.
Space above helps hold water for gradual root uptake. Proper potting means fewer surprises like wilting or root rot.
Choosing the Right Pot Size and Material
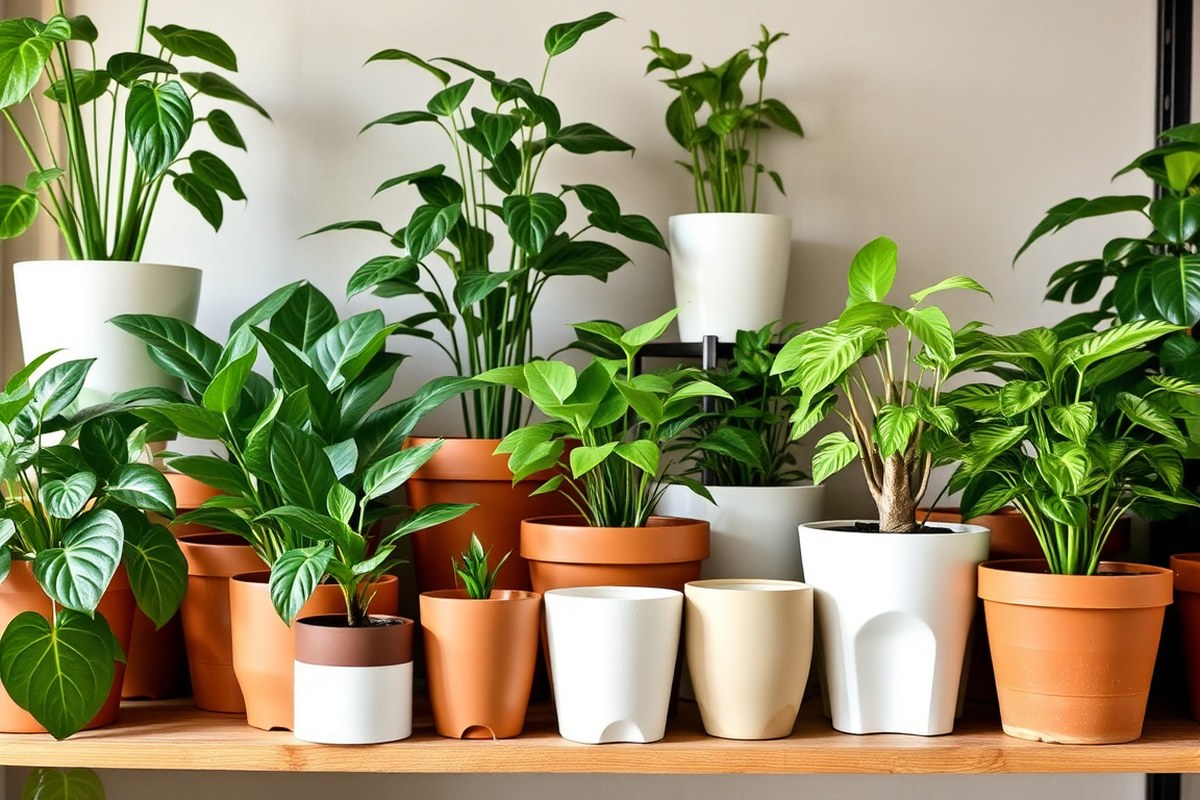
Choose a pot 1 to 2 inches larger in diameter than your plant’s current pot. This gives roots space to grow without drowning in too much soil. The pot depth should match the root mass size.
Avoid a pot that’s too deep. Extra depth holds water, risking root rot.
Some plants like snake plants prefer pots that keep roots snug to prevent overwatering problems. For fast growers like monsteras, go 4 to 6 inches bigger to encourage growth. Roots showing through drainage holes mean the plant is root-bound.
The plant will tip if the pot is too small. Time to use a bigger pot.
Avoid pots without drainage holes for direct planting. Water builds up and can rot roots fast.
Use plastic pots with holes inside decorative pots without holes instead. This setup lets excess water drain safely while still looking good on your shelf.
| Pot Material | Advantages | Best For | Physiological Reason |
|---|---|---|---|
| Terracotta (Unglazed) | Wicks excess moisture, porous | ZZ Plant, Snake Plant | Shallow roots need fast drainage |
| Glazed Ceramic | Retains humidity, decorative | Calathea, Ferns | Prefers moist, stable root environment |
| Fabric Pots | Air-prunes roots, breathable | Monstera, Pothos | Supports aerial roots and oxygen flow |
Match your pot material to your plant’s root needs. Unglazed terracotta suits plants that hate soggy roots.
Plants needing constant moisture like ferns do better in glazed pots. Fabric pots aid plants with aerial roots by letting more air reach them.
Use a pot with drainage holes for any plant. Only exception: a plastic pot without holes inside a decorative pot. This setup stops water buildup.
Choose a pot size by volume more than height, focusing on diameter increase. Plants that are root-bound may need root pruning before moving up a size. Only increase pot size modestly unless the plant grows quickly or shows root crowding signs.
Selecting and Preparing Potting Soil for Indoor Plants
Choosing the right potting mix depends on what kind of plant you have. Most indoor plants like potting mix that drains well. The mix should hold some moisture but not stay soggy.
This prevents root rot and keeps plants healthy. Add perlite or sand to potting soil to improve drainage.
This is helpful if your plant often sits in water. It helps water flow through the soil better.
Some plants need special soil types. Succulents and cacti want a gritty or sandy mix to dry out fast.
Orchids prefer bark or a chunky mix for air around their roots. Tropical plants like ferns and palms benefit from peat-based soil that keeps moisture but drains well.
- Use cactus or succulent mix for plants that need fast drainage
- Mix peat with perlite for tropical plants that like moisture
- Add bark pieces when potting orchids or air plants
- Blend in sand or grit to heavy soil to prevent compaction
- Fresh soil plus a tiny amount of slow-release fertilizer is best
- Make sure your new soil allows air circulation around roots
Reusing potting soil is possible but you need to refresh it first. Remove old roots and break up hardened clumps.
You can mix used soil with fresh potting mix to restore nutrients and improve drainage. Avoid soil that smells bad or stays soggy, as that can harm your plant.
Soil compaction stops air and water from reaching roots, causing poor growth. Prevent this by avoiding heavy garden soil indoors. Use light mixes made for pots.
Don’t pack soil tightly when filling a pot. Tap the pot gently to settle soil. Keep soil loose so roots can breathe and grow.
For best results, add fresh potting mix to the pot bottom first. This creates a good base for your plant’s roots. Then place the root ball on top.
Place the plant in the center of the pot. Fill soil around it until one inch below the rim.
This leaves room for watering without overflow. Leave space for watering so water doesn’t overflow or cause root rot.
When and How Often to Repot Indoor Plants
Indoor plants usually need repotting every 12 to 18 months. Fast-growing plants might need repotting once a year. Slow growers can wait closer to two years.
The best time to repot is late winter or early spring. This lets the plant recover as daylight and warmth increase.
You’ll notice when your plant is rootbound if it’s drying out quickly. Growth slows down, and new leaves are smaller. Roots may appear through drainage holes or circle tightly inside the pot.
The soil might stay wet for too long or repel water fast, making watering tricky. These signs show your plant needs more room to grow.
- Drying quickly even after watering
- Small or no new leaves
- Roots growing through drainage holes
- Soil dries unevenly or stays soggy
- Pot feels light despite watering
- Plant top looks crowded
Try root pruning to repot a rootbound plant without making it bigger. That means trimming some roots before putting it back in the same size pot. Don’t repot if your plant hasn’t grown in over six weeks.
Keep the soil dry for a week before you decide. Wet soil lasting over a week means you should wait. This could mean root rot, and moving the plant might spread infection.
Spring is a good time to move your plant to a bigger pot. Choose a pot up to 3 inches wider in diameter. Gently water the plant a few hours before repotting.
This helps you remove it cleanly without breaking roots. After repotting, don’t fertilize for at least four weeks because fresh potting mix already has nutrients. Keep the soil lightly moist during this adjustment period to avoid stress.
Common Potting Mistakes and How to Avoid Them
One common mistake is using a pot that’s too big. Moving a plant to a bigger pot adds more soil around roots. This extra soil keeps too much water inside.
It can cause the roots to stay too wet. Without enough roots to soak it up, the soil stays wet, which invites root rot. Using a pot just one size larger than the old one helps avoid this problem.
People often overwater right after repotting. New roots haven’t developed enough yet to handle lots of water. Keep soil moist but not soggy.
Wait about 10 days before watering again if the soil feels damp. This pause helps the roots recover without drowning.
Don’t fertilize your plant for at least 10 days after repotting. This pause helps prevent stress and root burn. It gives roots time to settle in first.
Feeding plants immediately after repotting can harm their tender roots. Fresh potting soil usually has enough nutrients to support them in the short term.
After about two weeks, you can start feeding with a diluted houseplant fertilizer. This boosts growth without overwhelming the plant.
Another common error is not quarantining newly potted plants. Changes in environment stress plants, making them vulnerable to pests or rot.
Keep your plant in lower light with higher humidity for about 10 days. Bathrooms or a humidity dome work well for this.
- Use a pot only one size larger than the old one
- Water sparingly right after repotting to avoid soggy soil
- Wait 10 days before fertilizing to protect roots
- Give plants 10 days in low light and high humidity to recover
- Check for soft, wilted leaves as a sign of overwatering
- Avoid repotting in cold spots that cause rot
- Watch for top-heavy plants that need sturdier pots
After repotting, watch closely for signs of trouble. Wilting leaves or yellowing might mean overwatering or root damage. A stable root system keeps plants steady and upright.
So top-heavy or unstable plants will need repotting sooner. Avoid planting in cold places because low temperatures harm roots and invite rot. Proper care through this sensitive time prevents bigger problems later.
Handling Plants Without Drainage Holes Safely
Indoor plant pots usually need drainage holes to avoid water buildup. Without holes, excess water can cause root rot and kill your plant. You can pot plants without drainage holes using liners.
Water carefully to avoid overwatering. Use materials that hold extra moisture safely.
Using Liners and Moisture Reservoirs
Place a plastic grower’s pot with drainage holes inside your decorative pot. This creates a built-in drainage system. The water collects in the outer pot, keeping roots from sitting in water.
Alternatively, use hydrogranules at the bottom of the pot. These absorb excess water and release it slowly to roots. Cover the hydrogranules with decorative stones to improve looks and keep soil from washing out.
This setup protects roots from waterlogging. Make sure the outer pot can hold any drained water safely without tipping over.
Watering Strategies for No-Drainage Pots
Water less often and check soil moisture before adding water. Use a finger test by sticking it about 1 inch deep into the soil. Only water when the soil feels dry at this depth.
Water slowly so the soil absorbs moisture evenly. Avoid pouring water until it pools on top or runs down the sides inside the pot. This helps prevent overwatering and root rot.
For bigger plants, water the soil thoroughly but less frequently. Let your plant drink before watering again to avoid soggy soil and roots.
Alternative Materials for Bottom Layers
Don’t fill pots with gravel or stones at the bottom. They hold water and cause root rot. Avoid this for healthy roots.
Use expanded clay or hydroponic clay pebbles instead. These materials create air pockets and improve drainage inside the pot.
Hydroponic clay pebbles hold some moisture while allowing excess water to drain away within the liner. They are lightweight and reusable but cost more than gravel.
Expanded clay is affordable and widely available. It helps keep roots aerated but won’t absorb water like hydrogranules do. Choose based on what your plant prefers and your budget.
- Pick a plastic grower’s pot that fits inside your decorative pot.
- Put a 1- to 2-inch layer of clay pebbles at the pot bottom. Hydrogranules also work well in the grower’s pot.
- Fill the grower’s pot with potting soil, leaving space for roots.
- Set the grower’s pot inside the decorative no-drainage pot carefully.
- Water your plant slowly, allowing soil to absorb moisture evenly.
- Check soil moisture with your finger before watering again.
- Drain any water collected in the outer decorative pot regularly.
- Use decorative stones to cover hydrogranules for a neat finish.
Root Pruning and Dealing with Rootbound Plants
Root pruning helps promote healthy growth when you repot indoor plants. Cut off about one-third of the roots, especially circling ones, to encourage fresh root development. This process stops root crowding and lets the plant absorb water and nutrients better.
Identifying Rootbound Symptoms
Look inside the pot to check root growth. Roots that circle tightly around the soil show the plant is rootbound. This can reduce water uptake and nutrient absorption.
Roots packed tightly benefit from pruning before repotting new soil. But if roots barely fill the pot, skip cutting to avoid stress. Some plants tolerate being slightly rootbound without harm.
Safe Techniques for Trimming Roots
Handle the root ball gently to avoid breaking too many roots. Spot circling roots? Trim them with sharp, clean scissors right away.
Cut across the root ball horizontally. Make cuts about half an inch deep. Space cuts 2 to 3 inches apart.
Remove up to one-third of the root mass, mostly from the outer edges and bottom. Loosen the root ball by gently teasing roots apart before repotting. This encourages roots to grow outward into the new soil.
- Water the plant lightly one day before repotting. This eases root removal.
- Invert the pot slowly while supporting the plant base. Avoid disturbing roots more than needed.
- Examine roots for circling or dead sections. Prune off circling roots with sharp scissors.
- Cut horizontally into the root ball at 2- to 3-inch intervals about half an inch deep.
- Remove about one-third of the roots, focusing on dense or unhealthy parts.
- Loosen the remaining root ball gently to prepare for repotting.
- Place the plant in fresh potting mix and fill around the roots. Firm soil gently.
- Water lightly and place in indirect light for recovery.
Post-Pruning Care to Reduce Shock
Avoid watering your plant for around a week after pruning roots. This helps roots heal instead of drowning. Overwatering can reduce root growth and harm the plant.
Place the plant in bright, indirect light while it recovers. Wait 4 to 6 months before feeding the plant again. This gives the roots time to regrow fully.
The saucer might collect water. Leave the pot on it for 30 minutes.
Then pour off any extra water carefully. Proper drainage prevents root rot from sitting in water too long.
Caring for Plants After Potting or Repotting
Water your plant right after potting to settle the soil and help roots recover. Keep it in a spot with moderate light and steady humidity to reduce stress. Wait 4 to 6 weeks before feeding, so the roots adjust without being shocked.
Optimal Light and Humidity Conditions
Place newly potted plants in indirect light to avoid burning their stressed leaves. Avoid direct sunlight for at least a week to prevent leaf yellowing or curling. Moderate humidity helps plants stay hydrated until roots settle in.
You can increase humidity with a small humidifier or by grouping plants together. Avoid drafts and sudden temperature changes, which can slow recovery. Keep room temperature steady, ideally between 65 and 75 degrees Fahrenheit.
Watering Frequency and Technique
Water thoroughly right after repotting to moisten the fresh soil around the roots. After that, wait until the top inch of soil feels dry before watering again. Check soil moisture with your finger every few days to avoid overwatering.
Use a watering can with a narrow spout to control the flow and prevent soil displacement. Water slowly until some drains from the bottom; this ensures deep root hydration. Avoid routine watering schedules; conditions and plant size affect how often to water.
- Water fully once at potting to help root contact
- Check soil moisture before watering again
- Water slowly to prevent soil washing away
- Look for drainage holes to avoid water buildup
- Keep soil evenly moist but not soggy
- Adjust frequency if air is dry or plant is in bright light
- Watch for drooping or yellowing leaves as stress signs
Too much water after potting causes root rot. So never let plants sit in standing water.
Fertilizing Timeline and Best Practices
Wait four to six weeks after repotting before fertilizing to avoid overloading stressed roots. This pause gives the plant time to adjust and start growing in fresh soil. Start with a diluted, balanced fertilizer to ease plants into feeding.
Choose a fertilizer with equal parts nitrogen, phosphorus, and potassium for general use. Feed your plants every four to six weeks during active growing seasons like spring and summer. Skip fertilizing in fall and winter when many houseplants slow down growth.
Step-by-Step Action Plan for Potting Your Indoor Plant
Follow these steps to pot your indoor plant successfully. Each step tells you what to do and how to check if it worked.
- Before you start: Choose a pot with drainage holes slightly bigger than the root ball. It should feel stable and not tip over easily.
- Day 1: Put fresh potting soil in the pot. Add enough soil to hold the plant at the same level as before. Place your plant gently, keeping roots spread out. It should sit firmly and not lean.
- Day 1: Fill around the roots with soil. Press gently so the plant stays upright. The soil should be snug but not compacted hard.
- Day 1: Water the plant thoroughly until water drains out the bottom. Check the pot feels moist but not soggy after a few minutes.
- Week 1: Keep your plant in bright, indirect light. Check daily for wilting or dry soil and water only when the top inch feels dry.
- After 2 weeks: Look for new growth or firmer leaves as signs your plant adjusted well. Avoid repotting again too soon.
- Month 1: Dust leaves gently and check for pests. Healthy foliage means you’re on the right track.
Frequently Asked Questions
What Are the Biggest Mistakes When Repotting?
The biggest mistakes are choosing a pot that’s too large and overwatering. New soil holds moisture longer, so water less to avoid root rot. Moving up just one pot size helps prevent watering problems and stress on the plant.
What to Put in the Bottom of a Houseplant Pot?
Use a layer of hydrogranules or small stones to trap water at the bottom. This layer acts as a reservoir, holding moisture for the roots to absorb slowly. Avoid blocking the drainage hole completely to keep water flowing out.
Should You Water Plants Immediately After Repotting Them?
Yes, water your plant right after repotting to help settle the soil around roots. Use enough water until some runs out the drainage hole. This ensures good root contact with the soil and prevents air pockets.
Do Indoor Plants Need a Hole in the Pot?
Most indoor plants do best with drainage holes to prevent water buildup. Without holes, roots risk rotting from sitting in soggy soil. Your pot needs drainage holes or use hydrogranules and water carefully.
How Do I Know If My Houseplant Is Rootbound?
Your plant is rootbound if water runs quickly from the pot without soaking in. Roots will circle tightly inside, limiting growth and water uptake. Repot into a slightly bigger container and gently loosen roots to encourage spreading.
Can I Reuse Old Potting Soil for Repotting Indoor Plants?
It’s better to use fresh potting soil to avoid pests and disease. Old soil loses nutrients and drains poorly, which can stress your plant. When reusing soil, mix fresh soil and dry it in the sun first.
Key Points to Remember
Potting houseplants correctly helps them grow strong and stay healthy. Start with good soil, the right pot, and careful watering. Next, watch your plant closely and adjust care as it settles in its new home.