How to Know When to Repot a Plant: 9 Key Signs and Steps That Work
Knowing when to repot a plant helps prevent root problems and poor growth. Quick action keeps the plant healthy and stress-free. A plant usually needs repotting if it has been 1 to 2 years since the last time.
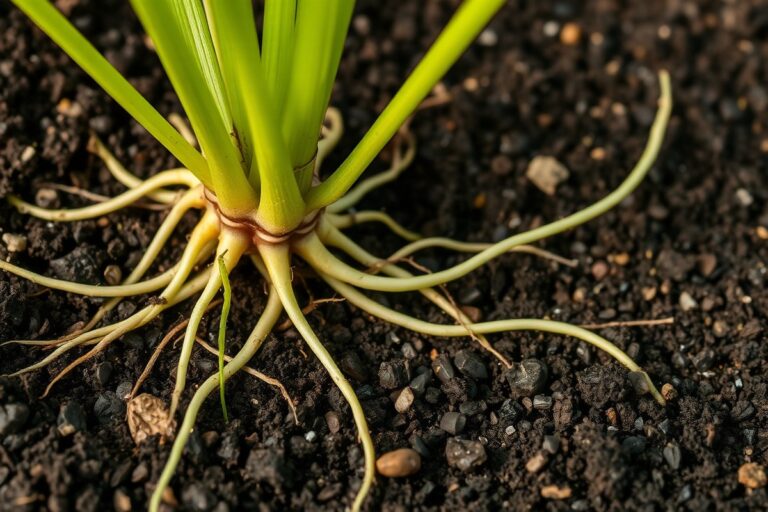
Check if roots circle the pot or poke out of drainage holes. This shows the plant is outgrowing its space and needs fresh soil.
Repotting refreshes soil by providing new nutrients and better moisture retention. Old soil breaks down and loses nutrients, which repotting stops.
Water the plant lightly a day before repotting. Moist roots come out easier and stay healthy longer.
Avoid repotting too soon, which can stress the plant. If you repotted less than six months ago, wait longer unless roots seem crowded.
Check the pot size and root health before repotting. These steps help you decide the right time and method.
Key Takeaways
- Repot plants every 1 to 2 years to refresh soil and nutrients.
- Slide the plant from its pot to see if roots circle the root ball.
- Water plants lightly 24 hours before repotting to ease removal.
- Avoid repotting within 3 to 6 months of the last repotting.
- Look for soil that breaks down; it won’t hold water well.
- Roots coming out of drainage holes show it’s time to repot. Do it right away to keep your plant happy.
1. How to Tell When Your Plant Needs Repotting

Look for roots growing through drainage holes or circling inside the pot. This means the plant is root-bound and needs more space fast. You can gently slide the plant out of its pot.
Check if roots form a tight circle or fill the root ball. Look for little visible soil among the roots.
Soil drying in less than 24 hours or water rushing through means problems. The potting mix is spent or the pot is too small. That causes the roots to dry too quickly and starve the plant.
A white crust on top or a sour smell means salt or root issues. They need a soil refresh or repotting right away.
Growth can also tell you when to repot. Your plant’s leaves limp or growth slows, even with feeding. The roots may be too crowded inside the pot.
Sometimes, watering increases from once a week to two or three times. This happens because the plant tries to pull more moisture. The pot may be limiting root growth.
Signs fall into urgent, moderate, or low priority for repotting. Roots pushing strongly from drainage holes or circling mean urgent repot now. Poor soil or salt buildup can be a moderate problem.
You can add new soil on top or plan repotting soon. Limp leaves or slow growth alone are low priority; check other causes first.
Always pick early spring to repot. This timing helps the plant recover and start strong. Use pots just one or two inches larger than the old one.
Bigger pots can keep the soil soggy and harm roots. Fresh indoor potting mix with good drainage keeps roots healthy after moving.
Being cautious helps too. Slide the plant out gently to avoid root damage.
Avoid repotting during a plant’s dormant season or if it’s stressed from pests or poor light. Wait to fix those problems first because repotting under stress can hurt more than help.
2. How Often Should Different Houseplants Be Repotted?

Different houseplants have different needs for repotting, based on their growth speed and pot size. Fast-growing plants like pothos often need repotting every 12 to 18 months. Slower growers, such as many succulents, typically only need repotting every 2 to 3 years.
Some plants rarely outgrow their pots and rarely need repotting. Orchids do better in specialized bark or chunky media. They usually need repotting only when the bark breaks down.
This can take 2 to 3 years or more. Mature plants that grow slowly may only need fresh soil every 3 to 4 years.
| Plant Type | Typical Repotting Interval | Pot Size Adjustment |
|---|---|---|
| Pothos and fast-growing tropicals | 12-18 months | Increase 1 pot size (e.g., 4″ to 6″) |
| Succulents and cacti | 2-3 years | Increase 1 pot size; use cactus soil mix |
| Orchids | 2-3+ years (or when bark breaks down) | Use chunkier media, same or slightly larger pot |
| Large mature houseplants | Every 3-4 years | Increase pot size by 1-2 sizes if growing |
| African violets | Every 1-2 years | Use shallow pots, light peat mix |
Plant maturity strongly affects when to repot. Young, actively growing plants benefit from more frequent repotting to give roots room to spread. Older plants slow down, so repotting mainly refreshes the soil every few years.
Avoid repotting right after bringing a plant home. New-environment stress can cause leaf drop. This happens without needing a new pot.
Only go up one pot size at a time for small plants to avoid root stress.
Pot size should always match plant growth carefully. Moving a plant into a pot too large can lead to root rot. Repotting at the right time helps your plants stay healthy.
It refreshes soil nutrients. It also prevents root-bound conditions.
3. Choosing the Right Pot Size and Material
Choose a pot just one to two inches wider in diameter than your current one. This size gives roots room to grow without overwhelming the plant. Going too big causes soil to hold excess water, which can rot roots.
Drainage is essential for all pots. It stops water from pooling and drowning roots. If your decorative pot lacks holes, place a plastic nursery pot with drainage inside or drill holes in the outer pot if possible.
| Pot Material | Good For | Benefit |
|---|---|---|
| Clay (Terracotta) | Dry-loving plants | Prevents soggy roots by allowing soil to dry quickly |
| Plastic | Plants that like moist soil | Holds moisture longer, reduces watering frequency |
| Glazed Ceramic | Any houseplant | Decorative, but often heavier and sometimes without drainage holes |
Clay pots are porous. So they dry the soil faster and suit plants that hate soggy feet.
You might find plants slip out easier when repotting with terracotta. Plastic pots keep moisture longer, good for tropical plants that need damp soil.
Heavier pots like ceramic or clay are better for tall or top-heavy plants. They keep the plant steady and avoid tipping over. Lighter plastic pots make moving plants easier and reduce stress during repotting.
Check root health before selecting the pot. Roots circling the old pot or poking out drainage holes mean it’s time to go bigger. Always prepare fresh soil and keep roots moist, not soggy, before repotting.
4. Step-by-Step Guide to Safely Repotting Your Plant
Repotting a plant means moving it to a new pot with fresh soil. Start by preparing clean soil and the right pot size with good drainage. Take your plant out gently and check its roots carefully.
Trim any dead or damaged roots before replanting. Put the plant in fresh soil without hurting the roots.
Preparing Soil and Pot
Pick a pot one size larger than the current one, with drainage holes at the bottom. Drainage keeps roots healthy by avoiding wet, soggy soil. Use fresh, quality potting mix designed for houseplants for the best nutrients and airflow.
Fill the new pot with some soil before adding the plant. Leave about an inch of space from the pot’s top for watering later. Prepare all tools and water to have them ready when repotting.
Removing and Inspecting the Plant
Water your plant a day before repotting. Moist soil holds roots together and reduces stress. Gently hold the base, tilt the pot, and tap the sides to loosen the root ball.
Pull the plant out carefully. Avoid yanking on the stems or leaves to prevent damage. After removing, check for roots circling heavily inside the root ball, an indicator of root-binding.
Handling Roots and Root Ball
Carefully loosen the root ball with fingers or a small tool to separate tangled roots. This encourages roots to grow into the new soil. Remove any dead, soft, or mushy roots by trimming them with clean scissors.
Roots that are very tight may need snipping to encourage growth. Do this carefully to avoid stressing the plant.
For plants needing division, this is the perfect time to separate healthy sections. Only divide plants that naturally do well with splitting, like snake plants or spider plants.
Replanting and Positioning
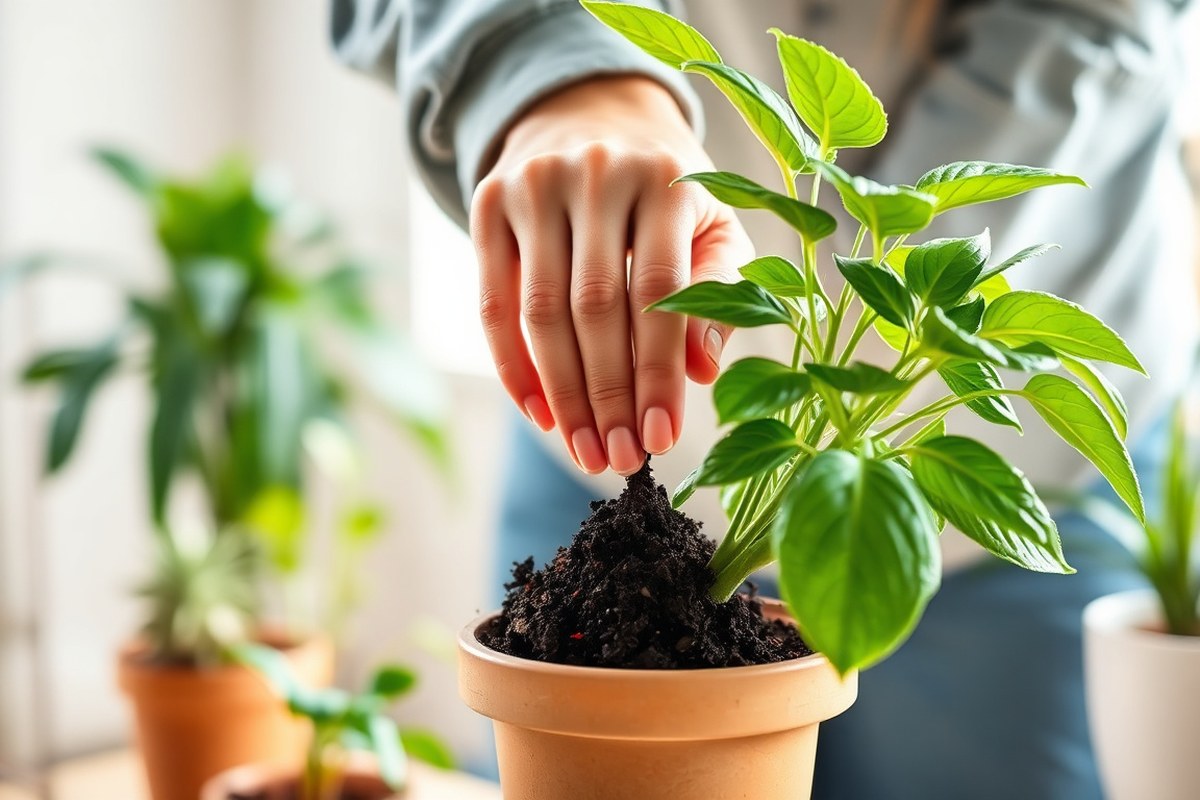
Start with a layer of fresh soil at the pot’s bottom, about an inch thick. Set the plant so the root ball top is 1 inch below the rim. Add soil around the roots, pressing lightly to remove air pockets without squeezing too hard.
Water the plant fully after repotting to help soil settle and roots adjust. Avoid repotting a stressed or flowering plant except in emergencies. Fresh soil replenishes nutrients, improving root health and plant growth.
- Water your plant a day before repotting to moisten the soil.
- Choose a pot one size larger with drainage holes and quality soil.
- Loosen the root ball by gently tapping and pulling the plant out.
- Inspect roots and trim any dead or mushy parts carefully.
- Loosen tangled roots to encourage new soil growth around them.
- Add fresh soil to the new pot, leaving room for the root ball.
- Set plant in pot so the root ball is 1 inch below the rim.
- Fill in with soil around roots and water thoroughly to settle soil.
5. How to Check and Manage Root Problems During Repotting
Recognizing Root-Bound Plants
Roots circling the bottom or sides of the pot show the plant is root-bound. This means roots have run out of space and form a tight mass. That dense root mat stops your plant from absorbing enough water and nutrients.
Gently slide the plant out of the pot to check for circling roots. When you see them, loosen the root ball carefully to avoid damage.
Use a sterile knife to cut thick root rings. Break roots apart gently.
Spotting Root Rot During Repotting
Root rot shows up as soft, brown, or black roots with a bad smell. Healthy roots stay firm and white or tan. Rot happens when roots sit in soggy soil too long, starving them of oxygen.
When you spot root rot, remove all affected roots with clean scissors or a knife. Rinse the remaining roots with water to wash away fungus or mold. Replace all the old soil because harmful fungi can linger there.
Stepping Through Root Pruning
Prune roots carefully during repotting to help your plant grow well in new soil. Start by removing roots circling the root ball or any that look dead or damaged. Use sharp, sterile scissors or a knife to prevent infections.
Cut roots in small sections; avoid removing more than one-third of the root mass. This keeps the plant healthy and able to take up water. After pruning, gently loosen the remaining roots to encourage growth into the new soil.
Checking Root Health Checklist
Look for firm, white or tan roots. These show your plant’s root system is healthy. Brown, mushy, or slimy roots mean rot and need cutting away immediately.
Feel for roots pushing the plant out of the pot or growing through drainage holes. That means it’s time to repot or prune roots. Also, check soil condition; broken-down media forces more frequent repotting.
When Not to Prune Roots
You don’t always need to prune roots each time you repot. Roots look healthy and untangled.
Gently loosen the soil around them. Too much root cutting can shock the plant.
Skip root pruning if your plant is young or just moved into a larger pot. Leave roots alone unless they are damaged, dead, or severely root-bound. Pruning too often slows growth and can cause stress.
Always use sharp and sterile tools to prune roots to avoid spreading infections.
6. When and How to Divide Plants While Repotting
Dividing plants during repotting works well for plants that grow fast or produce clumps. It helps control size and refreshes growth without stress to the whole plant. Doing it right protects roots and gives new plants the best chance to thrive.
Identifying Candidates for Division
Plants that grow in clumps or have several stems often benefit from division when repotting. Examples include snake plants, peace lilies, and spider plants. These species usually form separate root balls that you can split safely.
You should divide the plant when overcrowding shows. Look for roots circling the pot. Also, watch for stems crowding each other.
Early spring or just before active growing starts is best for dividing most houseplants. Avoid division during winter or when plants are weak from pests or disease.
Techniques for Dividing Root Balls
Handle roots gently to avoid damage. A firm but careful approach helps roots stay intact and reduces transplant shock. Use clean, sharp tools for pruning.
A sharp knife or pruning shears work best. This cuts better and lowers infection risk.
Follow these steps to divide your plant safely:
- Water your plant lightly a few hours before repotting. Moist soil helps remove the root ball easily. This makes dividing less stressful for roots.
- Gently remove the plant from its pot, loosening the root ball by pressing pot sides.
- Inspect the root ball, identifying natural dividing points or clumps.
- Cut the root ball into sections using a sharp knife or pruners. Leave 3 to 5 inches of roots for each section. This supports healthy growth in new pots.
- Use your hands to gently pull apart the clumps if roots naturally separate.
- Trim dead or damaged roots with sterilized scissors to encourage healthy regrowth.
- Place each divided section into a clean pot with fresh soil suitable for the plant species.
- Water each new plant lightly to settle soil around roots and reduce air pockets.
Post-Division Care and Planting
Keep divided plants in indirect light for about one to two weeks. This helps reduce stress and helps them settle in their new pots. After that, you can resume usual light exposure gradually.
Water carefully after dividing. Soil should stay moist but not soggy to avoid root rot. Avoid fertilizing for at least a month to let roots recover fully.
Watch new plants closely for dryness or pests during the first few weeks. Label every new pot with the plant’s name and division date.
This helps you keep track of care and growth. It’s useful to review progress later.
7. Best Timing and Seasonal Considerations for Repotting
Spring is the best time to repot most houseplants. This season marks the start of active growth, so plants root and recover faster. Increased light and warmer temperatures support strong new roots during this time.
Early summer can also work well for repotting if your plant missed spring. Avoid repotting in fall or winter unless necessary. Plants grow slowly in cooler months and take longer to bounce back from stress.
Sometimes you need to repot right away, even in winter. Emergency repotting is needed if the plant becomes severely root-bound or if roots start rotting. In these cases, waiting several months can harm the plant more than repotting does.
When repotting out of season, keep conditions as steady as possible. Use the same potting soil and water at usual levels. This helps reduce shock and helps your plant adjust.
Plan to check root health and pot size at spring’s start. This lets you catch problems before growth stalls.
Your plant may stop growing in spring or summer because it needs repotting. This can happen even if you keep fertilizing it.
Repotting in spring costs you extra time but helps your plant thrive faster. Roots usually settle in the new pot in one or two weeks.
This happens when spring conditions are good. Avoid repotting during low light or cold drafts to prevent slow recovery.
8. Watering and Aftercare Tips After Repotting
Water your plant a day before repotting. This moistens roots and helps reduce breakage.
After repotting, wait at least one to two weeks before watering again. The soil stays moist enough from the repotting process for this short period.
New potting mix often has enough nutrients to support your plant for a while. Hold off on fertilizing for four to six weeks after repotting.
This pause lets the plant settle without stressing its roots with added chemicals. Water carefully during this time, letting the soil dry partially between waterings.
Light conditions should be stable and not too intense right after repotting. Avoid direct sun, which can stress your plant more.
Instead, place it in bright, indirect light for at least a week. This setting supports recovery and encourages healthy growth without shock.
- Water the plant thoroughly the day before repotting
- Hold off on watering for 7 to 14 days post-repot
- Skip fertilizing for 4 to 6 weeks after repotting
- Keep the plant in indirect, bright light while recovering
- Check soil moisture every few days to avoid overwatering
- Watch for signs of stress like drooping or yellowing leaves
- Gradually return to normal care routines after one month
Repotting shock often happens because roots get disturbed and conditions suddenly change. You soften this shock by watering the plant beforehand and using fresh, healthy soil. Give your plant time and gentle care to bounce back.
Don’t rush to water your plant immediately after repotting; let it adjust first.
9. Alternatives and Special Cases: When Full Repotting Isn’t Needed
Top-dressing means adding fresh soil over existing soil without removing roots. You don’t take out the whole root ball. It’s an easy way to refresh soil.
This helps if the soil feels tired or a bit compacted. Roots still have space to grow. The soil isn’t completely worn out yet.
Add one to two inches of fresh potting mix on top. Loosen the old soil first to help water soak in.
This helps roots get moisture better. Avoid topping off the soil too often, or it can cause crusting and poor drainage.
Large plants or those fixed in heavy containers often can’t be fully repotted. You can refresh soil by scraping off the top few inches. Then add fresh soil to replace it.
This method refreshes the plant’s growing area. For the best results, do this during the plant’s active growing season. Water well after adding new soil to help it settle around the roots.
Orchids and bonsai have unique repotting needs. Orchids need new potting mix every 1 to 2 years. Their bark-based mix breaks down quickly.
Replacing it keeps the plant healthy. Use special orchid mix like chunky bark, not regular soil. Remove old mix carefully to avoid breaking delicate roots.
Bonsai also need repotting every 1 to 3 years, often in spring. They grow in shallow pots.
So root pruning and fresh, well-draining bonsai mix are important. Avoid repotting bonsai when they bloom.
| Action | When to Use | How to Do It | Benefits |
|---|---|---|---|
| Top-dressing | Soil surface tired, roots have space | Loosen top soil, add 1-2 inches fresh mix | Refreshes nutrients, less root disturbance |
| Repotting | Roots crowded, soil dries out fast | Remove plant, fresh mix in larger pot | More root room, soil refresh |
Some plants require special soils or timing. For example, succulents and cacti thrive in quick-draining, gritty soil often with perlite or sand.
Terra cotta pots work well here, helping soil dry between waterings. Always check your plant’s label for specific requirements before repotting or top-dressing.
For large or fixed plants, only replace the top soil layer. This cuts down on effort and reduces plant stress. It’s easier than full repotting.
Orchid and bonsai repotting demands using proper potting mixes and timing to avoid damage. Using the right method keeps plants healthy without unnecessary disturbance.
Step-by-Step Action Plan for Repotting Your Houseplant
Follow these steps to repot your plant safely and help it thrive. Each step shows you how to tell it’s working well.
- Before repotting: Check the roots for crowding or damage. Healthy, white roots mean your plant is ready.
- Day 1: Choose a pot one size bigger with drainage holes. Your plant should have room to grow but not too much extra soil.
- Day 2: Carefully remove the plant and loosen the root ball. If roots are tightly wound or circling, your plant will grow better after loosening.
- Day 3: Add fresh soil to the new pot. Use potting mix suited for your plant’s needs. The soil should hold moisture but drain well.
- Day 4: Place the plant in the new soil and water gently. The soil should feel damp but not soggy.
- Week 1: Keep the plant in indirect light and check soil moisture daily. Your plant will stop wilting and start showing new growth if happy.
- Week 2: Resume normal watering and feeding routines. Watch for strong stems and firm leaves as signs of good recovery.
Frequently Asked Questions
Can I Repot My Plant into a Pot Larger Than 2 Inches Bigger?
It’s best to go up by 1-2 inches only to avoid root rot. Larger pots hold too much water and can drown roots.
Are There Signs to Wait Before Repotting After Bringing a New Plant Home?
Give your new plant 4-6 weeks to settle before repotting. Check roots only if problems show.
Can Poor Lighting Affect When I Should Repot My Plant?
Low light makes plants grow slower, so wait before repotting. Fix light issues first for healthy growth.
Is It Okay to Repot a Plant in Winter?
Winter is not ideal for repotting houseplants. Wait for spring when active growth resumes.
How Do Salt Crusts on Soil Relate to the Need for Repotting?
Salt crusts mean nutrient buildup but don’t always need repotting. Sometimes a top-dress or soil refresh helps.
Can I Repot a Plant That Looks Stressed from Pests or Disease?
Don’t repot stressed plants from pests or disease right away. Treat the problem first and repot after recovery.
The Bottom Line
Repotting is key to keeping your plant healthy and growing. Take the time to check roots and choose the right pot size. Now, get your hands dirty and give your plant a fresh start today.