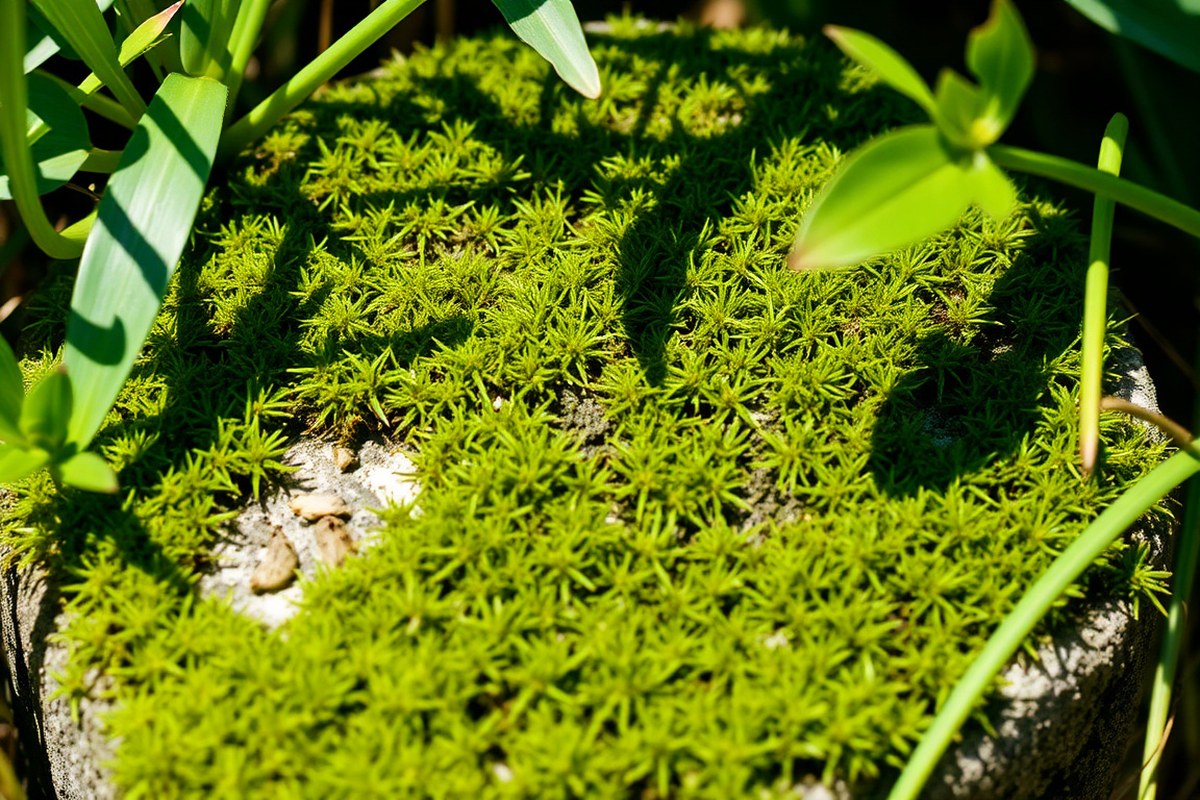
How to Grow Moss on Stone: A Complete Guide with Proven Tips
Wondering how to grow moss on stone? The best way is to start with clean or slightly dirty stone in a shaded area.
Moss likes moisture and partial shade. So pick a spot that doesn’t get harsh sun all day.
Use crushed moss to make a slurry with buttermilk, yogurt, or water. This helps the moss stick and grow on surfaces. Spread the slurry over the area you want to cover.
Regularly mist your stone with rainwater or non-chlorinated water to keep it moist. Chlorine in tap water can slow moss growth.
Give moss time to settle. It usually takes 2 to 6 months before you see new growth.
Keep the stone damp during that time, and avoid disturbing the area. Patience is key because moss grows slowly but steadily when conditions are right.
Key Takeaways
- Choose a stone surface with partial shade to avoid direct sunlight all day.
- Make a slurry by mixing crushed moss with buttermilk or yogurt. Then spread it onto the stone surface to help moss grow.
- Use rainwater or water left uncovered 24 hours to avoid chlorine in watering.
- Keep the stone moist by regularly misting during the first several months.
- Expect initial moss growth to appear between two and six months.
- Avoid disturbing the moss area while it establishes to encourage steady growth.
How to Grow Moss on Stone Step by Step

To grow moss on stone, first gather moss or moss powder. Next, mix it with a binding agent to make slurry.
Apply the slurry or transplant moss patches onto your stone surface. Keep the moss moist for several weeks until it establishes firmly.
Gathering Moss or Sourcing Moss Powder
Collect moss from shady areas with similar growing conditions to your stone surface. Choose moss that naturally grows on rocks rather than trees or soil.
You can also buy moss powder online or from garden centers. This works well if you want to make slurry from powder.
Harvest moss gently to avoid damaging it. Store it in a cool, moist place until ready. Picking moss early in the morning helps because it’s damp then.
Damp moss is easier to handle and grows better. Avoid moss that looks dry or old because it won’t grow well.
Preparing the Slurry Mixture with Buttermilk or Yogurt
Blend moss with a sticky base to help it cling and grow on stone. Buttermilk or plain yogurt work well as binders and food for moss growth. Mixing moss with water alone doesn’t spread or hold as effectively on vertical surfaces.
Use two parts chopped moss, two parts buttermilk, and one part water. This mix creates a thick, spreadable slurry.
The University of Oregon suggests adding two eggs for better adhesion and growth support when blending. Use non-chlorinated water, like rainwater or water left uncovered for 24 hours, to avoid harming moss.
Applying the Slurry or Transplanting Moss Patches
Choose a stone surface with partial shade and good moisture retention before applying moss. Clean the stone well by brushing off dirt and weeds to create a smooth planting area.
Press moss patches firmly onto the stone in your chosen spots. This helps the moss stick and start growing.
Paint slurry onto the stone evenly with a brush or small trowel. Apply enough slurry to cover the area fully but avoid dripping.
For patchy or vertical stones, transplant patches instead of only slurry to avoid uneven moss growth. The moss should begin rooting within six weeks.
Initial Watering and Moisture Maintenance
Water your new moss patch regularly for the first few weeks to keep it moist. Mist moss daily or water it lightly in the morning or evening.
Avoid watering during midday sun to prevent drying out. Use rainwater or chlorine-free water to prevent moss damage.
Remove weeds promptly because they compete for moisture and nutrients. Don’t let moss dry out completely while it’s getting established.
Moss does not store much water to survive dry spells. After 2 to 6 months, your moss will look green and dense if conditions are right.
- Gather moss or moss powder from a shady, moist location.
- Mix moss with buttermilk or yogurt and water to form slurry.
- Clean and prepare the stone surface by removing dirt and weeds.
- Apply moss slurry evenly or transplant moss patches onto the stone.
- Keep moss moist by watering with non-chlorinated water regularly.
- Remove weeds that compete for moisture and prevent drying out.
- Be patient; expect moss to start showing growth in six weeks.
Ideal Conditions for Moss Growth on Stone
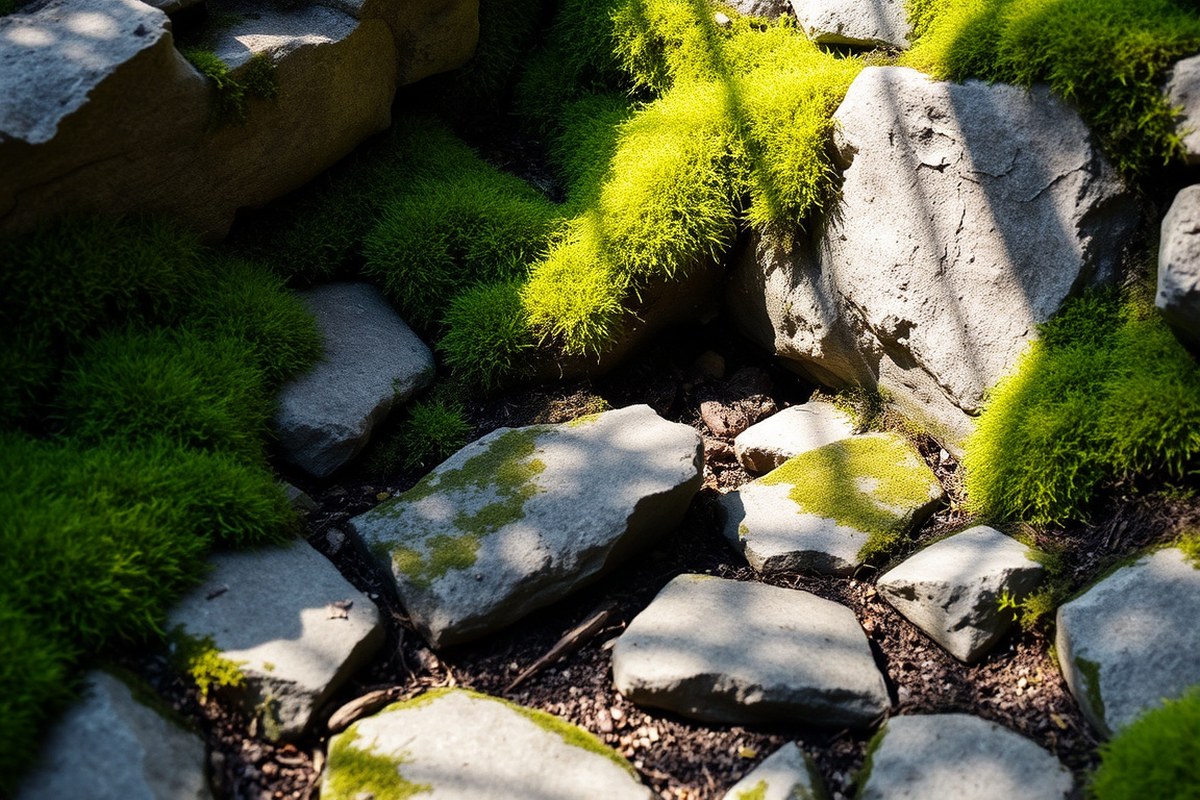
Moss needs cool, moist, and shady spots to grow well on stone. It won’t handle direct sunlight or hot temperatures.
Aim for areas that stay between 55 and 70°F, which helps moss stay healthy and active. Too much heat or sun dries moss out quickly.
Moisture is key. Moss needs consistently damp stones, but not soggy ones. You can water stones during dry spells to keep the moss alive.
Group stones close together and add soil between them to hold extra moisture. Stones like sandstone or limestone soak up some water.
They usually help moss grow better. Granite is denser and dries faster, so moss grows less well.
The stone’s pH matters too. Moss prefers slightly acidic conditions, roughly between pH 5.0 and 6.0. Your stone may be very alkaline, like concrete or marble.
Moss might have trouble sticking and spreading on it. You can add some organic matter around the stones.
Using acidic peat moss also helps to lower pH. This makes a better place for moss to grow.
Place stones in spots protected from strong wind and heavy foot traffic. East- or north-facing walls or shaded garden corners work well. Constant shade reduces drying from the sun and wind, so moss stays moist longer.
Moving stones after moss starts growing can disrupt its hold. So pick a good location and leave them there.
Keep stones moist but avoid puddles. Too much water can kill moss roots or wash them away.
Caring for moss outdoors means checking weather and watering especially during dry weeks. Regular misting or a light spray keeps moss patches alive and green.
You might spot moss growing faster in cooler months with higher humidity. Some moss types, like pleurocarps, grow year-round if you water them well and provide shade.
Choosing the Right Moss Species for Stone Surfaces
Sheet moss, rock cap moss, and cushion moss work best on stone surfaces. They grow well in different climates and stone types. Choosing the right species depends on sun exposure, stone roughness, and moisture levels.
Characteristics of Common Moss Types
Sheet moss spreads flat and creates dense carpets on smooth stones. It thrives in partial shade and moist spots. This moss handles moderate foot traffic but grows slowly on dry stones.
Rock cap moss prefers exposed, rough stone surfaces. It grows in clumps and tolerates more sun than sheet moss. This type is ideal for sunny, dry areas where moisture is limited.
Cushion moss forms round, dense cushions that can hold water well. It grows best on stones with cracks and crevices where water collects. Cushion moss suits shaded, humid climates and acts as a natural sponge.
Suitability of Moss Species by Stone and Environment
Different moss species fit distinct stone textures and garden settings. Smooth, cool stones favor sheet moss.
Rough, weathered rocks suit rock cap moss better. Cushion moss fits stones that trap moisture, like in shaded garden corners.
Select moss based on sunlight the stone receives. Use a mix of sun-tolerant and shade-loving moss to boost success rates.
In dry climates, lean toward rock cap moss. For humid, shady spots, cushion and sheet moss work well.
| Moss Type | Stone Preference | Light Tolerance | Moisture Needs | Growth Habit |
|---|---|---|---|---|
| Sheet Moss | Smooth, flat stones | Partial shade | Moderate | Flat carpet |
| Rock Cap Moss | Rough, exposed stones | Sun to partial shade | Low | Clumping |
| Cushion Moss | Cracked, moisture-holding stones | Shade | High | Dense cushions |
Some moss types don’t do well on hard surfaces like concrete or dry stones. Avoid species needing constant moisture or soft soil beds. Skip moss that grows only on tree bark.
Avoid moss found only on soil too. These types won’t cover stone as you want.
Tips on Sourcing Moss Sustainably
Harvest moss carefully from your garden or local areas without damaging the environment. Take only small patches from multiple spots instead of removing large sections. Check local laws about moss harvesting to avoid fines.
You can also buy moss plugs or sheets from nurseries or garden centres. These sources usually offer species suited for stone growth and sun exposure. Buying helps avoid harming wild moss populations and speeds up your project.
Before applying moss to stone, clean the surface lightly if needed. Dirt doesn’t stop moss from growing but removes algae or debris that compete for space. Securing moss with pins is helpful on vertical or sloped stones for better attachment.
Preparing Stone Surfaces for Moss Growth
Cleaning stone surfaces before growing moss is essential. Dirt, dust, and loose material block moss from attaching firmly.
Use a soft brush and water to remove debris without damaging the stone. Avoid harsh chemicals that could change the stone’s pH or texture.
Rough surfaces help moss rhizoids hold on much better than smooth ones. Lightly scratch your stone with sandpaper or a wire brush first. This helps create tiny nooks on very smooth stone.
Those nooks help moss grow better. These rough spots trap moisture and give the moss roots a better grip. Be gentle to avoid breaking or chipping the stone.
Testing the stone’s pH tells you if it’s moss-friendly. Moss prefers slightly acidic to neutral surfaces with a pH around 5.0 to 7.0. Use an inexpensive soil pH test kit from a garden center.
Moisten a cotton swab on the stone then press onto the test strip. Avoid stones with very alkaline or heavily treated surfaces.
Moisture retention helps moss thrive on stone. Porous stones like sandstone or limestone hold water well. But granite or slate may dry too fast.
Spray the stone often after placing moss to encourage moisture. Do this especially when the stone faces the sun.
Keep the moss damp so it can settle. For vertical stones, use flat rocks or biodegradable pins to press moss firmly against the surface.
- Clean stones with a soft brush and water, no harsh cleaners
- Roughen very smooth stones lightly with fine sandpaper
- Test stone pH using a soil test kit to check acidity
- Choose porous stones or water frequently for moisture
- Press moss firmly on vertical stones using pins or small rocks
- Avoid stones treated with sealers or strong chemicals
- Keep prepared stones shaded to maintain dampness initially
After you prepare the stone, press moss firmly so it stays in close contact. Use flat stones or clean garden staples to hold moss in place on walls.
Check daily for drying and mist often, especially in sunny or windy spots. Freshly cleaned and textured stones can keep moss moist longer, helping it root deeply.
Timing and Growth Expectations for Moss on Stone
Moss on stone usually starts showing growth within six weeks. By then, you should see patches of green thickening if you keep the area moist. It can take 12 to 18 months for moss to spread well across a stone surface.
Full coverage and maximum thickness often need up to two years. Porous stones in direct sun slow moss growth because they dry out too fast. Stones in shady, damp spots encourage moss to grow faster and thicker over time.
Starting to grow moss in spring or fall works best. These seasons have cooler temperatures and more moisture.
Summer heat risks drying moss out. Winter cold can stunt the spread, so avoid planting in harsh weather.
Watch for early signs like small green spots becoming fuzzier and increasing in size. Keep watering gently without heavy sprays that could wash moss away. Patience matters since moss grows slowly and needs steady moisture and shade to thrive.
Too much sun or dry conditions will kill young moss quickly. Keep stones shaded and moist without overwatering.
Common Problems and How to Fix Them When Growing Moss
Moss often grows unevenly or dies off when it doesn’t get the right shade or moisture. Brown or yellow patches usually mean too much direct sun exposure. Moving the stone to a shadier spot helps moss stay green.
You can also place a shade cloth over it during hot afternoons. This keeps the moss healthy and prevents drying out.
Dried out moss is a sign that it needs more water, especially in hot weather. Moss doesn’t have roots and absorbs water through its leaf-like parts. So it dries quickly on exposed stones.
Spray moss with water once daily, or twice if it is very dry. But avoid soaking as moss prefers moist, not soggy, environments.
Weeds can choke moss and stop it from spreading calmly. Removing weeds by hand protects moss better than herbicides, which can harm it. Moss works as a natural weed barrier once it grows thick.
Pull weeds early before moss gets crowded by other plants. This improves your moss’s chances to thrive well.
- Water moss regularly with a gentle mist to keep it moist.
- Place stones in partial shade to avoid sun damage.
- Remove weeds by hand to prevent damage to moss.
- Use a shade cloth for harsh afternoon sun if needed.
- Keep moss free from debris that blocks light and water.
- Check for pests like slugs and gently remove them by hand.
Slugs and snails might nibble on moss but rarely cause lasting harm. Pests on moss should be picked off by hand. You can also use barriers like crushed eggshells around moss patches.
These stop pests from harming your moss. Diseases are uncommon in moss growing on stone.
But poor air flow and excessive moisture can encourage mold. Ensuring enough sunlight a few hours daily helps prevent fungal growth.
Moss may stay patchy even with good care. Check if you chose the right moss species for your climate and stone. Using the wrong moss affects how well it grows.
Some mosses like cooler, humid spots. Others handle drier or sunnier conditions better. Swapping moss or mixing species can solve stubborn growth problems.
Caring for Moss After It’s Established on Stone
Moss needs steady moisture once it grows on stone. But you won’t water it as often.
Mist or soak moss during dry spells, and keep it shaded to hold moisture. Protect it from harsh sun and frost to avoid damage.
Regular Watering and Misting Routines
Water established moss less often than new moss. Mist moss with rainwater or distilled water once or twice a week during normal weather. In dry, hot spells, mist several times a day to keep moss from drying out.
Moss looks dull or feels brittle; soak the stone in water for hours. Avoid flooding stones that don’t drain well, as moss hates standing water. Monitor moss moisture by touch, it should stay damp but not soggy.
Seasonal Care Adjustments
Moss needs more water during summer when temperatures rise above 85°F. Misting early morning or late evening helps reduce evaporation. In cool, humid months, water less since moss gets moisture naturally from rain and mist.
Check moss growth when spring starts. Remove dead parts gently and boost watering if growth slows.
Avoid watering moss during heavy rain to prevent fungus and rot risks. Adjust care based on weather, dry winters call for light watering.
Weed and Debris Management
Keep moss clean by removing leaves, sticks, and dirt regularly. Debris blocks moisture and light, which moss needs. Use a soft brush or your fingers to clear debris without harming the moss.
Weeds compete with moss for moisture and nutrients. Pull weeds out by hand before they root deeply. Avoid herbicides near moss as chemicals can kill moss or harm stones.
- Clear fallen leaves every 2 to 3 days during fall
- Brush off debris gently once a week in spring and summer
- Hand-pull weeds monthly or as you notice them
- Avoid power washing or harsh cleaning products
- Keep pets and foot traffic low near moss areas
Frequent cleaning helps moss stay healthy and green. It also keeps stones looking good by preventing buildup and mold.
Protecting Moss from Sun and Cold Damage
Moss prefers shade and will struggle in full sun. Stones in direct sun over 4 hours need shade cloth or taller shrubs nearby. Hair cap moss can handle sun but still needs water.
In freezing temperatures, moss can dry out and die. Cover moss with burlap or frost cloth during cold snaps under 20°F. Mist moss before frost to boost moisture, which helps protect cells from damage.
Avoid salt or chemical ice melts near moss; they kill moss quickly. Winter is harsh; move potted moss indoors briefly or add mulch for warmth.
Differences in Growing Moss on Horizontal vs Vertical Stones
Moss on flat stones holds moisture better than on vertical surfaces. This helps moss spores settle and grow evenly across horizontal stones. For vertical stones or walls, water runs off quickly, needing you to water moss more often.
Applying a moss slurry works well on flat stones by brushing the mixture evenly. On vertical stones, spread the slurry in thicker coats. Do it in small sections.
This helps the slurry stick better. This helps prevent it from dripping off before the moss can attach.
Some moss species handle vertical growth better. Species like Hypnum or Orthotrichum thrive on walls because they cling tightly. For flat stones, Bryum species work well.
They spread fast in moist soil. They also grow in stone cracks.
| Aspect | Horizontal Stone | Vertical Stone/Wall |
|---|---|---|
| Moisture Retention | High, holds water longer | Low, requires frequent watering |
| Slurry Application | Smooth, even brush strokes | Thicker, section-by-section application |
| Best Moss Species | Bryum, spreading mosses | Hypnum, Orthotrichum, clingy mosses |
| Growth Challenges | Less runoff, may dry from sun | Dripping slurry, high runoff risk |
| Care Needed | Water regularly | Water often, especially after rain |
Moss on horizontal stones often fills cracks naturally. Vertical stones sometimes need moss clumps pressed into holes or crevices. Direct sunlight dries flat stones faster than shaded walls.
So time moss spreading when shade lasts longer. Choose dappled sunlight for either to avoid drying.
Apply the moss slurry early in the day. This helps it stick better. It prevents drying or wind from blowing it away.
After applying, spray vertical stones gently. Use a watering can with a fine spray.
Avoid strong jets that wash moss off. A flat stone benefits from a slow shower to keep moss moist.
Moss slurry slides off if applied too thin on walls. So apply thicker coats carefully.
Vertical stones may need support until moss attaches. Press moss patches firmly into nooks or use non-toxic mesh to hold it while roots form.
Flat stones usually keep moss in place naturally. But avoid heavy foot traffic that damages young moss.
Step-by-Step Action Plan for Growing Moss on Stone
Follow these steps to grow moss on stone confidently. Each step helps you check if you’re on track.
- Before you start: Choose a shady, moist spot and clean the stone well. The surface must be free of dirt and loose debris.
- Day 1: Select moss species suited for your stone type. Gently press moss fragments or moss slurry onto the stone surface.
- Week 1: Keep the moss moist by misting twice a day. Check the moss feels damp but not soaked.
- Weeks 2, 4: Continue watering regularly. Look for tiny green sprouts; that means moss is growing.
- Month 2: Reduce watering to once a day if moss looks healthy and is spreading. Avoid letting moss dry out.
- Month 3 and beyond: Trim surrounding plants that block light or airflow. Moss should cover more stone and look vibrant.
- After 4 months: Inspect for weeds or algae growing with moss. Remove any intruders by hand early.
Frequently Asked Questions
Can I Grow Moss on Stone Without Cleaning the Surface First?
Yes, cleaning the stone is optional. Moss can grow on slightly dirty stones but cleaning helps better adhesion.
How Long Does It Take for Moss to Fully Cover Stone?
Moss usually takes several months to cover stone. Patience is key, and consistent moisture helps speed growth.
What Type of Stone Is Best for Growing Moss?
Porous stones like sandstone hold moisture better and support moss growth. Smooth stones may need more care.
Can Moss Growth Damage Stone Surfaces?
Moss generally does not damage stone but can trap moisture. Make sure to monitor moisture levels to avoid problems.
Is It Possible to Grow Moss on Stone in Full Sun?
Moss prefers partial to full shade. Full sun can dry it out and stop growth.
How Do I Keep Moss Looking Even and Healthy on Stone?
Keep the moss moist and avoid direct sunlight. Regular watering prevents uneven patches and keeps moss healthy.
The Bottom Line
Growing moss on stone takes patience but gives great results. Start today by picking the right moss for your stone. Watch closely to keep moss moist during early growth stages.