How to Replace Garden Hose End: Simple Steps for Fast, Leak-Free Repair
Knowing how to replace garden hose end saves you time and money. First, cut off 2 to 3 inches of the old hose with a utility knife. Then, slide the new hose end fitting on and tighten it by hand or with pliers.
Choosing the right hose end size ensures a snug, leak-free connection. The common size is 3/4-inch hose with matching garden hose thread. Having basic tools like a knife and pliers ready speeds up the process.
Replacing a hose end usually takes under 30 minutes with the right parts and prep. Watch out for jagged hose edges to avoid a poor seal. Smooth cuts and clean surfaces make for a reliable fit and no drips.
Key Takeaways
- Always cut 2 to 3 inches off the hose to remove damaged ends.
- Choose a 3/4-inch hose end to match standard garden hoses.
- Use a sharp utility knife for a smooth cut on the hose.
- Tighten the new hose end by hand, then firm with pliers if needed.
- Check for leaks by turning on water after attaching the new end.
- Keep basic tools nearby: utility knife, pliers, and replacement hose end.
How to Replace a Garden Hose End Step by Step

Replacing a garden hose end means cutting off the damaged part. Then attach a new fitting tightly. Make sure the new end fits snugly.
You start by preparing the hose, then remove the old end. Finally, slide on the new hose end and secure it tight.
Preparing the Hose for Replacement
Begin by cleaning the hose end to remove dirt or debris. This helps the new fitting slide on smoothly and form a tight seal. Use a sharp utility knife to cut off 2 to 3 inches.
Keep the cut straight and neat. This helps the new end fit well.
A straight cut avoids leaks and helps the fitting fit properly. Make sure the hose is dry before cutting to get a clean edge. A rough or angled cut can cause the new end to slip or not seal well.
Removing the Damaged Hose End
Disconnect the hose from any water source to avoid leaks. Use a utility knife to cut through the old hose end if it won’t slide off. This usually means removing 2 to 3 inches just beyond the damaged fitting.
When the old end won’t come off easily, cut further back. Keep cutting until the hose end separates cleanly.
Avoid tearing or crushing the hose tubing. Some hose ends require releasing clamps or unscrewing parts before you can remove them.
Attaching the New Hose End
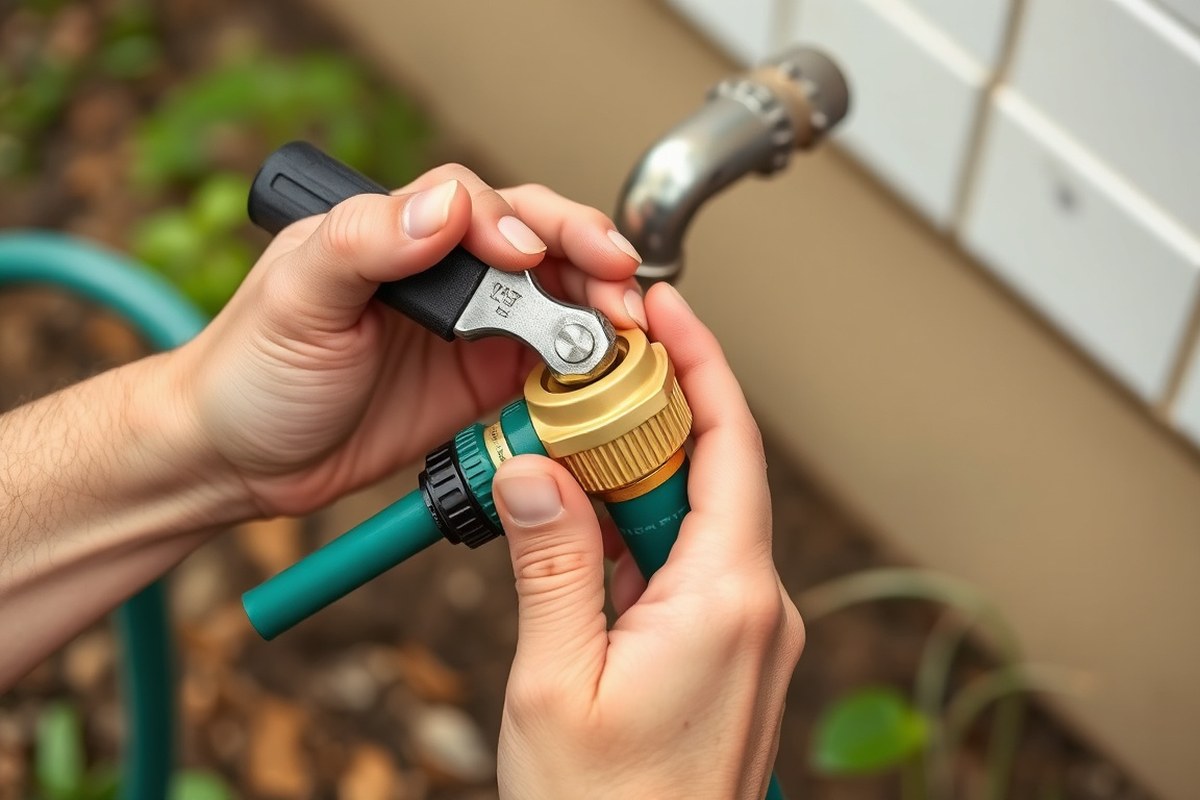
Push the new hose end onto the freshly cut section firmly. Tighten any clamp or crimp ring the fitting has. Use pliers or a screwdriver to tighten, but don’t overdo it.
Make sure the hose and fitting join close with no gaps. A loose fit can cause leaks once water flows. Turn on the water and check the connection for leaks.
Follow these steps to replace your garden hose end properly:
- Turn off the water supply and disconnect the hose.
- Clean the damaged hose end for better cutting and fitting.
- Cut off 2 to 3 inches of the damaged hose end with a sharp knife.
- Remove the old hose end fitting by sliding or cutting it off.
- Take the hose end to match it at a garden supply store.
- Slide the new hose end onto the cut hose, ensuring a tight fit.
- Tighten the clamp or crimp ring securely with a tool.
- Reconnect the hose and turn on water to check for leaks.
What Tools and Materials Are Needed for Replacement

Replacing a garden hose end requires just a few simple tools and materials. Having the right supplies ready speeds up the job and avoids frustration. You want a fitting that matches your hose diameter exactly for a tight, leak-free seal.
Before starting, check that the hose diameter is standard, typically 5/8 inch or 3/4 inch. Buy a replacement hose end that fits this size. Make sure it works with your faucet or nozzle thread type.
A new hose end usually costs between $3 and $15. It’s a cheap fix compared to buying a whole new hose.
- Replacement hose end fitting matching your hose size
- Hose cutter or sharp utility knife for a clean cut
- Adjustable wrench or slip-joint pliers for tightening
- Thread seal tape (plumber’s tape) to prevent leaks
- Rag or cloth to clean the hose end before attaching
- Bucket or towel to catch water during the swap
Cutting the hose cleanly matters a lot. A jagged or crushed cut can cause leaks or make the fitting slip off.
Use a hose cutter or a sharp utility knife, slicing straight across the hose end. Wipe the cut edge with a rag to remove dirt or debris.
Wrap a few layers of thread seal tape around the fitting’s threaded part. Do this before screwing it onto the hose end. This tape helps block small gaps and keeps water from dripping.
Tighten the fitting by hand first. Then use pliers or a wrench to snug it the rest of the way. But don’t over-tighten or you might damage the threads.
Keep the work area dry. Grip the hose firmly to avoid slipping while tightening the new hose end.
How to Identify When Your Garden Hose End Needs Replacement
Checking your garden hose end for damage is easy and important. Start by examining the connection where the hose meets the fitting. Look for cracks in plastic or metal parts.
These can let water leak out. Check carefully under pressure.
Corrosion or rust on metal fittings means the hose end won’t seal properly. This happens after years of exposure to water and weather.
Cracks or breaks in the fitting usually get worse with use. These signs mean replacing the hose end will save you from leaks and water waste.
- Visible cracks or breaks in the fitting or hose end
- Rust or corrosion on metal parts
- Leaks where the hose connects to the fitting, noticed under water pressure
- Hose end feels loose or wobbly when attached
- Threads on the fitting are stripped or damaged, causing poor seals
- Water sprays irregularly or spurts from the connection point
Regularly inspect your hose ends, especially before heavy watering seasons. You usually pay less to replace these parts than get a new hose. A tight, new hose end stops leaks right away.
Damaged parts let water drip slowly. Fixing the end stops leaks immediately. Doing this extends the life of your hose and saves water.
Some hoses have uncommon sizes or thread types. But most common garden hoses use standard fittings that fit replacement ends easily. Don’t ignore leaks or loose ends on the hose.
They can damage the hose body over time. Act quickly to avoid bigger problems. Fixing the hose end promptly keeps the whole hose working well through many seasons.
Choosing the Right Hose End Fitting for Your Hose
Most garden hoses use 3/4-inch fittings. But you should check the size on your hose before buying a replacement end.
Hose ends come in several types and thread standards, which affect compatibility. Matching your hose diameter and thread type avoids leaks and connection issues.
Common Hose End Types and Their Uses
Threaded connectors are the most common hose ends. They screw onto the hose and fittings to create a tight seal.
Quick-connect couplers let you snap the hose on and off fast without twisting. These save time but may wear out faster.
Push-fit fittings offer simple installation and work well for smaller hoses or temporary setups. They don’t require tools for attachment.
Standard Sizes and Threads Explained
Garden hoses typically use a 3/4-inch diameter for fittings but sizes can vary. It’s best to measure your hose’s internal diameter.
The most usual thread is the Garden Hose Thread (GHT), 3/4-inch diameter with 11.5 threads per inch. It’s pretty much a universal size in the US.
Some hoses follow international standards like Swedish Metric Standard. These include SMS 32 or SMS 63 types.
Others use UK round thread standards. These sizes are for specialized uses.
| Hose Size / Standard | Diameter (inches) | Thread / Notes |
|---|---|---|
| Standard Garden Hose (GHT) | 3/4 | 11.5 threads/inch, common US hose thread |
| Swedish Metric Standard (SMS) | 1.25 (32mm) or 2.47 (63mm) | Used mostly in Europe |
| UK Fire Hose | 1.5 to 3 | Round thread, 3 threads/inch |
| Spanish Barcelona Coupling | 1 to 2.75 | Sexless coupling, sizes 25, 45, 70 mm |
| UNI Fire Fittings (Italy) | 1 to 2.75 | UNI 25, 45, 70 standard sizes |
Checking your hose’s exact size and thread type prevents buying the wrong hose end. For normal garden hoses, 3/4-inch GHT works almost always.
Choosing Between Metal and Plastic Fittings
Metal fittings last longer and resist cracking better than plastic. They handle rough use and sun exposure well.
Plastic fittings cost less and weigh less but can break more easily, especially in cold weather. They still work fine for light-duty use.
Most metal and plastic fittings are compatible with each other. Choose the material based on how tough your garden work is.
Troubleshooting When the Old Hose End Won’t Come Off
Old garden hose ends can get stuck from rust, dirt, or tight fittings. Trying to force them off might damage the hose or cause leaks. Using the right approach helps you save the hose and avoid extra costs.
Start by spraying the connection with a penetrating lubricant. Let it soak for 10 to 15 minutes to loosen rust and debris.
Try warming the metal with a hairdryer when the hose end won’t move. Heat expands metal slightly, making removal easier without damage.
Sometimes twisting the hose end by hand isn’t enough. Using tools gently can help. But avoid hammers or pliers that pinch or flatten the hose.
Instead, try a strap wrench or an adjustable wrench with padded jaws. These tools grip firmly while protecting the hose surface.
- Apply penetrating oil and wait 10, 15 minutes before trying again
- Use a hairdryer to warm the metal fitting for 3, 5 minutes
- Grip with a strap wrench or adjustable wrench padded with cloth
- Twist gently back and forth instead of forcing in one direction
- Cut the hose end cleanly if all else fails, preparing for a new fitting
- Keep tools steady to avoid bending or crushing the hose material
Some hoses have plastic or brass ends that can crack if forced. Here, warming or lubricating is even more important.
Avoid using metal wrenches on a frayed or weak hose jacket end. Instead, support the hose with a firm hand or use a hose clamp for grip.
Don’t use excessive force or metal pliers directly on hoses; you risk permanent damage.
None of these tips work? Cut off the damaged section to be safe. Use a sharp pair of scissors or a hose cutter.
They give a clean edge. This prepares the hose for the new end. This method avoids risk to the hose body and saves you time that struggling would waste.
Testing and Adjusting the New Hose End for Leaks
To check your new garden hose end for leaks, reconnect it to your water supply. Turn on the water. Watch for any leaks at the connection point.
Watch the connection points closely. Spot any dripping or water spray? Take action to fix it before use.
Initial Water Pressure Test
Start by slowly turning on the water supply. This prevents a sudden surge that can cause leaks or loosen fittings. Watch the hose end and its joints carefully to catch any signs of leaking.
Make sure the hose is pressurized enough to seal the connection. Low water pressure can cause leaks because some fittings rely on pressure for a proper seal. Keep an eye out for drops or wet spots around the hose end.
Tightening Clamps or Fittings
Leaks during your pressure test? Check the hose clamps and fittings first.
Loose fittings often cause leaks that are easy to fix. Use a screwdriver or wrench as needed to tighten them securely.
Don’t overtighten clamps or fittings. Too much force can damage the hose or fittings.
Tighten until snug and then test again to see if the leak stops. This step usually solves most small leaks quickly.
Replacing Faulty Seals or Washers
Leaks can happen if rubber washers are damaged or missing. O-rings inside the hose end can cause leaks too. Check these parts carefully.
These seals block water from escaping at the fitting joints. Always inspect these parts before reinstalling the hose end.
Replace any worn or cracked washers with new ones of the exact size. Suction hoses use special gaskets to prevent air leaks. These gaskets differ from those on regular garden hoses.
Use the correct ones for best results. After swapping seals, retest the hose to confirm no leaks remain.
Follow these steps to test and fix leaks on your new garden hose end:
- Reconnect the hose to the water supply.
- Slowly turn on the water while watching the new hose end.
- Look carefully for any water dripping or spraying.
- See leaks? Turn off the water. Then check clamps or fittings carefully.
- Tighten loose clamps or fittings with a screwdriver or wrench.
- Inspect the rubber washers or o-rings for damage.
- Replace any faulty seals with new ones matching the hose size.
- Turn water on again and make sure no leaks occur before use.
How to Prevent Future Damage to Garden Hose Ends
Protecting your garden hose ends means handling them gently and storing them wisely. Twisting or bending hose ends too sharply wears out the connectors and can cause leaks. Keep the ends clear of dirt and debris to prevent corrosion and rust over time.
Drying your hose before storage helps avoid mold and mildew buildup on the ends. Leaving your hose out in the sun can cause damage. It also cracks easier if freezing temperatures hit it.
This weakens the hose and shortens its life. Storing your hose away from sharp objects or heavy tools prevents accidental damage to the fittings.
- Drain water from the hose after each use
- Coil the hose loosely, avoiding tight bends at the ends
- Store the hose in shade or indoors during winter
- Use a hose reel or hanger to prevent kinks
- Clean hose ends regularly with a soft cloth
- Apply a silicone-based lubricant to metal fittings once a season
Coiling the hose properly saves space and reduces stress on the ends. A hose reel costs around $30 to $60 but helps keep your hose ready for use. Regular cleaning and lubrication cost very little but can add months to the hose’s life.
Ignoring these steps can cause leaks or broken ends, meaning repairs or replacements sooner. These damages often show as drips near the connectors or cracks you can see. Following care tips you avoid wasting time and money while your outdoor watering stays smooth.
When to Call a Professional for Hose End Replacement
Most garden hoses and ends are simple enough for you to replace on your own. You should consider calling a professional if your hose has special fittings or internal swaging. These connections often appear on heavy-duty or fuel oil hoses.
They need precise tools. You should have experience to avoid leaks.
Repeated failures with hose ends may also mean professional help is needed. You replaced the end more than twice.
The leak or loose fitting may come from hose damage. A pro can check for internal wear or recommend replacing the whole hose.
Look for signs like corrosion, cracking, or very tight industrial fittings before deciding. Professionals usually charge between $50 and $100 to replace complex hose ends, depending on the job. This can save you time, avoid water waste, and prevent bigger problems.
Using a wrench too hard can break a damaged hose fitting. Special fittings are fragile. Get help if unsure.
Step-by-Step Action Plan to Replace Your Garden Hose End
Follow these steps to change a hose end fast. You’ll get your garden hose working like new again.
Just do these simple tasks. Check after each step to see if you’re on the right track.
- Before you start: Gather pliers, a replacement hose end, a knife, and Teflon tape. Having all tools ready prevents delays.
- Step 1: Cut off the damaged end straightly using a sharp knife. Inspect the cut end for smoothness to ensure a good seal.
- Step 2: Wrap Teflon tape tightly around the hose’s threads to avoid leaks. Make sure the tape covers the threads fully and evenly.
- Step 3: Push the new hose end onto the cut hose firmly. You should feel it fit snugly without gaps or bends.
- Step 4: Tighten the hose end with pliers but avoid over-tightening, which can crack parts. The fitting should be secure and hold still when you tug gently.
- Step 5: Turn on the water slowly and watch for leaks at the new end. No drips or moisture means the job is done right.
- After one week: Check the hose end for any signs of loosening or small leaks. Fix or tighten the fitting if you see moisture or movement.
Frequently Asked Questions
Can I Replace a Garden Hose End Without Removing the Old One?
No, you must remove the old hose end first. Use a utility knife to cut 2-3 inches off the hose before attaching a new end.
What Size Hose End Should I Buy for My Garden Hose?
Buy the hose end that matches your hose diameter. Most garden hoses use 3/4-inch size with Garden Hose Thread (GHT).
How Do I Avoid Leaks After Replacing a Hose End?
Check the o-ring inside the new hose end first. Tighten the fitting well and test it under water pressure for leaks.
Can I Use Metal Hose Ends Instead of Plastic Ones?
Yes, metal ends work but they can corrode faster. Plastic click-on types avoid rust and offer easier, safer connections.
Is It Normal for the Hose End to Stick or Be Hard to Remove?
Yes, old hose ends can stick due to dirt or corrosion. Use lubricant or carefully cut the hose to remove the old end.
Why Does My New Garden Hose End Keep Disconnecting?
Your hose end might not be the right size or damaged. Double-check the fitting match and replace worn parts for a secure hold.
Final Thoughts
Replacing your garden hose end saves money and keeps your hose working well longer. Make sure you test for leaks to avoid wasted water. Grab your tools and fix that hose end today.