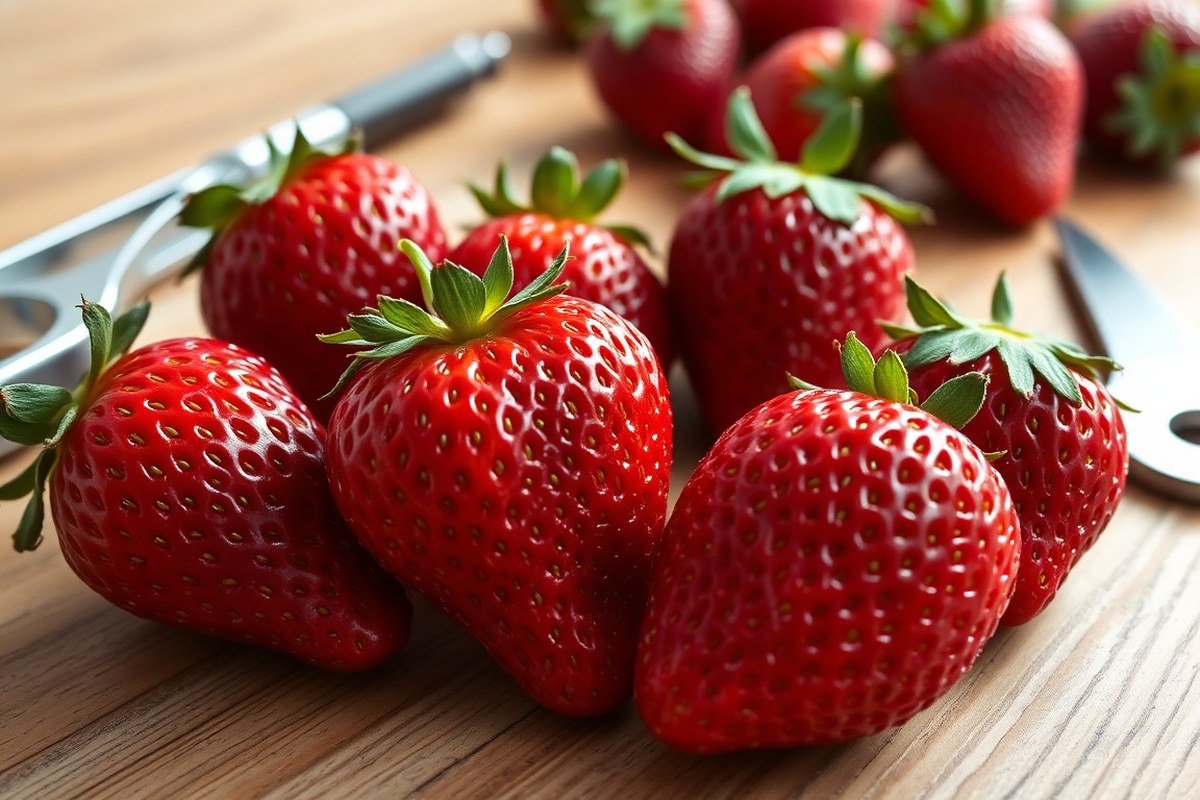
How to Remove Seeds from Strawberries: 8 Methods That Really Work
Wondering how to remove seeds from strawberries quickly and easily? The best way is to hull the strawberries first. Then use a small knife or fork to scrape off the tiny seeds.
This simple method works well because the seeds sit on the fruit’s surface. Using a pointed tool helps target the seeds without damaging the berry’s flesh.
Start by washing your strawberries and removing the green tops. Then gently rub or scrape the seeds off without wasting too much of the flesh.
You’ll notice the fruit texture stays mostly intact this way. Taking your time will prevent squishing the berries and keep them looking fresh for serving.
To keep the strawberry flavor, avoid harsh tools. Don’t soak the berries too long either.
A light touch ensures the seeds come off cleanly and the strawberries stay tasty. Also, drying them gently with a towel after washing helps maintain their firmness.
Key Takeaways
- Wash and hull strawberries before attempting seed removal.
- Use a small knife or fork to scrape seeds from the surface.
- Rub gently to avoid damaging the fruit flesh.
- Freezing strawberries first can ease seed removal without flavor loss.
- For juices, strain purees to separate seeds efficiently.
- Dried seeds can last six months if kept dry for planting.
1. Quick Methods to Remove Strawberry Seeds at Home

Removing seeds from strawberries can be quick and simple with a few easy tools. You can use a spoon, a huller, or a drinking straw. Choose the tool based on your need and how whole the fruit stays.
Each works differently depending on what you want. Each method works without bruising the berry too much and takes just a few minutes.
Using a Spoon or Toothpick
This is a gentle way to scrape tiny seeds off strawberries without crushing them. Use a small spoon or toothpick to work carefully on the surface. This keeps the strawberry’s shape and texture intact.
It’s great for detail work. It’s perfect when you want the berries mostly whole for salads or desserts.
- Hold the strawberry with the pointed end facing up.
- Use a teaspoon or toothpick to gently scrape the seeds off.
- Move around the berry, collecting seeds in a bowl or on parchment.
- Rinse the strawberry gently if needed, then pat dry.
This method takes about 2 to 4 minutes for several berries. It’s slow but keeps the fruit unbruised. Avoid pressing too hard, or you might mash the strawberry.
Employing a Strawberry Huller or Apple Corer
A strawberry huller or apple corer quickly removes seeds and the stem area. This works best if you plan to mash the strawberries later or use them in smoothies. The tool pulls out a core that often contains the seeds, saving manual scraping time.
- Place the strawberry on a cutting board stem side up.
- Position the huller or corer around the stem and seeds area.
- Push the tool down to extract the core and attached seeds.
- Discard the extracted core before preparing the remaining fruit.
- Repeat for all strawberries you want to deseed.
This method takes only a minute or two for a dozen berries. It’s simple and affordable, with hullers costing around $5 to $10 online. The fruit will stay mostly intact except for the small hole where the core came out.
Using a Drinking Straw to Pop Out Seeds
A drinking straw quickly pushes seeds through the strawberry. This works well for smoothies or cooking. Appearance matters less in these cases.
The straw acts like a tiny pusher, cutting through seeds inside the fruit. This approach is fast and doesn’t require special tools.
- Choose a sturdy plastic straw about 6 to 8 inches long.
- Hold the strawberry firmly with the pointed end down.
- Place the straw at the top, near the stem.
- Push the straw straight through to the bottom of the berry.
- Remove the straw and discard the core with seeds inside.
- Repeat until all strawberries have been cleared of seeds.
Each strawberry takes about 10 seconds this way. The berry ends with a hollow core but retains most of its flesh. This method suits recipes like smoothies where the seedless texture matters most.
2. Removing Seeds from Strawberry Purees and Juices
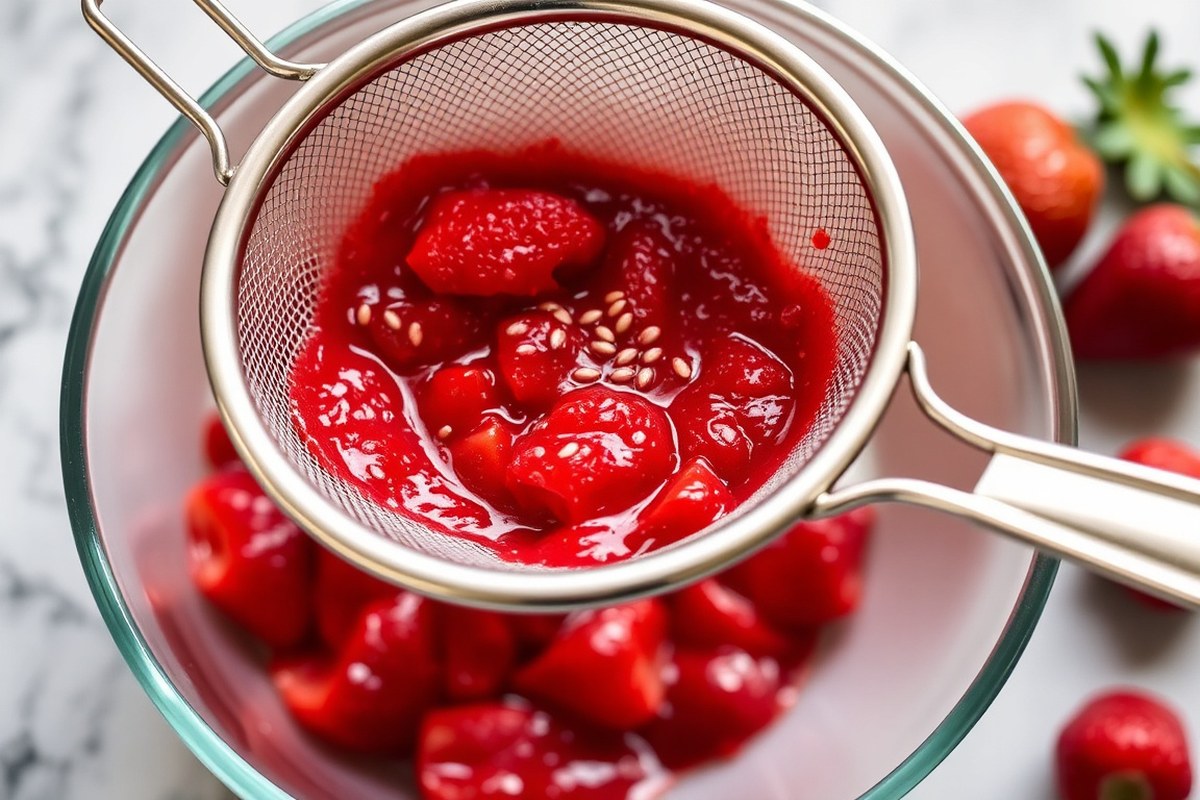
Removing seeds from strawberry purees or juices makes the texture smoother and better for recipes. You can strain seeds out using fine mesh sieves or a food mill. Soaking the strawberries briefly helps loosen seeds without making the puree too watery.
Straining with Fine Mesh Sieves
A fine mesh sieve works well to filter seeds from puree. It catches most of the pulp and juice too. This makes the puree smooth and seed-free.
Use one that fits your bowl snugly to avoid spills and mess. Adjusting the mesh size helps keep seeds separated without losing too much pulp.
- Place the sieve over a clean bowl to catch the puree.
- Pour the strawberry puree slowly into the sieve.
- Use the back of a spoon to press the puree gently.
- Work in small batches to avoid clogging the sieve.
- Rest the puree in the sieve for 2 to 3 minutes to let juice drain.
- Scrape seeds stuck to the sieve’s edges into a separate bowl.
- Discard collected seeds or set aside if you need them for planting.
Switch to a sieve with a slightly larger mesh if the fine one clogs easily.
Using a Food Mill for Large Batches
A food mill can quickly separate seeds from larger batches of strawberry puree. It works by pressing the fruit through a perforated disc, leaving seeds behind. Pick a disc with holes small enough to keep seeds out.
At the same time, the holes should be large enough to keep pulp. This helps keep the right texture.
- Prepare fresh or thawed strawberries, removing stems and leaves.
- Place strawberries in the food mill top chamber.
- Turn the crank steadily, pressing berries through the disk.
- Collect the smooth puree in a bowl below.
- Inspect the leftover seeds and discard them.
- Repeat until all the puree is passed through.
Make sure the sieve disc is intact and taut to prevent seeds slipping through.
Soaking and Rubbing Techniques
Soak strawberry puree in cold water for up to 5 minutes. This loosens the seeds without making the juice too thin. It helps separate seeds nicely.
Avoid soaking longer than 10 minutes because the puree becomes watery and loses flavor. Gentle rubbing after soaking helps release seeds but press immediately to keep puree thick.
- Place puree or crushed strawberries in a bowl.
- Add a splash of cold water, just enough to cover the seeds.
- Let the mixture soak for about 5 minutes.
- Rub the mixture gently with your fingers to loosen seeds.
- Pour the mixture through a fine mesh sieve.
- Press the pulp briefly with a spoon to extract juice.
- Discard floating seeds that rise to the surface.
Do not soak puree longer than 5 to 7 minutes. Too much soaking thins the texture.
3. How to Prepare Strawberry Seeds for Planting
To prepare strawberry seeds for planting, first collect mature seeds. Then, clean off all fruit pulp. Finally, treat the seeds to boost germination.
You also need to store seeds properly if you won’t plant them right away. These steps help ensure healthy seedlings within a few weeks.
Extracting and Cleaning Seeds
Take ripe strawberries and separate the seeds carefully. The seeds sit on the outside of the fruit, making it easy to collect them.
Use cold water to rinse the seeds thoroughly. This removes the fruit pulp, which could cause mold or rot during germination.
- Pull apart the strawberries gently to loosen the seeds.
- Place the seeds and pulp mixture in a fine sieve.
- Rinse under cold running water to wash away the pulp.
- Use your fingers or a soft brush to help separate stubborn pulp.
- Spread seeds on a paper towel to dry for a day or two.
Stratification and Soaking Process
Strawberry seeds need a cold treatment called stratification to start germinating. This simulates winter conditions the seeds would experience outdoors.
After stratifying, soak the seeds in warm water to trigger sprouting. This step speeds up germination and improves the success rate.
- Place dry seeds in a damp paper towel inside a plastic bag.
- Put the bag in the refrigerator at 33 to 41 °F for 2 to 4 weeks.
- Remove seeds and soak them in warm water at 70 to 75 °F for 12 hours.
- Drain seeds before planting.
Planting and Caring for Seedlings
Sow strawberry seeds on the soil surface and press lightly. Cover them with a thin, fine layer of soil or vermiculite, about 1/8 inch thick.
Keep the soil moist but not soaked. Maintain temperatures between 60 and 75 °F for germination over 2 to 6 weeks.
Space seed trays or pots 1 to 2 inches apart. This gives seedlings enough room to grow well. After germination, gradually move seedlings to brighter light.
4. Choosing the Best Seed Removal Method for Your Needs
Choosing the right method to remove seeds depends on your strawberry quantity and goal. For small batches or fresh eating, using a small spoon or silicone spatula works well. This method keeps most juice and flavour intact but takes time for many strawberries.
For purees or juices, methods that mash or strain berries remove seeds quickly and in bulk. They tend to lose some juice but give a smooth texture for cooking or drinks. Seed removal for planting calls for careful extraction to keep seeds whole and viable.
| Method | Best For | Tools Needed | Seed Removal Detail | Effect on Juice/Flavor |
|---|---|---|---|---|
| Small Spoon or Silicone Spatula | Small quantities, fresh eating | Small spoon, silicone spatula | Scoop seeds out carefully, preserves berry shape | Preserves most juice and flavor |
| Cutting and Picking | Medium quantities, preparing seeds for planting | Paring knife, toothpick | Cut around seeds, pick with toothpick | Keeps seeds intact for planting, slight juice loss |
| Pureeing and Straining | Large batches for sauces, juices | Blender, fine sieve or chinois | Blend berries, strain out seeds | Some juice and flavor lost, smooth texture |
| Freezing and Rubbing | Large amount, easy seed release | Freezer, cloth or hands for rubbing | Freeze berries, rub seeds off skin | Good juice retention, works well on heirloom types |
For quick, tasty fresh strawberries, scooping seeds by hand works best. It lets you keep the berry’s juice and texture with minimal waste.
Large batches for cooking suit pureeing and straining. Pureeing breaks down berries, and straining pulls out seeds but leaves some juice behind.
When saving seeds for planting, avoid crushing. Cut around seeds and remove carefully with a toothpick to keep them alive. Frozen berries help loosen seeds quickly.
They save time too. This works well with berries that have big or many seeds. Pick your method based on quantity and final use for best results.
5. Why Strawberry Seeds Are on the Outside and What It Means
Strawberry seeds are actually the tiny yellow or brown spots you see on the fruit’s surface. Botanically, those spots are called achenes, and they each contain a single seed inside. Unlike most fruits that hide seeds inside, strawberries show them outside.
The tiny seeds are called achenes. The red part is actually a swollen flower stem, the receptacle.
This outside placement happens because the red part of a strawberry isn’t a true fruit. Instead, the real fruits are the achenes themselves. Each achene grows from a different ovary in the flower.
That’s why seeds spread unevenly over the surface. They don’t follow any specific pattern.
The seed placement means you can remove seeds without cutting deep into the flesh. Since achenes sit on top, gently scraping or brushing them off can work. When the strawberry is ripe and soft, seeds may stick more tightly.
Sometimes they sink just a bit into the fruit. That can make them harder to remove.
To get the seeds off, use a small knife, toothpick, or even a fine brush. Run it carefully along the surface while holding the strawberry steady. Don’t press too hard on the fruit while removing seeds.
Too much pressure can squash the soft strawberry. This might turn it mushy or cause juice to spill.
Since each achene varies in firmness, removing all seeds evenly can take time. It’s easier with firmer berries, as the seeds are less integrated into the flesh.
Very ripe berries may shed seeds less easily. So peeling or processing into purees might be better for seed removal in those cases.
Use gentle strokes with a dull knife or a clean toothbrush to avoid squashing the strawberry.
The seeds you remove are true seeds inside the achenes. But strawberries also contain many tiny, undeveloped seeds inside the flesh.
Those are usually too small to notice or remove. Most recipes benefit from removing the outer achenes to improve texture and avoid gritty bites.
Knowing the seed placement helps you decide how deep to work and which tool to use. For fresher, firmer strawberries aimed at eating fresh, carefully scraping seeds can keep the fruit intact. To remove seeds in jams or jellies, break the whole berries down first.
Then use a strainer or sieve to catch the seeds. This method removes seeds more completely.
6. Tips to Avoid Common Mistakes When Removing Seeds
Applying too much pressure with your spoon often bruises strawberries. This releases bitter juice that worsens the fruit’s flavor. Using a dull spoon is another common error that makes seed removal slow and messy.
Strawberry seeds cling tightly because of the pulp around them. This pulp acts like glue, so seeds won’t come out easily. Let the fruit ripen fully.
This softens the pulp a lot. Seeds come out easier without tearing the berry.
- Use a small, sharp spoon like a melon baller or grapefruit spoon.
- Gently scoop just under the seed without pressing hard on the fruit.
- Choose ripe or slightly mushy strawberries for easier seed release.
- Work slowly to avoid wasting juice or damaging berry flesh.
- Rinse your spoon often to remove sticky pulp build-up.
- Chill strawberries first; cold fruit holds together better when scooping.
Pressing gently keeps the pulp mostly intact and reduces juice loss. A sharp spoon slices cleanly between seed and pulp, lifting seeds with less fruit caught. Rinsing the spoon stops pulp from gumming up and pulling seeds back into the berry.
Keeping strawberries cold firms the fruit, so seeds pop out more easily. Use fully ripe berries for best results. The pulp loosens around seeds.
This helps cut down on tearing and tugging. These methods make seed removal smoother and keep the fruit looking fresh.
7. How Freezing Strawberries Helps Seed Removal
Freezing strawberries makes seed removal easier without losing much flavor. The cold firms the fruit, so seeds loosen when you rub them off. This method works best if you plan to use the strawberries later for cooking or smoothies.
Prepare the berries by rinsing and drying them first. You want them clean but dry so they freeze quickly and evenly.
Freeze the strawberries for at least 4 hours or until solid. Overnight is fine too.
- Freeze the strawberries: Place clean, dry berries in a single layer on a baking sheet. Freeze for 4 to 12 hours until fully hard.
- Transfer to a bowl: Put the frozen berries into a large bowl for rubbing.
- Rub gently: Use your hands or a clean towel to rub the berries. This loosens the seeds from the surface without breaking the flesh too much.
- Remove loosened seeds: Tilt the bowl and pour out water along with floating seeds. Repeat rinsing if needed.
- Inspect berries: Check for any remaining seeds and remove these by hand if needed.
- Thaw gently: Let berries thaw in the fridge or under cool running water if using soon.
Frozen strawberries keep most of their fresh flavour after thawing. The texture changes slightly, becoming softer but still good for sauces or drinks. If you want firmer fruit for salads, avoid freezing first.
This cold rubbing way helps separate seeds easily but may remove some juice along with seeds. It’s best to handle berries carefully during rubbing.
You don’t have to spend money on special tools. Your hands or a kitchen towel work fine.
8. Storing and Using Deseeded Strawberries
After removing seeds from strawberries, you can use them right away or store them for later. Keep them in an airtight container to avoid moisture loss. Put the container in the refrigerator, where strawberries stay fresh for about 2 to 3 days.
Seedless strawberries don’t last much longer than those with seeds. The seeds don’t cause spoilage, so removing them won’t significantly extend shelf life. Their freshness still depends on proper storage and handling after seed removal.
Use seedless strawberries to improve the texture of soft dishes. Smooth jams, sauces, or smoothies benefit most. Recipes where a uniform, seed-free mouthfeel matters get better results with deseeded fruit.
- Store deseeded strawberries in a clean, airtight container.
- Refrigerate immediately and use within 2 to 3 days.
- Use seedless berries in jams or fruit sauces for smooth texture.
- Add deseeded strawberries to smoothies for a creamier blend.
- Include them in desserts like panna cotta or mousse for a fine mouthfeel.
- Freeze deseeded strawberries pressed flat on trays, then bagged for longer storage.
Seal the container tightly to keep out unwanted moisture and odors. Using seedless strawberries in baking can cause less gritty texture, especially in pies and tarts. When freezing, spread the fruit so they freeze evenly without clumps forming.
Remove all seeds gently to avoid bruising; bruises cause faster spoilage.
Your Step-by-Step Action Plan to Remove Seeds from Strawberries
Follow these clear steps to remove strawberry seeds effectively. Each phase helps you check your progress quickly.
- Before You Start: Choose fresh, ripe strawberries for easier seed removal and better taste.
- Day 1: Wash strawberries under cold water and pat dry to remove dirt and debris.
- Day 1: Use a small paring knife or huller to remove seeds. Do this gently so you don’t damage the fruit’s surface.
- Day 1-2: Blend strawberries to make juice or puree. Then strain through a fine mesh sieve. This catches loose seeds.
- Day 2: Freeze whole strawberries if you want to soften them for easier seed removal later.
- Day 3: Rinse and dry collected seeds carefully before preparing them for planting.
- Within 1 Week: Store deseeded strawberries in airtight containers. Keep them in the fridge or freezer. Use them later.
- After 1 Week: Test a few seeds by sprouting them on moist paper towels. Check seed viability before planting.
Frequently Asked Questions
Is It Safe to Eat Strawberries with Seeds?
Yes, strawberry seeds are safe to eat and common in fresh berries. Some people remove seeds to reduce texture problems or choking risks.
The seeds are edible. They also have fiber.
Can You Take Seeds from a Strawberry and Plant Them?
You can plant strawberry seeds taken from the fruit. But it’s tricky to do without damage. Clean the seeds first, then follow germination steps carefully for best results.
How Long Does It Take for Strawberries to Go from Seed to Fruit?
Strawberry seeds typically germinate in 2 to 6 weeks. After germination, it usually takes several months more for plants to grow and produce ripe fruit.
Why Do Some Strawberries Have Protruding Seeds?
Protruding seeds happen when the strawberry’s surface grows unevenly during ripening. The seeds make the fruit bumpy. They stick out instead of lying flat.
Can Soaking Strawberries Make It Easier to Remove Seeds?
Yes, soaking berries briefly softens the fruit and loosens seeds. Rinse under cold water afterward to wash away released seeds for cleaner strawberries.
Does Removing Seeds Change a Strawberry’s Taste or Texture?
Removing seeds slightly changes texture by making it smoother. But flavor mostly stays the same. Seed removal is best for recipes needing soft consistency like purees.
Before You Go
Removing seeds from strawberries improves your recipes and helps you start new plants. Try removing seeds using a knife and then straining a puree to see what feels easier. Grab some fresh strawberries now and give it a quick try yourself.