How to Do Soil Analysis: A Complete Guide for Accurate Testing and Better Crops
Learning how to do soil analysis starts with collecting a good sample. Take soil from where plant roots grow, usually 6 to 8 inches deep. Mix samples from a few spots to get a clear picture of your soil’s health.
Use a clean tool to dig each spot and remove debris like leaves or stones. Combine at least five samples in a clean bucket for a mixed sample. This mix represents the average soil condition across your garden or field.
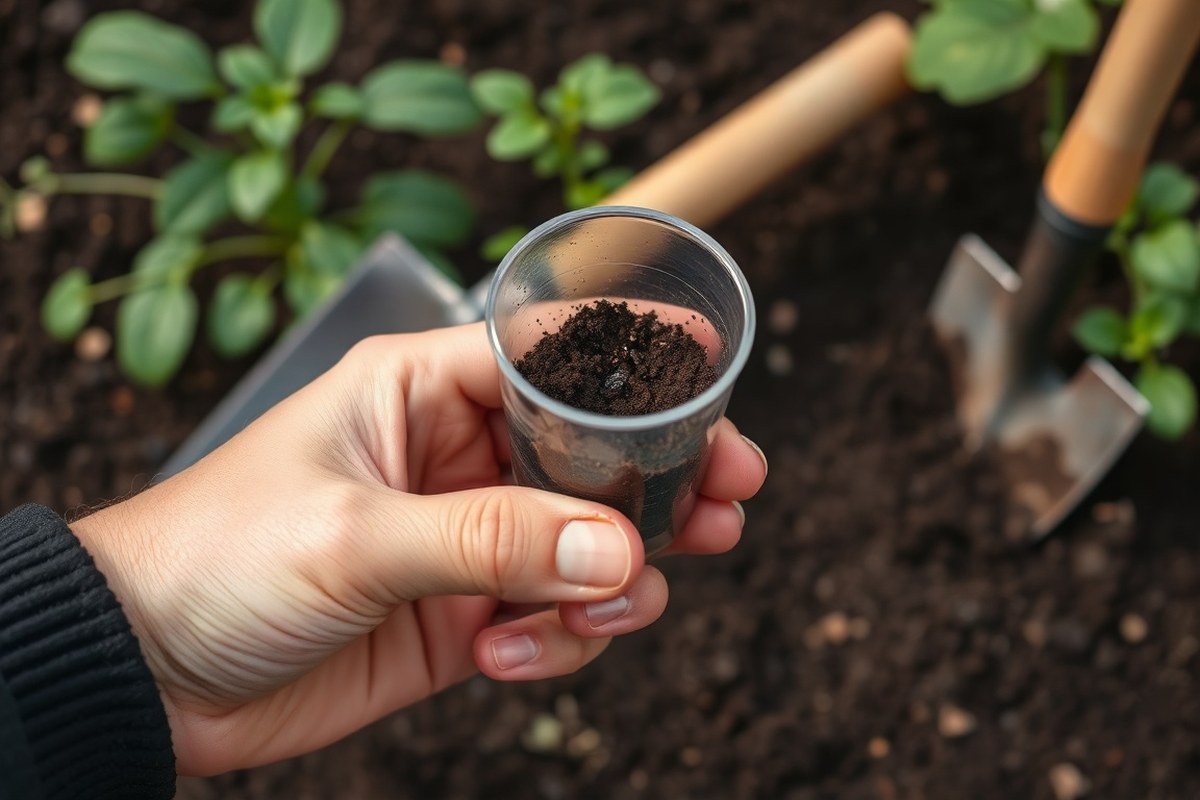
Send about a cup of that mixed soil for testing. It helps you understand pH, nutrients, and more. Testing shows what your plants need and what to add or avoid.
Check your soil every 3 to 4 years for steady care. Testing regularly keeps your garden productive and healthy. Avoid sampling too shallow or from only one spot, it can lead to wrong results.
Key Takeaways
- Collect soil samples from 6 to 8 inches deep for accurate testing.
- Mix soil from several spots to represent your entire garden.
- Send about one cup of mixed soil to a local lab or extension service.
- Test soil every 3 to 4 years for nutrient and pH levels.
- Avoid sampling only one spot to prevent misleading soil results.
- Use a shovel or trowel to cut a V-shaped hole when sampling.
What Is Soil Analysis and Why It Matters

Soil analysis is a quick chemical test to check the soil’s nutrients and pH level. It shows what your soil needs for healthy plants. The test usually needs 1 to 2 pounds of soil.
Dig 6 to 8 inches deep in a few spots. Collect soil from around your garden or farm.
You should test your soil every 3 to 5 years to keep track of its condition. Knowing the soil’s nutrient levels helps you apply the right amount of fertilizer. Overfeeding can waste money and harm the environment, while underfeeding will slow plant growth.
Good soil tests show balanced nutrients and proper pH. Your plants often do best with a pH between 6 and 7. Keeping pH close to ideal helps plant health.
Testing can also reveal soil salinity or other problems that might hurt your crops. Fixing these issues early improves plant health and increases yields.
Start by digging several small holes where you want to test. Mix all the soil samples in one container. This gives a consistent soil sample for testing.
Put one cup of the mixed soil in a clean container. Send this to your local extension office for analysis. Make sure the container is clean to avoid contamination.
You’ll get a report explaining your soil’s condition. It also gives advice on how to make your soil better. Use this advice to improve your growing area.
Soil analysis works best with proper sampling. Take soil only from areas where plants grow roots, about 6 to 8 inches deep. Avoid sampling near compost piles or odd spots.
These areas don’t reflect your typical soil condition. This way, your results show the real soil you grow in.
Regular soil testing is a smart way to manage your garden or farm. It saves time and money by guiding your care, so you don’t waste resources. Soil reports help you avoid issues like acidic or salty soil.
Fixing these problems makes your plants grow better. This leads to more consistent and successful gardens.
Types of Soil Tests and What They Measure

Soil tests fall into three main types: chemical, physical, and biological. Each measures different soil qualities that affect plant growth. Picking the right test depends on your garden goals.
Also, consider any soil problems you want fixed. This helps you get useful results.
Chemical Soil Tests
Chemical tests measure soil nutrient levels, pH, salinity, and contamination. They tell you what minerals and chemicals the soil holds that plants need or find harmful. Nutrient tests focus on elements like nitrogen, phosphorus, potassium, and micronutrients.
Soil pH testing is important because it affects nutrient availability. Most plants prefer a pH between 6.0 and 7.5.
Salinity tests reveal concentrations of soluble salts that can harm roots or reduce water uptake. Chemical contamination tests check for pesticides or heavy metals that affect safety.
DIY test kits can measure pH or basic nutrients cheaply. Professional labs offer detailed nutrient profiles and contamination screening. Labs ask for soil samples 0 to 10 cm deep.
They usually take 1 to 3 weeks to report. Costs range from $10 to $50 based on tests picked.
Physical Soil Tests
These tests assess soil texture, structure, moisture, and density. Texture means the amount of sand, silt, and clay in your soil. Gardeners often aim for loamy soil with about equal parts of each.
Soil structure describes how particles clump together, affecting air and water flow. Bulk density tests show how compacted the soil is, which influences root growth. Moisture tests check current water content, helping with irrigation decisions.
You can perform simple texture tests with a jar and water or feel methods at home. More detailed tests need equipment like a soil core or lab analysis. Physical tests show if you should add organic matter.
They also tell if you need to change watering. This keeps soil healthy and balanced.
Biological Soil Tests
Biological tests measure the living parts of soil like microbes and organic matter. These organisms break down organic material, recycle nutrients, and improve soil health. The percent of organic matter shows overall soil fertility and structure benefits.
Simple home tests look for earthworms in the soil. You can also use kits that test soil microbes. These checks give a quick soil health idea.
More precise lab tests analyze microbial diversity or organic carbon content. Biological tests help you understand soil vitality beyond nutrients and texture.
Using compost or mulch can boost biological activity. High organic matter usually means better plant growth and resilience against disease.
These tests take more time and can cost more. But they offer a clearer picture of long-term soil health.
Here’s a guide comparing main soil test types. It lists what each test measures.
Also, see their strengths and limits in use. This helps you pick the right test for your needs.
| Test Type | Measures | Benefits | Limitations |
|---|---|---|---|
| Chemical | Nutrients, pH, salinity, contamination | Shows what plants can use or avoid; aids fertilizing | Doesn’t show physical or biological soil health |
| Physical | Texture, structure, moisture, bulk density | Helps amend soil structure; aids water management | Needs tools or labs; no nutrient data |
| Biological | Organic matter, microbes, microbial activity | Reveals soil vitality; guides organic matter use | More time and cost; less common for home gardeners |
Testing soil once every few years usually works well. Test more if plants act sick or you change soil care. This helps catch problems early.
How to Collect Soil Samples Correctly
Collecting soil samples properly is key to reliable test results. Dig 6 to 8 inches deep for most garden crops to get representative soil. Take 10 to 30 samples across your area to cover variation and avoid contamination.
Identifying Sampling Locations
Divide your garden or field into sections based on soil type or crop growth. Avoid spots near compost piles, chemical spills, or old fences that may skew results. Choose random spots inside each section to get a true average.
Increase sampling where soil looks different or plants vary in health. This helps catch problem areas needing special attention. Mark each sample’s spot so you can track any later tests.
Collecting Samples at Correct Depth
Use a shovel or garden trowel to dig a V-shaped hole 6 to 8 inches deep. Cut a 1.5-inch thick slice from top to bottom of the hole’s face for your sample. This depth captures the root zone where nutrients matter most.
Remove any surface debris like leaves or grass before digging. Use clean tools and gloves to avoid contaminating the soil with fertilizers or residues. Keep layers separate if testing different soil depths.
Mixing and Storing Samples
Combine your 10 to 30 samples from the same section into a clean bucket. Spread the mixed soil over a clean cloth and pull corners diagonally to mix evenly. Avoid lumps and stones to get a uniform sample.
Place about 1 to 2 cups of the mixed soil into a labelled, clean plastic bag. Include details like your name, sample date, crop, and soil area. Keep samples cool and out of direct sun before sending to the lab.
Follow these steps to collect and prepare your soil samples:
- Divide your growing area into distinct soil or crop zones.
- Pick 10 to 30 random spots across each section.
- Clear surface debris at each spot before sampling.
- Dig a V-shaped hole 6 to 8 inches deep.
- Cut a 1.5-inch slice from the hole’s face for the sample.
- Combine all samples from one section in a clean container.
- Mix soil thoroughly over a cloth to ensure evenness.
- Transfer 1 to 2 cups of mixed soil into a labelled bag.
When and How Often to Test Your Soil
Soil testing works best every three to four years. This applies if you grow the same crop in one spot. It helps track soil changes over time.
This frequency helps track nutrient changes and avoids unnecessary tests. Test soil after every third crop cycle for crops rotated yearly.
Nutrients and pH can change faster with rotation. This keeps soil ready for new planting.
Fall is the preferred season to take soil samples. Test soil when it has cooled down but is still easy to work. This timing lets you fix soil before planting season.
It’s the best moment to prepare soil. Fall sampling avoids nutrient changes from summer heat or spring rain.
These weather factors can distort test results. So fall gives a clearer soil picture.
Perennial crops need soil tests during dormancy, usually in late fall or winter. This timing prevents disturbing growing roots and reflects nutrient availability before new growth begins. For annual vegetables and flowers, test in fall or early spring before planting seeds or seedlings.
Divide your garden into zones based on soil type or problem spots before sampling. Take 8 to 12 samples in each zone to get a representative mix. Mixing different soil samples gives a better view of nutrients.
It shows what’s in the whole garden or field. This helps plan soil care wisely.
Keep in mind that nitrogen tests aren’t usually helpful, as nitrogen levels change rapidly. Instead, focus on pH, phosphorus, potassium, and organic matter. The local extension office tests soil for $5 to $25.
This makes checking your soil easy and cheap. You can keep your garden healthy this way.
Where to Get Soil Tested and What to Expect
You can send soil samples to state university extension labs. Private commercial labs or local agricultural agencies also accept samples. Extension labs may test samples for free or charge a small fee.
The fee usually ranges from $10 to $30 per sample. Private labs charge more, often between $30 and $75. But may provide more detailed reports.
Turnaround times vary by lab and test type. Extension services often take 1 to 3 weeks to send you results.
Private labs can be quicker, with some returning results in 3 to 7 days. Timing depends on how many samples the lab handles and the complexity of the analysis.
Home soil test kits give less precise but faster answers on pH and nutrient basics. These kits cost about $10 to $20.
They give instant results or take a few minutes to show color changes. However, they don’t replace lab testing for detailed nutrient levels or contaminants.
- State extension labs: $10-$30, 1-3 weeks, basic to detailed testing
- Private commercial labs: $30-$75, 3-7 days, detailed reports
- Local agricultural agencies: sometimes free or low-cost, timing varies
- Home soil test kits: $10-$20, immediate to few minutes, limited detail
- DIY pH tests: very cheap, quick, simple pH only
Before sending soil to any lab, collect samples correctly and avoid adding fertilizer beforehand. Dry and bag them as instructed by the lab’s guidelines. Labs usually provide sample bags and instructions on specific steps and amount required.
Don’t test soil if it is too wet or too dry. This can change moisture and nutrient readings.
Store samples in a cool, dry place before mailing. Label bags clearly with your contact info and location details to avoid mix-ups.
Always follow your testing lab’s instructions carefully to avoid delays or inaccurate results.
How to Read and Interpret Soil Test Results
Soil test results show key details about your soil’s health and nutrient needs. They tell you the pH level, nutrient amounts, and sometimes the soil’s ability to hold nutrients. You can use these results to make smart choices about fertilizers and soil amendments.
Understanding pH and Acidity
Soil pH measures how acidic or alkaline your soil is. A pH of 7 is neutral, below 7 means acidic, and above 7 means alkaline. Most plants grow best in soil with pH between 6 and 7.5.
Too low or too high pH limits nutrient availability and plant growth. For example, acidic soil can lock up phosphorus and make it unavailable to plants. Your soil test report might say your soil is too acidic.
It then may suggest adding lime to raise the pH. This helps balance your soil’s acidity.
Apply finely ground limestone exactly as the lab recommends to avoid over-liming. This usually costs around $30 to $50 per ton.
But amounts vary by your soil’s test results. Follow the recommendation carefully for the best crop growth results.
Key Nutrient Levels Explained (N, P, K)
Your soil test covers primary nutrients: nitrogen (N), phosphorus (P), and potassium (K). Nitrogen helps leaves grow green and full. Phosphorus supports root and flower growth.
Potassium improves overall plant health. The test measures how much of these nutrients your soil currently holds.
Results use units like parts per million or pounds per acre, depending on the lab. Low nutrient levels mean your soil can’t supply enough for your crops. High levels may reduce the need for fertilizer or risk nutrient runoff if overapplied.
Soil tests use various chemical extractants to measure nutrients, which affects result interpretation. Make sure you know the test method to understand the nutrient levels correctly. Sharing this info with your fertilizer supplier helps get the right recommendations.
Making Fertilizer Recommendations
Use your soil test results to decide how much fertilizer to apply before planting. Labs give fertilizer amounts based on your crop and soil. They consider current levels of nitrogen, phosphorus, and potassium.
This advice matches your soil’s needs. These help avoid under- or over-fertilizing your garden or field.
For example, if phosphorus is low, they may recommend phosphate fertilizer. The suggested amount could be 30 to 50 pounds per acre. This helps correct the phosphorus shortage.
Potassium may not be needed if your soil already has enough. The report might say no extra potassium fertilizer is necessary. Nitrogen needs depend more on the crop and growth stage.
Cation Exchange Capacity (CEC) is another important value that shows how well your soil holds nutrients. Soils with higher CEC hold more nutrients and release them slowly to plants. Low CEC means your soil holds fewer nutrients.
You might need to fertilize more often or add organic matter. This improves your soil’s nutrient retention.
Common Soil Sampling Mistakes and How to Avoid Them
Mixing soil from different areas into one sample causes unreliable test results. Each part of your garden or farm may have different nutrient levels.
Take samples from uniform spots like flower beds, vegetable plots, or pasture sections. That way, test results show accurate nutrient information for each area.
Contamination ruins soil test results too. Tools with leftover fertilizers or dirt from other sites can change nutrient readings. Use clean tools and containers when sampling.
Wash shovels, trowels, or probes with water and mild soap before use. Dry them to avoid mixing moisture or bacteria into your sample.
Sampling too shallow or too deep is common and affects nutrients detected. Most tests ask for soil from about 6 to 8 inches deep.
Check instructions for specific crop needs and adjust depth accordingly. Inconsistent depth across samples makes it hard to compare results, masking problem spots or nutrient deficits.
- Sample only similar soil areas separately to avoid misleading averages
- Use clean, dry tools and containers for each sample to stop contamination
- Collect soil at the recommended 6 to 8 inches deep for typical crops
- Take multiple subsamples per area to represent soil variability fairly
- Remove plant debris and large clumps before mixing soil samples
- Label samples clearly with location and date to track results
Skipping multiple subsamples causes spotty data. Take about 10 to 15 subsamples in each area you want to test. Combine them in a clean bucket and mix well.
Send a quarter cup of this mixed soil in a labeled bag to your lab. This approach averages out variations and gives a reliable nutrient snapshot.
Ignoring soil moisture also leads to errors. Don’t sample after heavy rain or irrigation that saturates soil.
Let the soil dry naturally for at least 24 hours. Too much water skews pH and nutrient concentrations, affecting fertilizer recommendations and amendment plans.
Special Considerations: Soil Testing by Crop and Season
Sampling depth changes based on the crop you plan to grow. Root vegetables need samples from 8 to 12 inches deep. For shallow-rooted crops like lettuce or carrots, 4 to 6 inches is enough.
Grains and grasses require a deeper sample, often 12 inches, to cover full root zones. Follow your lab’s instructions closely on depth when collecting samples.
Season matters because soil conditions shift with weather. Early spring sampling shows fertility before planting. Fall testing reveals nutrient loss or buildup after harvest.
Avoid sampling when soil is too wet or frozen, as it skews results. Try to sample during dry, stable soil conditions for accurate data.
Some crops need extra soil tests. High-salinity tests help if drought or irrigation affects your soil. Heavy metal or pesticide contamination tests are important if your land had past chemical use.
These contaminants can lower crop quality and yield, especially for vegetables or fruits eaten fresh. Testing for these takes extra costs, often $20 to $50 per test.
| Crop Type | Sampling Depth | Season for Testing | Extra Tests Needed |
|---|---|---|---|
| Root Vegetables (carrots, beets) | 8, 12 inches | Early spring or fall | Salinity, contaminants if previously treated |
| Leafy Greens (lettuce, spinach) | 4, 6 inches | Early spring | Contaminants (pesticides/heavy metals) |
| Grain Crops (wheat, corn) | 12 inches or more | Fall before tillage | Salinity where irrigation used |
| Fruit Crops (berries, tomatoes) | 6, 10 inches | Spring before planting | Contaminants, salinity |
Take samples from several spots in your field to get a good average. Divide your land by crop zones or soil types for better accuracy. Soil layers can vary, so collect from the exact depth each crop’s roots reach.
Test soil for pesticides and heavy metals before starting new crops. This helps you choose safer seeds and adjust treatment plans for past chemical use.
Liming rates depend on soil type, depth, and limestone quality. So sampling depth affects how you handle soil pH.
Do not sample wet or frozen soil, wait for dry conditions for reliable results.
Step-by-Step Action Plan for Soil Analysis
Follow these steps to get accurate soil test results and improve your garden or farm soil.
- Before planting: Collect soil samples from different spots in your area. Mix them into one combined sample to represent your soil well.
- Day 1: Send the mixed soil sample to a reputable lab or extension service. Make sure to follow their submission instructions.
- Week 1: Review the soil test results carefully, noting pH, nutrient levels, and organic matter content. Compare these with your crop’s needs.
- Week 2: Apply fertilizer or soil amendments based on test recommendations. Use the right amounts to avoid over-fertilizing.
- Month 1: Plant your crops using improved soil conditions. Monitor plant growth for signs of nutrient stress or improvement.
- After harvest: Collect samples again to track changes in soil health. Adjust your soil management plan as needed.
- Every 2-3 years: Test your soil again. This keeps nutrient levels steady. Good soil means better crop yields.
Frequently Asked Questions
How Do I Prepare Soil Samples for Nutrient Testing?
Mix soil from several spots in your garden to get a good sample. Remove rocks and debris before sending about one cup to your testing lab for consistent results.
Can I Do Soil Analysis Myself at Home?
Yes, you can use DIY kits for basic checks like pH or moisture. However, sending samples to a lab gives more accurate nutrient profiles and detailed results.
What Tools Do I Need to Collect Soil Samples?
Use a clean trowel or soil probe to dig about 6-8 inches deep. Avoid metal tools that can contaminate the sample with unwanted elements.
How Long Does It Take to Get Soil Test Results?
Most labs take one to two weeks to analyze and send back results. This timing depends on their workload and the number of tests requested.
Can Soil Analysis Detect Contaminants or Toxins?
Some labs offer tests for heavy metals and pesticides if requested. Standard nutrient tests don’t check for these, so specify your concern when submitting samples.
What Should I Do After Getting My Soil Test Results?
Review the nutrient levels and pH to adjust your fertilizing plan. Follow local extension office advice for correcting deficiencies or imbalances.
Before You Go
Good soil analysis feels like a solid foundation for better growing. Test your soil now so you know exactly what it needs. Then, take care with your next growing season for healthier plants and bigger harvests.