How to Measure Humidity in House: 8 Practical Ways for Accurate Results
Measuring indoor humidity helps keep your home comfortable and healthy. Use a digital hygrometer for quick, accurate readings.
Place it about 5 feet high on an inside wall, away from vents, windows, and doors. Wait 20 to 30 minutes before checking the measurement.
Humidity levels show as relative humidity, comparing moisture in the air to how much it can hold. The ideal range is usually between 30% and 50%.
Staying in this range prevents mold growth and keeps your skin and lungs healthy. Keep the hygrometer away from areas with uneven airflow or trapped moisture.
Checking several spots around your home shows how humidity varies by room. Basements often stay humid, while bedrooms can get too dry at night.
Tracking these changes helps you spot problem areas or ventilation issues early. This baseline lets you act before humidity damages your home.
Key Takeaways
- Use a digital hygrometer accurate to about ±2-3% for reliable results.
- Mount the hygrometer 5 feet high on an interior wall away from vents.
- Wait 20-30 minutes after placement before reading the humidity level.
- Ideal indoor humidity usually stays between 30% and 50% relative humidity.
- Measure at chest height near the room’s center for best airflow readings.
- Check multiple rooms to find moisture problem areas or dry spots.
1. How to Measure Indoor Humidity Accurately with a Hygrometer
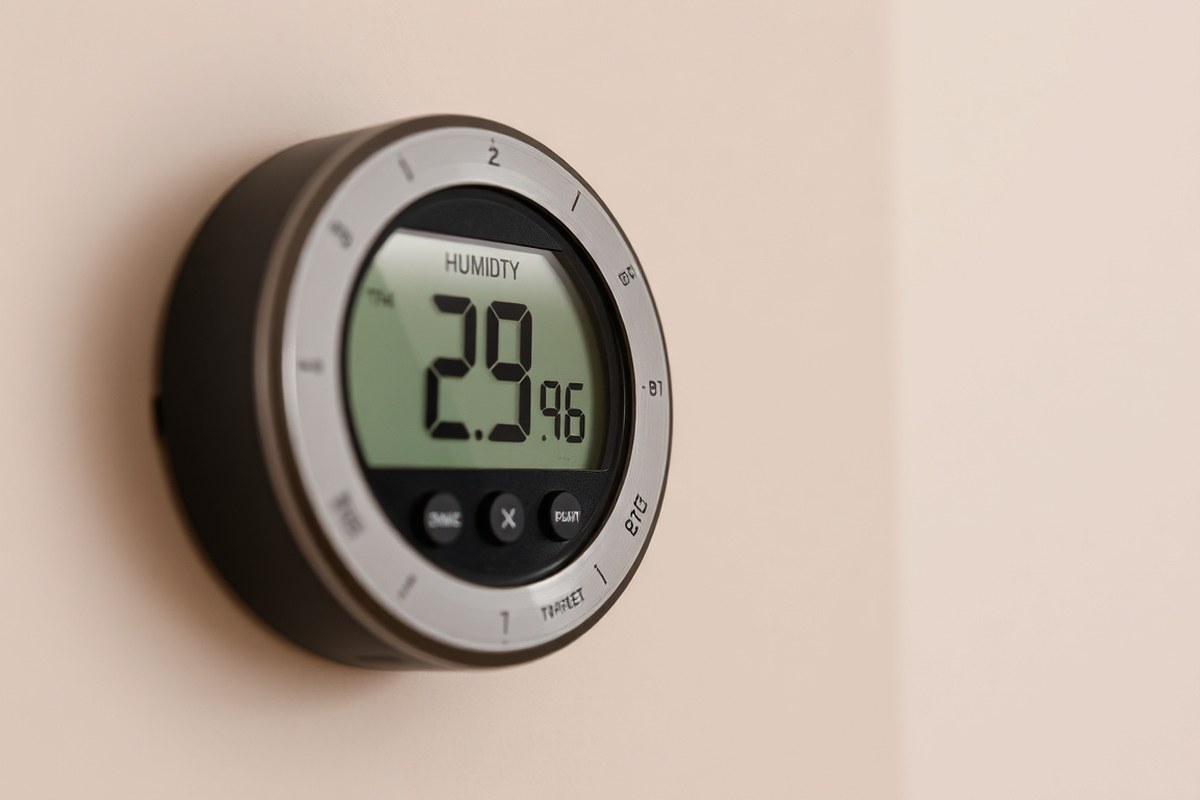
- Choose a digital hygrometer with ±2-3% accuracy for best results.
- Mount the hygrometer on an inside wall about 5 feet above the floor.
- Keep it away from windows, doors, vents, and exterior walls to avoid false readings.
- Turn off or avoid sources that affect humidity nearby, like heaters or humidifiers.
- Let the hygrometer settle undisturbed for 20 to 30 minutes before reading.
- Check the display and record the relative humidity percentage.
- Repeat measurements at different times of day if you want to track changes.
The best way to measure indoor humidity accurately is with a digital hygrometer. It directly shows the relative humidity as a percentage. You want a model that reads within 2 or 3 points.
This gives you more reliable info every time. A close reading helps you make good choices about humidity.
Place the hygrometer about 5 feet high on an interior wall. That’s roughly chest or head height. Don’t put it near windows or vents.
These spots can cause false jumps in readings. Keep it in a steady spot for best results.
Stay away from heat sources and humidifiers. Avoid putting it near air conditioners too. These can change humidity right around the sensor.
Wait about 20 to 30 minutes before checking numbers. This gives the sensor time to adjust to the room’s true humidity level.
Reading the hygrometer too soon or in the wrong spot is a common slip-up. It can make your house’s humidity seem higher or lower than it actually is.
Taking multiple readings in different rooms can help catch any odd spots. This lets you see where moisture problems or dry air may build up in your home.
2. Understanding What Relative Humidity Means for Your Home

Relative humidity shows how much moisture is in the air. It compares moisture to the air’s capacity at a certain temperature. This helps us understand air moisture levels easily.
It is expressed as a percentage. If relative humidity is 50%, the air holds half its max moisture.
This value is at the current air temperature. It shows how wet or dry the air feels inside.
Relative humidity inside impacts your home’s comfort and health. It also affects your home’s materials and how they hold up. This makes checking humidity important for your house.
Too low humidity dries out your skin and can cause respiratory irritation. Too high humidity encourages mold growth, dust mites, and a stuffy, clammy feeling.
The best indoor relative humidity is usually 30% to 50%. Many aim for 40% to 60% for comfort. This range helps keep your home healthy and cozy.
Levels below 30% tend to feel dry, especially in winter. Levels above 60% raise the risk of mold and mildew, according to the EPA. You can use a digital hygrometer to watch these levels daily.
When indoor air is too dry, you might notice cracking wood or static shocks. Dry air often happens during colder months when heaters run nonstop.
High humidity at normal room temperatures above 70°F leads to condensation on windows and damp walls. This can cause odors and damage finishes.
Maintaining the right humidity stops these problems before they start. Appliances like humidifiers or dehumidifiers adjust moisture in the air.
You can lower humidity by ventilating kitchens and bathrooms or using exhaust fans during showers. Sealing leaks and repairing water damage also help keep moisture controlled.
Relative humidity also changes with temperature. Air at 60°F with 75% humidity holds more moisture than cooler air. Cooler air at 50°F cannot hold as much moisture.
So, warmer air feels more humid inside. That’s why condensation occurs on colder surfaces. Monitoring humidity throughout the house at different temperatures gives a clearer picture of moisture risks.
You should keep indoor humidity between 30% and 50%. This helps lower health risks and stops mold from growing. It protects your family and your home materials.
3. Where and How Many Spots to Measure Indoor Humidity
Humidity can vary a lot from room to room in your house. Measure it in several spots to understand the full picture. Focus on rooms that often deal with moisture or poor airflow.
High Priority Rooms to Measure
Some rooms hold more moisture or have different temperatures. Basements, bathrooms, and kitchens usually have higher humidity levels. Bedrooms and living rooms tend to be drier and more stable.
Basements are cooler and damper, leading to more moisture. Bathrooms get steamy from showers and often have poor ventilation. Kitchens create humidity when cooking or washing dishes.
- Basement or crawl space
- Bathrooms, especially near showers
- Kitchens by the stove or sink
- Bedrooms, especially on upper floors
- Living room if it’s the main gathering spot
Checking these rooms first helps you spot problem areas quickly. For example, a basement can feel damp at 70% humidity while the living room reads 45%. This difference impacts mold risk and comfort.
When to Measure Multiple Points
One hygrometer gives a rough idea of your home’s humidity. But it won’t show variations between floors or rooms with different uses. Use multiple devices when you want detailed info or if you spot moisture problems.
Rooms used for cooking, bathing, or laundry have quick humidity changes. Measure at least two points if your house has a basement or multiple floors. Also test different sides if some rooms face sun, shade, or wind.
- Your basement or bathroom feels damp or stuffy sometimes. It may mean high humidity or poor air flow.
- Rooms with different heating or cooling can cause uneven humidity. You might notice dry air in one room and damp in another.
- When you see mold, condensation, or musty odors
- In large homes or apartments with varied airflow
- Before and after using humidifiers or dehumidifiers
Place the hygrometers at eye level, away from vents and windows. Let them sit for 10 to 15 minutes before reading. Leaving the room helps avoid incorrect results from your own breath or body heat.
How to Track Readings over Time
Humidity changes with weather, heating, and activity like cooking or showering. Check your hygrometer several times during the day for a full picture. Write down readings or use digital devices with memory for easy tracking.
Note the time, temperature, and room where you measured. This habit helps you spot trends or sudden changes. Humidity over 60% in a basement for days causes problems.
It can lead to mold and musty smells. You should check for leaks or poor ventilation.
- Check readings morning, afternoon, and evening
- Record results in a notebook or phone app
- Compare rooms side by side on the same day
- Retest after weather changes or fixing ventilation
- Watch for readings constantly above 60% or below 30%
Tracking prevents surprises like mold or dry air damage. It also guides you on where to add or reduce humidity. Regular checks help keep your home comfortable and safe.
4. How to Measure Humidity Without a Hygrometer
You can check indoor humidity without a meter, but only roughly. Alternative ways like the ice water test and hair strand method give estimates, not exact readings. These methods show if air feels dry, moist, or balanced but won’t provide numbers.
Performing the Ice Water Test
This test uses a glass of ice water to estimate humidity in your room. Cold causes condensation, which signals the air’s moisture level around the glass. It’s simple and needs no special tools.
- Fill a clean glass with water and add four ice cubes.
- Stir gently to chill evenly.
- Set the glass on a table in the room to test, avoiding the kitchen.
- Watch the glass sides for condensation forming within five minutes.
- If water droplets cover the glass, the humidity is likely high (above 60%).
- Light or no condensation suggests low humidity (under 30%).
- Moderate fog or droplets mean humidity is around 30% to 60%, typical indoors.
This test won’t tell you the exact humidity but helps spot extremes. Condensation means moist air, which might cause mold or damage. Little moisture means dry air, possibly irritating your skin and throat.
Using Hair Strands to Estimate Humidity
The hair strand method relies on hair’s natural moisture response. Hair shrinks or swells depending on humidity. You need two strands to compare dry and wet states.
- Take two similar hair strands from yourself or a brush.
- Lightly spray one strand with water to make it wet.
- Hold both strands close but separate for easy observation.
- Dry the other strand with a blow dryer until it is completely dry.
- Notice the wet strand expands or curls, showing high humidity (near 100%).
- The dry, shrunk strand indicates near 0% humidity.
- Your room’s real humidity falls somewhere between these two extremes.
This method provides a rough idea but isn’t reliable for exact values. Hair reacts to moisture unevenly, so results vary with hair type and room conditions. Still, it shows if the air is very dry or moist.
Observing Signs of Humidity Indoors
Your home shows clear clues about humidity levels through common signs. Look for condensation on windows, musty smells, or dry skin problems. These are simple ways to guess if humidity is too high or low.
- Check windows for condensation, a sign of damp air and high humidity.
- Smell for musty odors or notice mold spots on walls or ceilings.
- Feel if towels or laundry take a long time to dry indoors.
- Notice dry or irritated skin, static electricity, or frequent winter discomfort.
- Watch for wood shrinkage or seasonal gaps in doors and floors.
These visual and physical signs help you catch humidity problems early. Too much moisture can lead to mold growth and damage.
Too little causes discomfort and static. Observations alone can’t measure humidity but guide you to check further.
5. Calibrating Your Hygrometer for Accurate Readings
Your hygrometer can show wrong numbers if it’s in the wrong place or gets bumped often. Testing its accuracy helps you avoid mistakes when tracking your home’s humidity. You can check and adjust it using simple salt, ice water, or oven methods at home.
Calibrating Using Saturated Salt Solution
The salt test checks if your hygrometer reads near 75% humidity. It is a reliable simple method. Use it to confirm your meter’s accuracy.
You make a salt slurry that creates a steady humidity inside a sealed bag. The meter should settle close to 75% after about eight hours.
Follow these steps to set up the salt test:
- Mix table salt with a small amount of water until it forms a paste.
- Put the salt mixture in a jar or bowl.
- Place your hygrometer near the jar inside a sealed zip-top bag.
- Seal the bag tightly to trap the air.
- Leave the bag at room temperature, around 68 to 77°F (20 to 25°C), for eight hours.
- Check the hygrometer reading after this wait.
- It should read roughly 75%, indicating proper calibration.
- Adjust your meter’s offset if possible to match 75%. Otherwise, note the difference for future readings.
Pick a stable spot away from vents or windows. This prevents false humidity readings. It helps get a better test result.
The Ice Water Calibration Method
Fill a glass with ice and water to test your hygrometer. It should read near 100% humidity. This method shows if your meter is accurate.
The melting ice keeps the air right at the dew point for accurate checking. The meter should show close to saturation if it works well.
Here is how to run the ice water test:
- Fill a glass halfway with ice cubes.
- Add enough water to cover the ice just a little bit.
- Place your hygrometer just above the glass without touching the water.
- Wait at least five minutes for the air around it to stabilize.
- Read the meter; it should approach 100% relative humidity.
- Your meter should read close to 100%. If it shows much less, recalibrate or replace it.
Don’t put the hygrometer directly on ice or water. Contact with moisture can skew readings. Keep it near but dry for accuracy.
Using Oven Heat for Meter Adjustment
You can check your meter’s high-end accuracy by using low oven heat. Heat the meter briefly to about 200°F (93°C). This simulates near-zero humidity levels.
It gives a scale point for adjusting the meter. This method works best on digital or analog models with manual calibration options.
Follow these instructions to try the oven method safely:
- Preheat your oven to 200°F (93°C).
- Turn off the oven after it reaches temperature.
- Place the hygrometer inside on a heat-safe tray, away from heating elements.
- Leave it in the oven for about three minutes, watching it carefully.
- Remove the device and immediately check the reading.
- It should show about 0% relative humidity or a very low value.
- Adjust the offset setting on your meter if it’s far from zero.
Be careful not to burn yourself or damage the meter. Don’t overheat or leave it too long near the heat. Use short heating times only.
6. How Temperature and Airflow Affect Humidity Readings
Airflow from vents, windows, and doors changes humidity readings by mixing indoor air with outside air. This movement can raise or lower the moisture level near your sensor.
Place the humidity meter at least 3 feet from vents, windows, or doors. This stops quick changes from affecting the reading.
Heat or cold sources nearby also affect readings. Warm air holds more moisture. Putting a hygrometer near a radiator or heat vent can raise the reading.
This shows more humidity than the room actually has. Cool surfaces near air conditioners or drafty windows can cause false low readings. Keep the sensor about 4 to 5 feet above the floor and away from these spots.
Room temperature changes how much water the air can hold. Relative humidity depends on this water-holding capacity. When the temperature rises, RH drops even if moisture stays the same.
When it gets colder, RH rises. This means a reading in a warm room won’t match one in a cooler room. For accuracy, measure in a space with stable temperatures.
A microclimate is a small spot with different temperature or humidity. It doesn’t match the rest of the room. Examples include corners near poorly insulated windows, or spots close to humidifiers or bathrooms.
These localized conditions can skew your readings. Avoid placing sensors near exterior walls, bathrooms, kitchens, or direct sunlight to reduce microclimate effects.
Checking sensor placement regularly helps spot problems. In an apartment, conditions vary room to room, so measure in each important space. A digital hygrometer gives better results if kept away from heat, cold, and sunlight.
Avoid placing it near vents or moisture sources. Proper placement takes no extra cost but often improves reading accuracy significantly.
7. Tracking and Interpreting Humidity Trends over Time
Check your home’s humidity two to three times a day at first. Take readings in the morning, afternoon, and evening to catch daily changes. Tracking for at least two weeks helps you see real patterns and spot odd spikes.
Daily activities can change humidity quickly. Cooking, showering, and drying clothes all add moisture to the air.
Running a humidifier or heater also shifts humidity up or down. Noticing these effects helps you understand why numbers change.
Write down your humidity readings along with the time and what you were doing. Use a notebook, spreadsheet, or an app that logs levels and temperature. This record shows long-term trends and highlights when things get too dry or wet.
Humidity over 55% for several days can cause mold. This is worse in rooms without good airflow. Watch these areas closely to prevent problems.
Below 30% humidity for days might cause dry skin or worsen allergies. Watch your notes for these problem zones before they cause damage.
Act if humidity stays above 60% for more than two days. Also, watch for levels below 30%. Both extremes can damage your home’s air quality.
Fixing high humidity might mean using a dehumidifier or improving ventilation. For low humidity, try a humidifier or keep indoor plants that release moisture.
Keep monitoring even after fixes. Sometimes improvements take days or weeks to show. Regular checks confirm your home feels better and mold risks go down.
Use a checklist to track humidity three times a day. Note activities like cooking or showering that may raise moisture.
Compare readings to 30%, 60% and act if needed. This routine takes just a few minutes but saves you from big problems later.
8. Choosing the Right Humidity Measurement Method for Your Home
Choosing the right humidity tool depends on your budget and needs. Also, think about how many rooms you want to check. These factors will help you decide.
Basic digital or analog hygrometers give quick, accurate results for a single room. They cost between $10 and $30.
Many have memory that shows highs and lows. This helps track changes when you’re not watching.
Smart sensors connect to your phone and send alerts when humidity goes too high or low. They provide data over time for constant monitoring. These meters are good if you want smart home control.
They work well in those setups. These cost more, usually $40 to $100 each, and can be set up in multiple rooms. Multi-room setups help track changes throughout your home but increase cost and setup complexity.
| Type | How It Works | Best For | Trade-off |
|---|---|---|---|
| Capacitive | Water absorbed by polymer changes capacitance | Home and HVAC use | Sensor can foul over time |
| Resistive | Moisture changes electrical resistance | Budget sensor modules | Less sensitive than capacitive |
| Psychrometer | Wet and dry bulb thermometers compared | Field HVAC work, teaching | Slower, technique dependent |
| Chilled mirror | Mirror cooled until dew forms, then read | Specialist, lab measurements | Expensive, not practical for home |
For quick checks in one or two rooms, a simple digital meter works fine. It should have ±3% accuracy. This is enough for basic checks.
Place it away from vents, windows, or doors for best results. Two cheap meters in different rooms give more useful data.
That’s better than one costly meter in the wrong spot. Spread them out for best results.
Use smart sensors if you want to track humidity trends, receive alerts, or control humidifiers remotely. Multi-room systems are worth it for bigger homes or if you manage humidity in several areas.
Budget sensors suit renters or homeowners wanting a simple tool to check main rooms. Avoid relying on your phone’s built-in sensor, as most phones lack the hardware for accurate readings.
Put humidity meters where you spend most time. Avoid drafty windows or vents for accurate readings. This gives you correct results.
Step-by-Step Action Plan to Measure Your Home’s Humidity
Follow these steps to start measuring humidity and track it accurately in your home.
- Day 1: Place a reliable hygrometer in the main living area. Wait six hours to get a stable reading.
- Day 2: Check humidity in other key spots like the kitchen and bathroom. Look for readings that differ by more than 5% from your main area.
- Day 3: Calibrate your hygrometer using a salt test or calibration kit. Confirm the reading matches the expected 75% relative humidity.
- Week 1: Record humidity levels twice daily, morning and evening, to see daily changes.
- Week 2: Compare humidity trends between rooms and time of day. Note any spikes or drops linked to cooking or showering.
- After 2 weeks: Find areas with humidity below 30%. Spot spots above 50%. Plan using a humidifier or dehumidifier.
- Month 1: Check your calibration monthly to ensure accurate readings. Replace batteries if needed in digital devices.
Frequently Asked Questions
Can Sunlight Affect Indoor Humidity Readings?
Yes, direct sunlight heats the sensor and raises readings. Keep your hygrometer away from windows to get accurate results.
How Often Should I Replace My Hygrometer?
Replace it every 2 to 3 years for best accuracy. Older devices can drift and give wrong humidity levels.
Can Household Plants Change Humidity in My Rooms?
Yes, they release moisture and can raise humidity locally. Consider this when placing your hygrometer near plants.
Does Cooking in the Kitchen Impact the Whole House’s Humidity?
Cooking adds moisture mainly to the kitchen area. Proper ventilation helps keep the rest of the house stable.
Can Using a Dehumidifier Lower Humidity Unevenly?
Yes, dehumidifiers can dry one room more than others. Measure humidity in multiple spots to check this effect.
Are Bathroom Exhaust Fans Enough to Control Humidity Levels?
They help reduce moisture during showers but only in the bathroom. Use other ventilation to manage whole-house humidity.
Wrapping Up
Measuring indoor humidity helps keep your home comfortable and prevents damage. Start by placing your hygrometer and tracking readings. Take action when levels stray too far from the ideal range.