Do It Yourself Wood Planter Boxes: A Complete Guide for Beginners
Do it yourself wood planter boxes let you grow flowers, herbs, or vegetables at home. Building your own box saves money and lets you customize size and style. It’s a simple project that can fit small patios or larger gardens.
Start by choosing durable wood that holds up outside, like cedar or treated pine. Measure the space you have before you cut wood panels for your planter box. Using a carpenter’s square helps keep every corner at a perfect 90 degrees.
Plan for drainage by adding holes or a bottom that lets water out. The depth depends on the plants you want, eight to twelve inches usually works well. Tackling the project in one or two days keeps tools and supplies manageable.
Key Takeaways
- Use weather-resistant wood like cedar to prevent rot and decay outdoors.
- Keep planter depth between 8 and 12 inches for most herbs and shallow plants.
- Measure carefully and use a carpenter’s square to get square corners.
- Plan drainage by drilling holes or adding a removable bottom panel.
- Build a planter box size that fits your space, commonly 2 by 4 feet.
- Glue and nail 2×2 boards at corners for extra strength and stability.
What Are DIY Wood Planter Boxes and Why Build Them?

A wooden planter box is a container made from wood where you can grow plants. It usually has sides, a bottom, and sometimes legs or feet to stand on. These boxes hold soil so you can grow plants in small spaces.
They work well on patios and balconies. You can grow flowers, herbs, or vegetables this way.
Building your own planter box costs less than buying one. You also pick the perfect size and design. This helps match your space and style.
Most DIY planter boxes use 2×4 or 1×4 lumber. These boards usually cost between $10 and $20 each. You can find them at lumber or hardware stores.
You can finish a basic planter in under a day. Beginners can complete this project easily and quickly. It feels good to build something with your hands.
Wood planter boxes suit both inside and outside spaces well. Outdoors, wood looks natural and fits gardens better than plastic or metal.
Indoors, wood adds warmth and you can paint or stain it. You can add drainage holes or benches for more use.
Besides looking good, wooden boxes drain water well, preventing root rot. They also provide insulation against temperature swings that plastic containers don’t. However, wood needs protection, like sealing or using rot-resistant types, or it might decay faster outside.
Wooden planters come in many shapes and sizes, from small herb boxes to large raised beds. You can customize the dimensions to fit limited spaces or grow bigger crops. A typical beginner planter box is 19 by 18 by 19 inches.
This size is easy to build and carry. It also holds enough soil for many plants.
Making a wooden planter box teaches you hands-on skills. It lets you get the size and style you want. This project can be very satisfying.
You can tailor each box with personal touches like paint colors or decorative trim. Using wood connects your garden with natural materials.
It improves how your space looks and feels. Wood adds a nice, natural touch.
Choosing the Best Wood and Materials for Outdoor Planter Boxes
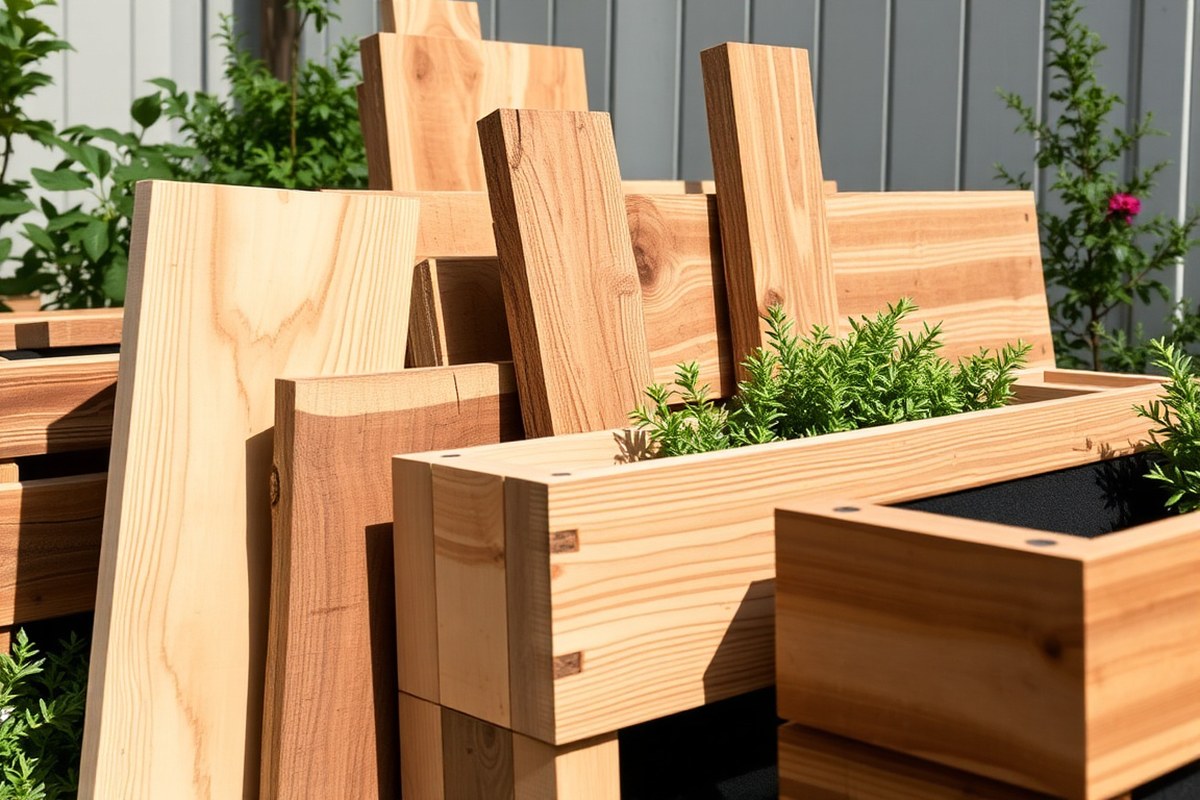
The best wood for outdoor planter boxes resists rot and holds up to weather. Cedar stands out for outdoor use because it lasts long without harsh chemicals.
You can use reclaimed or scrap wood. But treat it carefully to keep plants safe and wood durable.
Wood Types That Last Outside
Cedar is one of the best woods for planter boxes. It naturally resists decay for several years without treatment. This wood is lightweight and easy to use.
Beginners and experienced woodworkers both like it. It’s a good choice for planter boxes.
Other good woods include redwood and cypress, which also resist rot but tend to cost more. Pine and fir are cheaper but need extra protection because they rot faster outdoors. Avoid pressure-treated wood unless it’s labeled safe for edible plants.
Safe Treatments for Edible Plants
When growing herbs or vegetables, avoid toxic chemicals in wood treatments. Natural oils like linseed oil or tung oil seal wood without harming your plants. Apply two coats with a brush and let each dry for 24 hours before planting.
Some gardeners use untreated wood lined with plastic pots or liners inside the planter. It stops soil from touching the wood.
This keeps moisture away and extends wood life. No chemicals contact your plants that way.
Using Reclaimed and Scrap Wood
Reclaimed wood and scrap pieces work well if you check for rot or pests first. Sand old wood smooth and remove any paint or varnish. Don’t use wood that held chemicals before.
Avoid old pallets and painted furniture pieces. These are unsafe for growing food crops.
This wood saves money and adds character to planter boxes. Use 2×2 scraps to make a platform inside. The platform supports the soil and helps water drain.
This keeps plants healthy and your box sturdy. This setup helps keep the wood dry longer.
Extra Materials for Durability and Drainage
Good drainage is key to prevent wood rot. Drill several ½-inch holes in the bottom boards. Put a plastic liner inside the box.
Or separate soil in smaller pots inside. This keeps the wood from staying wet all the time.
Use galvanized or stainless steel screws to avoid rust. Avoid nails that can loosen or corrode. Sealing cut edges with natural oils also helps wood resist moisture and cracks.
| Wood Type | Durability | Cost | Safe for Edibles | Notes |
|---|---|---|---|---|
| Cedar | High | Moderate | Yes | Natural rot resistance, attractive grain |
| Redwood | High | High | Yes | Durable but expensive |
| Cypress | High | High | Yes | Good for wet conditions |
| Pine/Fir | Low | Low | Only if treated safely | Needs sealing, more prone to rot |
| Reclaimed Wood | Varies | Free to Low | Depends on source | Check for paint, chemicals, rot |
Always drill drainage holes and use rust-proof screws to keep your planter box lasting.
Essential Tools and Safety Tips for Building Wooden Planters
To build a wood planter box, you need a few basic tools and safety gear. Knowing how to use each tool safely helps prevent accidents. Follow clear steps for cutting and assembling the wood securely.
Must-Have Tools for Beginners
The main tools you’ll need are a saw, drill, screwdriver, measuring tape, pencil, and clamps. A circular saw or miter saw works best for clean, straight cuts. A power drill lets you quickly make pilot holes and secure screws.
Measuring tape and pencil help plan exact cuts for your planter box dimensions. Clamps hold the wood steady while you drill or screw parts together. These tools cost between $10 and $60 each, depending on quality.
Safe Techniques for Wood Cutting and Assembly
Start by measuring twice, then mark the cut lines clearly with a pencil. Use a slow, steady motion with a circular saw or handsaw to avoid splintering wood edges. Keep your hands well away from the blade during cutting.
Pre-drill holes before driving screws to stop the wood from splitting. Clamp wood pieces securely before screwing to keep edges aligned and stable.
Use wood glue at joints for extra strength. But let it dry before moving the planter box.
Here are precise steps for cutting and assembling your planter box:
- Measure wood pieces to your planter box size.
- Mark cut lines with a pencil.
- Cut wood carefully following your lines.
- Sand rough edges smooth to avoid splinters.
- Clamp pieces together to form the box frame.
- Pre-drill screw holes at each joint.
- Screw pieces together firmly.
- Apply wood glue at seams and let dry.
Protective Gear and Workspace Setup
Always wear safety glasses to stop sawdust and splinters from hitting your eyes. Ear protection protects your hearing during power tool use. Use a dust mask if you make lots of sawdust or work indoors.
Wear gloves for hand protection but avoid loose gloves around spinning blades. Work on a flat, sturdy surface with good lighting. Keep your workspace clear of clutter to avoid trips and falls.
Make sure to unplug power tools when changing blades or bits. Check blades and bits for sharpness before use, they cut better and safer. With these precautions, building your wooden planter box will be safer and more enjoyable.
Determining the Right Size and Design for Your Planter Box
Pick planter box sizes that fit your space and plants. A typical size is 2 feet wide by 4 feet long. The depth should be 10 to 12 inches for root growth and drainage.
Shallow-root plants like herbs need only 6 to 8 inches depth. Deeper-root vegetables, such as carrots or tomatoes, require 12 to 18 inches. A planter with a width of 12 to 18 inches lets plants spread comfortably without crowding.
Match the planter size to your space carefully. Small patios suit boxes around 21 inches cube, which fit neatly without crowding. Larger spaces let you build longer boxes up to 52 inches.
These boxes give more room for many plants or mixed groups. They help when you want to grow several types of plants together.
Design features affect usability and plant health. Taller sides prevent soil from spilling, while drainage holes stop waterlogging. You can add shelves to hold potted plants or tools.
Another option is building an arbor for hanging containers. These ideas boost your planting space without more ground area.
Keep plant types in mind when choosing shape. Rectangular boxes give more planting area but fit narrow spaces better.
Square or round boxes are easy to move but hold fewer plants. Custom shapes like table-style boxes double as furniture and flowerpots.
Good results mean healthy plants with enough soil, sunlight, and airflow. Avoid crowding plants in too small a box, which stresses roots and causes poor growth. Too big a planter can waste space and soil, raising watering needs.
Buying wood or cutting it to custom sizes takes more time. It also costs more money than standard sizes. But you get a planter that fits your exact spot.
Standard sizes save effort and materials but might not use space efficiently. Balance budget, space, and plant needs for your best fit.
Step-by-Step Instructions to Build a Simple Wood Planter Box
Building a simple wood planter box starts with cutting the right pieces. Next, assemble a sturdy frame with square corners. Finally, add a bottom with plenty of drainage holes to keep plants healthy.
Measuring and Cutting the Wood Pieces
Begin by marking your 2×6 lumber for cutting. A beginner planter box usually measures 2 feet long and 1 foot wide. It stands 12 inches tall.
These dimensions work well for most small gardens. You will need four side boards and four corner legs, each cut precisely.
Measure twice before cutting to avoid mistakes. Use a circular saw or jigsaw for straight cuts. Clamps help hold pieces steady while cutting and drilling.
- Measure and mark four 24-inch sideboards (2×6 lumber) for the longer sides.
- Measure and mark four 12-inch sideboards for the shorter sides inside the frame.
- Cut four 12-inch pieces of 2×2 lumber for the corner legs.
- Double-check all cuts with a carpenter’s square to ensure right angles.
Always use a speed square to check your cuts and prevent uneven edges.
Assembling the Frame and Securing Corners
Lay out the side pieces flat on your workspace in a rectangle. Position the 2×2 corner legs outside each corner, flush with the top edges of the boards. This adds extra strength and raises the box slightly off the ground.
Use wood glue on the contact surfaces for stronger joints. Then, drill pilot holes before screwing the boards and legs together. This prevents wood from splitting.
- Arrange the four sideboards into a rectangular frame on a flat surface.
- Add wood glue to corner joints and set the 2×2 legs on each outside corner.
- Clamp the pieces in place and drill pilot holes through the legs into the boards.
- Screw the legs to the frame using 1.5-inch flat wood screws.
- Check again with a carpenter’s square to ensure the frame is perfectly square.
Pre-drill all screw holes near corners to avoid splitting the wood.
Installing the Bottom and Drainage
Cut bottom boards to fit inside the frame, with a slight gap or holes for drainage. Attach them to the frame with 1-inch screws, pre-drilling each hole. Adding many drainage holes prevents water from pooling and harming roots.
You can line the inside walls with heavy plastic before installing the bottom boards. Cut drainage holes through the plastic and boards to keep soil in but water flowing.
- Cut bottom boards to fit snugly inside the frame, covering the base.
- Drill multiple ½-inch drainage holes evenly spaced across the bottom boards.
- Use a heavy-duty plastic liner inside the planter walls. Attach it by stapling securely. This helps protect wood from moisture damage.
- Pre-drill holes in bottom boards and attach them to the frame with 1-inch screws.
- Ensure all edges are flush and the bottom sits firmly against the frame.
Do not skip drainage holes; stagnant water kills plant roots quickly.
Customizing and improving Your Wooden Planter Boxes
Building tiered wooden planter boxes adds more growing space without using extra ground area. Stack smaller boxes or build shelves inside a larger frame to create levels. Use 1×4 or 1×6 boards.
Secure tiers with screws or brackets, making sure the bottom has drainage holes. This setup usually takes about an hour if you follow a simple design.
Self-watering planters help keep your plants hydrated with less effort. To build one, make a water reservoir under the planter. Use a plastic liner or pond liner to hold water.
Drill small holes in the bottom of the wooden box or put in a false bottom. Use a cotton wick or fabric strip to connect soil to water.
This lets water seep up slowly to plants. You’ll spend about 30 minutes adding these features, but it saves frequent watering later.
Decorative finishes protect wood while boosting visual appeal. Outdoor-safe stains or sealers prevent moisture damage and extend planter life. You can also use exterior-grade paint for color.
Just pick one labeled for decks or siding. Add trim shaped like small “x” on each side with 1×2 boards. Use wood glue to attach these.
It gives a rustic look. These small extras cost under $20 and take less than an hour.
Adding seating or storage to your planter boxes combines function and style. Attach a strong wooden bench on one side of the planter. Or use wide, flat boards as a top edge.
This can double as seating. Build storage compartments underneath or beside the potting area to hold tools and soil bags.
Use weatherproof wood like cedar and seal everything well to handle outdoor exposure. It takes a bit more woodworking skills but turns your planter into a useful garden workstation.
You could also customize your planter shape for specific spaces. L-shaped or rectangular boxes work well against walls or fences. Narrow vertical planters save space on patios and decks.
They help you grow herbs or flowers standing up. Choose wood like cedar or redwood for your planter. Use a good finish to make it last for years.
These planter styles let you match your garden size and style. They don’t add much extra cost to your project.
Maintaining and Protecting Your Wooden Planter Boxes for Longevity
Wooden planter boxes need regular sealing or painting to last longer. Apply an outdoor water sealer or paint every one to two years. Check how much rain and sun your planter gets to decide.
This helps protect the wood from damage and wear. This protects the wood from moisture, which causes rot and mold.
Before sealing or painting, clean the planter with a stiff brush and mild soap. Let it dry completely for at least 24 hours. Sand rough spots or peeling paint lightly to help new coatings stick better.
To avoid rot, never put soil directly into the wood. Line the planter with plastic or a gardening fabric to keep moisture off the wood surfaces. Drill drainage holes in the bottom to let extra water out.
This keeps water from sitting inside the planter box. Standing water can cause wood to rot faster.
Watch for signs of rot like soft spots or discoloration, and treat them quickly. Spot small insect holes? Use insect-resistant wood treatment carefully.
Follow the product instructions for safe and effective use. These steps keep pests from damaging your planter.
Before winter, empty the planter and remove all soil. This reduces moisture trapped against the wood in freezing temperatures. Store planters in a dry, covered place or cover them with a breathable tarp outdoors.
Check your planter each spring and fall. Clean off dirt and debris, repair cracks, and reseal any worn areas. This simple seasonal maintenance keeps your planter looking good and extends its useful life.
Common Mistakes and How to Avoid Them When Building Planter Boxes
Uneven or weak joints are the most common issues when building planter boxes. Using only nails or screws can cause problems. This happens if wood pieces don’t line up.
It weakens the joint and makes the box shaky. To fix this, apply wood glue at every joint.
Add brad nails to hold the pieces firmly. Let the glue dry before moving the box.
Drainage is another big mistake that affects plant health. Planter boxes without proper drainage holes can trap water, causing roots to rot. Make sure you drill holes that allow water to escape easily.
For most boxes, 1/4-inch holes spaced every 6 inches along the bottom work well. Also, place a layer of gravel or broken pot shards at the bottom to improve drainage.
Here’s a list of common problems and easy fixes. These tips will help your planter box last longer. They keep your box strong and hold up better.
- Weak joints: use wood glue plus brad nails for stronger bonding
- Uneven boards: measure carefully and clamp pieces before fastening
- Poor drainage: drill enough 1/4-inch holes and add a gravel base
- Tipping planters: design base wider than top or add support feet
- Warped wood: pick kiln-dried lumber and seal all sides
- Too small size: go for at least 12 inches deep for most plants
- Ignoring layering: stack boards with alternating joints for strength
Your joints seem shaky. Add another timber layer with boards staggered by 40cm. This will strengthen the corners and make the box more stable.
This alternating pattern locks the sides firmly. Continue stacking until your planter is about four layers tall. This method builds a sturdy wall that won’t wobble or fall apart repeatedly.
Seal your planter box on all sides every time. This keeps moisture out and prevents warping. It also stops joints from becoming weak.
Not thinking about support can cause tipping problems. This especially happens on narrow deck railings. Make sure your planter stands on stable, wide surfaces.
Use a design that fits a 2×4 or 2×6 rail tightly. Or add wider feet for more outdoor support.
This keeps the planter steady in all conditions. Good planning here keeps the box steady, even in wind or uneven surfaces.
Step-by-Step Action Plan
Follow these steps to build your wooden planter box confidently and efficiently.
- Day 1: Select the right wood and gather your tools. Check that your wood is untreated and suitable for outdoors.
- Day 2: Measure your space and decide the planter size. Use a tape measure and mark the wood clearly.
- Day 3: Cut the wood pieces with a saw. Make sure edges are smooth to avoid splinters.
- Day 4: Assemble the planter box with screws. Test for sturdiness by gently shaking it.
- Day 5: Sand all surfaces to remove rough areas. Run your hand over the wood to check smoothness.
- Day 6: Apply a wood preservative or outdoor sealant. Let it dry fully as per product instructions.
- Day 7: Add drainage holes and line the planter with landscaping fabric. Pour a little water to see if it drains well.
- After 1 Week: Fill with soil and plant your chosen flowers or herbs. Watch for healthy growth as a success sign.
Frequently Asked Questions
What Type of Wood Is Best If I Want a Natural, Decay-Resistant Planter?
Cedar is a top choice for planter boxes since it resists decay. It looks great and holds up outdoors without harsh chemicals.
Can I Use Scrap Wood Safely for Building Planter Boxes?
Yes, scrap wood can be used if it’s solid and untreated. Avoid any wood that has been painted or chemically treated to keep plants safe.
How Do I Protect My Planter Box Without Using Toxic Finishes?
Use natural oils or sealants safe for outdoor wood. They keep moisture out and avoid harming plants or the soil.
What Size Planter Box Is Best for Growing Vegetables?
A depth of 12-18 inches suits most vegetables. This depth allows good root growth and enough soil for healthy plants.
How Can I Add Drainage to My Wooden Planter Boxes?
Drill holes in the bottom layer of the box for drainage. Place gravel beneath soil to keep roots healthy and prevent waterlogging.
What’s the Easiest Way to Customize Planter Boxes for My Deck?
Paint or stain them with outdoor-safe finishes that match your style. Adding legs or casters makes moving them easier.
The Bottom Line
Building your own wooden planter box helps you create a perfect fit for your garden space. Choose the right materials and follow simple steps for best results. Start your project today by selecting wood and tools that suit your needs.