How to Set Up a Greenhouse: A Complete Step-by-Step Guide for Beginners
How to set up a greenhouse starts with choosing a sunny, protected spot. You need at least six hours of direct sunlight each day. Pick a place free from shade by nearby trees or buildings to get the most light.
Next, select the right size and style for your space and plants. A common size is 8 by 6 feet.
But bigger ones need a strong foundation like concrete. A bigger greenhouse lets you arrange shelves or staging on both sides for better plant growth.
Prepare well by checking the soil temperature with a soil thermometer. Keep the temperature above 60 degrees Fahrenheit to protect your plants from cold. Also, good ventilation and heating help keep your greenhouse comfortable year-round.
Key Takeaways
- Choose a site with six to eight hours of direct sunlight daily.
- Avoid low spots to prevent frost pockets that can chill plants.
- Select a size based on your space, 8×6 feet is popular.
- Use a concrete base for any greenhouse larger than 8×6 feet.
- Install windows that can open to control sunlight and airflow.
- Keep soil temperature above 60°F using a soil thermometer.
How to Set Up a Greenhouse Step-by-Step

Setting up your greenhouse follows clear steps to avoid delays and mistakes. Start with solid preparation, then build gradually to ensure stability and ease. The right order helps keep you safe and your plants happy from day one.
- Gather materials and tools. Collect all parts, screws, and safety gear first. Check the instructions and prepare common tools like a drill, level, and measuring tape. This step saves time and lowers the chance of missing parts during setup.
- Prepare the site and foundation. Clear the soil of debris and level the ground. You can lay concrete, bricks, or gravel as a base based on your greenhouse model. A strong, flat foundation prevents frame distortion and water pooling.
- Assemble the frame. Follow the manual carefully and start with the base frame. Secure the joints tightly using bolts or screws. Working on a calm day is the best choice. Panels catch wind easily. They become hard to manage when windy.
- Install the coverings. Attach plastic, glass, or polycarbonate panels to the frame. Overlap them properly to avoid drafts and water leaks. Clear coverings let in maximum light for growth and keep warmth inside during cold months.
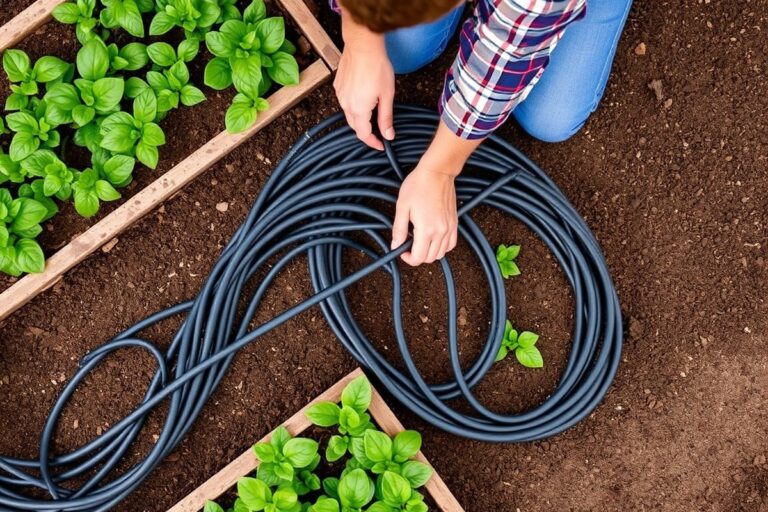
- Set up ventilation and water systems. Fit vents where hot air can escape easily, usually near the roof. Install drip irrigation or hoses to maintain consistent moisture. Proper air and water flow prevent diseases and support plant health.
- Fill with soil and prepare planting areas. Use high-quality potting soil or mix your own with compost and sand. Lay out raised beds or containers depending on your space. Good soil and organization speed up the planting and growing process.
- Monitor temperature and humidity. Use a soil thermometer and a hygrometer to track conditions daily. Keep temperatures above 60°F for seed starting and adjust ventilation if it gets too hot. This care helps plants thrive instead of just surviving.
These steps typically take a few days to a week depending on your time and help. Choosing a good day without wind or rain speeds assembly. After setup, you’ll have a sturdy, efficient growing space ready for your first plants.
Selecting the Best Location for Your Greenhouse

Pick a place that gets at least six hours of direct sunlight daily. South-facing spots usually offer the best light in most US areas. Avoid shaded parts near buildings or tall trees since they block valuable sun.
Keep your greenhouse away from strong, funneled winds. A narrow 10-foot gap between structures can raise wind pressure on your greenhouse panels by 40%. Set it where natural windbreaks like shrubs or fences reduce gusts but don’t block sun.
Watch for cold air buildup in low spots. Frost pockets cause temperatures to drop 5°F to 8°F more than nearby areas. Place your greenhouse higher up on gentle slopes.
This helps avoid chilly damage. It’s useful early or late in the season.
Give at least 10 feet between your greenhouse and trees or buildings. This stops shade problems and stops roots from stealing soil moisture. Put the greenhouse near your house for easy access.
You can then hook it up to water or heat. This location saves time and effort.
Putting the greenhouse near existing water saves hassle. You’ll water plants more often if you don’t want to drag hoses far. It’s easier to run electricity for heating or grow lights.
Keep your greenhouse close to your home. That way, you avoid long cable runs.
Don’t build your greenhouse just anywhere. A poor spot wastes energy, damages plants, and cheats your effort.
Choosing the Right Greenhouse Design and Size
Choosing the right greenhouse design and size means matching your space and goals. Designs vary from simple frames to larger conservatories. Size depends on how much you want to grow and where you’ll place it.
Common Greenhouse Types Explained
Lean-to greenhouses attach to existing buildings. They save space and use building heat but limit size. They suit small yards with limited room for stand-alone structures.
A-frame greenhouses have a triangular shape with sloping sides. This design helps snow slide off and gives good sun exposure. They work well in snowy climates and moderate spaces.
Dome and geodesic greenhouses use shapes that spread light evenly. These usually require more initial setup but offer strength and good airflow. They fit medium to large spaces and showcase your growing plants.
Size Recommendations Based on Use
Small greenhouses usually measure about 6 ft by 8 ft or less. These fit small yards or urban areas well. They allow for vertical shelving to maximize space for a few plants.
A common medium size is around 8 ft by 10 ft. This size suits most gardeners who want staging on both sides for easy access. It balances space and cost without overwhelming a yard.
Large greenhouses can be 12 ft by 20 ft or bigger. These work best for serious growers with ample outdoor space. They provide room to grow many plants and allow better climate control.
| Type | Typical Size (ft) | Best For | Space Needed |
|---|---|---|---|
| Lean-to | 6 x 8 | Small yards, limited space | Minimal, attached |
| A-frame | 8 x 10 | Snowy regions, small to medium yards | Moderate |
| Dome/Geodesic | 12 x 20+ | Large spaces, all-season growing | Ample, open |
| Conservatory | Varies large | Dedicated garden rooms, larger budgets | Large, standalone |
Matching size to your goals means knowing the plants you’re growing too. Taller plants like tomatoes need more vertical space. Small herbs and lettuces work well on multi-shelf staging inside smaller greenhouses.
Pros and Cons of Popular Designs
Lean-to greenhouses are easy to heat using the building’s warmth. They cost less but limit your workspace and sunlight from one side. The confined size can make air circulation tricky.
A-frame greenhouses shed snow easily and use space more effectively. Their angled sides reduce growing space near the edges. You can fit staging on both sides, making plant access easier.
Dome designs give even light and strong wind resistance. They cost more to build and need a larger foundation. The open space inside makes climate control simpler and growing more plants easier.
Preparing the Foundation and Assembling the Frame
Start by choosing a strong foundation suited for your greenhouse size and local weather. A secure base makes your greenhouse steady and protects it from wind and weather damage. Anchoring the frame firmly to this foundation prevents shifting and extends the structure’s life.
Foundation Types and When to Use Them
Concrete perimeter foundations provide the best wind resistance. They cost between $350 and $500 for a 10 by 12-foot greenhouse. Installation takes 2 to 3 days.
This timeframe depends on your setup skills and help available. These are ideal in areas with heavy snow or strong winds.
Treated timber bases cost less, about $150 to $250. They take only 4 to 6 hours to set up.
This makes them quicker to install than other options. They work well in mild climates and for smaller greenhouses but offer moderate wind resistance.
Your soil is rocky or you want a quick setup? Try earth anchors (augers). They hold greenhouses firmly and install fast.
They cost $80 to $120 with a 2 to 3-hour install and resist wind well. These are perfect for temporary greenhouses or uneven ground.
Step-by-Step Frame Assembly
Lay out all parts and check the instruction manual before starting. Begin by assembling the base frame, ensuring it is level. Use a spirit level to check all sides carefully.
Secure the frame to the foundation with heavy-duty brackets or masonry anchors. This prevents the structure from lifting in strong winds. Next, add vertical supports and cross braces for added stability.
Attach framing components tightly and make sure connections are flush. Tighten all bolts or screws in stages to keep everything aligned. Double check that the frame is square before moving to cover installation.
Essential Tools and Safety Tips
Use proper tools to make installation safer and easier. You’ll need a spirit level, power drill, wrench set, hammer, and measuring tape. Keep all tools close to minimize trips and speed up the work.
Wear safety goggles and gloves to protect your eyes and hands. Secure your work area and watch for loose debris that could cause trips or slips. Have a buddy help you handle large frame sections for safety and balance.
- Spirit level for base and frame alignment
- Power drill and bits for anchors and screws
- Wrenches and screwdrivers
- Gloves and goggles for protection
- Measuring tape for precise layout
- Rubber mallet for fitting pieces gently
- Helper for lifting large parts
Check all connections and anchors again before finishing. A solid frame will last many years and give your plants a safe home.
Selecting and Installing Greenhouse Coverings
Plastic, polycarbonate, and glass are the main greenhouse covering options. Plastic panels cost less and offer good light flow and durability.
Polycarbonate sheets are stronger than glass and insulate better but often cost more. Glass provides excellent light clarity but is heavier and can break more easily.
Installing panels starts after securing a firm foundation and frame. Use glazing bars to hold glass or plastic in place smoothly. Check vertical posts with a spirit level when placing panels.
Make sure everything is straight and plumb. This stops gaps or pressure on panels. Always put plastic or polycarbonate panels with the UV side out.
This side protects from sun damage. It helps prevent quick damage and yellowing.
Light loss happens fast if dust or algae covers panels, so clean them regularly. Avoid quick fixes like overlapping panels incorrectly since gaps let cold air in.
Attach weatherstripping tape between aluminum frames and polycarbonate to stop drafts and water leaks. For glass panels, handle carefully to avoid chips that grow into fractures.
Polycarbonate is a smart choice if you want lower maintenance and stronger impact resistance. Glass suits greenhouses focused on clear light quality but needs a wood frame and more care. Plastic film covers work well for cheap, temporary setups.
They wear out faster than solid panels. Expect to replace them every few years.
Always carefully read kit instructions and watch for sharp edges on aluminum frame parts. Use gloves and safety glasses for glass or polycarbonate work to protect hands and eyes.
Take your time. Rushing installation risks cracking panels or uneven fits that shorten greenhouse life.
Put foam weatherstripping tape between polycarbonate panels and aluminum frames before securing to avoid leaks.
Setting Up Climate Control: Ventilation, Heating, and Irrigation
Set up your greenhouse climate control to keep plants happy year-round. Ventilate to keep air fresh, heat during cold months, and water efficiently. Automate these tasks for consistent care and less daily work.
Installing Ventilation Systems
Air circulation prevents heat buildup and controls humidity. In warm months, natural convection usually keeps air moving inside. Adding vents and fans improves airflow and stops mold or mildew from forming.
Manual vents can be roof-top or sidewall styles. Automatic vent openers use temperature-sensitive parts to open and close vents without electricity. Adding an oscillating fan helps move air more evenly.
- Choose vent locations at roof and sidewalls to allow hot air to escape.
- Install vent frames and vents securely in your greenhouse structure.
- Add automatic vent openers that react between 60 and 85°F for hands-off control.
- Mount an oscillating fan inside to maintain airflow during calm days.
- Plug fans into a timer or thermostat to run only when needed.
- Test the system on warm days to check vent operation and airflow.
Options for Heating and Temperature Control
Heating keeps plants safe during winter when temperatures drop below 60°F soil temperature. Electric heaters offer precise control but cost more to run. Propane or natural gas heaters are cheaper but need ventilation.
Install the heater on a stable, non-flammable surface near your plants but away from direct contact. Use a thermostat to keep temperatures steady and avoid wasting fuel. Don’t block vents while heating to prevent carbon dioxide buildup.
Setting Up Automated Irrigation
Automating watering saves time and ensures consistent moisture for your plants. Drip irrigation targets roots directly, reducing water waste and leaf diseases. Misting systems add humidity, good for delicate seedlings or tropical plants.
Connect your irrigation system to a timer or moisture sensor. Sensors adjust watering based on soil dryness, preventing overwatering. Use a pressure regulator to keep water flow steady and protect thin tubing in your setup.
- Plan your irrigation layout near plant containers or beds.
- Install drip lines or mist emitters along your planting areas.
- Attach the system to a water source with a filter to keep clogs away.
- Set a timer or connect a soil moisture sensor for automation.
- Test the system to check even water distribution and adjust emitters.
- Monitor regularly for leaks or blockages to maintain system reliability.
Best Plants and Organization Tips for Your Greenhouse
Tomatoes, lettuce, herbs, and peppers are excellent choices for beginners. They grow quickly, need moderate care, and produce plenty of food. These plants thrive in the controlled warmth and humidity of a greenhouse.
Organize your greenhouse by installing benches along the walls to maximize floor space. Use shelves for smaller plants or seedlings to keep them accessible. Space plants at least 12 inches apart.
Keep up to 18 inches for best air flow. This spacing helps cut down disease risk.
Place taller plants like tomatoes where they won’t shade smaller ones. Group herbs and leafy greens together since they have similar water and light needs. Keeping plants organized this way makes watering and pruning easier and prevents overcrowding.
Supplement natural sunlight with LED grow lights especially during winter or cloudy days. Set timers to give plants about 12 to 16 hours of light daily. Avoid over-lighting, as plants also need dark periods to grow properly.
Keep soil moist but avoid wetting leaves to prevent mold in the warm, humid environment. Water at soil level using drip irrigation or watering cans. Regularly ventilate your greenhouse to reduce humidity and keep the air fresh for healthy growth.
Heating is important during colder months to maintain 65 to 75 °F for most vegetables. Use small electric heaters safely positioned away from plants. Fans can help circulate warm air evenly, preventing cold spots that slow growth.
Benches and shelves cost between $50 and $150, depending on size and materials. They save space and make cleaning spills easier. A well-organized greenhouse saves you time and effort in daily plant care, boosting your growing success.
Common Setup Mistakes and How to Avoid Them
Choosing a spot that floods or stays too damp invites trouble. Water pooling under your greenhouse raises humidity and risks mold.
Pick a flat place with good drainage to stop this. Avoid slopes where water might gather and flood your plants.
Ignoring wind protection can lead to broken panels and stressed plants. Position your greenhouse near a fence or hedge to block strong gusts. This shielding saves you repair costs and keeps your plants safe from sudden cold drafts.
Using fragile materials or a weak frame often leads to early replacement. Metal greenhouses, though pricier, around $700 to $2000, bring better stability. They last longer and manage changing climates, which is key as your plant collection grows.
- Check soil drainage to avoid pooled water and excess moisture
- Place the greenhouse close to windbreaks like fences or trees
- Invest in a sturdy frame to handle weather and last years
- Match your greenhouse size to your plant plan for efficient space use
- Install vents on opposite sides for better airflow and humidity control
- Seal all openings properly to keep pests and drafts out
- Measure sun exposure to ensure plants get 6 to 8 hours of light daily
Temperature swings and high humidity often come from poor ventilation. Install vents on opposite walls so fresh air flows through easily. Add thermostats and automatic vent openers to keep your plants comfortable year-round.
Neglecting to plan for the plants you want leads to wasted effort. Different species need specific light, humidity, and temperature. Adjust your setup based on plant needs.
Raise humidity for tropical plants. Add heaters for winter crops.
Keep vents open on warm days to avoid too much humidity and mold growth.
Step-by-Step Action Plan
Here is a simple plan to get your greenhouse up and running fast. Follow these steps to check that each phase works right.
- Before you start: Pick a flat, sunny spot with easy water access. Make sure it gets at least six hours of sun daily.
- Day 1: Mark out and prepare the foundation area. Level the ground and clear debris to ensure a stable base.
- Day 2: Assemble the frame according to the instructions. Check all bolts and screws are tight for safety.
- Day 3: Install your chosen covering, like polycarbonate panels or plastic film. Look for even coverage without gaps.
- Day 4: Set up ventilation systems, such as vents or fans. Test airflow by feeling for fresh air movement inside.
- Day 5: Install heating if needed and set up irrigation. Turn on heaters and drip lines to make sure they work well.
- Day 6: Organize your plants, grouping those with similar needs together. Check plants are getting the right amount of light and water.
- After 2 weeks: Monitor inside temperature and humidity daily. Adjust ventilation or watering schedules to keep plants happy.
Frequently Asked Questions
How Long Does It Take to Set Up a Small Greenhouse?
Setting up a small greenhouse usually takes one to two days. This includes assembling the frame, installing coverings, and setting up basic ventilation systems. Simple kits with clear instructions speed up the process.
Can I Set Up a Greenhouse on Concrete or Pavement?
Yes, you can set up a greenhouse on concrete or pavement if the base is level. You may need to add raised beds or containers since soil won’t be accessible. Check drainage to avoid water pooling under the greenhouse.
What Tools Do I Need to Set Up a Greenhouse?
Basic tools like a screwdriver, tape measure, and drill are essential. You might also need a level, hammer, and ladder depending on the frame type. Having the right tools makes assembly safer and quicker.
Should I Anchor My Greenhouse, and How?
Yes, anchoring your greenhouse is important to prevent wind damage. Use ground spikes, weights, or concrete footings depending on your greenhouse size. Proper anchoring keeps the structure stable during storms.
Can I Set Up a Greenhouse Indoors or on a Balcony?
Yes, mini greenhouses and grow tents work well indoors or on balconies. They’ll need good light and ventilation. Make sure the space can handle extra moisture and that you can control temperature.
When Is the Best Time of Year to Set Up My First Greenhouse?
Setting up in early spring or summer is best. It lets you start growing seeds and cuttings when temperatures stay between 65° and 70°F. This timing helps plants establish in warmer greenhouse conditions.
Key Points to Remember
Setting up a greenhouse correctly boosts plant growth and enjoyment. Start with the right spot and solid base for long-term success. Now, pick your greenhouse design and begin your build this weekend.