How to Start a Strawberry Plant: A Complete Guide for Fast, Healthy Growth
Knowing how to start a strawberry plant means getting a healthy start for sweet fruit. Start by choosing strong plants or fresh seeds, then focus on good soil and sunlight. Healthy strawberries need well-drained soil and at least six hours of sun daily to thrive.
Plant strawberries just deep enough to cover roots but keep crowns above ground. Space plants about 12 to 18 inches apart to give runners room to grow. This spacing helps strawberries spread without crowding and reduces disease risk.
Start seeds indoors or buy young plants from a nursery for a quick boost. Keep soil moist but not soaked to help roots settle in. Avoid planting strawberries where similar fruits or flowers grew recently to prevent soil problems.
Key Takeaways
- Choose strawberry varieties suited to your local climate and taste preferences.
- Space plants 12 to 18 inches apart to allow room for runners and growth.
- Plant strawberries shallowly, covering roots but leaving crowns exposed.
- Use well-drained soil rich in organic matter for best strawberry growth.
- Water strawberries about 1 to 2 inches weekly; increase in hot, dry weather.
- Start seeds indoors under grow lights or use nursery plants for faster growth.
How to Start a Strawberry Plant from Seed or Plant

Starting strawberry plants is easier when you choose young plants instead of seeds. Seeds take longer to sprout and grow and need extra care to keep moist and warm. Most gardeners buy bare-root or potted strawberry plants.
These are ready to plant outdoors. They start bearing fruit in 3 to 4 months.
You can save money by starting strawberries from seed. This method takes longer but costs less. You’ll start seeds indoors 6 to 8 weeks before the last frost date.
Seeds take 2 to 3 weeks to start growing. Then keep seedlings indoors for a few months.
After that, move them outside. Bare-root or potted plants usually go directly into the soil in early spring.
Plant strawberry crowns just above the soil surface. Cover the roots with about ¼ inch (6mm) of soil.
Space plants 12 to 18 inches apart in rows 2 to 3 feet apart. This gives enough room for runners to grow and spreads your harvest.
- Choose your method: seeds for patience and cost-saving, plants for quicker harvest.
- For seeds, start indoors 6 to 8 weeks before frost. Keep soil moist and at 60, 70°F.
- Transplant seedlings outdoors after hardening them off for 1 to 2 weeks.
- For bare-root or potted plants, plant in early spring when soil warms.
- Dig holes wide enough to spread roots without bending.
- Place the plant so the crown is just above soil surface.
- Cover roots with soil gently, leaving crown exposed.
- Space plants 12 to 18 inches apart, rows 2 to 3 feet apart.
Choosing the Best Strawberry Varieties for Your Climate and Use

Choosing the right strawberry variety depends on your climate. It also depends on when you want to harvest. Taste preferences matter, too.
You’ll pick from June-bearing, everbearing, or day-neutral types. Each type works better in different regions and offers different harvest times and flavors.
June-Bearing Varieties
June-bearing strawberries produce one large crop each year, usually in late spring to early summer. They need cool winters and warm springs to develop the best berries. These strawberries grow well in temperate climates.
Winters must be cold enough to meet chilling needs. They shouldn’t be so cold that plants get damaged.
Plant them between March and May for a harvest the following year. These plants usually give the most berries per plant. They are perfect if you want a large harvest.
The berries grow closely together on the plant. Popular types include Chandler and Honeoye, known for good flavor and size.
Pinching off blossoms during the first year helps plants establish stronger roots and runners. This improves the harvest for the next season. Avoid planting in places recently used for related crops to reduce disease risk.
Ever-Bearing Varieties
Ever-bearing strawberries provide two to three smaller harvests from summer through fall. They are suitable for warmer climates or long growing seasons where fruit ripens quickly. These types won’t produce as heavily as June-bearers but give you berries over a longer period.
Planting in April or late summer works best for ever-bearing varieties like Sequoia and Ozark Beauty. You’ll see fruit in the same year you plant them, usually through summer and fall. Their flavor can be mild but consistent during the season.
Ever-bearing plants need plenty of sunlight and watering for steady production. Keep flower buds removed until July if planting new beds. This lets plants focus on root growth before fruiting.
Day-Neutral Varieties
Day-neutral strawberries produce fruit throughout the growing season, regardless of daylight length. These do well in mild or variable climates, giving you berries from spring to fall. Their fruit size and yield are moderate but steady.
Grow day-neutral types like Albion by planting in April or late summer. They start fruiting quickly, often the same year as planting. They taste sweeter and better than many everbearing types but less intense than June-bearers.
Keep soil evenly moist and avoid crowding to keep day-neutral plants healthy. They handle heat better than June-bearing types, making them good for warmer spots. Their long harvest suits garden beds and containers alike.
Disease-Resistant Options
Disease resistance is key to keeping your strawberry patch healthy. Choose varieties labeled as resistant to Verticillium wilt, a common soil fungus that can kill plants. Resistant types help avoid costly losses and the trouble of replanting.
Check plant labels or descriptions for disease resistance before buying. Honeoye is often recommended for its resistance to many common strawberry diseases. You can also rotate plant locations yearly to reduce soil-borne diseases.
Good spacing of 1.5 to 2 feet allows air circulation, lowering disease risk. Avoid planting strawberries where melons or roses recently grew. Keeping plants healthy with disease-resistant varieties saves work and improves your crop size and quality.
Pick at least two types of strawberries for a longer harvest season.
| Strawberry Variety | Planting Time | Expected Harvest Time |
|---|---|---|
| Chandler (June-Bearing) | March to May | Late Spring to Early Summer (next year) |
| Honeoye (June-Bearing) | March to May | Early to Mid-Summer (next year) |
| Sequoia (Ever-Bearing) | April or late summer | Summer and Fall (same year) |
| Ozark Beauty (Ever-Bearing) | April or late summer | Summer and Fall (same year) |
| Albion (Day-Neutral) | April or late summer | Spring to Fall (same year) |
Selecting the Perfect Spot and Preparing Soil for Strawberry Plants
Pick a sunny spot with at least six hours of direct sun. The soil should drain well and have a pH close to 6.5. Avoid planting strawberries where similar crops or strawberries grew before to prevent disease.
Sunlight and Microclimate Needs
Strawberries need full sun to produce sweet, ripe fruit, ideally six to eight hours daily. South-facing fences or walls work best because they provide warmth and protect from wind. This setup creates a microclimate that helps strawberries grow better and ripen faster.
Choose a location away from large trees. Tree roots compete for water and nutrients, stunting your strawberry plants. Good air circulation reduces fungal problems and keeps plants dry after rain or watering.
Ideal Soil pH and Texture
Strawberries prefer soil with a pH between 6.0 and 6.8, slightly acidic to neutral. This range helps them absorb nutrients easily. Soil should be loose, sandy loam or loamy clay that drains well but holds enough moisture.
Heavy clay or soggy soil can cause root rot and stunt growth. Your soil is sticky or stays wet after rain.
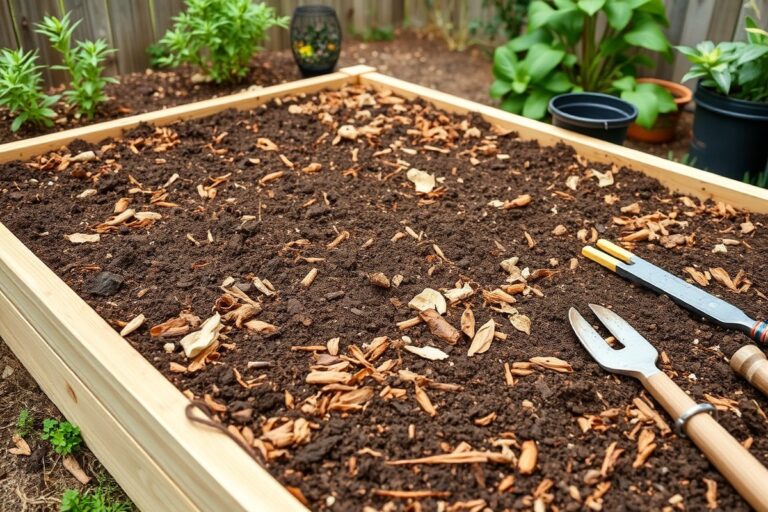
Try raised beds. Raised beds improve drainage and prevent the plants from sitting in water.
Soil Testing and Amendments
Test your soil’s pH before planting. Use a home kit.
This tells you what amendments your soil needs. Apply lime if the soil is too acidic to raise pH to the ideal range.
Mix lime into the soil several weeks before planting to give it time to work. Add organic matter like compost or aged manure to improve soil texture and fertility. A balanced fertilizer, such as 10-10-10, can be worked in just before planting.
Crop Rotation and Avoiding Soil Diseases
Plant strawberries in a fresh spot, not where you’ve grown strawberries, tomatoes, peppers, or eggplants recently. These crops share similar diseases that survive in the soil. Rotating helps reduce the risk of soil-borne diseases and pests.
Choosing disease-resistant strawberry varieties also helps. Water the soil at the base of plants rather than the leaves to avoid fungal problems. Healthy, well-prepared soil paired with proper care lowers disease chances drastically.
Proper Spacing and Planting Techniques for Strawberry Plants
Strawberry plants need proper spacing between each other and rows for air flow and fruit size. Plant crowns should sit right at soil level, not too deep or high. You can pick between matted row or hill planting systems.
The choice depends on your strawberry variety and runner control. Choose the one that fits your garden best.
Matted Row System
The matted row system works best for June-bearing strawberries that send out runners freely. Here are the steps to set up a matted row planting:
- Space the initial plants about 18 to 30 inches apart in rows.
- Set rows four feet apart to allow walking and air flow.
- Let runners fill in the space naturally. But keep runner plants at least 4 inches away from others.
- Thin plants to about 6 inches apart after runner growth in renovation time.
- Plant the strawberry crown at soil level and spread roots evenly.
- Remove dead leaves or debris to promote air circulation within the row.
This system lets plants produce many runners for ground cover and more fruiting points. Too close spacing blocks air, causing diseases. Too wide spacing wastes space and reduces yield.
Hill (Mound) System
The hill system fits day-neutral and ever-bearing strawberries that you want to keep runner-free. Follow these steps to plant in a hill system:
- Form small mounds or hills spaced about 24 inches apart in rows.
- Set two staggered rows of plants per hill, 12 inches apart from each other.
- Keep rows at least 4 feet apart for access and sunlight.
- Crush runners as soon as they appear to prevent spread.
- Place the crown of the plant at soil level, spreading roots around the hill.
- Use mulch to protect plants but watch for regrowth that can cause frost damage.
This system offers good disease control because runners don’t spread. It needs more attention to runner removal and careful watering. You get fewer but larger berries per plant.
Single Row and Container Spacing
Single rows and container planting require precise spacing to keep plants healthy and productive. Here’s how to space plants in these setups:
- Plant strawberry crowns at soil level in individual holes or pots.
- Space plants 12 inches apart in single rows outdoors.
- Set rows about 4 feet apart if you have multiple ones.
- Put one strawberry plant per hole on the lower tiers. Add three or four plants in each hole at the top. This helps the plants grow well in tiered containers.
- Remove runners promptly to control plant spread.
Good spacing ensures roots can expand and plants avoid competition. Crowns set too low will rot; too high causes drying out. Containers need frequent watering since they dry faster.
| Planting System | Plant Spacing | Row Spacing | Runner Management |
|---|---|---|---|
| Matted Row | 18 to 30 inches apart | About 4 feet | Allow runners, thin to 6 inches after growth |
| Hill (Mound) | 12 inches in two staggered rows per hill | About 4 feet | Remove all runners immediately |
| Single Row/Containers | 12 inches apart | 4 feet or separate containers | Remove runners regularly |
Watering Strawberries: How Much and How Often
Strawberry plants need about 1 to 2 inches of water each week. During hot, dry weather, increase watering to about 2.5 inches each time.
This helps prevent stress and keeps berries juicy. Use a rain gauge or a simple container to measure the water your plants get weekly.
Water strawberries when the top soil feels dry to the touch. Avoid soaking the soil, especially right after planting. If water pools or runs off, your soil may drain poorly, which can harm the roots and cause brown leaves.
Watering early in the morning works best. This lets plants absorb moisture before heat peaks. Morning watering also helps leaves dry quickly, lowering the chance of leaf spot and fungal diseases.
Try to water the soil, not the leaves, to prevent disease. Leaves curled up or wilting usually signal underwatering or high heat. Brown or droopy leaves often mean too much water is sitting in the soil.
Sandy soils need more frequent watering because they drain fast. Clay soils hold water longer, so water less often. Adjust your schedule by checking soil moisture every few days.
Avoid watering late in the day to keep leaves dry and prevent fungal problems.
Fertilizing Strawberry Plants for Maximum Yield
Apply a balanced fertilizer as soon as you plant your strawberries. Use an all-purpose fertilizer with equal parts nitrogen, phosphorus, and potassium, like a 10-10-10 formula. Spread about one tablespoon around each plant’s base and water it in well right after.
When new growth appears in spring, feed your perennial strawberries with the same balanced fertilizer again. Avoid fertilizing in the spring of a fruiting year because it may reduce fruit production. After the last harvest, apply fertilizer one more time to help plants recover for next season.
Use one to two tablespoons of fertilizer per plant. Another option is one to two pounds per 100 feet of row. Both work well for strawberry plants.
It’s important to keep fertilizer off leaves to avoid burning them. Always water the soil after applying fertilizer to help nutrients soak in and prevent chemical damage.
Watch your plants for yellow leaves or poor growth. These signs often point to nutrient deficiencies, especially nitrogen. Yellow leaves?
Increase your fertilizer just a bit next time. No flowers or fruit?
Check your watering and pest control. These matter just as much as fertilizing.
Apply fertilizer evenly around each strawberry plant, keeping it about 1 inch away from the crown. A balanced approach with twice-yearly feedings keeps plants healthy and productive.
A 5-pound bag of 10-10-10 fertilizer costs $10 to $20. This amount covers about 100 strawberry plants.
Managing Runners and Propagating New Strawberry Plants
- Check your plants weekly for runners, which appear in spring and early summer. Runners are long stems that grow away from the main plant. They develop small plantlets, called daughter plants, at their tips.
- Decide whether to remove or let runners root based on your goals. In the first year, remove runners from day-neutral plants until July 1. This helps the plants focus on growing fruit. Stop removing runners after July 1. For perennial beds, allow runners after that date to create new plants.
- Choose strong, healthy daughter plants close to the mother plant. They root more easily and produce vigorous new strawberry plants. Gently pin these runners down into moist soil using small U-shaped pins or twisted wire loops.
- Keep soil moist around the rooted runners for 2 to 3 weeks. Avoid disturbing them so roots can develop well. Check daily during hot weather to prevent drying out.
- After roots form, sever the runner connecting the daughter plant to the mother plant. Use clean scissors or garden shears. This separates the new plant, allowing independent growth.
- Transplant the new plant when it has a healthy root system and a few leaves. This usually takes 3 to 4 weeks after pinning. Move it carefully to another spot with well-prepared soil or pots.
- Space the new strawberry plants 12 to 18 inches apart. This spacing reduces competition and improves air flow. Proper spacing lowers the chance of diseases like black root rot.
- Watch for signs of root problems during propagation. Stunted runners or small, weak plantlets may indicate black root rot. Remove affected plants promptly to protect your patch.
Runners are natural strawberry stems that spread plants around your garden. They usually show up in spring and early summer. You either remove them to focus on fruit or use them to grow more plants.
In the first growing season, cutting runners encourages bigger berries. After July 1, letting runners root builds your strawberry bed. Rooted runners create daughter plants, helping you expand without buying new ones.
Pin down healthy runners close to the main plant. Soil must stay moist but not soggy. This helps roots form in 2 to 3 weeks.
Check the soil often to keep moisture balanced. Once rooted, cut the runner to free the daughter plant and move it carefully.
Transplant new plants once the roots and leaves look strong. Spacing them 12 to 18 inches apart helps them grow better and avoid diseases. Poor runner care can lead to diseases or weak plants.
Watch for small, stunted growth on your plants. Remove those weak plants quickly. This protects the rest of your strawberry patch.
Protecting Strawberries from Birds, Pests, and Diseases
Birds love ripe strawberries and can quickly ruin your harvest. Cover plants with bird netting or garden fleece as they ripen.
You can also hang shiny objects like old CDs nearby. The reflections scare birds away.
Common pests include slugs, aphids, and spider mites. Slugs leave slimy trails and chew holes in leaves and fruit. Use organic slug pellets or hand-pick slugs at dusk and dawn to control them.
Aphids cluster on new growth and leave sticky residue. Spray plants with a strong water stream or insecticidal soap to cut their numbers. Spider mites cause tiny yellow spots on leaves and webbing.
They thrive in dry heat. Misting plants and using neem oil helps keep these bugs away.
Diseases like Verticillium wilt kill plants and stop fruit production. Leaves can wilt and show brown streaks on stems. Prevent it by planting varieties resistant to Verticillium and rotating where you grow strawberries each year.
Strawberry anthracnose causes dark, sunken spots on fruit and stems. Keep the area clean by removing plant debris and weeds. The fungus lives there over winter.
Clearing these helps stop it from spreading. Cercospora leaf spot shows as small red or purple spots on leaves, leading to leaf death.
Organic controls involve physical removal, natural predators, and plant-safe sprays like neem oil or insecticidal soap. These methods reduce chemical use and keep your garden eco-friendly. Chemical pesticides may control pests faster but can harm beneficial insects and require careful follow-up.
Watch for yellowing leaves, stunted growth, or spots on plants. Catching problems early means you can act before damage spreads. Regularly inspect your strawberry plants, especially during wet or warm weather when diseases and pests thrive.
Check your strawberries often, especially during fruiting season. Early spotting stops small problems from becoming big ones.
Harvesting Strawberries and Knowing When They’re Ready
Strawberries are ripe when they are fully red with no green or white spots. They won’t ripen further once picked. So wait until the fruit has deep, even color.
The berry should feel firm but slightly soft to gentle pressure. You might notice a sweet aroma.
To avoid damaging strawberries, avoid pulling on the fruit itself. Pinch the stem just above the berry. Use your thumb and forefinger.
This will cleanly release the berry. This method helps keep the fruit intact and reduces bruising.
You can extend your harvest by picking berries every other day. This keeps the strawberries fresh and encourages new fruit to ripen. Also, removing ripe berries promptly prevents overripening on the plant.
Store freshly picked strawberries in a container lined with a paper towel to absorb moisture. Keep them in the fridge unwashed until you’re ready to eat. Wash just before use to help keep them fresh longer.
Follow these steps to harvest your strawberries correctly:
- Check the color. Pick only fully red strawberries for best flavor.
- Hold the stem firmly between thumb and forefinger, just above the berry.
- Gently pinch and twist the stem to release the berry without pulling hard.
- Place picked strawberries carefully into a shallow container to avoid crushing.
- Harvest every 1 to 2 days during peak season to catch berries at peak ripeness.
- Remove any damaged or overripe fruit from plants to avoid attracting pests.
- Store berries in the refrigerator, unwashed, in a single layer on paper towels.
Pruning and Renovating Strawberry Plants for Next Season
Prune strawberry plants right after harvesting all the fruit. Removing old leaves and runners lets plants save energy for new growth. Dead or weak parts use up energy but don’t help the plant.
Removing them supports healthier growth and stronger plants. This keeps your bed healthy and productive for years.
Renovating means thinning and cleaning strawberry beds to boost future yields. This gives room for strong new runner plants to grow and replace older, less vigorous ones. Renovating every season can extend your plants’ life up to five years.
Prune by cutting off dead or diseased leaves near the base. Pull out old runners to stop overcrowding and focus the plant’s energy. Thin plants by spacing runners 4 to 6 inches apart, keeping the healthiest ones.
Follow these steps to prune and renovate your strawberry plants for next season:
- Remove all leftover fruit and debris from the bed.
- Cut old leaves close to the crown, leaving healthy green leaves.
- Pull out or cut runners that are unhealthy, crowded, or growing too far.
- Space remaining plants evenly, about 4 to 6 inches apart.
- Thin out weak plants, keeping only the most vigorous runners for next season.
- Lightly till or cultivate the soil to help new roots establish.
- Apply mulch to protect crowns and keep soil moist.
- Water beds well after pruning and renovation to reduce stress.
Avoid cutting the crown just below soil level. It should stay at soil surface level. Look at leaves for red patches or other signs of fungus.
Remove infected leaves right away to stop the fungus from spreading. This helps keep your plants healthy and growing well.
Renovation may take a few hours per bed, depending on size. But it pays off with bigger, healthier harvests.
Growing Strawberries in Containers and Small Spaces
Choosing the right container helps strawberries thrive in small spaces. Choose pots at least 12 inches wide and 8 inches deep. This size holds enough soil for roots to grow well.
Terracotta and plastic pots both work. But plastic retains moisture better, so you water less often.
Fill containers with loose, fertile soil that drains well. Use a mix of equal parts potting soil, compost, and peat moss or coconut coir.
This blend keeps moisture without becoming soggy. Also, check the soil’s pH to keep it slightly acidic, around 5.7 to 6.5, for the best fruit growth.
Your watering needs change when growing strawberries in pots. The soil dries faster because of limited volume and sun exposure. Check soil moisture every day by sticking your finger about 1 inch deep.
Water when the soil feels dry, but don’t let it get soggy. Usually, this means watering every 1 to 3 days. It depends on heat and pot size.
You can grow strawberries indoors. But choose spots with lots of sunlight, like south-facing windows. Plants need 6 to 8 hours of light daily to flower and fruit well.
Use a grow light for 10 to 12 hours daily when natural light is low. This helps your plants get the sunlight they need.
Maximizing yield means using vertical and space-saving methods. Hanging baskets, vertical planters, or window boxes let you grow more plants in a small area.
Let strawberry runners root in nearby pots to fill your space efficiently. Rotate plants yearly to avoid soil diseases common in containers.
Water your strawberry containers in the morning to reduce mold and give plants time to dry.
Common Problems and How to Fix Them Quickly
Yellow or curling leaves often point to nutrient or watering problems. Check if the leaves feel dry or brittle; that could mean underwatering. Overwatered plants usually show limp leaves and often have soggy soil, which suffocates roots.
Poor fruiting or wilting might mean your plant isn’t getting enough nutrients or water. Use this script to diagnose the problem: “Are the leaves yellow or pale? Is the soil dry or soggy?
Do you see any spots or powdery coating on leaves or fruit?” Answering these helps pinpoint if pests, disease, or nutrient issues are involved.
Fungal infections like botrytis rot cause gray mold on fruit. Powdery mildew looks like white dust on leaves. Both ruin your crop and spread fast in humid conditions.
Remove any infected leaves or berries immediately to stop the spread. Apply a fungicide approved for strawberries as the label says.
Usually, you spray it once a week during wet weather. Follow the package instructions carefully to protect your plants.
Root rot happens when soil stays too wet and lacks oxygen. Plants may wilt even when soil feels moist. To fix this, improve drainage by mixing in sand or organic matter.
Avoid watering too often: let soil dry a bit between waterings. Severely infected plants rarely recover and should be removed to protect others.
Check your plants for leaf color changes and soil moisture levels. Look closely for mold, powdery spots or damaged fruit. This quick check helps catch problems early on.
Spot pests like aphids or slugs? Treat them with insecticidal soap or organic baits now. Regularly inspecting your plants helps catch issues early before they spread.
Call a gardening professional or local extension office when problems persist despite care adjustments. Some diseases or pest infestations require expert diagnosis and stronger treatments. Getting expert help early stops serious damage to your plants.
It also prevents pests from spreading to nearby gardens. Don’t wait to call a pro when you see problems.
Step-by-Step Action Plan to Start Your Strawberry Plant
Follow these clear steps to get your strawberry plants growing strong. Each step helps you check if your plant is on track.
- Before planting: Choose a sunny spot with well-draining soil. If the soil is loose and drains quickly, you are ready to go.
- Day 1: Plant your strawberry seeds or young plants about 12 inches apart. Check that new plants look healthy after planting.
- Week 1: Water the plants gently but thoroughly twice a week. The soil should stay moist, not soggy.
- Week 3: Add a balanced fertilizer following the package instructions. Look for fresh green leaves as a good sign.
- Month 2: Remove any runners to focus energy on fruit production. New fruit buds should start to form.
- Month 3: Set up netting or bird deterrents as berries begin to ripen. Protected fruit means less loss.
- Month 4: Harvest ripe strawberries daily, picking those that are fully red. Regular harvesting keeps plants productive.
- End of season: Prune old leaves and renovate the bed by trimming plants. Healthy plants ready for next season mean success.
Frequently Asked Questions
How Long Does It Take for Strawberry Plants to Produce Fruit After Planting?
Most strawberry plants start producing fruit about 3 to 4 months after planting. Typically, if you plant in March or April, expect berries by July or August.
Can I Start Strawberry Plants Indoors Before Transplanting Outdoors?
Yes, you can start strawberry plants indoors, especially from seeds. This helps protect young plants from harsh weather and pests early on.
Should I Remove Flowers from New Strawberry Plants?
Removing flowers during the first few weeks helps plants focus energy on establishing roots. This can lead to bigger harvests later in the season.
How Do I Tell If My Strawberry Plant Needs More Water?
Leaves curling up or turning brown usually signal water stress. Check soil moisture and water when the top inch feels dry.
Is It Better to Grow Strawberries from Seeds or Plugs?
Plugs give a quicker and easier start with fruit the first year. Seeds take longer and need more care before fruiting.
What Common Mistakes Kill Strawberry Plants Early On?
Planting too deep, overwatering, or poor soil drainage usually cause early problems. Keep crowns just above soil and avoid soggy roots.
Wrapping Up
Starting a strawberry plant takes some clear steps but gives great rewards. Plant in a good spot, keep water regular, and protect your fruits. Today, pick your planting spot and prepare the soil to begin growing tasty berries soon.