

How to Plant Potatoes from Seed: A Complete Guide for Healthy Crops
Knowing how to plant potatoes from seed helps you grow healthy, strong plants. Choose seed potatoes or true potato seeds from a reliable source. Plant them when soil temperatures reach at least 45°F (7°C) to encourage good growth.
Let your seed potatoes sprout for one week in a warm, well-lit place. If sprouting is slow, a few weeks will still work. Cut larger seed potatoes into pieces, each with at least one eye.
Make sure the soil is loose and drains well before planting. Plant seed potatoes 2 to 3 inches deep and space them 18 to 24 inches apart. This spacing gives room to grow underground stems called stolons.
Starting when soil is steady above 45°F helps potatoes establish and produce a good harvest. Proper timing and space are key for strong potato plants.
Key Takeaways
- Plant seed potatoes in soil heated above 45°F (7°C) for best results.
- Shoot sprouts a week or two before planting in temperatures around 60-70°F.
- Cut seed potatoes into pieces with at least one eye each if larger than 2 inches.
- Put seed potatoes 2-3 inches deep and space them 18 to 24 inches apart.
- Use loose, well-draining soil to help roots and tubers grow easily.
- Plant in rows with 24 to 30 inches apart for maincrop potatoes.
What Are Seed Potatoes and True Potato Seeds?

Seed potatoes are small tubers used for planting new potato plants. They are usually disease-free and ready to grow. True potato seeds come from the berries that form on the potato plant after it flowers.
You can grow potatoes from true seeds. But it takes longer and is less predictable.
Plants from true seeds may not look like their parent because you are breeding new varieties. This makes true seeds more useful for breeders than for home gardeners.
Seed potatoes are preferred by home growers because they give more consistent results. Each seed potato piece sprouts into a plant nearly identical to the parent. Cut seed potatoes into pieces with an “eye” or sprout.
Plant them 2 to 3 inches deep. Space pieces 24 inches apart in soil that’s 45°F (7°C) or warmer.
True potato seeds must be started indoors in trays before moving them outside. It takes weeks to get seedlings large enough to transplant.
In contrast, seed potatoes can go directly in the soil after frost danger passes. This saves time and effort for home gardeners.
Growing from seed potatoes also offers access to many potato varieties. You can pick from over 100 types of potatoes. This is many more than the half dozen varieties found at most grocery stores.
Seed potatoes come from healthy, certified stock to avoid disease. Disease can hurt how well your crop grows.
Using true potato seeds involves selection and breeding for years to stabilize traits. Home gardeners usually skip this process because it demands extra space, time, and care.
Seed potatoes make planting faster and simpler. They help you get a good harvest in 90 to 120 days.
When and Where to Plant Potatoes from Seed
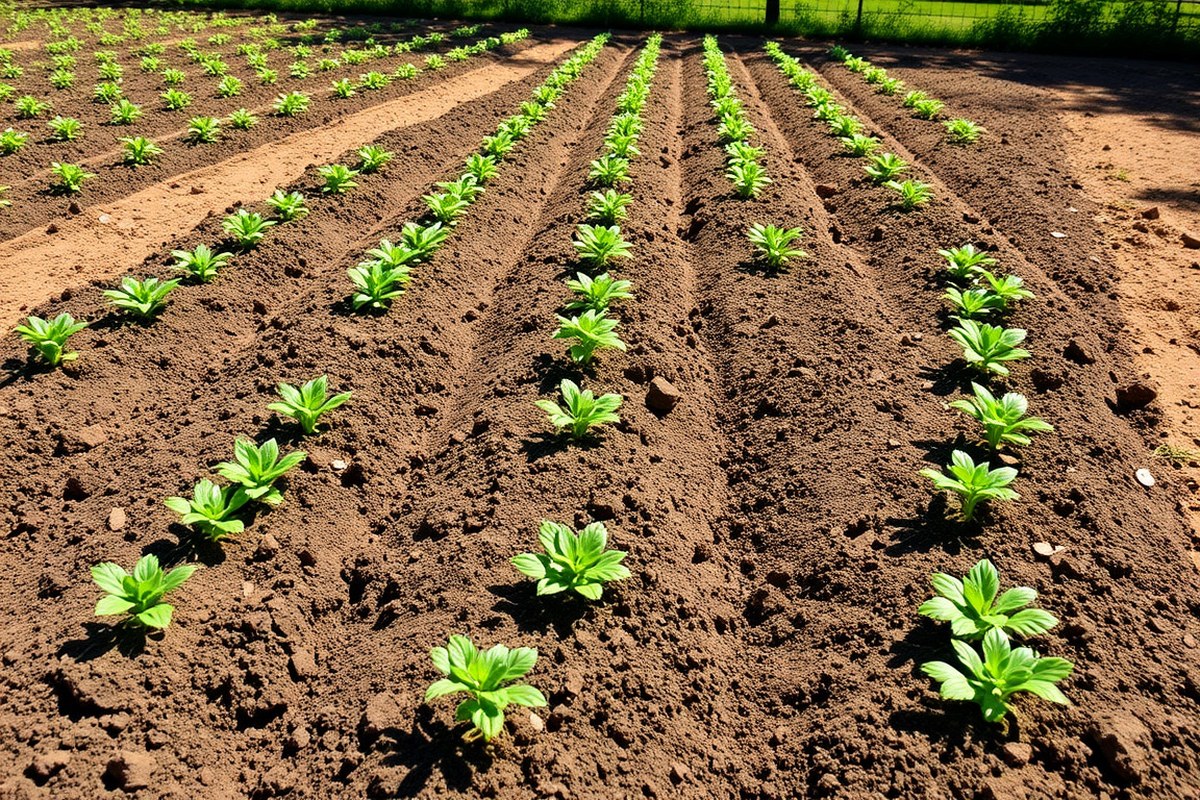
Plant seed potatoes when soil temperature reaches 45°F to 55°F. Choose a sunny spot with at least six hours of direct sunlight daily. Well-drained soil and a frost-free period are key to healthy growth.
Best Planting Months by Region
In most regions, early spring is the best time for planting seed potatoes. This means late February through April, depending on your local climate and last frost date. Planting too early can cause seeds to rot or sprout poorly.
For cooler zones, wait until mid-March when the ground warms and frost risk drops. Southern areas with mild winters may start as early as February. Keep track of local frost dates and soil warmth for the best timing.
Planting after these months risks hot soil, which can stress seed potatoes and reduce yield. Preparing seeds indoors before outdoor planting helps avoid premature sprouting.
Ideal Soil and Sunlight Conditions
Healthy potatoes need loose, well-drained soil with good fertility. Avoid compacted or wet soil because this invites rot and stunt growth. Loosen the bed to at least 12 inches deep.
Potatoes thrive best when soil temperature reaches 45°F to 55°F at planting time. They prefer full sun with six or more hours of direct light per day. Adequate sunlight supports strong sprouting and leaf growth.
- Soil pH between 5.0 and 7.0
- Loose soil, 12 to 18 inches deep
- Full sun, minimum 6 hours daily
- Good drainage to prevent waterlogging
- Remove weeds and debris before planting
- Apply organic matter or compost to enrich soil
- Keep soil moist but not soggy during growth
Well-prepared soil encourages deep root and tuber development. Potatoes developing close to the surface risk turning green and toxic.
Plant seed potatoes in warm soil, not cold or wet, to avoid rot and poor sprouting.
Starting Potatoes Indoors vs Outdoors
Starting seed potatoes indoors lets you control temperature and light for sprouting. Start seeds in trays at 60°F to 70°F. Keep them under indirect sunlight.
Do this one to two weeks before planting outside. This boosts early growth and saves time.
Outdoor planting requires soil above 45°F and a frost-free window. Directly planting outdoors is common but risks colder soil slowing sprout growth. Outdoor conditions must also provide at least six hours of sunlight daily.
Indoor sprouting is helpful in cooler regions or early seasons. However, growing plants outside after sprouting is necessary for healthy tuber formation. Space your outdoor site 12 to 18 inches apart to accommodate growing roots and stolons.
How to Prepare Seed Potatoes for Planting
Preparing seed potatoes correctly boosts your chances for a good harvest. This means picking healthy tubers, cutting them right, curing, and sprouting before planting. The steps help your potatoes grow strong roots and shoots.
Selecting Healthy Seed Potatoes
Choose seed potatoes that look firm and free from cuts, bruises, or soft spots. Avoid grocery store potatoes. They often carry diseases and may be treated to prevent sprouting.
Buy certified seed potatoes from garden centers or mail-order suppliers. Choose them in late winter or early spring for best results.
Good seed potatoes are usually about the size of a hen’s egg or larger. They should not be shriveled or damaged. Healthy tubers stand a better chance of producing a strong crop without disease risks.
Proper Cutting Techniques
Cutting seed potatoes is optional but common, especially if they are large. Cut them into pieces about the size of a golf ball. Each piece should have at least one or two eyes (the small sprouts or buds).
Use a sharp, clean knife to minimize damage and reduce disease entry. Do this a day or two before planting to let the cut surfaces dry slightly. Plant the cut side down with the sprouts facing up.
Curing and Sprouting Process
Curing seed potatoes means letting cut pieces dry. This forms a protective layer over the cuts. Leave the pieces in a cool, dry, dark spot.
Keep them there for two to three days. This step helps reduce rotting after planting.
For sprouting, store seed potatoes at cool temperatures between 45°F and 60°F for several weeks. This encourages chitting, where small shoots grow from the eyes. You want sturdy, short sprouts before planting, long or weak sprouts don’t do well in soil.
Follow these steps to prepare seed potatoes before planting:
- Buy certified seed potatoes from a trusted supplier in late winter or early spring.
- Inspect tubers and pick firm, undamaged ones about egg-sized or larger.
- Use a clean, sharp knife to cut large potatoes. Make pieces golf-ball size with one or two eyes each.
- Place cut pieces in a cool, dark, dry place. Let them cure for two to three days.
- Store seed potatoes in a light spot at 45°F to 60°F. Let them sprout for two to four weeks.
- Look for short, healthy sprouts before planting; discard any rotten pieces.
- Plant seed potatoes with sprouts facing up and cut side down.
Planting Seed Potatoes: Techniques and Spacing
Start planting seed potatoes by digging a trench about 4 inches deep. Place seed pieces roughly 12 inches apart inside the trench. Cover them with soil and gently pat it down.
Trench planting helps protect tubers and makes it easier to mound soil as plants grow. You can adapt the trench depth to your soil type. 2 to 3 inches is typical, but sandy soil needs up to 4 inches.
Spacing matters to avoid crowded growth. Aim for 9 to 12 inches between seed pieces within rows. Rows should sit 30 to 36 inches apart in medium-sized potato varieties.
| Planting Method | Depth | Spacing (Between seed pieces) | Row Spacing | Notes |
|---|---|---|---|---|
| Trench Planting | 3-4 inches | 12 inches | N/A | Most common; easy to mound later |
| Ground Rows | 2-3 inches (sandy up to 4 inches) | 9-12 inches | 30-36 inches | Good for medium-sized varieties |
| Container Planting | At least 4 inches from container sides | 10 inches | N/A | At least 2-3 feet deep pot needed |
Containers suit small spaces nicely. Pick one at least 2 to 3 feet deep to help roots grow. Keep about 4 inches clear from the container’s edge.
You can fit two seed potato pieces in a container the size of a 5-gallon bucket. Use well-draining soil and water regularly to keep moisture steady. Containers warm up faster, so watch for early sprouts.
Once planted, keep the seed pieces cool and humid for 2-3 days to heal cuts. Patience pays off since sprouts usually appear in 7 to 10 days. This method helps you grow healthy plants and decent yields.
Caring for Potato Plants After Planting
Potatoes need steady moisture to grow well. Water them once or twice a week, giving about 1 to 2 inches each time.
Avoid soaking the soil; wet conditions can cause rot and disease. After planting, water the seed potatoes well to help them start growing.
Fertilize your potatoes a few weeks after they sprout. Use a balanced fertilizer with equal nitrogen, phosphorus, and potassium or one slightly higher in potassium.
Apply fertilizer every 3 to 4 weeks to keep feeding your plants. Too much nitrogen makes leafy growth but fewer tubers, so balance is key.
Hilling helps protect your tubers from sunlight and supports stem growth. Pull soil up around the base of your plants twice or three times during the season.
Leave the plant tops about 4 inches tall. Make sure the hill spreads at least 12 inches wide around each plant.
- Soil should stay moist but not soggy.
- Hill plants when they reach 6 to 8 inches tall.
- Fertilize starting 3 weeks after emergence.
- Repeat hilling every 3 to 4 weeks during growth.
- Watch for pests like Colorado potato beetles.
- Remove weeds and damaged leaves promptly.
- Switch planting spots yearly to avoid soil diseases.
Pests like Colorado potato beetles can eat your plants fast. Check leaves weekly for beetles and their eggs. Handpick and destroy them or use insecticidal soap if needed.
Potato blight is a fungal disease that turns leaves brown and causes plant collapse. Remove and destroy infected plants quickly to reduce spread.
Scab disease causes rough, cracked tubers and happens more in dry soil. Rotate planting areas to avoid scab buildup.
Healthy soil, proper watering, and hilling reduce many pest and disease risks. Keep your garden clean of old plant debris to stop overwintering pests.
Hilling potatoes regularly keeps tubers safely underground. It stops greening, which makes potatoes bitter and toxic.
How Long Does It Take to Grow Potatoes from Seed?
Potato shoots usually appear about 2 to 4 weeks after planting seed potatoes. This depends on soil temperature, which should be around 50°F to 70°F for best sprouting. Cooler soil can delay the shoots, while warmer soil speeds up growth.
New potatoes can be harvested 10 to 12 weeks after planting. Harvest them when the plants start flowering.
Maincrop potatoes take longer, typically about 14 to 16 weeks before they are ready. These timelines assume you provide steady moisture and avoid extreme weather.
The growing period changes with the potato variety and your local climate. Early varieties mature faster but produce smaller harvests.
Maincrop types take longer but yield larger, store-able potatoes. Soil quality and how deeply you plant the seed potatoes also affect growth speed.
Hill soil around plants when foliage is 6 to 8 inches tall. This helps more tubers develop below ground. This step can also extend the harvest window slightly.
Buy seed potatoes early in the season. Choose ones already sprouting. This reduces your wait time before planting.
Harvesting Potatoes: When and How to Dig Them Up
You can harvest potatoes once the plant tops turn yellow and die back. For early potatoes, you may dig them while plants still bloom. Proper digging avoids damaging tubers and prepares them for storage.
Signs Potatoes Are Ready to Harvest
The main sign to harvest is when potato plant tops start yellowing. This usually happens late summer or early fall. The dying tops show tubers are mature and stored starch.
Another sign is the dry soil around the plants, which helps skin set on tubers. Avoid digging too soon because the skins may rub off easily. Firm skins last longer in storage and resist bruising.
Harvesting Early vs Maincrop Potatoes
Early potatoes are ready two to three weeks after plants blossom. These small tubers, called new potatoes, have thin skins and taste great boiled fresh. Dig carefully without moving too much soil to find them.
Maincrop potatoes mature later, after plant tops die back fully. Dig up the entire plant by loosening soil around roots. Use a garden fork or shovel but lift gently to avoid stabbing tubers.
Here is a step-by-step digging guide to prevent damage and collect potatoes safely:
- Water the soil a day before harvesting to soften it.
- Cut off the dead tops and remove them from the site.
- Insert a garden fork about 8 inches away from the stem.
- Lift the soil carefully without forcing the fork deep into tubers.
- Pull out loose tubers by hand to avoid bruising.
- Shallow dig for small new potatoes early in the season.
- Fill any holes with soil after harvesting to keep your garden safe.
Best Practices for Potato Storage
After harvesting, cure potatoes by keeping them 45-60°F in darkness and high humidity. This helps toughen skins for longer storage. Leave them for 1, 2 weeks before moving to cooler storage.
Store potatoes at 38-40°F with 90-95% humidity in a dark space. Avoid sunlight to prevent green spots, which are toxic. Check stored potatoes often and remove any that get soft or sprout early.
Avoid storing potatoes near onions or apples because gases can cause spoilage. Using burlap sacks or ventilated boxes helps air circulate. Good storage keeps potatoes fresh for months and preserves their taste.
Common Mistakes and How to Fix Them When Growing Potatoes
Poor sprouting or rotting seed potatoes often happen in cold, wet soil. Soil temperatures below 50°F slow sprouting and cause decay. Warm soil over 70°F can also hurt tuber growth and limit output.
To prevent pests and diseases, avoid planting potatoes where tomatoes or peppers grew last year. These crops share many pests and viruses. Clean tools and use disease-free seed potatoes to reduce risk.
- Plant seed potatoes in loose, well-drained soil around 55°F to 65°F
- Remove all but the top four sprouts from each tuber to focus energy
- Water deeply but avoid soaking; let soil dry a bit between watering
- Fertilize with a balanced fertilizer high in phosphorus after sprouts appear
- Watch for pests like Colorado potato beetle and remove them quickly
- Space seed potatoes 12 inches apart to prevent overcrowding
- Keep small seed potatoes under 2 inches whole; cut larger ones
Few or small tubers usually mean the plant did not get enough nutrients or water. Too much nitrogen fertilizer encourages vines but limits tuber size.
Water too little or too much also stops good growth. A weekly deep soak is better than daily shallow watering.
Immature or unhealthy potato plants may still recover. Thin crowded patches to open space.
Stop fertilizing with nitrogen once the plants flower. Add a 2-inch layer of mulch to keep soil moist and cool during hot spells.
Always store seed potatoes in a cool, dark place before planting. This helps prevent sprout loss and rot. Keep them dry and well-ventilated for best results.
Step-by-Step Action Plan for Planting Potatoes from Seed
Follow these simple steps to get your potato plants going strong. Check for healthy sprouts and good soil moisture to know you’re on track.
- Before Planting: Choose disease-free seed potatoes or true seeds. Healthy seeds start healthy plants.
- One Week Before Planting: Cut large seed potatoes into pieces with at least two eyes each. Let them dry to prevent rot.
- Planting Day: Plant seed pieces 4 inches deep and 12 inches apart in well-drained soil. Cover with loose soil.
- Week 1 to 2: Water lightly but keep soil moist. Watch for sprouts cutting through the soil.
- Week 3 to 4: Hill soil around plants as they grow. This protects tubers from sunlight and supports stems.
- Weeks 5 to 10: Keep watering regularly, especially in dry spells. Remove weeds to reduce competition.
- Week 11 and Beyond: Stop watering once leaves yellow and die back. That shows tubers are ready to harvest.
Frequently Asked Questions
What Month Is the Best Month to Plant Potatoes?
The best month to plant potatoes is early spring. Soil temperatures should be at least 45°F (7°C) before planting your seed potatoes outdoors.
Can I Just Cut Up Potatoes and Plant Them?
Yes, you can cut seed potatoes into pieces with at least one sprout each. Plant cut pieces with the cut side down and sprouts facing up for best results.
How Long Does It Take to Grow Potatoes from Seed Potatoes?
It usually takes 70 to 120 days for potatoes to mature. The time depends on the potato variety and growing conditions like temperature and soil quality.
What Are the Mistakes for Potatoes Growing?
Common mistakes include planting too early in cold soil and poor spacing. Too cold or wet soil can cause rot, while crowded plants produce smaller potatoes.
Can I Plant Potatoes in Containers?
Yes, potatoes grow well in containers with at least 12 inches depth. Use loose soil and add about 3 inches of soil mix before planting seed potatoes.
Do Seed Potatoes Produce the Same Potatoes as the Parent Plant?
No, potatoes grown from true seeds won’t match the parent exactly. They often vary in size and shape because of genetic differences.
Wrapping Up
Planting potatoes from seed takes patience but is worth it for fresh spuds. Start by prepping healthy seed potatoes today. You’ll enjoy digging up your own potatoes in a few months.


