How to Build a Wire Fence: Complete Step-by-Step Guide for Durable Fencing
How to build a wire fence starts with choosing the right materials. Use durable wire and sturdy posts spaced properly for stability. Setting your posts deep and straight keeps the fence solid and lasting.
Measure your area carefully, adding 18 to 24 inches of clearance outside garden beds. This extra space lets you work around plants and prevents damage. Next, plan post spacing between 6 and 10 feet depending on the wire type you use.
Stretching the wire tightly is important to avoid sagging and weakening your fence. Use a come-along tool and secure wire every few feet with staples or clips. Check for 2 to 3 inches of maximum sag between posts for the best tension.
Key Takeaways
- Choose 6 to 8-foot metal posts for strong, durable wire fences.
- Dig post holes at least 2 feet deep and fill with concrete for support.
- Use 2.0 mm diameter wire for welded wire fences to ensure strength.
- Space posts every 6 to 8 feet to minimize wire sag and movement.
- Stretch wire tight with a come-along tool before stapling it down.
- Attach wire to posts every 8 to 12 inches for lasting stability.
Step-by-Step Process to Build a Wire Fence
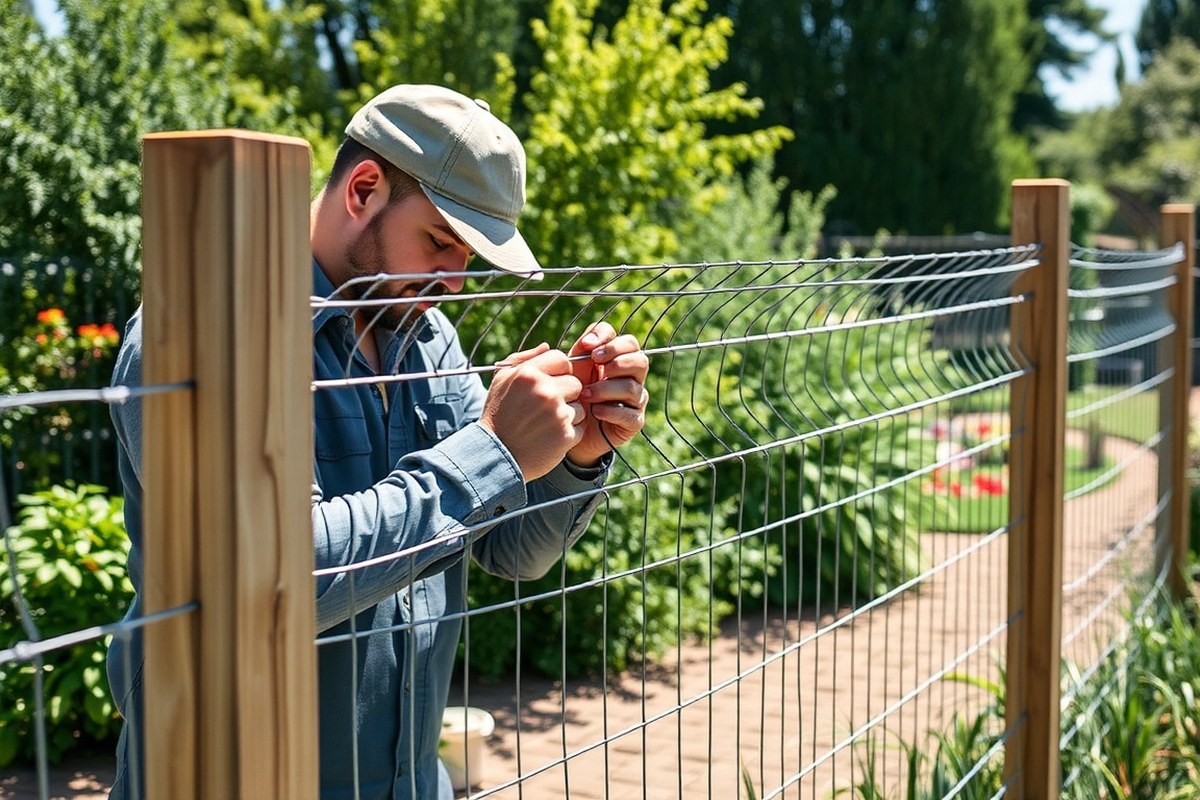
Building a wire fence requires a clear plan and careful work. You’ll start by preparing the site and measuring where the posts go.
Then, install the posts firmly before attaching and stretching the wire. Finishing touches secure the fence and keep it looking good.
Follow these steps to build a sturdy wire fence, whether you use metal or wooden posts. Each step helps prevent sagging and ensures the fence stands strong for years.
- Clear and measure the site. Remove any plants or debris. Measure from the outside edges of the area. Add 18 to 24 inches clearance for raised garden beds. This extra space helps fit the fence properly. Mark post spots about 8 feet apart for welded wire fences. Use closer spacing for heavier wire types. This keeps the fence stable.
- Dig post holes and set posts. Dig holes at least 2 feet deep for good stability. Use a level to make sure posts stand straight. Fill holes with soil or concrete to hold posts in place tightly.
- Attach wire fencing to the first post. Start at a corner or end post. Use fence staples or ties to secure the wire firmly. Make sure the wire is flush against the post to avoid gaps.
- Stretch the wire tight.Use a come-along tool to stretch the wire. Pull until you can’t make the mesh pattern any smaller by hand. This keeps the fence tight. This step stops sagging. Work carefully to avoid over-stretching and damaging the wire.
- Secure wire to line posts. Attach wire every 2 feet along each post with ties or staples. Make sure the wire stays tight and stable between posts.
- Fill any gaps and check alignment. Look along the fence for sagging or loose sections. Tighten the wire or add extra staples if needed. Straighten any leaning posts for safety and appearance.
- Add finishing touches. Trim any nearby vegetation to reduce rust risk. Cover exposed metal with paint or protective coating. This protects your fence from weather damage and wear.
Taking your time with each step matters. Proper post depth and a tight wire stretch keep the fence upright and neat. Skipping these steps can cause sagging or leaning that will require repairs later.
Choosing the Right Materials and Tools for Wire Fences

Picking the right wire matters for what your fence needs to do. For garden fences, welded wire mesh works well. It’s easy to cut and sturdy enough to keep pests out.
Barbed wire suits livestock fences by adding security and keeping animals contained. Plain galvanized wire fits for simple boundaries or low fences.
Your posts hold the fence firm. Metal T-posts push directly into the ground and cost less around $10 to $15 each. They fit well for quick installs or uneven ground.
Wooden posts, usually 4×4 inches, work better where appearance counts and for corner posts. You’ll spend about $15 to $25 per wooden post. Set wood posts in concrete for stability, especially at corners.
Here’s what you’ll need to build a welded wire fence, with typical costs and reasons:
| Material/Tool | Purpose | Typical Cost |
|---|---|---|
| Welded Wire Mesh | Main fencing material for garden or pet areas | $0.50 to $2.50 per sq ft |
| Metal T-posts | Support posts driven into the ground | $10 to $15 each |
| Wooden 4×4 Posts | Stronger posts, used for corners and braces | $15 to $25 each |
| Post Driver | Push metal T-posts into soil | $30 to $60 |
| Post Hole Digger/Auger | Dig holes for wooden posts | $20 to $60 rental |
| Fence Staples or Wire Clips | Attach wire to wooden or metal posts | $5 to $15 per box |
| Concrete Mix | Set wooden posts for stability | $3 to $5 per 50 lb bag |
Tools like a fence plier help twist and cut wire. A wire stretcher or come-along pulls wire tight between posts. Measuring tape and string lines guide straight, even layout.
Wood posts need holes dug 2 feet deep. Metal posts simply drive in. Concrete gives wood posts strong footing and stops shifting.
Barbed wire users require extra safety. Guard yourself with gloves and eye protection.
Fence staples must grab wire tight but avoid bending the wire shape. Letting wire sag more than 2 or 3 inches weakens fence strength and looks sloppy.
Keep posts spaced well apart, about 8 to 12 feet each. This prevents the wire from sagging over time. It also keeps the fence strong and durable.
How to Install Fence Posts for Maximum Stability
For strong fence posts, dig corner holes at least 3 feet deep. Line posts should go 2 feet deep. This depth helps keep the posts steady.
Use concrete to secure corner, gate, and brace posts to resist wire tension. Space posts 6 to 8 feet apart for best support, adjusting for terrain and fence type.
Digging and Preparing Post Holes
Dig holes 3 feet deep for corner and gate posts. Make them 10 to 12 inches wide. This size fits the posts and concrete or soil.
Line posts usually require holes 18 to 24 inches deep and 12 inches wide. Use a post hole digger to keep holes clean and uniform.
Loosen soil below the hole to improve drainage and stability. Make the hole’s bottom slightly wider than the top to avoid frost heave in cold climates. Remove loose dirt and debris before setting posts.
Setting Wooden Posts with and Without Concrete
Concrete keeps wooden corner and brace posts steady against wire tension. Line posts can work without concrete if soil is firm and posts are packed tightly. Always check local frost depth to avoid shifting posts.
Set corner posts 3 feet deep in concrete. Line post holes should be 2 feet deep. Fill the holes with soil firmly.
Tamp the soil every 6 inches to keep posts stable. Allow concrete to cure for 24 to 48 hours before attaching wire.
Steps to set wooden posts with concrete:
- Place post in hole, ensuring it’s plumb and level.
- Pour concrete around the post to fill the hole.
- Slant the concrete slightly away from the post for water runoff.
- Tamp concrete to remove air pockets.
- Let the concrete cure for 1 to 2 days.
- Backfill remaining space with soil, tamp firmly around the base if needed.
- Attach braces or wire once concrete fully sets.
Installing Metal T-Posts and Brace Posts
Drive metal T-posts about 18 to 24 inches into firm soil using a post driver. Space them 6 to 10 feet apart depending on the fence’s strength needs. Use closer spacing on slopes or exposed areas.
Place brace posts 8 feet from corner posts on the fence line. They help support wire tension. This spacing prevents sagging or shifting.
Use shorter wooden posts or steel braces angled between corner and line posts. Secure brace assemblies firmly with concrete or tightly packed soil.
Techniques for Stretching and Attaching Wire Fence
Start by unrolling the wire mesh carefully alongside your fence line. Stretch it tight to avoid sagging or gaps. Attach it firmly to posts with the right fasteners.
Unrolling and Positioning the Wire Mesh
Wire rolls can be heavy and spring back if mishandled. Always wear gloves and keep the roll secure on the ground. Unroll it along the fence line, positioning it near the posts for easy fastening.
Keep the bottom of the wire 12 inches above the ground. Don’t let it hang more than 18 inches above the ground. This helps stop gaps below the fence.
Avoid sharp bends in corners by gently shaping wire around posts before attaching. This helps keep wires firm and clean.
Using Wire Stretchers for Proper Tension
A wire stretcher lets you pull mesh tight without damaging it. Start by attaching one end of the mesh to a corner post. Use heavy-duty staples or wire ties to fasten it.
Make sure it’s tight and secure. Then, attach the stretcher at the opposite end to pull the wire taut.
Tighten the wire gradually, working from top to bottom. This prevents warping or twisting. Pause and check if posts are stable when pulling wire tight.
Don’t keep pulling past a certain point. This avoids breaking or shifting posts. Overstretching can warp posts, causing sagging later.
Securing Wire with Staples, Clips, or Ties
Use staples if posts are wood to fasten wire. For metal posts, use wire ties or fence clips. Make sure each fastener holds the wire firmly.
Space staples or ties every 8 to 12 inches along each post. This keeps the wire evenly tight and secure.
Start stapling at corners, moving top to bottom on posts. Check often for loose staples or clips and reset them as needed. Leave about a ½ inch gap at gate edges.
This keeps the gate swinging freely. It also prevents bending the wire near the gate.
- Unroll the wire mesh along your fence line, keeping it flat.
- Attach one end securely to a corner post with heavy staples or ties.
- Use a wire stretcher to pull the mesh tight toward the next post.
- Secure stretched wire to posts with staples or wire clips. Space the fasteners every 8 to 12 inches along the posts. This keeps the wire tight and strong.
- Work from the top down, ensuring no sagging sections remain.
- Bend wire gently around corners and attach firmly to corner posts.
- Allow a ½-inch gap at gate edges for proper movement.
- Inspect your fastening points, re-tighten staples or ties as needed.
Building a Wire Fence Gate: Framing and Installation
Building a wire fence gate means creating a strong frame, adding wire, and mounting it well. Use 2×4 inch lumber for framing and hardware designed for gates. Proper installation makes the gate swing smoothly and last longer.
Selecting Lumber and Hardware for the Gate
Choose pressure-treated 2×4 lumber for the gate frame to resist rot and insects. Use lumber that fits your fence posts. Usually, choose 4×4 inch treated wood.
Use this for corners and gate areas. Gate hardware includes heavy-duty hinges, a latch, and brackets to hold everything together.
Pick hinges rated to support the gate’s weight and a latch that locks securely. Aim to buy powder-coated or galvanized steel hardware for rust resistance. Adding post caps helps protect posts and finishes the look.
Assembling the Gate Frame and Attaching Wire
Cut two 2×4s vertical and two horizontal to fit your gate. Make this rectangle a bit smaller than your opening. Add a diagonal brace from lower hinge to upper latch for extra support.
Stretch welded wire or hardware cloth tightly across the frame. Use 1.5-inch staples every 6 to 8 inches to hold it. Make sure wire overlaps the edges of the frame evenly.
Installing Hinges, Latch, and Mounting the Gate
Fasten the hinges to the gate frame first. Then attach them to the fence post. Use lag screws or strong bolts for both.
Keep about 1 inch extra space for hinges and latch. This space lets the gate swing without hitting anything.
Make sure it’s wide enough for smooth movement. Check that the gate hangs level and swings smoothly before final tightening.
Mount the latch at a comfortable height, usually around waist level. Use a latch designed to keep animals and kids from opening the gate easily. Adjust the latch alignment to make sure it locks securely without forcing.
- Measure your gate opening and cut two vertical and two horizontal 2×4s accordingly.
- Assemble the rectangle frame and nail or screw corners tight.
- Cut and attach a diagonal brace from bottom hinge side to top latch side.
- Staple welded wire onto the frame, stretching it taut and evenly.
- Pre-drill holes and attach hinges to the gate frame.
- Secure hinges to the fence post, checking that the gate swings freely.
- Install the latch at a suitable height and adjust for smooth locking.
Leave about one inch extra space for gate swing clearance before mounting hardware.
Preventing Common Wire Fence Mistakes and How to Fix Them
Wire fences often sag because the wire isn’t tight enough. Use a fence stretcher to pull the wire taut until there’s no visible slack. This tool helps keep the wire firm and prevents sagging over time.
Posts leaning or becoming unstable usually means they weren’t set deep or firmly enough. Dig post holes at least 2 feet deep and fill with concrete or tightly packed soil. Let the concrete cure for at least 24 hours before attaching wire.
Gaps form when wire isn’t attached close to the post or fasteners loosen. Secure the wire with heavy-duty staples or galvanized nails spaced every 6 inches. Keep the wire tight during fastening to avoid gaps.
- Check for sagging and retighten wire from time to time
- Set posts in concrete for stability and prevent leaning
- Use a fence stretcher tool for firm wire tension
- Attach wire with sturdy staples spaced closely
- Inspect fence after storms or heavy winds
- Patch holes quickly with wire ties or new mesh pieces
Holes and breaks in wire fence happen from rust, animals, or impact. Fix small holes by twisting wire ties or clips around the break.
For larger holes, cut a patch piece slightly bigger than the hole. Attach this patch securely with wire ties on all sides to restore strength.
Regular checks catch problems early, saving time and money. A strong, well-tensioned fence lasts longer and keeps your yard secure. Avoid rushing post setting or skipping wire tension steps to prevent common mistakes.
Maintaining Your Wire Fence for Longevity and Performance
Check your wire fence at least twice a year, in spring and fall. These times catch damage from winter snow or summer heat. Walk along the fence line, looking for loose wires, rust spots, or broken posts.
Rust weakens wire and shortens fence life. Use a wire brush to remove surface rust.
Then coat the wire with rust-resistant paint or a clear sealer. This costs about $10 to $20 per gallon and lasts several years.
Over time, wire can loosen and sag. Tighten it using fence stretcher tools or pliers.
Work carefully from one end to the next, securing each section to posts. This keeps animals in and pests out.
Fix damage from weather or animals by replacing small wire sections or posts. Cut out rusted spots or breaks, then attach new wire with fencing staples. Replace rotten posts with treated wood or metal ones set deep into the ground.
Seasonal tasks include clearing plants and debris that cling to your fence. Plants trap moisture, speeding rust and rot. Trim weeds at least once a year to improve air flow and dry out the wire.
Winter prep means tightening wires before heavy snow and ice arrive. Check posts for looseness and add extra support if needed. In spring, inspect for damage from frost heaving or animals digging near posts.
Routine inspections take about 30 to 60 minutes per 100 feet of fence. Investing time and simple supplies stops small defects from becoming costly repairs. A well-maintained wire fence lasts 15 years or more, saving money and work over time.
When to Call a Professional for Wire Fence Installation
Handling fence jobs that require precise alignment or heavy lifting is often better left to pros. Installing fence posts in rocky soil or on slopes needs special tools. These tasks require skill to do safely.
You’ll need the right equipment to handle the job well. Pros use tools like post drivers or augers for these jobs.
These tools are hard to rent or handle safely. They also need training to use properly.
Hard soils, rocky patches, or uneven ground can slow your work and cause errors. Experts know how to adjust for these conditions to keep your fence straight and stable. For example, pros dig anchor holes deeper than usual.
They might also pour concrete footings to hold posts tight. This helps when soil won’t hold well.
Many wire fences cost $1 to $10 per linear foot to install professionally. A simple 50-foot fence usually takes at least one full day. This depends on the site and working conditions.
More complex areas will take even longer. Complicated terrain or lots of corners can double the time. Professionals give you a clear timeline before starting.
They also provide a list of needed materials. You usually don’t get this from a DIY fence build.
Don’t skip calling a pro if your yard has steep slopes or lots of rocks. It can save time and money in the long run.
Trust professionals for tasks beyond hanging wire mesh and securing posts in soft dirt. Their experience avoids costly mistakes like uneven fences or loose wire. They also install gates and corners with reinforced frames to last through weather and wear.
Terrain with drainage problems or mixed soils needs expert help. Pros make sure your fence stays solid and level. They handle tricky ground better than a beginner.
Call in help when your site looks tough or tools are missing. Heavy post drivers and special gear are expensive and hard to use. It’s safer and easier with a pro.
A pro’s hard work gives you a fence that lasts. Your fence will look neat and stay strong for years. This effort pays off in the long run.
Prices vary widely with job difficulty. But getting an estimate first helps you decide the best path forward.
Step-by-Step Action Plan
Follow these steps to build your wire fence with confidence. Each phase includes a clear task and a way to check your progress.
- Day 1: Gather all materials and tools listed for your wire fence. Confirm you have posts, wire, staples, and a fence stretcher ready.
- Day 2: Mark fence line and dig holes for posts about 8 feet apart. Check holes are deep enough for stable posts.
- Day 3: Install posts firmly using concrete or tight soil packing. Test stability by trying to rock each post gently.
- Day 4: Attach the bottom wire to posts using staples or clips. Make sure wire runs straight and tight without sagging.
- Day 5: Stretch the wire fence using a fence stretcher tool for even tension. Confirm wires are tight enough that they don’t move easily.
- Day 6: Build the fence gate frame and install it securely with hinges. Check that the gate swings freely without dragging.
- Week 2: Inspect the entire fence for loose staples or sagging wire. Fix any spots by tightening wire or adding more staples.
- After 1 month: Recheck post stability and wire tension. Adjust where needed to keep your fence strong over time.
Frequently Asked Questions
What Type of Wire Is Best for a Garden Fence?
Galvanized welded wire with a 2.0 mm diameter is best for gardens. It resists rust and holds up well to weather and animals.
How Much Space Should I Leave Around a Raised Bed for Wire Fencing?
Leave 18 to 24 inches of clearance around the raised bed edges. This space lets you work and keeps fences from damaging plants.
What Size and Spacing Should Fence Posts Have for a Welded Wire Fence?
Use 8 cm metal posts spaced every 2.4 meters. This spacing keeps the wire tight and the fence stable.
Can Wire Fences Be Built on Uneven Ground?
Yes, but you need to adapt the post heights and wire tension. This helps keep the fence secure and straight.
How Do I Build a Sturdy Gate for a Welded Wire Fence?
Frame the gate with 2×4 inch lumber. This size provides solid support for the wire mesh and latch.
What Tools Help Stretch Wire Tightly Without Damaging It?
Use a wire stretcher or fence puller tool for tight, even tension. Avoid twisting or snapping the wire during stretching.
Before You Go
Building a wire fence takes clear steps and patience. Start with firm posts and tight wire for the best results. Begin your project today by preparing your tools and site.