How Long to Dry Weed for Best Quality: Complete Guide & Tips
How long to dry weed depends mainly on temperature, humidity, and bud size. Typically, it takes 7 to 10 days to dry weed properly for the best quality. Drying too fast or slow can affect flavor, potency, and smoothness.
To get started, cut your plant into manageable 12 to 18-inch branches. Then hang them in a dark room with a steady 60-70°F temperature and 45-55% humidity. Keeping these conditions steady helps the buds dry evenly without molding or becoming too brittle.
Watch for buds that feel dry by day 4 or 5. They should still smell fresh, not like hay.
This means they need a few more days to dry fully before curing. The goal is to reach about 50 to 55% relative humidity inside the buds.
Key Takeaways
- Dry weed at 60-70°F and 45-55% humidity for best results.
- Hang branches 12 to 18 inches long for even drying.
- Expect 7 to 10 days for most buds to dry properly.
- Check buds daily; dryness by day 4 or 5 usually means too fast.
- Avoid drying weed too quickly to keep flavor and smoothness.
- Use a dark, well-ventilated room to prevent mold and degrade.
How Long Does It Take to Dry Weed Properly?
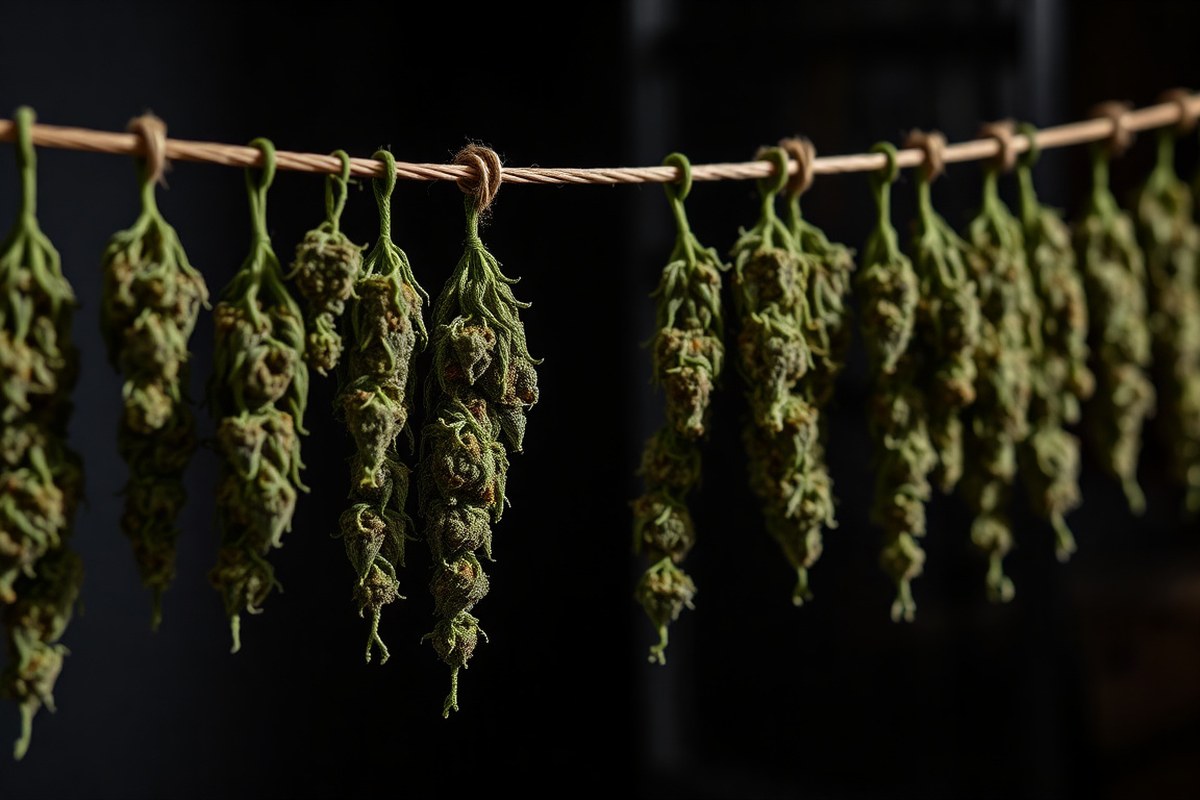
Drying weed usually takes between 7 and 14 days. Most small to medium buds dry in 5 to 10 days.
But large, dense colas need up to 14 days. The timing depends on humidity, temperature, and bud size or density.
Small popcorn buds dry the fastest, typically in 5 to 7 days. Medium-sized buds take about 7 to 10 days. Dense, large colas can take 10 to 14 days because their tight structure holds moisture longer.
Buds trimmed while wet dry faster, around 5 to 9 days. Dry-trimmed flower can need 10 to 14 days.
To estimate when your weed is ready to cure, try the snap test. Bend a small stem gently; it should snap cleanly instead of bending.
The buds should feel dry and slightly crispy but still spring back when you press lightly. This balance shows moisture has left the buds without overdrying.
The first few days of drying are the most critical to avoid mold or bacteria growth. Keep temperatures between 60 and 70°F and humidity around 45 to 55%.
Adjust drying time if your drying environment changes. Dry weed too fast, and the taste and potency may suffer.
Whole plants take the longest to dry, up to 14 days. Hanging branches usually dry in about 7 days, except dense colas which need longer. Using a flat rack takes 7 to 10 days to dry buds.
It works best with wet-trimmed buds. The drying method affects your timeline and terpene preservation.
Ideal Temperature and Humidity for Drying Cannabis

Keep your drying space between 60 and 70 degrees Fahrenheit (15 to 21°C). This temperature range slows drying enough to protect delicate terpenes. If the temperature climbs too high, terpenes will evaporate and the buds may taste weaker.
Relative humidity should stay around 60 percent to 65 percent. This level prevents mold but still lets moisture escape steadily.
Above 65 percent, mold can develop quickly, ruining your harvest. Below 50 percent, the buds dry too fast, losing flavor and smell because terpenes break down.
Use a digital hygrometer to monitor humidity and temperature in your drying space. These devices typically cost $8 to $15 and give real-time readings.
Adjust airflow with a fan or open window to lower humidity if it’s too high. Close vents or add a humidifier if it’s too dry.
For homes in very dry climates, leave more leaves on the buds when trimming. Leaves slow moisture loss and prevent too-rapid drying.
In humid climates, trim closer and keep space clean to avoid mold risk. Good airflow and darkness in the room also help.
Check humidity daily. A sudden jump above 65% needs quick action to stop mold growth before it spreads.
Setting Up the Best Drying Environment at Home
Set up your drying area with consistent temperature, humidity, light, and airflow. Choose a clean, dark room that stays between 60°F and 68°F (15°C to 20°C). Maintain humidity around 50% to 55% to dry buds slowly, keeping their taste and quality intact.
Essential Drying Tools and Gadgets
You’ll need a hygrometer to monitor humidity and a thermometer for temperature. Use a fan with adjustable speed for gentle airflow. Simple hanging supplies like string, wire racks, or clothes hangers help keep buds spaced out well.
Optional equipment includes drying tents or mesh racks if space is tight. These tools cost $10 to $50 depending on quality. Good airflow and monitoring tools prevent mold and overdrying.
Tips for Airflow and Plant Placement
Cut branches into 12- to 18-inch lengths for easy handling. Hang buds so air moves freely around each branch without touching others. Space branches 2 to 4 inches apart on a line, rack, or hanger.
Position a small fan to circulate air indirectly and gently. Avoid pointing fans straight at the buds or causing drafts. Good airflow stops moisture buildup and helps buds dry evenly in 5 to 10 days.
Maintaining a Dark and Clean Drying Space
Keep the drying area pitch dark to preserve terpenes and cannabinoids. Use a room with no windows or cover them with blackout curtains. Light exposure can degrade potency and flavor during drying.
Clean the space before drying starts using mild disinfectants and remove all debris. Avoid smoking or strong odors near drying cannabis. Clean, dark areas help prevent contamination or mold growth.
Adjusting Humidity Without Complex Equipment
Start drying at around 50% relative humidity for the first two days. Raise humidity to 55% from day three to when stems snap, around day 7 to 10. This gradual increase slows drying and preserves quality.
Use simple items to adjust humidity. Put a shallow bowl of water or a damp sponge in the drying area. These raise moisture levels effectively.
Open windows or use a dehumidifier to reduce humidity if needed. Check a hygrometer daily for adjustments.
Follow these steps to prepare your drying space:
- Select a dark, well-ventilated room with 60°F to 68°F temperature.
- Clean the room thoroughly, removing dust and contaminants.
- Install a hygrometer and thermometer for monitoring conditions.
- Hang trimmed branches spaced 2 to 4 inches apart on lines or racks.
- Set a fan for gentle indirect airflow inside the room.
- Start humidity near 50% and raise it to 55% after two days.
- Keep the area dark by closing blinds or covering windows.
- Check temperature and humidity daily; adjust airflow or moisture as needed.
Signs That Your Weed Is Dry Enough to Start Curing
The easiest sign your weed is dry enough is the snap test on stems. Take the smallest stems and try to bend them gently. Your buds are likely ready for curing when they snap with a sharp crack.
Bigger stems may still bend slightly but shouldn’t feel rubbery or overly flexible. This difference means the buds still hold some moisture inside, which helps prevent overdrying during curing. You want the outside dry, but not bone-dry inside.
Properly dried buds feel dry on the outside but still a bit spongy when squeezed lightly. They should not feel wet, sticky, or mushy, which shows excess moisture that risks mold. At the same time, they can’t crumble to dust from over-drying.
A properly dried bud smells fresh and strong. A dull or flat smell means your buds might have dried too fast. Over-dried weed also tends to burn harsh and lose potency.
You don’t need expensive moisture meters to check your cannabis dryness. Feel the stems and the bud texture often.
You can also weigh the buds before and after drying. A typical drying process removes about 70% to 80% of the original moisture.
Stems that bend without snapping or buds that feel damp need more drying. Buds that crumble easily or snap apart show signs of over-drying. They might also smell sharply grassy.
Drying too long or too hot causes this. Too dry buds don’t cure well and lose quality quickly.
Use airtight glass jars when the buds feel dry on the outside. Fill jars about 75% full, and stems should snap easily. This helps balance moisture inside during curing.
Open jars each day for at least two weeks to remove moisture. This helps keep mold from growing inside the jars.
How Bud Type and Size Affect Drying Time
Small, airy buds dry faster because air passes through them easily. Dense indica colas are thicker and hold more moisture inside.
That moisture takes more time to evaporate. So these buds need longer drying periods, often up to 14 days or more.
Trimming also changes the drying time. Wet trimming lets buds dry faster since you remove leaves before drying. Dry trimming takes longer because buds stay on stems and keep moisture longer.
The size and density of buds are key to deciding your drying schedule. Smaller buds may dry within 5 to 7 days.
Large dense colas can take up to 3 weeks in slow setups. Adjust the drying time if your space is more humid or cooler.
| Bud Type | Density | Drying Time (Days) | Trimming Method |
|---|---|---|---|
| Small airy buds | Low | 5, 7 | Wet or dry trim |
| Dense indica colas | High | 10, 14+ | Dry trim preferred |
| Medium dense buds | Medium | 7, 10 | Wet trim speeds drying |
| Large dense buds | High | 14, 21 | Dry trim extra slow |
You can speed drying by removing more leaves before hanging. Also, smaller trimmed buds dry faster because less material holds moisture. Jarring buds too early can trap wet spots, especially if dense buds stay too moist inside.
Keep an eye on the buds’ feel and weight as you dry. Dense buds might feel dry on the outside but still be wet inside. That’s a good cue to slow down or extend the drying time to avoid mold.
Always jar buds right before they feel dry-touch outside, especially if you removed stems. This stops overdrying and preserves moisture inside.
Common Drying Mistakes and How to Fix Them
Drying weed too fast usually means the buds’ outsides get crispy while insides stay moist. This leaves your buds harsh and less flavorful. Slow drying slows mold but risks mildew and can stall if temperatures drop below 55°F (13°C).
You spot problems early by checking for brittle buds or a musty smell. Buds drying too slow feel damp and smell like wet hay.
Buds that feel brittle or break easily mean they’re over-dried. Watch humidity closely, especially in the first two days when mold risk is highest.
Keep the drying room cool, around 60 to 70°F. Maintain humidity between 45% and 55% to avoid mold or mildew. Use a fan to circulate air without blowing directly on buds. Don’t let the room get too dry or the buds will lose terpenes and taste.
- Fans blowing too hard dry buds too fast; slow them down. Adding a humidifier can also help.
- For moldy buds, remove affected areas immediately and improve airflow.
- Use Humidipak packs to re-hydrate brittle buds.
- Inspect buds daily, especially early in drying.
- Keep temperature above 55°F to avoid drying stall.
- Put dryer in a dark room to protect terpenes.
Over-dried buds need humidity to recover. Put them in a jar with a humidipak indoors. Leave the jar open a few hours daily until moisture evens out.
Moldy buds may be unsafe to smoke. So remove mold and dry the rest quicker with better airflow.
Tweaking humidity is your best fix. Too dry? Add moisture packs.
Too wet? Increase airflow or slightly lower humidity. This helps protect your harvest and keeps your buds tasting their best after drying finishes.
Different Methods to Dry Cannabis and Their Pros and Cons
Hanging branches, drying racks, and paper bags are common methods to dry cannabis. Each method affects drying time, terpene preservation, and ease differently. Picking the right one depends on your space, harvest size, and patience.
Hanging Branches Method
This classic way means hanging whole branches upside down on lines or racks. Keep them 2-3 inches apart for good airflow. Dark, well-ventilated spaces help buds dry evenly and slowly.
It usually takes 7 to 14 days for buds to dry about 70%. Drying buds this way needs time and the right conditions. This careful drying locks in flavor and potency better than most quicker methods.
It takes enough room and patience to dry buds properly. This can be tough in small spaces. Big harvests make it harder too.
Drying Racks and Trays
Drying racks let you lay trimmed buds flat, speeding up drying. They save space because you stack or arrange many buds closely.
But still with airflow under and over. You use these racks after cutting buds from branches.
Buds dry faster here compared to hanging, usually in 5 to 10 days. Shorter dry times keep terpenes fresher. Watch for uneven drying on bottom layers.
Mold spots can also develop there. Drying racks cost between $30 and $100.
Price depends on size and material quality. These racks work well for smaller grows.
Paper Bag Drying for Final Equilibration
After drying, place buds in paper bags for 1 to 2 days. This helps spread moisture evenly. It prepares buds for curing.
This step lowers mold risk in storage jars. Moisture becomes more even for better curing.
It makes the final cure smoother. Bags should be kept open or loosely closed for airflow.
This method doesn’t replace hanging or racks, it’s a finishing move after reaching 70% dryness. It’s cheap and easy, using just a brown paper bag. Avoid plastic bags, which trap moisture and may cause mold or bad smells.
Here’s a simple comparison of these drying methods:
| Method | Drying Time | Space Needed | Cost Estimate | Terpene & Potency Preservation | Best For | Common Issue |
|---|---|---|---|---|---|---|
| Hanging Branches | 7, 14 days | High | Low (line/rack) | Best, slow and even | Large harvest, patient growers | Needs space, slower |
| Drying Racks | 5, 10 days | Medium (stackable) | $30, $100 | Good, watch for uneven spots | Small grows, trimmed buds | Uneven drying, mold risk |
| Paper Bag Final Dry | 1, 2 days | Low | Very low | Helps balance moisture | After initial drying | Poor airflow if closed too tight |
Picking hanging or racks depends on how much space you have and how patient you are. Hanging slows drying with better results for flavor.
Racks speed drying but need careful airflow management. Paper bags help at the end but aren’t a main drying method.
Transitioning from Drying to Curing for Best Results
Move your weed to curing jars once the buds feel dry outside but still moist inside. This step locks in flavors and boosts potency. It also stops over-drying and prepares buds for long storage.
Preparing Dried Buds for Jarring
Trim large stems before jarring to avoid excess moisture spots. Keep buds loose and don’t pack jars too tight; air needs space to circulate. Handle buds gently to avoid knocking off trichomes.
Break bigger buds into smaller pieces if needed. This lets air touch all parts and helps cure evenly. Be sure buds are dry enough to avoid mold but not brittle.
- Inspect buds to confirm they feel dry but slightly springy.
- Remove thick stems that can trap moisture.
- Separate and trim any oversized buds into manageable pieces.
- Gently place buds loosely into clean glass jars.
- Leave some room at the top; do not fill jars completely.
- Seal the jars with airtight lids to keep humidity steady.
Selecting Ideal Curing Containers
Choose glass jars with airtight lids, like mason jars. These keep humidity stable between 50-65%, which is perfect for curing. Avoid plastic bags, which can trap moisture unevenly.
Some growers use 2-way humidity packs inside jars. These packs absorb or release moisture to keep humidity near 62%. Specialty cannabis containers sold at dispensaries also work well for long-term storage.
Burping Jars and Monitoring Humidity
Open jars daily at first for 5 to 15 minutes to release moisture and fresh air. This prevents mold and helps even moisture distribution. Use a small hygrometer inside a jar to check humidity.
Aim for around 62% humidity inside the jars during the curing phase. When humidity is higher, leave the jar lid open longer or dry buds more. When humidity is too low, add a humidity pack briefly or burp jars longer.
Don’t skip burping. Mold can form quickly if air stays trapped and moist.
Duration and Environment for Curing
Keep jars in a dark, cool environment around 60-70°F. This slows drying and lets buds cure slowly. Curing usually takes at least two weeks. But a month or longer improves taste and potency.
After the first week, you can reduce burping to once every few days. Some growers cure for 4-8 weeks to develop complex flavors. Stop when buds feel dry but sticky, and smell fresh and rich.
Step-by-Step Action Plan for Drying Cannabis
Follow these steps to dry your cannabis properly, avoiding common problems. Each phase will help you know if you’re on track for great buds.
- Before you start: Harvest your cannabis in the morning after the dew dries. Check buds for trichome development, which signals readiness.
- Day 1-3: Hang branches upside down in a dark room. Keep temperature around 60-70°F and humidity near 50%. Feel buds daily for firmness.
- Day 4-7: Continue drying and start gently moving buds to let air circulate. Watch for signs like stems snapping, not bending.
- Day 8-10: Test smaller buds by breaking them apart. If they snap and feel dry inside, your drying is done.
- After drying: Place buds loosely in glass jars for curing. Open jars daily for 10-15 minutes to release moisture and fresh air.
- Week 2-4: Keep curing with jar burping. Monitor moisture to prevent mold. Your cannabis will gain flavor and smoothness.
Frequently Asked Questions
How Do I Speed Up Drying Without Ruining Quality?
Drying weed faster than 7 days risks losing flavor and potency. Try lowering humidity slightly but keep temperature steady, never above 70°F.
Can I Dry Weed Outdoors Safely?
Outdoor drying works but watch for bugs, wind, and direct sunlight. Use a shaded, sheltered place to avoid damage.
What Happens If I Dry Weed Too Long?
Overdrying makes buds brittle and harsh to smoke. It also reduces aroma and smoothness.
Is It Better to Dry Whole Plants or Cut Branches?
Cutting 12-18 inch branches dries more evenly and fits indoor setups easier. Whole plants dry slower and unevenly.
Should I Use Fans Directly on Buds While Drying?
Fans should circulate air without blowing directly on buds. Direct airflow may dry buds too fast and unevenly.
Can Drying Weed Affect THC Content?
Drying at proper 60-70°F preserves THC best. Too hot or fast drying can degrade cannabinoids.
Wrapping Up
Drying your weed properly takes about one to two weeks with controlled temperature and humidity. Keep a close eye on your buds’ feel and smell to know when to move on. Now you can start curing and enjoy better flavor and potency from your homegrown harvest.