How to Dry Weed Buds Properly: A Complete Guide with Proven Tips
Drying weed buds the right way matters for freshness and potency. Aim for 70°F (21°C) with 50% humidity in total darkness. This stops mold and keeps the flavor intact.
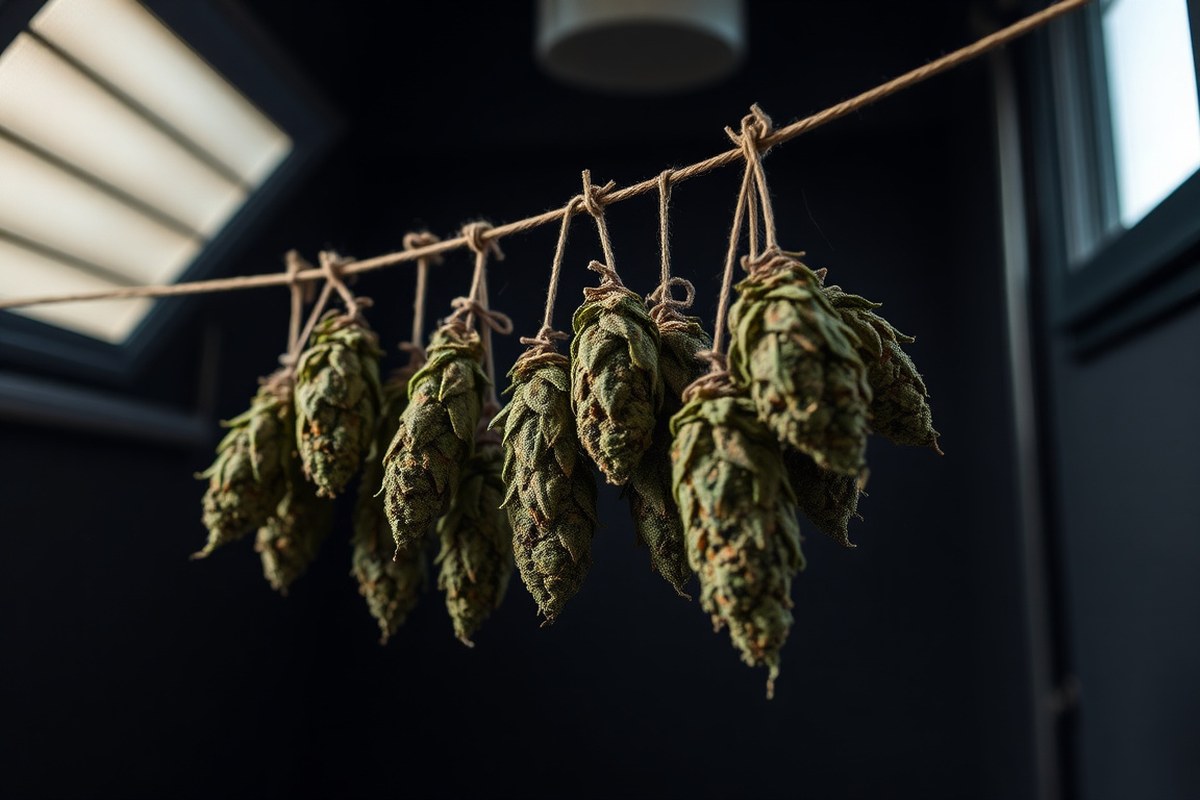
Hang trimmed buds on string lines in a dark, well-ventilated room. Use a fan pointing at a wall to move air gently. Buds should feel dry on the outside after 4 to 5 days, but not brittle.
Keep humidity around 50 to 55% after day 3 to reach about 70% dryness. Use a humidifier or dehumidifier to hold steady levels. Then, place buds in paper bags for 1 to 2 days to finish drying evenly.
Key Takeaways
- Always dry buds between 60 and 70°F for the best quality.
- Maintain humidity between 45% and 55% during drying to avoid mold.
- Use indirect airflow by pointing a small fan at the wall, not buds.
- Start drying at 50% humidity for the first two days to protect wet buds.
- Dense buds can take up to three weeks to dry properly.
- Move buds to paper bags once they are about 70% dry on the outside.
How to Dry Weed Buds Properly for Best Quality

Drying weed buds correctly means controlling temperature, humidity, airflow, and light. The best choice is a room or closet just for drying. You can change the temperature and humidity there.
This control helps the buds dry right. Avoid heat sources like ovens, which ruin bud quality and taste.
Creating the right environment protects cannabinoids and terpenes. Aim to keep the room dark, cool, and gently ventilated.
Start with lower humidity, then raise it slightly as buds dry. This step-by-step sequence helps buds dry evenly and prevents mold.
- Harvest and trim your buds. Remove large fan leaves but keep sugar leaves on. This reduces moisture but protects trichomes during drying.
- Hang buds or place them on a drying rack. Space them at least two inches apart. Avoid bunching buds to ensure good airflow around each one.
- Set the room temperature to 60, 70°F (15, 21°C). Keep the relative humidity at 50% for the first two days. This prevents mold while buds are still wet inside.
- Maintain complete darkness in the drying space. UV light damages THC and terpenes. Use blackout curtains or a dark closet to protect your buds.
- Adjust humidity to 55% from day three onward. This slows drying slightly, preserving flavor and potency. Keep airflow gentle, indirect, and consistent, never blow air directly at buds.
- Look at your buds each day to see how they dry. The outside should feel dry, but the stems still bend a little. Buds are ready when stems break easily, not just bend.
- Remove buds from drying when stems snap. This normally happens around day seven but may vary based on climate and bud density. Early removal risks mold; late removal can overdry buds.
Using a drying room lets you control the key factors well. Be patient, rushing drying leads to harsh smoke and loss of potency.
Watch humidity closely; too low dries buds too fast. Too high invites mold and ruin.
Once buds are dry, keep them in a jar for curing. This continues to improve taste and smoothness. Proper drying is the foundation for all good weed quality and long-term storage.
What Temperature and Humidity Are Best for Drying Cannabis?
The best temperature to dry cannabis buds is around 70°F (21°C). This range keeps your buds from drying too fast or too slow. Drying weed too fast burns off terpenes and cannabinoids.
This makes the weed taste harsh. It also reduces the weed’s potency. Too cool, and the buds might dry too slowly, risking mold.
Keep humidity near 50% while drying to save terpenes. High humidity above 60% risks mold, especially in the first two days. Too low humidity under 40% dries buds too fast and makes them brittle.
You can adjust conditions slightly based on your space size and climate. In dry climates, keep humidity a bit higher when drying. This slows down the drying and keeps buds from cracking.
Adjusting humidity helps keep the quality during drying. In humid areas, use a dehumidifier to keep it below 60%. Fans help control airflow but avoid direct blasts on buds to prevent dry spots.
Controlling temperature and humidity each day is key. Early on, keep humidity lower to reduce mold risk.
Later as buds near dryness, raise humidity slightly to save delicate terpenes. Try to avoid temperature swings beyond 5°F, since that stresses the buds and affects drying uniformity.
| Stage | Temperature (°F) | Humidity (%) | Notes |
|---|---|---|---|
| First 2 days | 68 to 72 | 45 to 50 | Reduce mold risk during wet stage |
| Mid drying | 70 | 50 | Steady conditions for slow drying |
| Final stage | 70 to 73 | 50 to 55 | Preserve terpenes near dryness |
Keep fans moving air gently to avoid pockets of high humidity that cause mold.
How Long Does It Take to Dry Cannabis Buds Correctly?
Drying cannabis buds usually takes between 7 and 14 days. Smaller buds often dry faster, around 5 to 7 days.
Larger, dense buds can need up to 3 weeks. Density matters because denser buds hold more moisture, which slows drying.
Check your buds every day to see how they feel and smell. Buds ready for curing will have stems that snap instead of bending.
Stems still bend? Give them more time to dry, especially big colas.
Start drying by hanging whole branches or trimmed buds. Keep room dark with 50-60% humidity. Temperature should be 60-70°F. After about a week, test a few buds by snapping their stems.
Snap means they’re drying well and ready to jar. Stems bend? Keep drying and check them every day.
During drying, watch for over-drying signs like crispy, brittle buds and a “hay-like” smell. That happens if buds dry too fast, usually under 5 days. Slow and steady drying preserves taste and potency better.
Buds too moist after 14 days? Move them to paper bags for a few days. This helps balance moisture.
You have dense buds on branches. Hang them in a 60°F room with 55% humidity. Check them around day 10.
Stems snap cleanly? Begin the curing process now. Stems don’t snap?
Wait up to 14 days and test every two days. Smaller buds might be ready by day 7, so check them sooner.
Proper drying prepares your buds for curing, which improves smell and smoothness. Jumping to curing too early keeps moisture inside and risks mold.
Waiting too long leaves buds dry and harsh. The right drying time balances moisture loss for the best final quality.
Which Equipment and Tools Do You Need to Dry Cannabis Buds?
You need a few key tools to dry your cannabis buds right. A drying rack or hanging lines let you space buds apart to avoid mold. This spacing allows air to move around each bud without damaging its shape or trichomes.
A tiered rack with mesh shelves costs about $20 to $40. It fits well for small grows without stems.
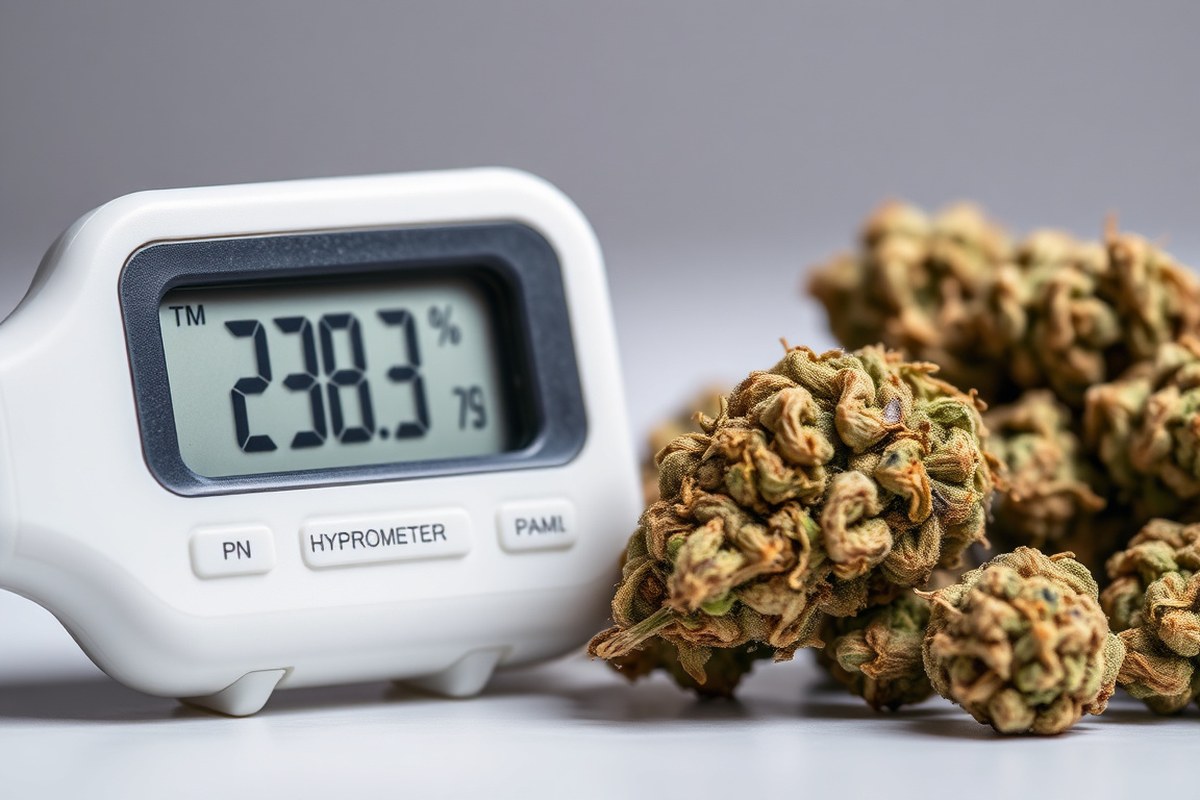
A hygrometer helps track humidity levels during drying. Aim for 50% to 60% relative humidity to prevent buds from drying out or molding. Digital hygrometers with a probe cost $10 to $30 and give quick readings.
Put it near your buds but not touching them. This helps check the room’s real humidity.
Fans are useful but should run gently to boost airflow. Make sure fans don’t blow directly on buds. Fast drying harms quality.
Use a small clip fan on low. Point it away to move air gently around buds.
- Hanging lines or drying racks spaced 2-3 inches apart for airflow
- Digital hygrometer to monitor 50%-60% relative humidity
- Small clip fan on low to gently move air without hitting buds
- Optional drying tent or box for enclosed climate control
- Thermometer to check room temperature stays 60-68°F (15-20°C)
- Plastic storage jars and humidity packs for curing after drying
Drying tents or boxes cost more but give better control over temperature and humidity. They have built-in racks and often sensors to keep the environment steady.
These setups run from $70 to over $200 and suit larger or more serious grows. You’ll need to check temperatures stay between 60 and 68°F to prevent terpene loss.
In low humidity areas, hang whole branches upside down to dry evenly. When humidity is higher, use drying racks. Avoid crowding your buds.
Adjust fan use by feeling buds daily. When buds dry too fast or seem brittle, slow the fan down. Raise humidity just a little.
How to Know When Your Weed Buds Are Dry Enough to Cure
To know when buds are dry enough for curing, snap the stems. Check that the buds feel dry, not brittle.
You can also measure moisture with a hygrometer, aiming for about 60-65% internal moisture. These signs tell you it’s time to move buds into airtight jars to start curing.
Testing Stem Snap Method
Bend the smallest stems on multiple buds to see if they snap sharply. Your buds have probably lost 75-80% of moisture at this point. That level is good for curing.
Larger stems might still bend without snapping. But focus on the smaller ones to avoid leftover moisture inside buds.
The snap test works best after seven to fourteen days of drying, depending on conditions. Don’t rely on just one stem, test several from different buds to check drying consistency.
Stems that bend or feel rubbery mean your buds need more drying. Dry longer to avoid mold or bad curing.
Test stems from different buds to avoid uneven drying and hidden moisture.
Using a Hygrometer to Check Moisture
Put a digital hygrometer probe inside a sealed jar with your buds. This helps check the relative humidity level.
The ideal reading for starting curing is around 60-65% RH. This moisture range supports even curing without mold forming inside the jar.
Check the hygrometer reading after putting trimmed buds in a jar filled to about 75% capacity. Humidity readings above 70% mean your buds need more drying time.
Leave them out longer before sealing. Readings below 55% may dry your buds too much, risking harsh taste and loss of cannabinoids.
Hygrometers cost between $10 and $30 and are worth it for consistent results. Some growers combine the stem snap test with hygrometer readings for more accuracy before curing.
Visual and Tactile Indicators
Buds ready for curing feel dry on the outside but slightly sticky or spongy inside. They shouldn’t crumble if you gently squeeze them. Look for a matte appearance without visible wet spots or excessive leaf moisture around the calyx.
Trichomes should still look intact and shiny, not dry and powdery. Damp or cold-feeling buds are not dry enough yet. Keep drying until they feel right.
Moisture trapped inside can cause mold during curing. Spread buds 2 to 3 centimeters apart while drying. This stops moisture from building up between them.
Dry trimming before curing helps expose buds evenly to air in the jar, reducing wet spots. Watch for any signs of mold and remove affected buds immediately. Properly dried buds usually weigh less by about 75% compared to fresh harvest weight.
What Are the Main Methods to Dry Cannabis and Their Differences?
You can dry cannabis by hanging whole branches. Another way is using paper bags. Or place buds on drying racks.
Each method takes different times and suits various bud sizes. Choosing the right way helps keep your buds fresh and flavorful.
Branch Hanging Method
Hang whole branches upside down in a dark room with good airflow. Cut branches 12 to 18 inches long and remove large fan leaves but keep sugar leaves. This protects buds as they slowly lose moisture.
Drying whole branches takes longer because the main stem slowly feeds water to buds. Expect one to two weeks before buds are dry enough. It’s a great choice for big harvests since you can hang many branches at once.
Paper Bag Drying
Use brown paper bags for smaller buds, especially popcorn buds. Put buds inside, filling the bag one-third to half full for airflow space. Turn the bag every couple of days to dry buds evenly.
This way takes about six to seven days. It’s faster than hanging branches. But slower than drying buds on racks.
Paper bags work well to finish drying but aren’t best for the full process. Keep humidity below 50% before using this method to avoid mold.
Drying Racks or Screens
Spread trimmed buds flat on a mesh drying rack or screen for faster drying. More airflow reaches the buds since they aren’t stacked or hanging with stems. This method suits small grows and popcorn buds best.
The exposed surface dries buds quicker, usually in less than a week. You must check and turn buds to prevent uneven drying or mold spots. Drying racks save space and let you dry many buds at once.
The table below shows the main drying methods. It helps you choose the best one. Pick based on your harvest needs.
| Method | Drying Time | Best For | Prep Needed | Key Steps | Risks |
|---|---|---|---|---|---|
| Branch Hanging | 1 to 2 weeks | Large harvests, full branches | Cut branches 12-18 inches, remove large fan leaves | Hang upside down in dark, ventilated room | Slow drying can cause mold if humidity too high |
| Paper Bag Drying | 6 to 7 days | Small, popcorn buds | Trim buds, fill bag 1/3 to 1/2 full | Turn bags every couple days, keep humidity below 50% | Overcrowding can cause uneven drying, mold risk |
| Drying Racks | Less than a week | Small harvests, trimmed buds | Trim buds, place flat on mesh racks | Turn buds regularly, keep airflow steady | Fast drying risks harsh flavor if rushed |
Quick drying, like with a hair dryer, causes harsh flavors and burnt buds. Slow drying keeps flavor but needs humidity control to avoid mold.
Dense buds dry slower, so hanging branches works better. Small buds dry well in paper bags or on racks.
Common Mistakes When Drying Weed Buds and How to Fix Them
Drying buds too fast causes harsh smoke and terpene loss. Rapid drying traps moisture inside, leading to mold or uneven texture. Keep the drying environment steady to avoid these problems.
Bad airflow lets mold grow and causes uneven drying. Dense colas need air circulating around them. Use fans set on low to gently move air without blasting the buds.
Even a little light reduces potency by 10 to 15 percent. Dry buds in complete darkness or a very dark room. This prevents cannabinoid and terpene breakdown.
- Rotate buds every 12 hours to avoid flat spots.
- Keep humidity below 70% to stop mold forming.
- Use a dehumidifier if your climate is humid.
- Hang or dry buds branch-by-branch for better airflow.
- Don’t pack buds tightly; give them space to breathe.
If buds get over-dried, they feel brittle and lose flavor. Try resealing them in a jar with a damp paper towel for a few hours. Avoid over-moistening or you risk mold.
On the other hand, buds that are too moist stay sticky and can spoil fast. Leave them to dry longer with air flowing around them. You might also spread them thinner or trim extra leaves to help drying.
How to Prepare and Handle Buds Before and During Drying
You can trim cannabis buds before or after drying. The choice depends on your drying setup. Also, it depends on what you prefer.
Removing large fan leaves at harvest helps airflow and drying speed. Handle buds gently to protect delicate trichomes and preserve terpenes, which affect scent and taste.
Cutting and Trimming Branches
Cut branches from the plant just above nodes where buds form. So the stems stay sturdy for hanging. Many growers trim some fan leaves right after harvest.
This is called a partial wet trim. It helps airflow and cuts moisture buildup. Leaving sugar leaves on during drying helps keep buds intact and slows drying.
Wet trimming reduces decay risks in humid rooms. Dry trimming means waiting until buds are fully dry. This lowers handling early on.
It helps keep terpenes safe. Both methods work. But choose based on your room humidity and how much time you want to spend.
Hanging and Spacing Buds
Hang whole branches or trimmed buds upside down on a string or drying rack. Leave 5 to 10 centimeters between branches or buds. This lets air flow well.
It also helps prevent mold growth. The drying room should not exceed 70°F (21°C) for best aroma retention.
Position buds at least one meter away from direct heat sources like heaters. Proper distance helps avoid fast drying that can harm terpene profiles and taste. Adjust hanging height so light stays off buds, as UV light breaks down cannabinoids.
Rotating and Checking Buds During Drying
Rotate hung branches daily by gently turning them to ensure even airflow. This prevents moisture pockets that cause mold or uneven drying. Check buds carefully for soft spots or odd smells that signal too much moisture.
Handling buds gently during checks preserves the sticky resin glands. Look for stems that snap cleanly which means drying is almost done. Avoid handling too often to keep buds fresh and avoid terpene loss.
Follow these steps to prepare, trim, and hang your buds for drying:
- Cut branches from the plant just above the nearest node.
- Remove large fan leaves to improve airflow (partial wet trim).
- Trim sugar leaves later if you prefer dry trimming.
- Hang branches or buds upside down on strings or racks.
- Space buds 5 to 10 cm apart for good airflow.
- Keep drying area below 70°F (21°C) and away from heaters.
- Turn branches daily to ensure even drying.
- Check buds regularly for mold and dryness.
Handle buds carefully when rotating to avoid breaking trichomes that hold aroma.
How to Maintain Proper Airflow and Darkness During Drying
Avoid pointing fans directly at your drying buds. Strong airflow can dry the outside too fast and trap moisture inside. Angle a small fan toward the floor or nearby wall.
This gives gentle, indirect airflow. Avoid pointing it straight at the buds.
Place your drying rack or net to allow full 360-degree airflow. Keep it away from walls and corners so the air can circulate evenly. Checking the buds daily helps you catch any wet spots or uneven drying early.
Light damages both THC and terpenes in your buds, reducing potency and flavor. Keep your drying space completely dark to protect these sensitive compounds. Using blackout curtains or a covered room stops sunlight and artificial light from reaching your harvest.
When drying buds outdoors or in a bright room, cover them. Use a tarp or cloth that blocks sunlight well.
This solution cuts down fading from UV rays while still allowing air to flow. For indoor grows, simply turn off all lights and avoid using clear plastic covers over buds.
Using an oscillating fan gives gentle air movement without blasting your buds directly. This method prevents mold and promotes even drying. A small fan usually costs $20 to $40.
It works well in most home setups. The fan runs quietly for daily use.
Make sure your drying space stays dark and cool, ideally between 60 to 70°F. Cool temperatures and darkness together help preserve freshness and keep buds from drying out too fast. Consider closing doors and windows to limit outside light and temperature fluctuations.
After setting up airflow, check your buds carefully. If buds feel dry outside but sticky inside, adjust the fan direction.
Indirect airflow is key. Too much wind causes uneven drying, which lowers the quality of your final product.
Busy growers with large harvests use racks in a dark room. A gentle ceiling fan helps keep air moving quietly.
Use room darkening shades on windows or seal cracks where light might sneak in. This setup balances airflow and light control without much cost or special equipment.
Step-by-Step Action Plan for Drying Your Weed Buds
Follow these steps to dry your cannabis buds well and keep their quality. Each step shows how to check your progress.
- Before You Start: Trim your buds and remove large leaves. This helps air reach all parts evenly.
- Day 1: Hang your buds in a dark room at 60-70°F and 45-55% humidity. Check the room’s temperature and humidity using a meter.
- Days 2 to 7: Keep airflow steady but gentle near the buds. Use a fan nearby. Avoid blowing air directly on the buds. Buds should feel dry on the outside but not brittle.
- Day 5: Test a small bud by bending the stem. It should snap, not bend. This means it’s close to dry.
- Day 7 to 10: Check if buds snap and feel dry outside. Then move them to jars. This starts the curing process. Open jars daily for 10-15 minutes to release moisture.
- Week 2 and Beyond: Continue curing in jars, opening them daily. Buds should smell fresh and strong without mustiness.
Frequently Asked Questions
Can You Dry Weed Buds Without Trimming First?
Yes, you can dry untrimmed buds, but trimming after drying is harder. Drying with leaves slows moisture loss and can affect smell and taste.
Is It Okay to Dry Weed Buds Outside?
Drying buds outside risks bugs, mold, and sunlight damage. It’s best to dry indoors with controlled temperature and darkness for quality.
How Do You Prevent Mold When Drying Weed Buds?
Control humidity between 50-60% and keep airflow gentle. Too much moisture or stagnant air invites mold growth during drying.
Can You Speed Up Drying Buds with a Fan?
A fan helps airflow but don’t point it directly at buds. Gentle circulation prevents mold without drying buds too fast.
What’s the Difference Between Drying and Curing Cannabis Buds?
Drying removes surface moisture to prevent rot. Curing improves taste and potency by slowly balancing moisture inside the buds.
How Do You Store Cannabis Buds After Drying?
Store dried buds in airtight containers in a cool, dark place. Avoid plastic bags that crush buds and degrade quality over time.
Wrapping Up
Drying cannabis buds carefully keeps their taste and strength. Keep an eye on temperature, humidity, and airflow. Start your drying right now by setting up a dark, airy space with the right conditions.