How to Use LECA for Plants: A Complete Guide with Expert Tips
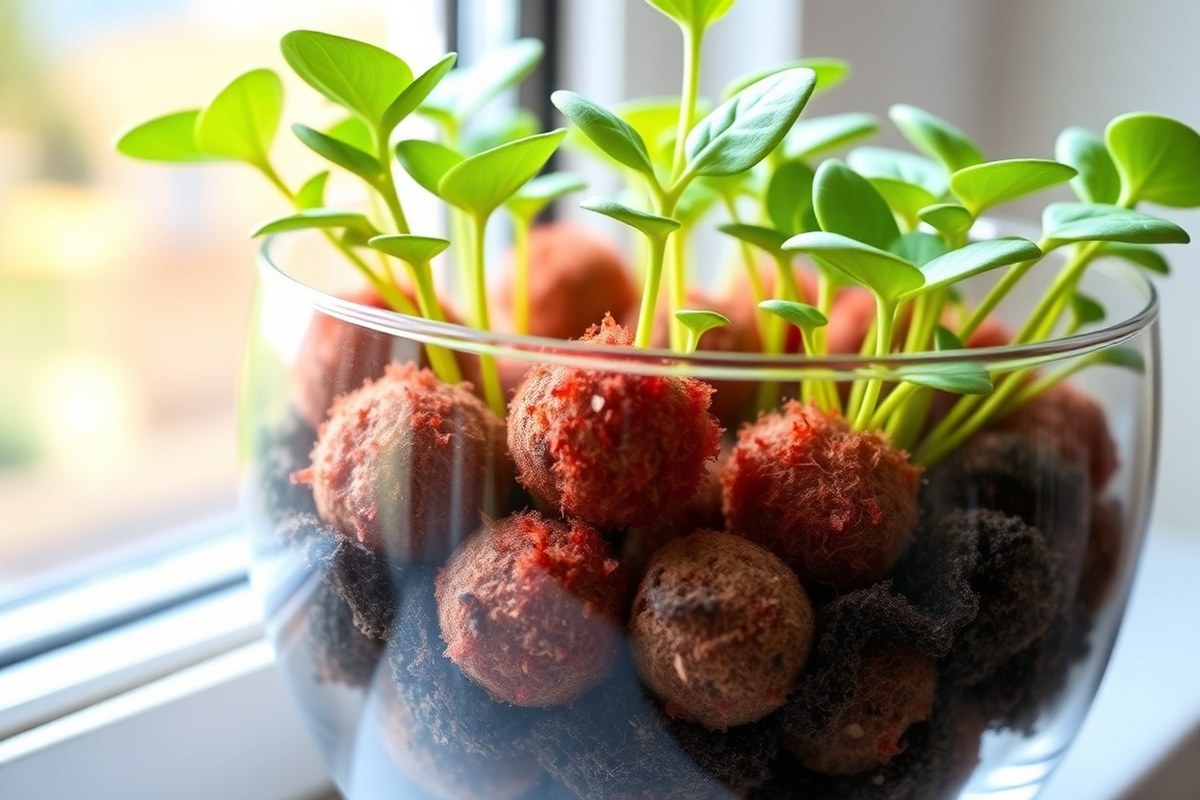
Figuring out how to use LECA for plants can really change your indoor gardening. LECA, or lightweight expanded clay aggregate, supports plants by keeping roots moist without drowning them.
It holds about 30% of its weight in water. So roots get oxygen and water together.
Start by soaking and thoroughly cleaning the LECA balls to remove dust and contaminants. Use sizes that fit your plant’s roots. Use small balls for small plants.
Use larger balls for plants with strong roots. Preparing LECA well helps prevent root rot and encourages plants to adjust smoothly.
Wait until your plant has strong white water roots before moving it fully into LECA. This step usually takes two to four weeks. Strong roots mean your plant can absorb water properly and thrive in this soil-free environment.
Key Takeaways
- Soak LECA balls for at least 24 hours before using to hydrate them fully.
- Boil LECA for 10 minutes to sterilize and remove buildup before planting.
- Choose LECA ball size based on plant root size; larger plants need bigger balls.
- Flush LECA every 2 to 4 weeks to remove salt buildup and protect roots.
- Wait for strong white water roots to form before transferring plants into LECA.
- Use Oxygen Plus 3% solution in water or soak when dealing with root rot.
What Is LECA and How Does It Support Plant Growth?
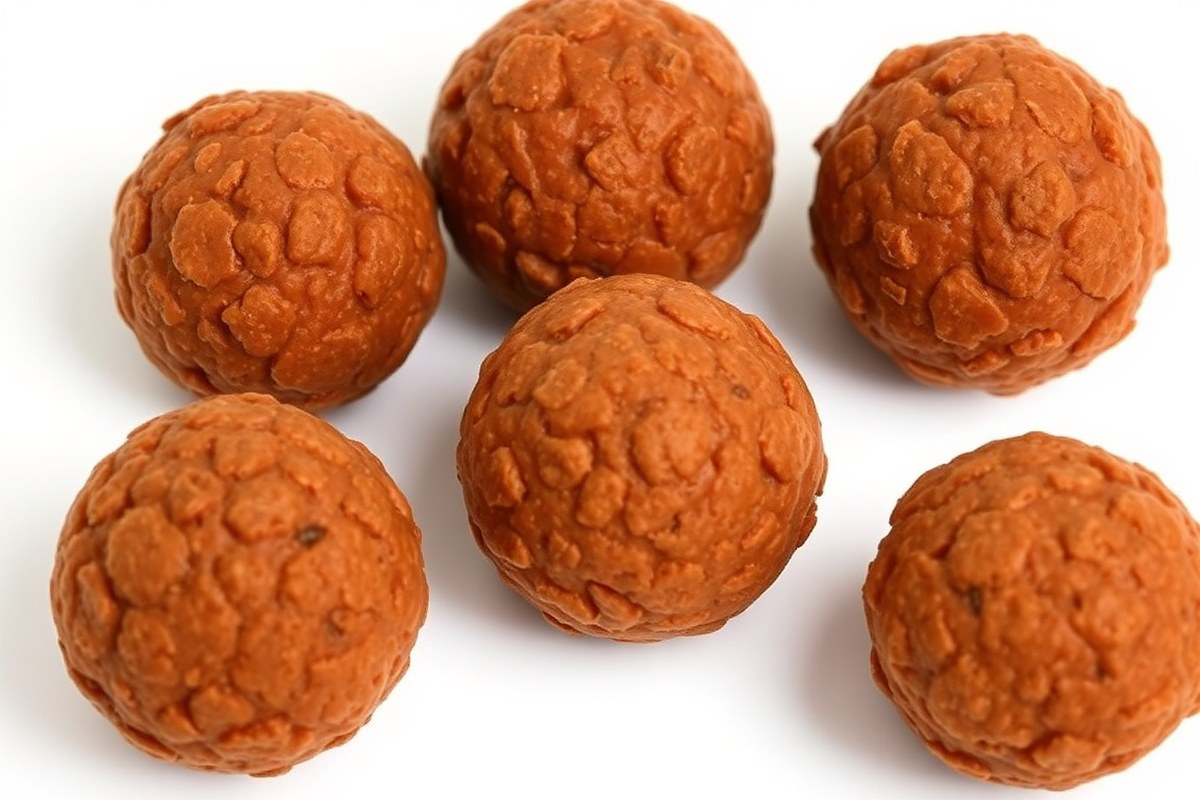
LECA means lightweight expanded clay aggregate. These are small clay pellets baked at high heat. The pellets have tiny holes and weigh little.
This helps them hold water and air. Plant roots get moisture and oxygen at once.
Unlike soil, LECA does not provide nutrients or organic matter. Its main job is to support your plant’s roots physically while controlling moisture around them.
You place LECA in a pot and keep a shallow reservoir of water below. The pellets soak up water like tiny sponges and release it slowly to the roots.
Plant roots behave differently in LECA compared to soil. Plant roots grow between the clay pellets. They get lots of air because LECA stays loose.
LECA does not pack down like soil. Good airflow stops water from staying too long near roots.
Too much water can cause root rot in soil. LECA helps roots stay healthy by airing well.
In typical soil, excess watering can fill air pockets with water, cutting off oxygen to roots. LECA’s porous structure and careful water level keep the roots moist but not drowning. Make sure to keep water below the root crown to avoid soggy crowns that cause rot.
When switching plants from soil to LECA, removing all soil particles from roots is important. Leftover organic matter in the root zone can trap moisture and cause rot even in LECA. Clean roots adjust better and grow healthier in the stable, airy environment LECA provides.
LECA can be pricier at first than soil. But you get benefits like fewer watering days and less mess. It also makes rooting cuttings easier since the pellets hold moisture gently.
This method suits plants that dislike too much water. Snake plants like well-aerated roots and less rot risk. LECA helps such plants grow strong and safe.
Choosing the Right Plants and LECA Ball Sizes
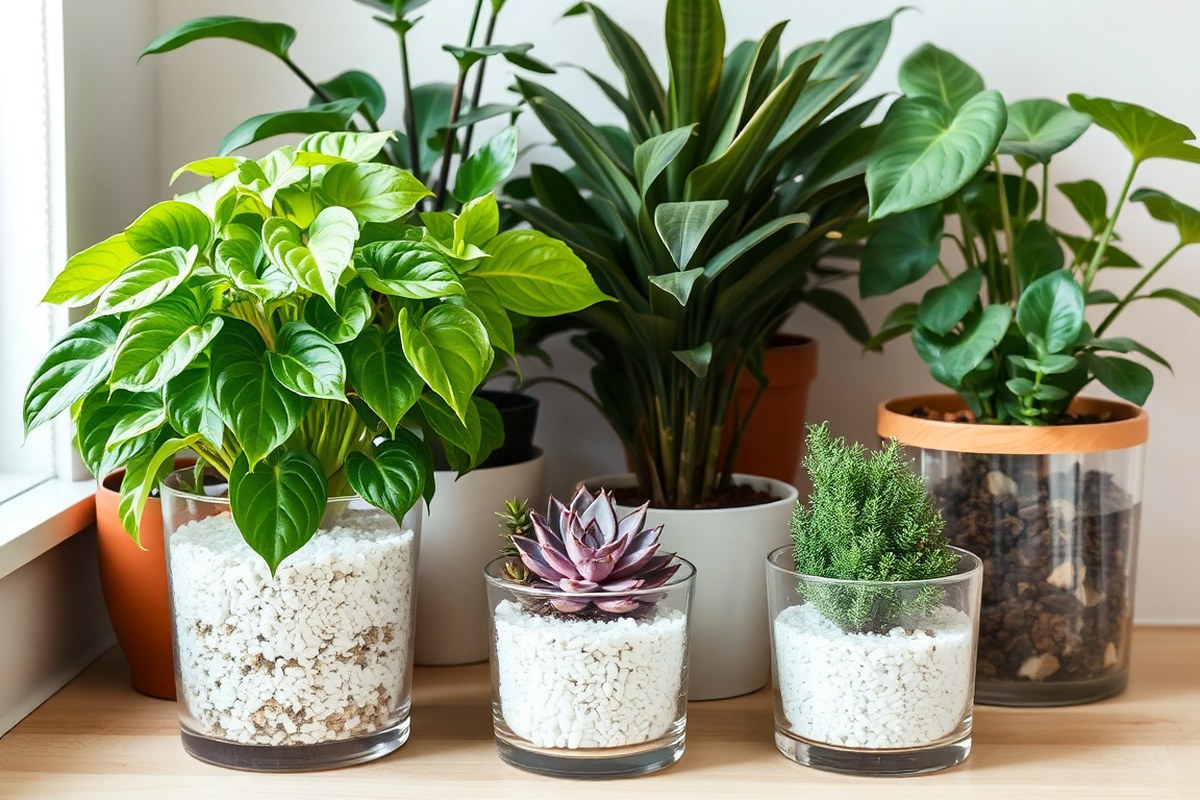
Choosing the Right Plants and LECA Ball Sizes
Pick plants with root systems that handle moisture and air well. Match LECA ball size to the plant’s root type for best growth.
Best Plants for LECA Growing
Plants that adapt well usually have thick, strong roots. They thrive because LECA keeps roots moist without waterlogging. You can switch plants like pothos, philodendron, and monstera over to LECA with good results.
Use water propagation for 2 to 4 weeks before moving these plants. This helps roots adjust before they grow in LECA media. Strong white roots signal readiness to transfer.
- Pothos
- Philodendron
- Monstera
- Snake plants
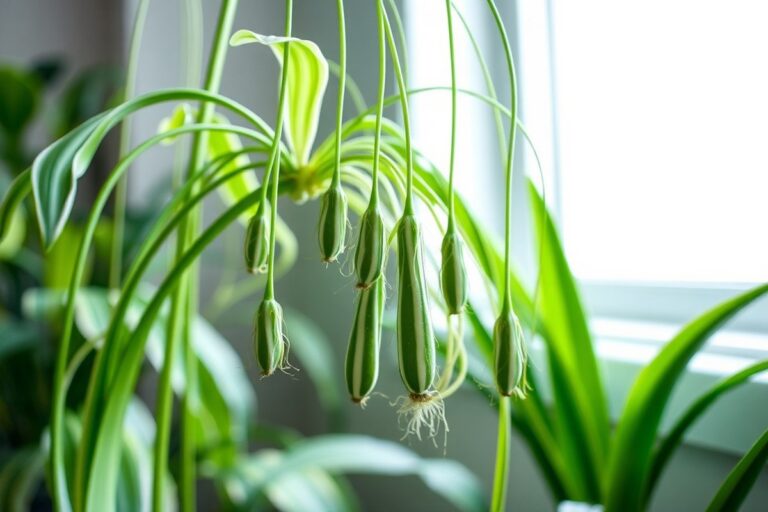
- Spider plants
- Peace lilies
- ZZ plants
Choosing plants like these cuts down shock when moving them from soil. Their roots handle direct contact with LECA well and won’t dry out easily.
Matching LECA Ball Sizes to Plant Root Types
Smaller LECA balls, around 8 to 16 mm, suit plants with delicate and small roots. Larger balls, over 18 mm, support bigger root systems and larger plants. Pick balls that leave room between them for air and water flow.
Your container should be about 1 to 2 inches wider than the root ball diameter. This space prevents crowding and boosts healthy root spread in LECA.
- Small balls (8-16 mm): small houseplants with delicate roots
- Medium balls (16-18 mm): general use for medium root systems
- Large balls (18 mm+): big plants with strong, thick roots
- Allow 1, 2 inches larger pot than root ball
- Keep spacing for air and water flow
Choosing the right size decreases risk of root rot or drying out. The right LECA size helps roots grow strong and stable.
Plants That Do Not Adapt Well to LECA
Avoid plants with very fine or fragile roots that need stable soil. These may become stressed or fail to absorb nutrients well in LECA. Some orchids and ferns fall into this category.
Plants sensitive to environmental shifts often do poorly. They struggle with changes in moisture and may develop root problems when moved to LECA.
Avoid LECA for plants with delicate roots or those that need stable soil moisture.
Choosing unsuitable plants leads to transplant shock and poor growth. Stick with hardy, flexible root systems to get the most from LECA growing.
Preparing and Cleaning LECA Before Planting
Preparing LECA balls before planting means cleaning, soaking, and optionally sterilizing them. This removes dust and minerals that might harm your plants. You want the balls to hold water well and stay free of harmful buildup.
Initial Rinsing to Remove Dust and Debris
Fresh LECA balls often have dust and dirt from packaging. This dust can block water absorption and cause root issues. Rinsing clears this dust and prepares the balls for soaking.
Put the LECA balls in a colander or fine mesh strainer. Rinse thoroughly under running water. Move the balls around with your hand to ensure all surfaces get rinsed.
Soaking Procedure to Hydrate LECA Balls
Soaking LECA balls hydrates them to hold moisture for your plant’s roots. It also removes any stubborn dust or loose debris. Proper soaking helps your plants adjust faster and prevents dehydration.
Use clean water at room temperature to soak the LECA. Soak the balls for at least 24 hours. This fills the pores in each clay ball so they can store and release water.
Optional Sterilization Methods for Reused LECA
Reuse LECA by cleaning and sterilizing it to avoid disease and salt buildup. Sterilizing kills pathogens that could harm your plants. You can use bleach, vinegar, baking, or boiling water.
Bleach soak uses 1 part bleach to 9 parts water. Soak LECA for about 30 minutes then rinse thoroughly. Vinegar soak uses a 1:3 white vinegar to water mix for 15 minutes for mild sterilization.
Baking LECA at 200°F (95°C) for 30 minutes kills microbes without chemicals. Boiling water poured over LECA also sterilizes but is less thorough. Always rinse LECA well after any sterilization to avoid residue.
Storage Tips for Prepared LECA
After cleaning and soaking, let LECA dry for at least 24 hours before storing. Dry LECA should be kept in a clean, dry container or bag. Avoid sealing it airtight if there’s any moisture left inside.
Store LECA away from dirt and dust between uses to keep it clean. When reusing LECA, rinse well before planting again. Flushing LECA in your plant’s pot every 2 to 4 weeks also helps maintain it.
- Rinse the LECA balls under running water to clear dust.
- Place rinsed LECA in a container filled with clean room-temperature water.
- Soak the LECA for 24 hours to fully hydrate each ball.
- For reused LECA, soak it in bleach and water 1:9 for 30 minutes. You can also use a vinegar and water mix of 1:3 for 15 minutes. This cleans the LECA before reusing it.
- After sterilizing, rinse LECA thoroughly to remove all chemical residues.
- Optionally bake LECA at 200°F for 30 minutes or pour boiling water over to sterilize.
- Spread LECA to air dry for 24 hours before storing or planting.
- Store dry LECA in a clean, breathable container until use.
Step-By-Step Transferring Plants from Soil to LECA
To transfer plants from soil to LECA, start by cleaning and trimming the roots. Place the plant gently in wet LECA. Set water level just below the roots.
Make sure the roots do not sit in water. This helps plants adjust in 2 to 4 weeks.
They will grow new water roots. This way, they avoid shock during transition.
Preparing the Plant by Trimming and Cleaning Roots
Begin by gently removing the plant from its soil pot. Wash away dirt from the roots using room temperature water until the roots are clean.
Trim off any dead or damaged roots with clean scissors to stop rot. This step encourages healthy new growth.
Placing the Plant in LECA Medium Correctly
Use a net pot to hold the plant and fill it with pre-soaked LECA balls. Spread the roots gently so they sit inside the LECA without bending.
Position the plant so roots can grow through the holes. Add more LECA around the base to keep it stable but don’t pack tightly.
Establishing the Water Reservoir with Right Level
Fill the container with water. Keep water just below the root base.
This prevents roots from drowning. The LECA balls will hold moisture, so roots access water without drowning.
Keep the water slightly below roots to avoid rot but enough to keep them moist. Topping up water regularly is important as plants start adjusting.
Monitoring and Care During the Adaptation Phase
Check water levels every few days and add a hydroponic fertilizer to support root growth. Use a balanced formula suited for semi-hydro setups.
New water roots usually appear within 2 to 4 weeks. You might see some old roots die off, that’s normal as the plant adjusts. Keep the plant in bright indirect light and room temperatures around 65 to 75°F. Avoid too much direct sun during this phase.
- Remove plant from soil pot carefully.
- Wash roots under room temp water to remove all soil.
- Trim dead or damaged roots with clean scissors.
- Fill net pot with soaked LECA balls.
- Place plant roots gently into LECA, spreading evenly.
- Fill around roots with more LECA to secure the plant.
- Add water to container until just below root base.
- Top up water frequently and add hydroponic nutrient solution.
Watering Practices and Reservoir Management in LECA
Water your plants in LECA by keeping a water reservoir at the pot’s bottom. The water should cover about one fifth to one third of the Leca ball layer. This setup lets the clay balls soak up water while letting roots get enough oxygen.
The reservoir’s water level depends on your pot size. Smaller pots (under 4 inches) may hold only 0.5 to 1 cup of water. Medium pots (around 6 inches) need about 1 to 2 cups.
Large pots (8 inches or more) may require 2 to 3 cups or more. Always check and refill before the reservoir dries completely.
| Pot Size | Typical Reservoir Depth | Water Volume Range | Watering Frequency |
|---|---|---|---|
| Small (up to 4 inches) | 1/5 to 1/3 of pot height | 0.5 – 1 cup | Every 7 to 10 days |
| Medium (5 to 7 inches) | 1/5 to 1/3 of pot height | 1 – 2 cups | Every 10 to 14 days |
| Large (8 inches or more) | 1/5 to 1/3 of pot height | 2 – 3 cups or more | Every 14 to 21 days |
Adjust watering based on seasons. Plants usually need more water during warm months due to faster evaporation.
In cooler months, water less often because roots absorb moisture slower. Use a water pH meter and a hydroponic fertilizer to keep your plants healthy.
Keep an eye on water clarity and the smell in the reservoir. Dirty water or bad smells signal that you should replace the water more often. Clear containers make it easier to watch how root growth reacts to watering.
Never let the water reservoir fully dry out. The LECA needs consistent moisture without drowning the roots.
Fertilizing Plants Grown in LECA: What and When
Plants grown in LECA need fertilizer since LECA contains no nutrients. Use a hydroponic or liquid fertilizer specifically made for nutrient solutions. This helps give plants the minerals they cannot get from the LECA itself.
Add the fertilizer by diluting it in the water you use to hydrate the LECA balls. Since the roots absorb nutrients directly from water, keeping this solution well mixed is important. Feeding plants about once a month is common.
Use plain water on other days. This helps keep moisture steady.
Monitoring pH is also key for nutrient uptake. The ideal pH range for most plants in LECA is between 5.5 and 6.5. You can buy a simple pH test kit.
Use pH up or pH down products. Adjust the water based on your test results.
- Use a hydroponic fertilizer designed for nutrient solutions
- Dilute fertilizer in water and use that to water LECA
- Feed plants once a month with nutrient-rich water
- Water with plain water between fertilizing to keep moisture consistent
- Test and adjust pH to keep it between 5.5 and 6.5
- Watch for discoloration or weak growth as signs of imbalance
- Cut back on fertilizing if buildup forms on LECA or roots
Because LECA balls don’t decompose, you avoid nutrient lock-up and root rot common in soil. That means you can use less fertilizer overall compared to soil systems. Still, applying the right amount at the right time keeps your plants strong and growing well.
Excess fertilizer can harm plants, especially if it builds up on LECA. Flush LECA with plain water to rinse off minerals. Do this if you see leaf burn.
Also flush if plant growth slows. Regular feeding combined with pH control gives your indoor plants the nutrients they need without guesswork.
Common Issues and Troubleshooting with LECA Plants
Common problems with plants in LECA are yellow leaves and wilting. Root rot, algae growth, and nutrient shortages are also common. These issues can hurt your plant’s health.
Yellow leaves often show root damage or nutrient issues. Wilting may mean your plant is underwatered or stressed.
Root rot happens when roots get too wet for too long. Both problems need quick care to fix.
Avoid overwatering by keeping about one-third of the pot above the water reservoir. Using net pots inside glass pots helps control water contact with the LECA balls. This method reduces root rot risks by limiting how wet the medium gets.
| Problem | Cause | Fix | Result |
|---|---|---|---|
| Root rot | Overwatering, water touching roots too long | Keep reservoir 1/3 below pot rim, use net pots | Healthy roots, no foul smell, no mushy stems |
| Yellow leaves | Root damage, low light, nutrient deficiency | Adjust light, feed with balanced fertilizer often | New leaves stay green, older leaves recover slowly |
| Wilting | Underwatering, adaptation stress | Increase watering frequency gradually, keep stable temps | Leaves perk up within days |
| Algae growth | Excess light on wet LECA surface | Reduce light exposure, rinse LECA balls regularly | LECA stays clean, no slippery surfaces |
| Nutrient deficiencies | Skipping or inadequate fertilizing | Use hydroponic nutrients on schedule | Plants grow evenly, color returns |
Root rot is the biggest trouble when watering too often or keeping water levels too high. LECA holds moisture well, so water demand drops.
Keep an eye on reservoir height and root color. White or light roots mean good health; dark, slimy roots need action.
Algae tends to appear with constant light and moisture on LECA balls. Rinsing them before reuse and avoiding bright direct light helps.
Yellowing can mean low nutrients or light. So adjust feedings or move the plant to a brighter spot.
Regular feeding with hydroponic nutrients matches the soil’s natural supply. Skip fertilizing and plants quickly show deficiencies in this soilless medium. Use balanced liquid feeds every 1 or 2 weeks for steady growth.
Maintaining and Reusing LECA for Long-Term Plant Health
Flushing LECA every three to six months keeps salt buildup and nutrients balanced. Use plain water, letting it flow through the balls to wash away residues. This prevents root stress and keeps oxygen flowing well around the plant roots.
Cleaning reused LECA means soaking it in a mild bleach solution. Use about one part bleach to ten parts water. Soak the balls for a short time to clean them.
Soak for 10 minutes, rinse thoroughly with clean water, then let dry completely. This kills pathogens and removes old salt deposits before you repot your plants.
Replace LECA if the balls break down or get badly stained. This usually happens after years of use. Changing the medium keeps your plants healthy.
Usually, LECA lasts 2 to 5 years with good care. Notice mold or a bad smell that cleaning can’t remove? Then it’s time to replace the LECA completely.
For sustainability, collect your LECA when repotting or trimming plants. Let it dry completely before storing. Use a breathable bag to keep it fresh.
This avoids wasting this eco-friendly growing option. Buying quality LECA costs more upfront but lasts longer.
It supports your plants better over time. This saves money and effort long term.
Always rinse your cleaned LECA thoroughly before reuse to protect your plants from bleach residue.
Regular checks every month help catch salt buildup or root clogging early. Roots look dry or water pools at the bottom?
Flush the LECA sooner to keep the roots healthy. Good lighting speeds plant growth and keeps roots healthy in LECA setups.
Cleaning and reusing LECA saves money since it is more expensive than soil but lasts longer. A 5-liter bag of LECA costs about $10 to $20. It can cover several pots depending on your setup size.
This makes it a good value. This makes LECA efficient for busy indoor gardeners who want less frequent repotting.
Step-by-Step Action Plan for Growing Plants in LECA
Follow these steps to set up and care for your LECA-grown plants successfully.
- Before you start: Soak your LECA balls in water first. Add mild bleach to the water. Leave them in the mix for 24 hours. This removes dust and prevents mold.
- Day 1: Transfer your plant from soil to LECA, washing off soil gently. The roots should look clean and healthy before placing in LECA.
- Day 2: Add water to the container until it just touches the bottom layer of LECA. This keeps roots moist without drowning them.
- Week 1: Monitor the water level and top it off as needed. Healthy plants will start to show new growth during this time.
- Week 2: Begin fertilizing with a diluted hydroponic nutrient solution once a week. Look for leaf color improvement as a sign it’s working.
- After 3 weeks: Check roots regularly for rot or dryness. Adjust watering and air exposure to keep roots firm and light-colored.
- Month 1 and ongoing: Flush LECA with fresh water monthly to prevent salt buildup. Plants that stay green and vibrant indicate good care.
Frequently Asked Questions
Can I Use LECA to Grow Succulents Indoors?
Yes, succulents can grow well in LECA since it drains quickly. They need less water, so avoid overwatering by checking moisture levels often.
How Often Should I Clean LECA Balls During Reuse?
Clean LECA every two to three months to prevent salt buildup. Rinse thoroughly with water and soak in vinegar briefly to keep it fresh.
Can LECA Help Prevent Root Rot in Houseplants?
LECA reduces root rot risk by improving airflow and draining excess water. The balls keep roots moist but not soggy, which roots love.
Do I Need a Special Fertilizer for Plants in LECA?
Use water-soluble fertilizer formulated for hydroponics or houseplants. It dissolves well and delivers nutrients straight to the roots through the water.
How Do I Tell If My Plant Needs More Water in LECA?
Check if LECA balls feel dry or if the reservoir water is low. Leaves may also wilt slightly when the plant needs hydration.
Is LECA Suitable for Orchid Propagation at Home?
Yes, LECA mimics orchid roots’ natural air and moisture environment. It supports healthy roots better than soil for epiphytic plants like orchids.
Final Thoughts
Using LECA helps you control water and nutrients better for your plants. Keep each step simple and watch your plants thrive in soil-free growing. Start by cleaning your LECA today and enjoy your greener space soon.