How Does Spider Plants Reproduce: A Complete Guide with Proven Methods
How does spider plants reproduce? They mainly reproduce by sending out baby plants called offsets or spiderettes.
These tiny plantlets grow from the mother plant’s stems and develop roots on their own. You simply remove and pot them once their roots are about 1 to 2 inches long.
Spider plants can also reproduce sexually by flowering and producing seeds. Spider plants blooming indoors is less common. They need bright, indirect light.
They also require good conditions to flower well. Usually, they’re mature at 1 to 2 years old before flowering or sending out spiderettes.
Place your spider plant by a bright window with indirect light. Keep the room temperature near 65 to 75 degrees Fahrenheit. Aim for 40 to 60 percent humidity to help it grow baby spiderettes faster.
Key Takeaways
- Spider plants reproduce naturally through offsets called spiderettes.
- Wait until spiderettes have 1 to 2-inch roots before potting.
- Flowering and seed production require bright, indirect light and maturity.
- Spider plants mature in 1 to 2 years before producing offsets or flowers.
- Keep plants near windows for 6 to 8 hours of indirect or filtered light.
- Maintain temperatures between 65 and 75 degrees Fahrenheit for best growth.
How Spider Plants Naturally Reproduce Through Offsets

Spider plants reproduce naturally by growing small plantlets on their long, trailing stems. These plantlets develop on special stems called stolons, which extend outward from the mother plant. Each plantlet has roots.
It also has leaves. It’s ready to grow when it touches soil.
Stolons look like long runners that arch away from the main plant. At the ends of stolons, you’ll find tiny baby spider plants. These are called spiderettes or offsets.
These offsets can grow roots before you separate them. That makes starting new plants easier.
These asexual offsets are the main way spider plants reproduce indoors and in nature. The process doesn’t require flowers or seeds, which are rare indoors.
Producing plantlets is an easy way for spider plants to spread. They fill new pots or spaces.
Spider plants usually start producing these offsets after they are about 1 to 2 years old. The mother plant must be healthy and mature enough before it sends out stolons with plantlets. Once the plant reaches this age, you’ll often see several plantlets forming at the same time.
To encourage offset production, the mother plant needs bright, indirect light. Stolons tend to grow longer in these conditions, making the plantlets easier to spot and harvest. This natural reproduction helps keep spider plants thriving without much effort.
| Step | What Happens | Timeframe |
|---|---|---|
| 1 | Mother plant reaches 1 to 2 years of age and grows large enough | 12 to 24 months |
| 2 | Stolons emerge, extending outward from the mother plant | Starts anytime after maturity |
| 3 | Plantlets (offsets) develop leaves and roots at stolon ends | Several weeks to a few months |
| 4 | Plantlets become ready to separate and root independently | Once roots reach 1 to 2 inches long |
Sexual Reproduction: Flowering and Seed Production in Spider Plants
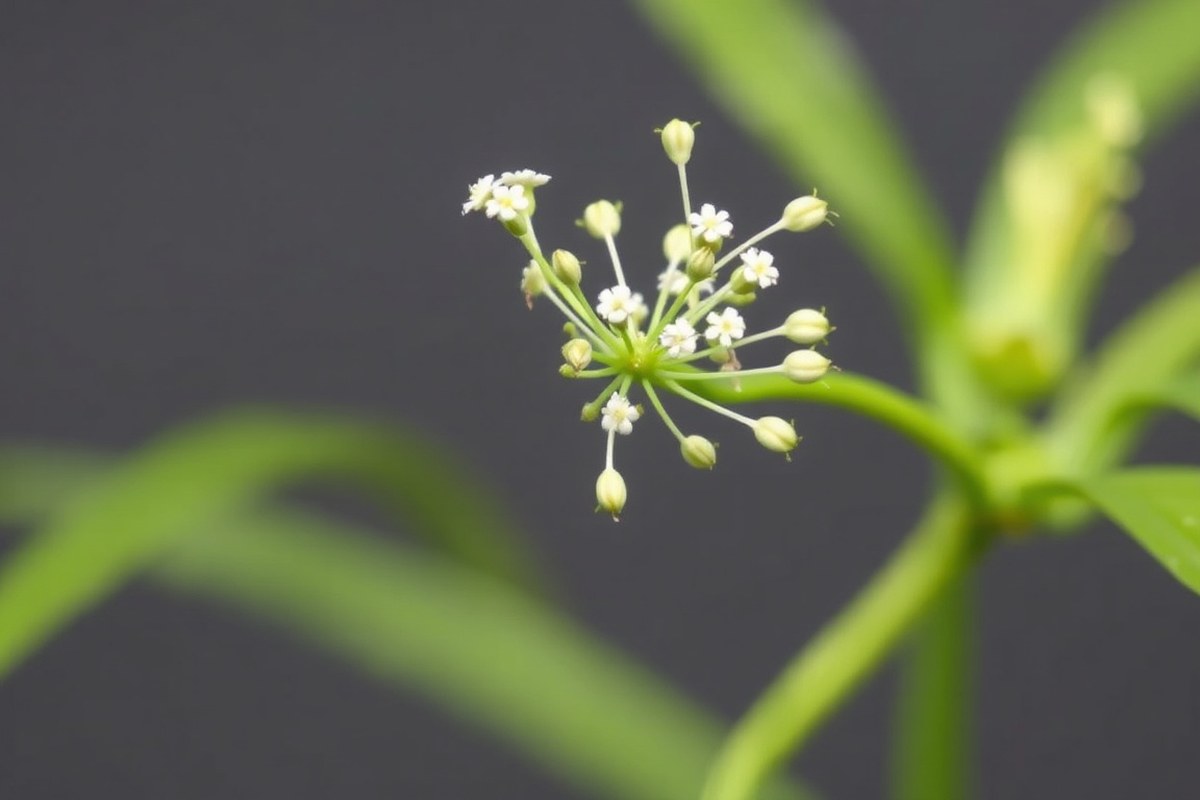
Spider plants reproduce sexually by producing small, star-shaped white flowers. These flowers contain both male and female parts, allowing self-pollination or cross-pollination. After pollination, the flowers may develop seeds, but this happens less often indoors.
Flowering usually happens when the plant is mature and receives enough light and a proper temperature. Bright, indirect light with temperatures between 65°F and 75°F encourages flower formation. Lower light or erratic temperatures reduce the chance of blooming and seed production.
Indoor conditions often limit seed development. Without pollinators like bees or manual pollination, the flowers rarely set viable seeds.
You can hand-pollinate by brushing a small paintbrush or cotton swab gently between flowers. This may increase seed production but takes time and patience.
Seeds need moist, well-drained soil and warmth to germinate. Keep the soil around 70°F to 75°F and consistently moist but not soggy.
Germination takes 2 to 4 weeks under good conditions. Still, growing spider plants from seeds is slower and less predictable than using plantlets.
Choosing sexual reproduction suits advanced growers wanting to explore new plant varieties. Seed-grown plants can have varied traits, unlike clones from offsets, which look identical to the parent. However, this method requires more care and longer waiting compared to asexual propagation.
Manual pollination can help produce seeds indoors. But don’t expect quick or reliable results without proper conditions.
Comparing Propagation Methods: Water, Soil, and Division
Spider plants reproduce well through water rooting, soil planting, or division. Each method fits different needs, timelines, and skill levels. Comparing these helps you pick the easiest way to grow new plants successfully.
Water Propagation: Steps and Tips
Rooting spider plantlets in water lets you watch roots grow clearly. Use clean containers and fresh water to avoid rot. Change the water every few days to keep it fresh and oxygenated.
Place the plantlet in a jar filled with water until roots reach 1 to 2 inches. This usually takes 1 to 3 weeks. Move it to soil once roots are a few inches long for stronger growth.
Soil Propagation: Preparing and Potting Plantlets
Plantlets with visible root nubs thrive when placed directly in soil. Use a well-draining potting mix to prevent soggy roots, which spider plants hate. Plant the root nubs just below the soil surface to support firm growth.
Keep the soil lightly moist but not wet. Roots usually establish within 2 to 4 weeks. Plantlets started in soil grow faster than those started in water.
Division Propagation: When and How to Split Plants
Division involves splitting a mature clump into smaller sections with roots. Use this method when the plant mat looks crowded or roots push out of the pot. Divide plants during spring or early summer for a quicker recovery.
Gently separate root balls with clean hands or a sharp knife. Repot each new section into similar potting soil and water well. New plants usually show growth within 2 to 3 weeks after division.
Pros and Cons of Each Propagation Type
Choosing the best method depends on your skill, time, and goals. Here’s a quick comparison to help you decide.
| Method | Best For | Watch Out For |
|---|---|---|
| Water rooting | Beginners who want to see roots | Stale water and rotting leaves |
| Direct soil | Strong plantlets with root nubs | Dry mix and deep planting |
| Attached rooting | Low-effort propagation | Tangled stems and crowded pots |
| Division | Quick new plants from mature clumps | Damaging roots or stress on sections |
Water rooting works nicely for beginners but needs regular water changes. Soil propagation produces stronger plants but takes some care with moisture.
Division offers many new plants faster but requires handling mature roots carefully. Watch for root damage or overcrowding in all cases.
Conditions That Promote Plantlet Production and Rooting Success
Spider plants produce more plantlets under bright, indirect sunlight, around 300 to 500 foot-candles. This amount of light encourages the growth of stolons, the runners that bear baby plants. Low light slows plantlet growth.
It limits the energy plants make. This happens because photosynthesis depends on light.
Temperature plays a big role too. Keeping your spider plant between 65 and 75°F (18 to 24°C) helps metabolic processes run smoothly.
This range speeds up root development in the plantlets. Temperatures below 60°F can stall growth, while anything above 80°F risks stressing the plant.
Spider plants appreciate moderate humidity, ideally between 40 and 60 percent. Dry indoor air, especially in winter, can slow plantlet rooting and cause the leaves to brown. You can raise humidity by misting plants lightly.
Another way is to set a pebble tray with water under the pot. Both help keep moisture around the plant. Keep the soil evenly moist by watering every 7 to 10 days.
Let the top inch of soil dry before watering again. This prevents overwatering. It also helps avoid root rot.
Fertilizing monthly with a balanced liquid fertilizer like 10-10-10 helps your spider plant grow strong plantlets. Fertilizer provides nutrients needed for stolon growth and healthy root systems.
Too much fertilizer can burn the roots. So stick to the recommended dose on the package during the growing season.
The soil should be well-draining and loose, using mixes with peat or coconut coir and perlite. This allows roots to breathe and prevents waterlogged conditions.
Rooting usually takes 2 to 4 weeks if conditions stay consistent. Expect rooting to slow when it gets cooler or drier than ideal.
Step-by-Step Guide to Propagate Spider Plant Plantlets Successfully
Spider plants reproduce easily using small plantlets that grow on stolons. You should wait until plantlets have 2, 3 leaves and visible roots before separating. Rooting usually takes 2 to 3 weeks in soil.
The same time applies in water. After roots form, you should pot up the plant.
Selecting Healthy Plantlets to Propagate
Look for plantlets with at least 2 or 3 leaves and some visible roots. These roots are usually tiny, white, or pale aerial roots at the base of the plantlet. Selecting healthy plantlets helps them establish quickly after separation.
Choose plantlets that are spaced out enough to avoid crowding. Crowded plantlets compete for light and nutrients and slow down growth. Leaving only one or two healthy offsets per mother plant keeps things tidy and strong.
Rooting Plantlets in Water: Procedures
Water propagation lets you watch roots grow before potting up. Start with a clean container and use room-temperature water to avoid shock. Change the water every few days to prevent bacteria.
- Fill a small glass or jar with room-temperature water.
- Cut the plantlet from the mother stalk once roots are at least 1 inch long.
- Place the root end in the water without submerging the leaves.
- Keep the container in bright, indirect light but away from direct sun.
- Change the water every 3 days to keep it fresh.
- Wait 2 to 3 weeks for roots to thicken and grow longer.
Don’t leave plantlets in water too long. Long exposure can weaken their ability to thrive in soil.
Rooting Plantlets in Soil: Best Practices
Plantlets can root directly in soil, which avoids transplant shock. Use a fresh, well-draining potting mix like a soilless blend made for houseplants. Keep the soil lightly moist but not soggy.
Set the plantlet on the soil surface while it’s still attached to the mother plant. Allow roots to grow into the soil before cutting the stolon connecting it. This method helps the plantlet adjust faster.
- Fill a small pot with moist, soilless potting mix.
- Position the plantlet on the soil surface with roots touching the mix.
- Keep the plantlet attached to the mother for about 2 weeks to root.
- After roots are visible and firm, cut the stolon to separate the plantlet.
- Water lightly after separation to settle the roots.
- Place the new plant in bright, indirect light.
Soil should feel slightly dry on top before watering to prevent rot in new roots.
Potting Up Rooted Plantlets
Once roots are about 2 inches long and look healthy, it’s time to pot up. Transplant into a small container with well-draining soil designed for spider plants or general houseplants. Avoid large pots, which hold too much moisture.
Water the newly potted plantlet lightly to settle soil around the roots. Keep it in indirect light and maintain warm temperatures between 65 and 75°F. You’ll see new growth in a few weeks, signaling successful establishing.
Propagating Spider Plants by Division: Splitting Mature Clumps
Dividing spider plants means splitting a mature plant into smaller clumps. This lets you grow new plants and stops overcrowding. The best time to divide your spider plant is spring or early summer.
That’s when the plant grows the most. This timing helps new divisions thrive.
Identifying When Division Is Needed
Look for crowded roots and many leaves emerging from a tight center. These signs show your spider plant needs more space.
Growth slows or water drains poorly; division helps revive the plant. It boosts new growth and improves health.
Also check if roots push out of drainage holes or the plant topples easily. These stress signs mean it’s time to divide and repot for better health.
Tools and Materials for Division
You’ll need a clean, sharp knife or garden scissors to split the root ball. Prepare pots with fresh potting mix suitable for spider plants. Gloves protect your hands and help avoid soil mess.
Have a small watering can ready. Well-draining soil mixed with perlite or sand works best.
You can use rooting hormone to help divisions root faster. It’s an optional step, but it can speed things up.
Step-by-Step Division Process
Follow these steps to divide your spider plant carefully. Avoid breaking the roots too much to keep the plant healthy.
- Water the plant a day before to moisten the soil.
- Gently remove the plant from its pot by tipping and squeezing the sides.
- Shake off excess soil to see the root structure clearly.
- Use your fingers or a knife to separate the root ball into sections.
- Pick divisions with several leaves and healthy roots.
- Trim any damaged or dead roots before planting divisions.
- Plant each division into a small pot with fresh soil.
- Water each new pot lightly to settle soil around roots.
Aftercare and Repotting Tips
Keep newly divided plants in indirect light and steady warmth, around 65 to 75 degrees Fahrenheit. Avoid direct sun for 1 to 2 weeks to reduce stress. Water moderately, letting the soil dry slightly between watering.
After roots grow strongly in 4 to 6 weeks, start normal watering and feeding routines. Repot when roots fill the pot again to keep plants healthy. Watch for new leaf growth to confirm recovery and success.
Common Propagation Mistakes and How to Fix Them
One common mistake is letting soil stay too wet during propagation. This often leads to root rot and kills the young plantlets.
Keep the soil moist but never soggy. Use a well-draining potting mix to stop water from pooling around the roots.
Plantlets sometimes fail because they get separated too soon. The roots should be at least an inch long before cutting. Cut only after you see strong roots.
This helps the new plant grow well. Otherwise, they struggle to take up water and nutrients, which slows growth or causes death.
Another error is planting offsets too deep in the soil. This blocks air from reaching the roots.
Instead, place offsets just at soil level with their roots spread out gently. This encourages healthy breathing for root development.
- Use fresh, light potting soil with good drainage.
- Water only when the top inch of soil feels dry.
- Wait until offsets have visible roots before separating.
- Plant offsets shallow enough to keep roots near soil surface.
- Keep propagated plants in indirect light, not direct sun.
- Use a clean pot to avoid spreading disease or fungi.
- Maintain room temperature around 65°F to 75°F for best root growth.
Root rot appears as black, mushy roots and wilting leaves. Catch the offset early. Remove it and wash off the soil.
Trim any rotten roots before planting. Repot in dry, fresh soil and cut back on watering. Moving the plant to an airy spot helps it dry out faster.
When rooting slows or fails, check light and temperature. Low light or cold drafts can stunt root growth.
Place plantlets near a north or east window for gentle light. Avoid sudden temperature changes during this sensitive stage.
How Maturity and Environment Affect Spider Plant Reproduction
Spider plants generally need to be mature enough to reproduce. Young spider plants rarely produce babies or flowers. Most plants start making plantlets after a few years.
They also need to grow bigger first. Then, plantlets will begin to appear naturally.
Sometimes, even older spider plants won’t produce babies if conditions aren’t right. Insufficient light is the most common cause.
These plants thrive with bright, indirect light. Keeping them in low light can prevent plantlet production.
Temperature also matters. Spider plants grow best between 65°F and 75°F. Temperatures below 50°F or above 85°F can stress them.
Stress can delay or stop reproduction. Sudden temperature swings affect their growth too.
Fertilizing can boost reproduction but must be done carefully. Use a balanced liquid fertilizer every two to four weeks during spring and summer.
Over-fertilizing can harm roots and reduce plantlet growth. A weak fertilizer solution is safer than a strong one.
To improve spider plant reproduction, place it in a spot with plenty of filtered sunlight. Avoid direct afternoon sun; it can burn the leaves.
Maintain room temperature around 70°F and keep away from cold drafts and heaters. Feed lightly every few weeks in growing season.
Let your spider plant grow for several years. It needs plenty of soft, indirect light. Only then can you expect new baby plants.
Step-by-Step Action Plan to Propagate Spider Plants
Follow these steps to grow new spider plants from plantlets or mature clumps. Check each step to make sure your new plant starts well.
- Before you start: Prepare small pots with well-draining potting mix. This helps roots grow healthy and strong.
- Week 1: Cut off a plantlet with visible roots from the mother plant. Healthy roots mean better chances of success.
- Day 1: Plant the plantlet in the soil and water lightly. The soil should be moist, not soggy.
- Week 2: Place the pot in bright, indirect sunlight. Avoid direct sun to prevent stress on new plants.
- Week 3: Check the soil moisture regularly. Water when the top inch feels dry to touch.
- Week 4: Look for new growth on the plantlet. New leaves show roots have established well.
- Month 2: For mature plants, gently separate root clumps and pot each section. Make sure each has roots and leaves.
- After 2 months: Continue normal spider plant care. Your new plants will grow stronger each week.
Frequently Asked Questions
How Long Do Spider Plant Runners Take to Develop Roots?
Spider plant runners usually develop roots within 1 to 2 weeks. Keep the runner’s base moist and in indirect light for best results.
Can Spider Plants Reproduce Without Flowers?
Yes, spider plants reproduce asexually through runners without needing flowers. This is the most common way they spread indoors.
Do Spider Plant Seeds Grow Faster Than Offsets?
No, seeds take longer to germinate and grow than offsets. Offsets develop roots quickly, making propagation faster.
Can Spider Plants Spread Too Quickly in a Home?
Spider plants can spread quickly with many runners but are easy to control. Regular pruning keeps their growth balanced.
Is Temperature Important for Spider Plant Reproduction?
Yes, spider plants prefer temperatures between 65°F and 75°F for best reproduction. Cooler temps can slow offset production.
How Often Should I Water Spider Plant Offsets?
Water offsets lightly every few days to keep soil moist but not soggy. Overwatering can cause root rot.
Final Thoughts
Spider plants reproduce easily through plantlets and division. Start with healthy plantlets and give them good light and water. Try your first propagation today and watch your spider plants grow fast.