Why Does My ZZ Plant Have Black Spots? A Complete Guide for Fast Diagnosis & Care
Why does my ZZ plant have black spots? Most often, black spots appear due to overwatering or fungal infections.
These problems can cause leaf damage and stem rot, so you should act fast. Start by checking your watering schedule and the soil condition to find the root cause.
ZZ plants only need deep watering about once every four weeks. Too much water creates soggy soil, which invites harmful fungi and causes black spots. Always make sure your pot drains well and remove any soggy soil on the surface.
Light and humidity also affect black spot development. ZZ plants need indirect light for at least 12 hours daily. They like humidity around 40 to 50 percent.
Keep the air moderately humid for best growth. Adjusting these factors can help prevent black spots from forming or spreading.
Key Takeaways
- Water ZZ plants deeply once every four weeks, never more.
- Always let excess water drain fully to avoid soggy soil.
- Keep ZZ plants in indirect light for at least 12 hours daily.
- Maintain moderate humidity around 40 to 50 percent for best health.
- Remove black-spotted leaves promptly, but trim less than 25% at once.
- Use well-draining soil and pots to prevent root rot and spots.
What Causes Black Spots on ZZ Plant Leaves and Stems?

Black spots on ZZ plant leaves and stems show a problem. They come from watering issues, pests, or diseases. Check these areas to find the cause.
Overwatering is the most common cause. It causes the soil to stay too wet, leading to root rot and fungal infections. The leaves or stems then develop soft, black, mushy spots that slowly spread.
Fungal infections from Fusarium, Pythium, or Rhizoctonia can cause black spots too. These fungi thrive in moist conditions. The spots may look dry or leathery if the fungus affects the leaf surface directly.
When stem or root rots, black spots show up. You may notice a foul smell too.
The base feels soggy or soft. This often signals serious damage.
Too much direct sunlight also causes black spots, but these appear as scorched patches. The spots often look crisp and dark, mostly on the leaves facing the light. This damage doesn’t spread like disease spots do.
It happens when the plant moves to brighter light. The spots usually stay in one place.
Pests like spider mites or scale insects cause black spots. They feed on the plant and leave marks. These spots are small and dark.
The spots caused by pests are usually tiny and surrounded by yellow halos. Sometimes sticky honeydew or fine webbing can also be seen. Unlike fungal spots, pest damage doesn’t soften the tissue but it stunts growth.
Not all black spots mean severe disease. Some appear when the plant is stressed, like after being moved or shipped. These stress spots often stay small and don’t spread quickly.
However, soft, expanding black spots often point to overwatering and root rot. Check the soil moisture to confirm if watering is the issue.
Black spots from root rot or fungus come with other signs. Look for yellow leaves and mushy stems. There may be a bad smell near soil.
These signs indicate the plant’s roots are suffering and the damage could soon kill the plant. Early spotting helps you catch problems before they worsen.
How to Diagnose Black Spots on Your ZZ Plant Accurately
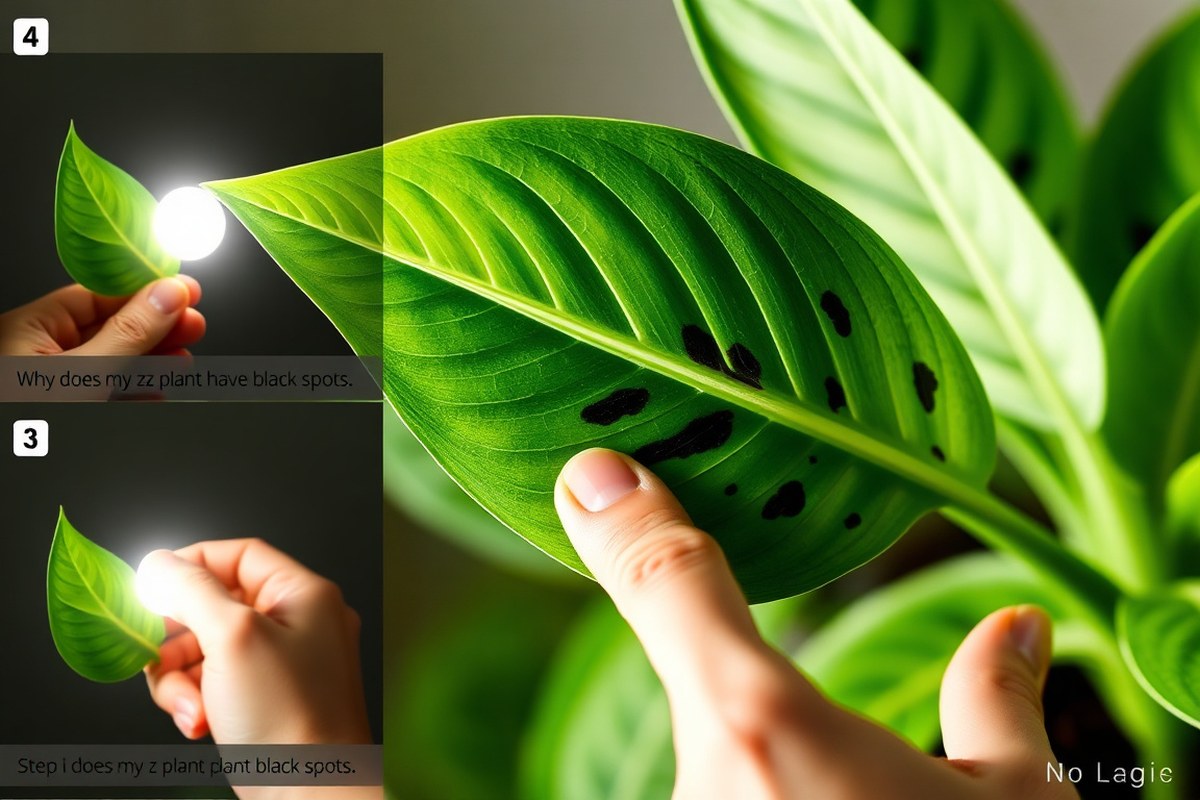
Black spots on your ZZ plant can mean different things. Some spots are just harmless scars.
Others show fungal infections or pest problems. So checking carefully helps pick the right fix.
Checking Stem and Leaf Symptoms
Look closely at where the black spots appear. Small, dry, dark spots near leaf joints usually aren’t serious.
These normal scars don’t affect health much. Spots that are slimy or mushy near the stem base show stem or root rot.
Compare the leaf and stem damage side by side:
| Symptom | Likely Cause | What to Watch For |
|---|---|---|
| Small dry black or brown spots on leaves | Normal scars | Usually near leaf stems, no soft texture |
| Soft, dark, mushy spots on stems | Stem or root rot | Black spots at soil line, may smell bad |
| Dark sunken spots on stem base | Fungal infection | Spreading spots, plant drooping |
Use this checklist as well:
- Note if spots are dry or slimy
- Check if spots are firmly attached or mushy
- Observe if the plant shows drooping
- Look for spread or new spots forming
- Check color changes beyond black (yellowing or browning)
Examining Soil Moisture and Roots
Check your potting mix moisture by sticking a finger about 2 inches deep. The soil feels wet or soggy, which means overwatering can cause black spots. Proper ZZ care means letting the soil dry completely between waterings.
Next, examine roots by gently lifting the plant from its pot. Healthy roots look firm and white or light brown.
Dark, slimy, or foul-smelling roots indicate root rot. Soft rhizomes mean severe damage needing quick action.
Never keep ZZ soil consistently damp; it invites rot and infections fast.
Identifying Pest vs. Disease Signs
Black spots can come from pests or diseases, but they look different. Fungal spots often spread and cause mushy decay near the soil line. They may also cause leaf yellowing or drooping.
Pests like spider mites or scale leave tiny bite marks or sticky residue. Spots from pests tend to be scattered and may come with visible bugs. Checking under leaves and on stems helps find pests early.
- Look for webbing or tiny bugs on leaves and stems
- Check for sticky or shiny spots from pest secretions
- Observe if spots spread progressively over days
- Note surrounding yellowing or weakening plant parts
- Test if spot centers are soft or dry
Why Overwatering Leads to Black Spots and How to Adjust Watering
Overwatering your ZZ plant causes root rot, which leads to black spots on stems and leaves. Excess water keeps the soil too wet. This dampness helps fungus grow.
It also causes rhizomes to rot. Root rot stops the plant from taking up water. Black spots show the plant is struggling.
The ideal watering schedule depends on pot size, soil type, and climate. Water a 6-inch pot every 2 to 3 weeks indoors. This timing works well for most conditions.
In warmer, drier homes or smaller pots, check the soil more often. Bigger pots or cooler spaces may need water less frequently, about once a month.
Soil moisture is the best way to know when to water. Insert your finger 1 to 2 inches into the soil. Check the soil at that depth.
Water when it feels dry. Wait a few days if the soil is moist. Check again before watering.
Signs of overwatering are black spots and mushy stems. Yellow leaves and musty soil smell also happen.
Small pots (4 to 6 inches) in warm rooms need water every 10 to 14 days. Medium pots (6 to 8 inches) in moderate light usually get water every 2 to 3 weeks.
Large pots (8 inches or more) in low light can wait 3 to 4 weeks before watering. Adjust based on humidity and temperature.
Avoid watering from above the soil because water pools around the stem base, causing rot. Instead, water slowly at the soil surface and let excess drain out. Make sure your pot has drainage holes and use well-draining succulent soil for the best results.
Reduce watering right away if you see black spots. Let soil dry fully before adding water again.
Trim off the damaged parts and repot healthy sections if root rot is severe. This routine helps stop the spread of rot and keeps your ZZ plant healthier.
Improving Soil Quality and Pot Conditions to Prevent Spots
Use a fast-draining soil mix to keep your ZZ plant healthy. A good choice is a cactus or succulent mix.
These mixes drain water quickly and prevent soggy roots that cause black spots. Avoid heavy garden soil or regular potting soil that holds moisture too long.
A typical succulent mix contains sand, perlite, and peat moss. Perlite helps air flow and drainage.
Sand adds extra drainage and weight, so the pot won’t tip over. Peat moss retains just enough moisture without keeping the soil wet.
Pot size affects moisture levels, too. Choose a pot slightly larger than the root ball, about 1 to 2 inches wider.
Too big a pot holds excess water, which raises moisture near roots. This keeps soil wet longer and risks black spot problems.
The pot must have several drainage holes. Those holes let water escape freely. Without them, water pools at the bottom and causes root rot.
Never let your pot sit in standing water. Empty any saucers within 30 minutes after watering.
Repotting helps fix black spot issues if your soil is old or poorly draining. Do this every 2 years or if the roots look crowded. ZZ plants grow rhizomes that fill the pot over time and hold onto moisture.
When repotting, gently take the plant out and trim any dead or mushy roots. Place it in fresh soil in a pot with good drainage.
Keep watering light the first few weeks to avoid stressing the plant. This refresh can stop black spots from coming back.
| Soil Type | Drainage Quality | Water Retention |
|---|---|---|
| Cactus/Succulent | High | Low |
| Houseplant Mix | Medium | Medium |
| Garden Soil | Low | High |
Identifying and Treating Fungal Infections Causing Black Spots
Black spots on a ZZ plant often come from fungal infections. These fungi attack stressed or overwatered plants. Treating them early with fungicide helps protect your plant and stop spots from spreading.
Common Fungal Pathogens on ZZ Plants
Fungi like leaf spot and stem rot often cause black spots on ZZ plants. These fungi infect damaged or overwatered areas, causing dark spots that may grow larger. You might also see yellow halos or soft, rotten patches near the spots.
Look for black spots that are dry or water-soaked with fuzzy mold under high humidity. Wilting leaves or stems can sometimes signal stem rot fungi. These signs show the infection is active and needs treatment immediately.
Applying Fungicide Safely
Choose a broad-spectrum fungicide labeled safe for houseplants. Use a spray or a soil drench, depending on whether spots are on leaves or roots. Always follow the label instructions for mixing, applying, and waiting times.
Wait for dry weather indoors to apply fungicide and wear gloves. Spray leaves fully but avoid drenching them to prevent damage. Repeat the treatment every 7 to 14 days until spots stop spreading.
- Remove affected leaves with clean scissors to reduce fungal spread.
- Apply fungicide evenly on all leaves and stems, focusing on spots.
- Water the soil if using a soil drench fungicide to target root fungi.
- Keep your ZZ plant away from direct sun for 24 hours after spraying.
- Repeat fungicide use after one week or as directed by the label.
- Dispose of fallen leaves carefully in a sealed bag to avoid contamination.
Wear gloves and work in a well-ventilated area when using fungicides.
Managing Quarantine and Spread
Move your infected ZZ plant away from others to stop fungal spores from spreading. Quarantine lasts until no new spots appear, which usually takes 2 to 3 weeks. Check nearby plants often for similar symptoms.
Clean your pots and tools with rubbing alcohol or bleach solution after use. Avoid watering overhead to keep leaves dry and limit fungal growth. Good ventilation and less moisture reduce the chance of reinfection.
How Light and Humidity Levels Affect Black Spot Formation
Too much direct sunlight can cause black spots on your ZZ plant’s leaves and stems. Bright light stresses the plant, leading to dry, dark marks that are hard and often irregular.
To avoid this, move your ZZ plant to indirect light. Place it near a north-facing window or far from a sunny one.
ZZ plants do best in moderate humidity, typically between 40% and 50%. Low humidity makes dry black or brown spots appear quickly. High humidity can encourage fungal growth that also causes spots.
Use a hygrometer to check your home’s humidity, and adjust if needed. You can add a small humidifier to raise humidity. Another way is putting a tray of water near the plant.
To keep your ZZ plant healthy, watch both light and humidity carefully. Avoid sudden changes by moving it gradually when adjusting light exposure. Keep it away from dry heating vents or air conditioners that lower humidity.
Keep your ZZ plant in a steady environment with indirect light. Maintain stable, moderate humidity to reduce black spots. This also keeps leaves smooth and shiny.
Best Practices to Remove, Trim, and Prevent Black Spots Spreading
Best Practices to Remove, Trim, and Prevent Black Spots Spreading
Trim only damaged parts, up to 20% of the plant at once to avoid stress. Always use clean tools and remove trimmings from the area. Follow with good ongoing care to stop spots from coming back and spreading.
Proper Pruning Techniques
Cut off black-spotted leaves and stems close to the base or healthy tissue. Do not remove more than one-fifth of the plant at once to prevent shock.
Dispose of all affected parts in a sealed bag to stop spread. Trim in dry weather or indoors away from other plants to reduce infection risks.
- Identify leaves and stems with black spots or mushy areas.
- Use sterilized, sharp scissors or pruning shears for clean cuts.
- Cut stems at their base or just above healthy tissue.
- Remove all cuttings from the pot and surrounding soil immediately.
- Place plant in a well-ventilated spot with indirect light.
- Avoid watering for 24 hours after trimming to let cuts heal.
- Check often for new signs of spots or damage.
Sanitizing Tools and Work Area
Clean your scissors or shears before each use with rubbing alcohol. After using, clean them again with rubbing alcohol or a 10% bleach solution.
This helps prevent spreading bacteria or fungus. This kills spores and bacteria that cause black spots.
Wipe down your work surface and hands too. Avoid cross-contaminating by never touching healthy plants with dirty tools.
Keep a dedicated container for sterilizing tools quickly between cuts. Regular sanitation lowers reinfection risks significantly.
Tracking Plant Healing Progress
Look for new, healthy growth where you trimmed. Leaves should appear firm and green without dark spots.
Monitor leaves weekly for signs of black spots or yellowing. Early detection helps stop spread fast.
Adjust care by reducing water slightly and boosting airflow if spots reappear. Healthy plants heal faster and resist infection better.
Preventing Black Spots Long-Term with Ventilation and Care
Good air flow cuts down germs and moisture on your ZZ plant’s leaves. You can boost air circulation by keeping your plant away from crowded spots. Putting your ZZ plant near an open window helps dry leaves.
A fan on low speed also speeds up drying after watering. This prevents too much moisture on the leaves.
Avoid placing your ZZ plant in areas with still, humid air. That traps moisture and invites black spots.
Try not to crowd multiple plants together, especially if their leaves touch. This blocks air movement and makes spots more likely.
- Keep your ZZ plant at least 12 inches from walls or other plants
- Open windows or use a fan for gentle daily air movement
- Wipe leaves with a damp cloth once a week to remove dust
- Only water your ZZ plant after the top inch of soil dries out. This keeps the plant from sitting in soggy soil. Checking soil moisture regularly helps you know when to water.
- Use well-draining soil to avoid soggy roots
- Avoid over-fertilizing, which can stress the plant
- Check leaves weekly for early signs of spots or damage
Routines help stop black spots from coming back. Set a weekly schedule to wipe leaves and check soil dryness.
Water carefully, only when the top inch is dry, to prevent root rot. Use a spray bottle or cloth to keep leaves clean and dry, too.
Keep an eye on light and temperatures around 65°F to 75°F. This range suits ZZ plants well and cuts stress, which can lead to spots. When you spot a leaf with black marks, trim it quickly to stop spread. Use clean scissors so you don’t bring germs back to the plant.
Don’t rush watering or leaf cleaning; too much moisture lets black spots thrive.
Simple habits like these might feel like extra work. However, a little patience pays off with a strong, green ZZ plant free of black spots.
Avoid habits like overwatering or crowding. Both can undo your good work and bring spots right back.
Step-by-Step Action Plan to Fix Black Spots on Your ZZ Plant
Follow these steps to stop black spots and help your ZZ plant recover. Check progress as you go to see improvement.
- Day 1: Stop watering for 3 days. This helps dry out soggy soil and checks if overwatering caused the spots.
- Day 4: Check soil moisture. When the soil feels damp, repot your plant with fresh, fast-draining mix.
- Day 5: Remove leaves with black spots. Use clean scissors and discard affected leaves to prevent spread.
- Week 2: Place your ZZ plant where it gets bright, indirect light. Watch for color improvement on leaves.
- Week 3: Increase air flow around the plant. Use a fan or open a window to reduce humidity and prevent fungal growth.
- Week 4: Start watering again, but only once the top inch dries out. This prevents overwatering and soil rot.
- After 5 weeks: Inspect leaves weekly. Spots should stop spreading and new growth will appear healthy.
Frequently Asked Questions
Can Black Spots on ZZ Plant Stems Indicate Root Rot?
Yes, black spots on stems often signal root rot, especially in low light. Check soil moisture and improve drainage to help your plant recover.
Are Black Spots from Pests or Just Fungal Infections?
Black spots mostly come from fungal infections, but pests can cause similar damage. Look closely for bugs or webs before treating your plant.
Can Too Much Direct Sunlight Cause Black Spots on ZZ Plants?
Yes, direct sun can scorch ZZ plant leaves and stems, leaving black spots. Move your plant to bright, indirect light for best results.
Will Trimming Black-Spotted Leaves Help My ZZ Plant?
Trimming infected leaves stops spots from spreading and helps plant health. Use clean tools and cut as close to the stem as possible.
Does Soil Type Affect the Chance of Black Spots on ZZ Plants?
Poor soil that holds excess water raises spot risk by promoting rot and fungi. Use well-draining soil to keep roots healthy and dry.
Can Low Humidity Cause Black Spots on ZZ Plants?
Low humidity is less likely to cause black spots but can stress your plant. Keep humidity moderate to maintain overall leaf health.
Wrapping Up
Black spots often come from too much water or poor air flow. Fix these first, and your ZZ plant will get stronger. Start by pausing watering and trimming affected leaves today.