How to Build a Vegetable Garden: Simple Steps and Expert Tips for Beginners
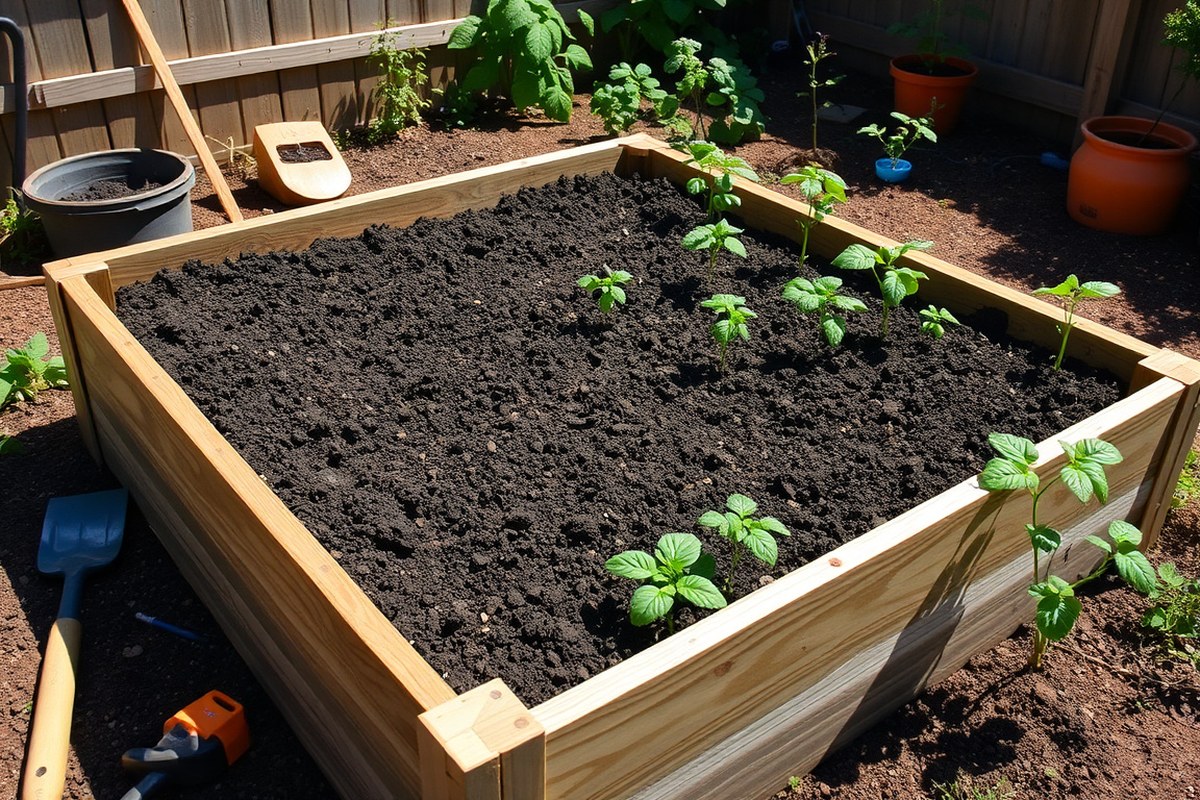
Knowing how to build a vegetable garden means starting with a sunny, level spot. Your garden needs at least six hours of full sun daily for best growth. Pick a place that’s easy to reach and water regularly.
Building raised beds helps control soil quality and drainage. Keep the bed width to four feet or less. This helps you reach plants in the middle with ease.
You won’t have to step into the bed to care for them. Use materials like cedar or untreated wood for lasting frames.
Before planting, test your soil and add finished compost. Spread compost two to three inches thick over the soil. Mix it into the top six inches well.
This improves soil and feeds your plants. This helps give your plants the nutrients they need to grow strong.
Key Takeaways
- Choose a garden spot that gets at least six hours of sun daily.
- Build raised beds no wider than four feet for easy plant access.
- Use untreated wood like cedar to build durable, safe garden frames.
- Level the ground and dig 3 to 6 inches deep if the area slopes.
- Spread 2 to 3 inches of finished compost and mix it into soil.
- Test soil before planting to know what nutrients it may lack.
How to Start Building Your Vegetable Garden
Begin by choosing the right spot for your vegetable garden. Pick a sunny area with at least six hours of direct sun each day. Also, check if the spot drains well to prevent waterlogging, which harms plants.
Next, decide your garden type based on space and soil. Raised beds suit beginners and poor soil with moderate cost.
In-ground gardens work well in large yards and cost less but need good soil prep. Containers fit balconies or patios, costing low to medium, but need more watering.
Set your garden size to make working easy. A popular choice is a 4×8-foot raised bed or two 4×4-foot beds.
Leave at least 2 feet between beds for walking and reaching plants without strain. Shape the beds in a U or square for better access with less bending.
Gather your tools and materials before building. You’ll need a shovel, measuring tape, and a level. Also get wood or bricks for framing.
Have screws or nails ready, plus soil mix if you want raised beds. Also have gloves, a garden rake, and a water source nearby.
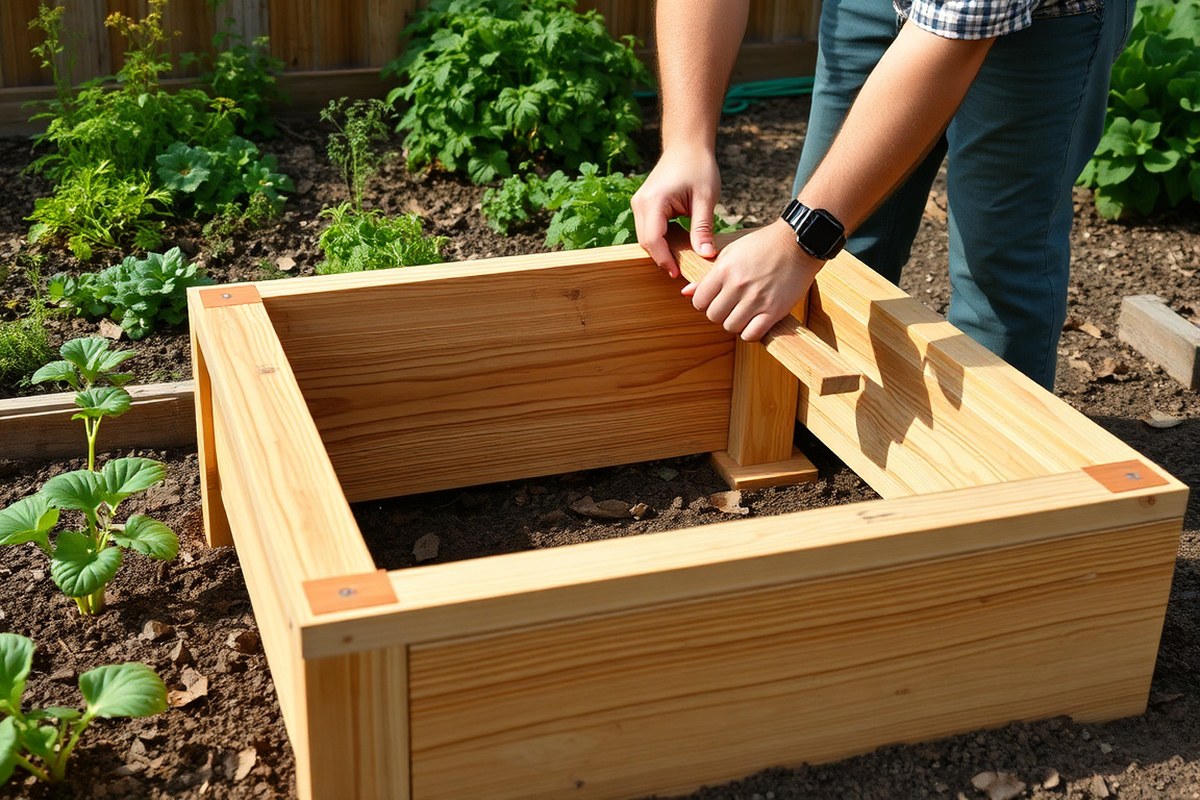
Use these steps to build a simple raised bed frame. They help you start your garden. Follow each step to finish the frame.
- Measure and mark a 4×8-foot area with stakes and string on your chosen site.
- Clear grass and rocks inside the marked space using a shovel and rake.
- Cut wood boards to 4 feet and 8 feet lengths for the bed frame sides.
- Assemble the frame by screwing the 4-foot boards to the 8-foot boards at corners.
- Place the frame in position and level it by adjusting the soil underneath.
- Fill the bed with a mix of topsoil, compost, and peat moss for healthy soil.
- Water the soil lightly to settle it and set the stage for planting.
Starting small keeps your garden manageable and encourages success. Raised beds let you control soil quality and eases weed control.
Containers work best when space is limited. In-ground needs good soil work but costs less initially.
Preparing and Testing Your Garden Soil
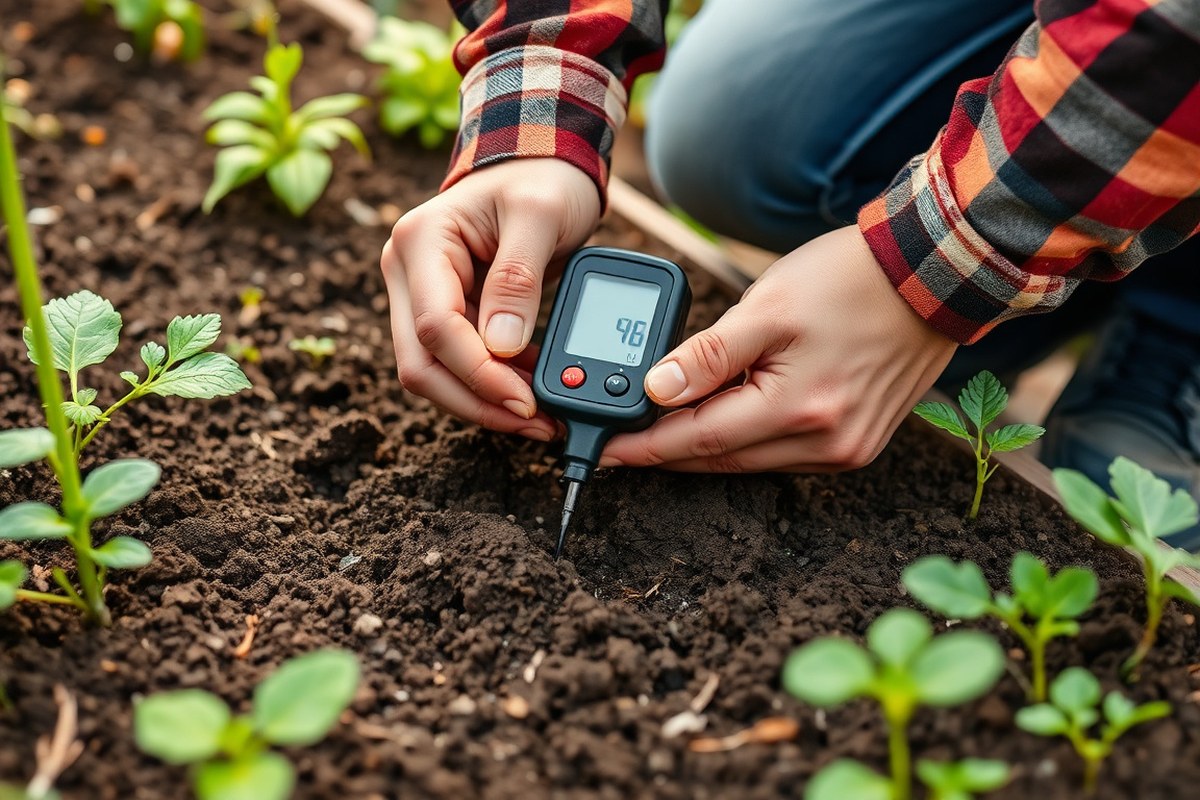
Test your soil by collecting samples from different spots in your garden. Mix the samples together well. Send about a cup to your local extension.
They will analyze the soil. They check pH, nutrient levels, and organic matter. This helps you know what your soil lacks or has too much of.
Good vegetable garden soil feels loose and crumbly. It drains well and has a rich smell from organic material.
Poor soil can be compacted, clay-heavy, or too sandy, making it hard for roots to grow. Organic matter fixes these issues by loosening clay and helping sandy soil hold water.
To improve poor soil, spread 2 to 3 inches of compost. You can also use well-rotted manure. Apply it over your garden area.
Use a shovel or fork to mix it into the top 6 inches of soil. This adds nutrients and improves drainage and texture. Compost breaks down slowly, feeding plants over time.
Add compost or manure every year. You can do it before planting season, usually in early spring or fall.
For new gardens, add 4 to 6 inches of organic matter right after clearing the site. This helps build a strong, fertile base for your vegetables.
Test soil every 2 to 3 years to keep nutrient levels balanced and your garden healthy.
Other amendments that help include leaf mold, peat moss, and aged manure. Very sandy soil needs more compost.
This helps it hold moisture better. For clay soils, organic matter breaks up the dense structure to improve drainage and root growth.
Digging 6 inches down when mixing in amendments is enough for most vegetable roots. Avoid digging too deep to not disturb soil layers that support microorganisms. Carefully break up hard clods while mixing to create even soil texture.
Bagged garden soil raised beds cost $100 to $150. This is for 12-inch deep soil in a 4 by 8-foot bed. You can save money by improving and using existing soil with amendments instead.
Keep garden beds no wider than 4 feet. This lets you reach plants easily. Avoid stepping on the soil.
Building Raised Beds: Materials, Sizes, and Construction
Begin your raised vegetable garden by choosing non-toxic materials and measuring precisely. Opt for untreated wood or composite boards to avoid soil contamination. A bed about 4 feet wide, 8 feet long, and 10 to 12 inches deep offers good space and easy access for gardening.
Selecting Wood or Alternative Materials
Untreated cedar or redwood boards work well because they resist rot naturally. Avoid pressure-treated wood since it can leach chemicals into your soil. Composite lumber or recycled plastic lumber lasts longer but costs more upfront.
Boards should be at least 6 to 12 inches wide for proper soil depth. The wider boards make a sturdy frame that holds soil well. Thicker boards resist warping and help the bed last several years.
Cutting and Assembling the Frame
Measure and mark your boards carefully using a tape measure and pencil. Cut the wood to size with a handsaw or power saw, making sure edges are square. Carpentry squares help check that corners form perfect 90-degree angles.
Assemble the frame by screwing the boards together at the corners. Use 3-inch exterior-grade screws for durability. Check if the frame is square by measuring diagonals.
Check the frame’s diagonals. They should be nearly equal to keep it square.5 inches, loosen screws to adjust.
Leveling and Securing the Bed
Pick a flat, sunny area that receives at least 6 hours of direct sunlight daily. Remove grass and debris, then use a shovel and rake to level the soil. Set the frame on this spot, then use a carpenter’s level to confirm it’s even.
Dig down or add soil to low spots if the surface isn’t level enough. Stake the frame corners into the ground with rebar or wooden stakes for stability. Press the bed firmly to prevent shifting over time.
Filling the Bed with the Right Soil Mix
Use a loose mix of topsoil and finished compost to give plants nutrients and good drainage. A common blend is 60% topsoil and 40% compost. Avoid heavy clay or sandy soils by themselves.
Fill the bed until the soil is 2 to 3 inches below the top edge. This keeps soil from spilling over while watering. Water the bed lightly to settle the soil before planting.
- Gather untreated cedar boards about 2 inches thick and 12 inches wide.
- Cut two boards to 8 feet long and two boards to 4 feet long.
- Use a carpenter’s square to check 90-degree corners before assembly.
- Attach boards in a rectangle with 3-inch exterior screws at each corner.
- Measure diagonals; adjust screws if measurements differ over 1.5 inches.
- Find a flat, sunny spot and clear the ground of grass and rocks.
- Set the frame on the leveled ground and check it with a carpenter’s level.
- Secure the frame with stakes driven into ground at corners.
- Mix 60% topsoil and 40% finished compost; fill bed 2, 3 inches below top.
- Lightly water soil to help it settle before planting.
Deciding What to Plant and When
Start by choosing easy vegetables like radishes, lettuce, green beans, and zucchini. These crops usually take between 30 to 60 days to harvest. They grow well in most gardens and won’t demand too much care.
Seed starting indoors fits plants needing a long growing season. Start seeds 6 to 8 weeks before the last frost.
Tomatoes and peppers do well this way. Peas and spinach grow fine sown outside after frost.
Use a planting calendar tailored to your USDA hardiness zone to time your sowing perfectly. The Old Farmer’s Almanac offers personalized planting calendars based on your local frost dates. These calendars stop planting too early, which harms seeds.
They also prevent planting too late, shortening the harvest. You get better timing for seed sowing.
Use this rule for seed starting: heat-loving plants begin indoors. Cold-tolerant plants can be sown directly outside. This keeps seed starting simple and effective.
After seedlings grow indoors, gradually expose them outdoors. Put them outside a few hours daily over one or two weeks.
This gets them ready for the garden. This step helps plants adjust to sunlight and wind.
Mark your calendar with important dates like last frost day. Also note the best days to start seeds indoors. These dates guide your planting schedule.
For example, a last frost on April 15 means start tomatoes indoors February 25 to March 10. Timing depends on your local frost date.
This gives seedlings time to grow. Direct sow peas around the last frost or a little earlier, as they tolerate cold soil.
Tracking days to harvest prevents overcrowding and helps plan your garden layout. Radishes typically mature in 25 to 30 days.
Green beans take about 50 to 60 days. Pick vegetables before they over-ripen for best flavor and continued production.
Knowing your garden’s timing helps avoid common mistakes like planting too early or late. Growing a few simple veggies first keeps your costs low. Seeds and starter pots usually cost under $20.
This budget works well for new gardeners. Gradually add more crops as confidence and experience grow.
Planting Your Vegetable Garden Properly
Planting seeds and seedlings correctly means putting them at the right depth and spacing. You also need to harden off seedlings before moving them outside. Following the right steps helps your garden thrive.
It also avoids weak growth. Crowded plants become less healthy.
Planting Depth and Spacing Guidelines
Plant seeds about two to three times as deep as their diameter. Small seeds like lettuce need shallower planting than larger ones like beans. This depth protects them but also lets them sprout easily.
Spacing depends on the vegetable type. Root vegetables such as carrots usually need 2 to 4 inches apart. Larger plants like tomatoes require 18 to 24 inches to spread out.
Check your seed packets or plant labels for exact spacing and depth. Dig a hole that’s twice as wide as the root ball. Make it twice as deep too.
This helps the plant grow well. Fill gently to avoid compacting the soil.
| Vegetable | Seed Depth | Spacing |
|---|---|---|
| Carrots | ¼ inch | 2 to 4 inches |
| Tomatoes (seedlings) | Plant root ball level | 18 to 24 inches |
| Lettuce | ⅛ to ¼ inch | 6 to 12 inches |
| Beans | 1 to 2 inches | 3 to 6 inches |
Seed Starting vs Direct Seeding
Some vegetables grow better when started indoors as seedlings, such as tomatoes and peppers. Others like carrots and spinach do well with direct seeding in the ground.
To start seeds indoors, sow them in small pots or seed trays with good drainage. Use a lightweight seed-starting mix and keep soil moist but not soggy.
When planting directly, prepare the soil with some compost mixed in. Plant seeds at the right depth and space, then water gently to settle the soil.
- Choose seeds or seedlings suited for your climate and season.
- Prepare soil by loosening and mixing in compost.
- Dig holes twice as wide and deep for seedlings.
- Plant seeds at two to three times their diameter.
- Space plants according to size and growth habit.
- Water immediately with gentle watering.
- Label each row or bed for easy care.
Hardening Off Seedlings for Outdoor Planting
Seedlings started indoors need to adjust before going outside. This process is called hardening off. It takes about 7 days of gradual exposure to outdoor conditions.
Start by placing seedlings outside in a shaded, protected spot for a few hours. Increase time outdoors each day, exposing them to more sun and wind.
Reduce watering slightly during this week but do not let seedlings wilt. After a week, your young plants will be ready for the garden.
Do not plant seedlings outside immediately; sudden exposure can shock and stunt growth.
Watering, Fertilizing, and General Care Tips
Water your vegetable garden deeply about 1 to 2 times weekly during cooler weather. When it’s hot and dry, increase watering to every 1 or 2 days.
Focus on watering around the base of plants to soak their root zones thoroughly. A good soak means water reaches 6 to 8 inches deep, encouraging strong roots.
Raised beds without mulch often need watering 2 to 3 times a week in summer. You can use soaker hoses to water directly at the roots. A watering can or hose spreads water over a larger area.
Both methods help keep plants hydrated. Avoid wetting leaves, as this can promote diseases and pest problems.
Fertilize your vegetables about every 3 to 4 weeks during the growing season. Use a balanced fertilizer for overall plant growth. Choose one with more phosphorus when planting.
Phosphorus helps strengthen the roots. Follow package directions carefully to avoid overfeeding, often leading to weak plants or burnt roots.
For veggies like tomatoes, side-dress with compost or granular fertilizer once fruits start developing. This gives a steady nutrient supply without shocking plants. Organic options like compost tea or fish emulsion are gentle and also feed soil microbes.
Check your garden weekly to keep it healthy and productive. Remove weeds by hand or hoe to prevent competition for water and nutrients.
Look for pests. Early spotting can help you take care of them naturally before big problems develop.
Mulching with straw, leaves, or grass clippings around plants helps retain moisture and reduce weeds. This saves watering time and feeds the soil as mulch breaks down. Watch your plants’ leaves and growth patterns closely.
Droopy or yellow leaves can signal a problem. You might need to change your water or fertilizer amounts.
Starting with a manageable space makes it easier to maintain healthy plants consistently. Crowded plants compete for light and nutrients, causing stunted growth. Keeping vegetables spaced according to their needs lets airflow reduce diseases and encourages bigger crops.
Natural Pest Control and Weed Management
Watch for common pests like aphids, caterpillars, and squash bugs in your vegetable garden. Aphids cluster on new growth and leaves turn yellow or curl. Caterpillars chew holes in leaves, while squash bugs cause wilting patches on squash plants.
Managing weed growth helps your vegetables thrive by reducing competition for nutrients and water. Pull weeds by hand early, especially before they flower and spread seeds. Using a hoe to slice weeds just below the soil surface is quick for bigger areas.
Natural pest control starts with attracting beneficial insects such as ladybugs or lacewings. These helpers feed on harmful pests and keep their numbers down.
Try companion planting too. Pairs like marigolds with tomatoes or basil with peppers can repel certain bugs.
Spot pests? Pick them off by hand. Or spray plants with soapy water made from mild liquid soap.
Apply diatomaceous earth around plants to keep crawling bugs away. But avoid windy days to prevent it from blowing off. Regular checks every week catch problems early and reduce damage.
Lay organic mulch like straw or shredded leaves around plants. This blocks weeds from growing. It also keeps soil moist.
It also keeps soil temperature steady and feeds the soil as it breaks down. Cover bare garden spots with a tarp in fall and winter.
This kills grass and weeds. Do it before planting season starts.
Cultivating a smaller garden area first reduces the risk of being overwhelmed by weeds and pests. Crop rotation, switching vegetable families yearly, breaks pest life cycles and improves soil health. Planning your plot with plant heights and scents in mind offers natural barriers to pests.
Avoiding Common Mistakes When Building Gardens
One common mistake is planting too close together. Overcrowding reduces airflow and invites disease. Use spacing charts for each crop and give plants room to grow.
Poor soil stops roots from thriving. Test your soil to check pH and nutrient levels. Amend it with compost or organic matter to improve texture and fertility.
Choosing a shady spot hurts most vegetables. They need at least 6 hours of sunlight daily. When light is limited, grow leafy greens such as spinach or kale.
- Don’t plant incompatible crops side by side, like onions near beans.
- Avoid planting before last frost dates to protect seedlings.
- Keep the garden clear of weeds that compete for nutrients and water.
- Don’t over-water; soggy soil harms roots and invites rot.
- Use mulch to retain moisture and regulate soil temperature.
- Plan your garden layout for easy access to plants and paths.
- Store tools in a backyard shed to keep the space tidy.
Fixing soil issues starts with loosening compacted ground using a garden fork. Add organic matter like compost or aged manure each season. Check drainage by digging a hole 12 inches deep.
Water should drain in 24 hours. When water tends to stand longer, construct raised beds for better drainage.
Don’t guess your garden’s needs, testing soil and sunlight avoids wasting time and money.
Decide to rearrange your garden if plants look weak or show yellow leaves. Signs of overcrowding include curling leaves or stunted growth.
Give plants more space or thin seedlings to boost productivity. Keep tall plants from shading smaller ones.
Using Containers and Small Spaces Effectively
You can grow vegetables successfully in containers even with limited space. Using the right container size and soil depth helps your plants thrive. Many vegetables grow well in pots on patios or balconies.
Container gardening works great for small spaces. It lets you garden without a big yard.
Container Sizes and Soil Requirements
Choose containers at least 12 inches deep to give roots enough room. Pots should have drainage holes to prevent waterlogging and root damage. Use a quality potting mix, not garden soil, to avoid compaction and poor drainage.
A 4×8-foot raised bed or several big containers offer good room. Most vegetables need about 12 inches of soil depth to grow roots well. Mixing 2 to 3 inches of compost into potting soil boosts nutrients and holds water better.
Remember, container plants dry out faster. So lighter soils designed for pots help maintain moisture. Avoid heavy soils that compact and suffocate roots in small containers.
Best Vegetables for Container Gardening
Some vegetables adapt better to container life than others. Tomatoes, peppers, lettuce, herbs, radishes, and bush beans grow well in at least 12-inch-deep pots. Choose vegetable varieties labeled “container-friendly” when available.
Leafy greens and root crops with shallow roots fit well in smaller or hanging containers. You can also use hanging baskets for herbs or small salad greens on balconies. Start seeds indoors or buy small plants to transplant into containers for a quicker start.
Container Care and Maintenance Tips
Water container plants daily in warm weather, as pots dry out quickly. Check soil moisture with your finger and water when the top inch feels dry. Feeding container plants every two weeks with liquid fertilizer will support steady growth.
Provide enough sunlight, six or more hours a day, for most vegetables. Rotate pots occasionally to ensure even growth. Avoid overwatering; soggy soil leads to root rot and poor vegetable production.
Keeping containers clean and free of pests helps prevent disease. Use raised edges or saucers to protect decks or balconies from water damage.
Below is a table highlighting the best container sizes for popular vegetable types. This can help you plan your containers based on the vegetable you want to grow.
| Vegetable | Container Size | Minimum Soil Depth |
|---|---|---|
| Tomatoes | 5-gallon pot or larger | 12+ inches |
| Peppers | 3-5 gallon pot | 12 inches |
| Lettuce | 1-2 gallon pot or hanging basket | 6-8 inches |
| Herbs | 1-2 gallon pot or smaller | 6-8 inches |
| Radishes | 1-2 gallon pot | 6-10 inches |
| Bush Beans | 3-gallon pot | 12 inches |
This size guide helps ensure your plants develop strong roots and produce well. Smaller pots suit shallow-rooted veggies, while larger containers support bigger plants like tomatoes. Adapt container size if you want bigger yields or have more space.
Step-by-Step Action Plan for Starting Your Vegetable Garden
Follow these steps to get your vegetable garden growing right away. Each step shows how to check you’re on track.
- Before You Start: Choose a sunny spot with good drainage. Check if the area gets at least 6 hours of sunlight daily.
- Day 1: Test your soil’s pH with a kit from the garden store. Aim for a pH between 6.0 and 7.0 for most vegetables.
- Week 1: Build your raised beds using untreated wood or concrete blocks. Make sure beds are 12 to 18 inches deep for root growth.
- Week 2: Add compost and balanced fertilizer to your soil. Mix well and check that soil feels loose and crumbly.
- Week 3: Pick plants that suit your climate and season. Buy seedlings or start seeds indoors if needed.
- Week 4: Plant your vegetables according to their spacing needs. Keep rows about 12 to 24 inches apart as instructed on seed packets.
- Ongoing: Water deeply once or twice a week, depending on rainfall. Look for moist soil about 6 inches down to confirm watering is right.
- Monthly: Check for pests and weeds regularly. Remove pests by hand or use safe natural controls to keep plants healthy.
Frequently Asked Questions
How Do I Choose the Best Spot for My Vegetable Garden?
Pick a sunny location with at least 6 hours of direct light daily. Make sure it drains well and stays free from strong winds to protect your plants.
Can I Garden in Poor Soil Without Spending a Lot on Amendments?
Yes, add compost and organic matter to improve poor soil naturally. This boosts nutrients and helps soil retain water better.
What Tools Do I Need to Start a Small Vegetable Garden?
Basic tools like a trowel, hand fork, and watering can work well. These help you plant, loosen soil, and water gently without damaging plants.
How Do I Avoid Soil Compaction in Frequently Used Garden Areas?
Use raised beds or pathways to limit foot traffic on soil. Compacted soil restricts root growth and reduces water absorption.
What’s the Best Way to Keep My Garden Organized and Productive?
Plan your layout before planting to group compatible vegetables together. Crop rotation can help prevent pests and nutrient depletion.
How Do I Protect My Vegetable Garden from Local Wildlife?
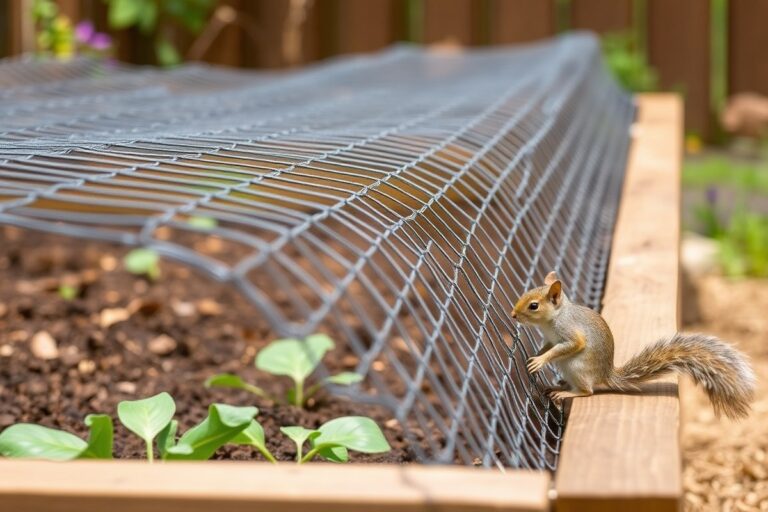
Use barriers like netting or fencing to keep animals out. Planting strong-smelling herbs can also discourage deer and rabbits.
Before You Go
Starting a vegetable garden takes planning and regular care. But it pays off with fresh food.
Plant something small today to see how your soil and light work. Keep learning and adjusting as your garden grows for better results.