How to Set Up a Vegetable Garden: 12 Essential Steps for Success
Knowing how to set up a vegetable garden starts with picking the right spot. Your garden needs 6 to 8 hours of sunlight every day to help plants grow strong. Make sure it’s easy to reach your garden spot.
Have a good water source close by. This will make watering quick and simple.
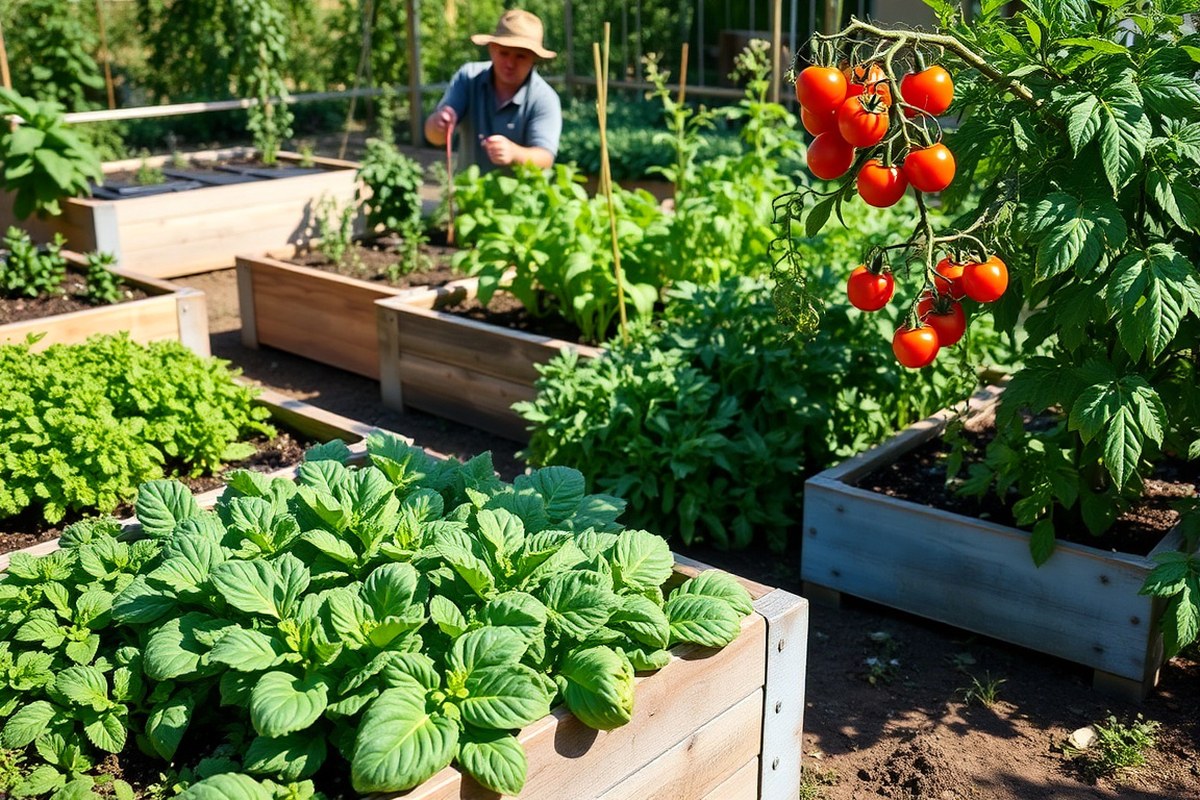
Next, decide on your garden bed type: raised beds, in-ground, or containers. Each has pros and cons.
But all work well if you keep beds less than 4 feet wide. This width helps you reach the middle without stepping on the soil and compacting it.
Finally, prepare your soil by adding 2 to 3 inches of finished compost. Mixing it into the top 6 inches makes the soil loose and full of nutrients. This step is key for healthy roots and better vegetables.
Key Takeaways
- Choose a location with 6 to 8 hours of direct sunlight daily.
- Keep your garden beds no wider than 4 feet for easy access.
- Use raised beds, in-ground, or containers based on your space and preference.
- Spread 2 to 3 inches of finished compost over your soil.
- Work compost into the top 6 inches to improve soil health.
- Locate your garden near a water source for convenient irrigation.
1. How to Start a Vegetable Garden from Scratch

Starting a vegetable garden means you need a clear plan and the right tools. First, decide where your garden will go and how big it should be. Even a small 3×6-foot balcony can work well with good planning.
Knowing what you want to grow helps with your layout and size. Creating a planting schedule tailored to your space and climate makes things easier. A small garden can fit multiple vegetables if you space plants correctly.
Here’s a simple plan to help start your vegetable garden. Follow these easy steps one by one.
You’ll get your garden growing strong. The initial tools and materials you gather set you up for success and reduce surprises later.
- Choose your garden spot and size. Pick a sunny place with 6, 8 hours of sunlight. Measure how much space you have, like a corner or balcony.
- Plan your garden layout.Use graph paper or a free tool like Plan My Garden. This helps you design where to plant each vegetable. Planning saves space and keeps plants organized. This helps you use space well and avoid crowding.
- Prepare a planting schedule. Write down planting dates based on local frost dates and plant needs. This keeps your garden organized.
- Gather basic tools and materials. Start with a trowel, garden fork, watering can, gloves, and seed packets or seedlings. Raised bed or containers may need soil or compost too.
- Test your soil if planting in-ground. Contact your local cooperative extension for a soil test kit. This will check nutrient levels and pH for better plant growth.
- Clear the area and loosen the soil. Remove weeds and rocks. Use a garden fork or tiller to break up the soil 6 to 8 inches deep.
- Add organic matter as needed. Mix in compost or well-rotted manure to improve soil texture and fertility. This helps vegetables grow strong.
- Mark out plant spaces and start planting. Follow your layout, allowing room for plants to mature. Plant seeds or transplants at recommended depths and spacing.
2. Choosing the Best Location for Your Vegetable Garden
Finding a Sunny Spot
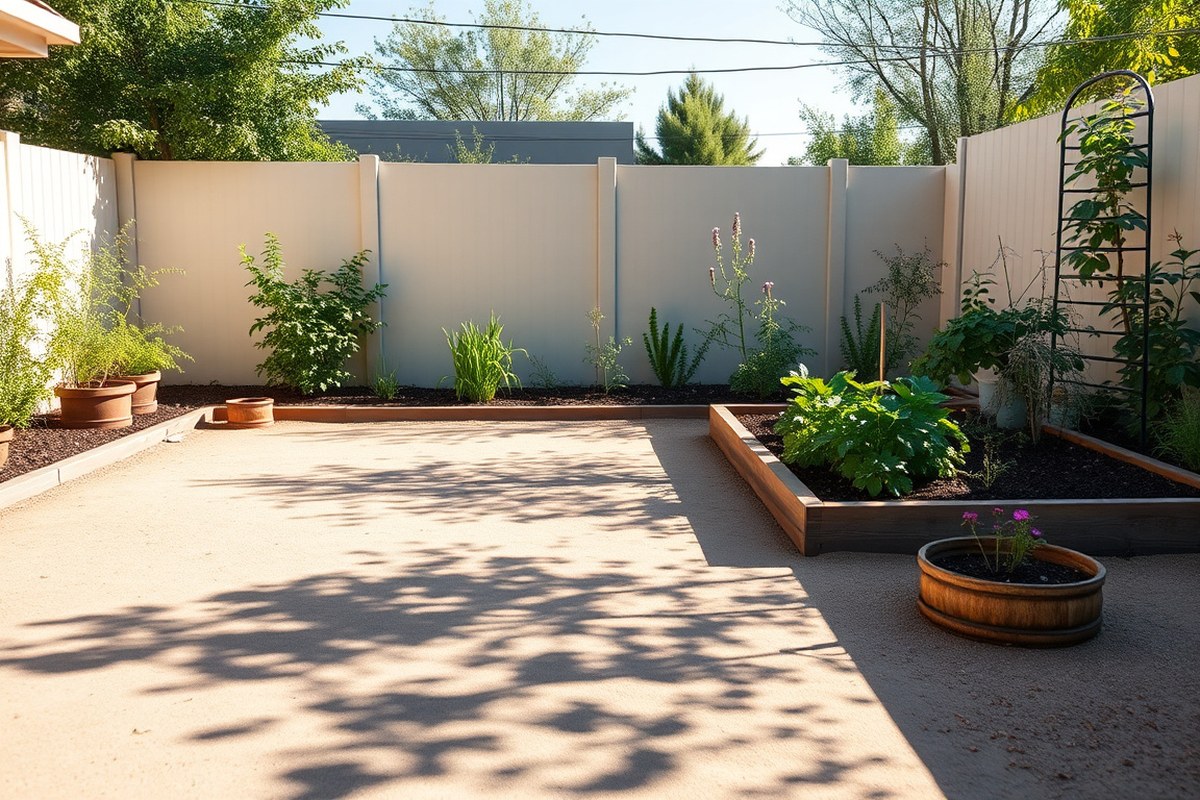
Most vegetables require 6 to 8 hours of direct sunlight every day. Pick a place that gets full sun without shade from trees or buildings. Sun in the morning helps dry dew and lowers disease risk.
Look for a place that stays sunny from mid-morning to afternoon. South-facing areas usually get more sun in the northern US. Avoid spots that are shaded late in the day.
Checking Soil and Drainage
Good drainage helps keep roots healthy and prevents waterlogging. Avoid low spots where water pools or soil stays soggy after rain. Walk around after a heavy rain and look for puddles or soft mud.
Test drainage by digging a hole about 1 foot deep and filling it with water. Water sitting for more than a day means you need better drainage. Find another spot or fix drainage before planting your vegetables.
Water Access and Convenience
Pick a garden spot close to your water source to make watering easier. Hose length and water pressure matter when choosing where to garden. You’ll want easy access to water for regular irrigation.
Gardening near your door or patio saves time and effort when harvesting and watering. A convenient location also makes it easier to check plants daily for pests or problems.
Space and Accessibility
Decide how large your garden will be based on your available space and time. Small gardens are easier to maintain and fit in most yards. You can grow many plants in a space as small as 10 by 10 feet.
Avoid hard-to-reach spots behind fences or under large trees. Make sure you have room to walk around and harvest comfortably. Good access reduces the risk of damaging plants.
Adjusting for Special Situations
Your yard may have areas with poor soil quality. Use raised beds or containers to grow vegetables successfully in those spots.
You can bring in quality soil and control moisture better this way. Raised beds also warm faster in spring and drain well.
For windy areas, choose sheltered spots near fences or buildings. Strong winds can dry soil and stress plants. Using windbreaks like bushes or lattices helps protect your garden.
Watch the sunlight in your garden for several days at spring’s start. Make sure the area receives enough sun each day before planting.
3. Comparing Garden Bed Types: Raised, In-Ground, and Containers
Raised beds, in-ground gardens, and containers each have unique benefits and challenges. Raised beds offer easy access and good soil control.
In-ground gardens fit large spaces and cost less. Containers work well for small areas and are beginner-friendly.
Raised Beds: Features and Benefits
Raised beds let you control the soil quality easily. You fill them with a mix rich in nutrients, which helps plants grow well. They also drain better, reducing water-logging risks.
They cut down on bending or kneeling since beds stand above ground level. This is good if you want easy access or have back pain. You can start with a 4×4-foot bed divided into sections for neat planting.
Building raised beds costs more than in-ground gardens. Expect to spend about $100 to $300 depending on materials. They usually use wood, stone, or metal frames and soil mix.
In-Ground Gardens: When to Choose Them
In-ground gardens use existing earth without need for frames or raised soil. This keeps costs low, making them best for large yards and budget growers. Soil quality can be a challenge if your land has poor soil.
You can mound soil into rows to mimic raised beds. This helps roots spread better and prevents hardpan issues around 12 inches deep. This is a good option if you want a traditional garden style.
In-ground gardens take moderate effort. You may need to till or loosen soil each season. This activity is physical but works well for bigger spaces and heavy producers.
Container Gardens: Best Uses and Tips
Container gardening fits small spaces like balconies, patios, or tiny yards. You can move containers around to catch sunlight or avoid storms. Containers are easy to set up and need little initial effort.
Containers suit beginners or people with limited mobility. You pick compact, bush, or dwarf vegetable varieties for better results. Keep containers watered often, since they dry out faster than beds or ground.
Costs range low, from $10 for small plastic pots to $50 or more for larger containers. You only need soil potting mix and good drainage holes. Containers also help control pests compared to in-ground gardens.
| Garden Type | Best For | Cost | Difficulty |
|---|---|---|---|
| Raised Beds | Beginners | $$ | Easy |
| In-Ground | Large Yards | $ | Moderate |
| Containers | Small Spaces | $ | Easy |
Raised beds balance ease of use and good control but cost more. In-ground gardens suit bigger areas and save money but need more work. Containers cost little and are portable but need frequent watering and space for ideal growth.
4. Preparing Soil for a Thriving Vegetable Garden
Testing and preparing your soil properly sets up your vegetables for healthy growth. Good soil drains well but holds some moisture and nutrients. Loosen it deeply and add organic matter like compost to feed plants and improve texture.
Start by testing your soil to check its pH and nutrient levels. You can buy a simple soil test kit for $10 to $20. Find them at garden centers or order online.
Follow the instructions to collect samples from several spots in your garden, then mix the samples. Test results show if your soil is too acidic or alkaline. They also tell if it needs nutrients like nitrogen, phosphorus, or potassium.
Most vegetable gardens benefit from loosening soil about 6 inches deep. This lets roots grow easily and access air and water.
Heavy clay or compacted soil needs extra effort to break up. Use a shovel or garden fork to turn and loosen the soil before planting.
Adding compost improves soil fertility and structure. Spread 2 to 3 inches of finished compost on your garden bed.
Work it into the top 6 inches of soil so it mixes well. Compost also helps soil hold moisture and feed beneficial microbes that support plant health.
- Test the soil: Use a soil test kit. Follow package instructions for sampling and testing.
- Clear the area: Remove weeds, roots, and debris from your garden spot.
- Loosen soil deeply: Dig or fork soil about 6 inches deep to improve aeration and drainage.
- Add compost: Spread 2 to 3 inches of fully composted organic matter over the soil.
- Work compost in: Mix compost into the top 6 inches of loosened soil. Use a shovel or fork to blend it well.
- Check soil texture: Ensure soil feels crumbly and drains well, not hard or soggy.
- Adjust soil if needed: Add lime if your soil is too acidic. Use sulfur if it is too alkaline, based on your test.
- Level and plan beds: Make garden beds no wider than 4 feet. This lets you reach plants without stepping on soil.
Choose soil amendments based on your test results and vegetable needs. Compost is ideal for most cases. Avoid using untreated manure as it can introduce weeds or pathogens.
Keep your garden beds fairly narrow to keep soil from becoming compacted by foot traffic. Preparing soil well takes a few hours but can greatly boost your garden’s success.
5. Selecting Vegetables to Grow: What Suits Your Garden and Skill
Start by knowing your climate zone to pick vegetables that thrive there. Local weather and your frost dates will limit your choices. Carrots, radishes, peas, and beans are easy for beginners to grow.
You can plant their seeds right in the garden. They don’t need much care.
Pick vegetables that fit your garden’s size. A 4×8-foot raised bed or big containers work well. Use 1-foot squares to give each plant enough room.
Plants that grow well together support each other and save space. For example, peas fix nitrogen in the soil, which helps leafy greens nearby grow better. Rotate crops yearly to prevent disease and keep soil healthy.
Think about why you want to grow vegetables. Fresh salads taste great with lettuce, radishes, and carrots. Focus your garden on these veggies.
They grow quickly and easily. Tomatoes and peppers need more sun to grow well. They also require extra space to spread out.
Plan your garden to give them room. Don’t plant too many varieties at first or your work doubles.
Keep a checklist of your climate zone and space. Note how many hours of sun your garden gets. Choose vegetables you like that are easy to care for.
Use garden gloves, a hand trowel, and watering tools to make planting smooth. Add plant labels so you remember what’s what once they sprout.
Try fewer healthy plants instead of crowding your garden. Overcrowding lowers yields and invites pests.
6. When and How to Plant Seeds and Transplants Outdoors
Plant seeds according to the seed packet instructions for best timing, depth, and spacing. Transplants let you start growing earlier, especially in colder zones. But seeds are cheaper and offer more variety.
Knowing when to plant your vegetables helps avoid overcrowding. Spacing them properly encourages healthy growth. This prevents plants from crowding each other.
Seed Planting Depth and Spacing
Plant seeds 1 to 2 times their size deep. This depth protects seeds under the soil. It also helps them sprout evenly and strong.
Use the spacing suggested on the seed packet to avoid crowded roots and competing plants. For example, root vegetables need more room between seeds than leafy greens to reach full size.
Push the seed into a small hole or furrow in loose soil. Cover it lightly with soil, then press gently to make good contact. Water carefully with a fine spray to keep the soil moist without washing seeds away.
| Vegetable | Planting Depth | Spacing Between Plants |
|---|---|---|
| Carrots, Beets (root crops) | About 1/4 inch | 2 to 4 inches |
| Lettuce, Spinach | 1/4 to 1/2 inch | 6 to 8 inches |
| Tomatoes | 1/4 inch | 18 to 24 inches |
| Basil | 1/4 inch | 12 inches |
| Potatoes | 4 inches (whole seed potato) | 12 inches |
Planting too deep may delay sprouting or cause rot. Seeds sown too shallow can dry out or be eaten by birds.
Using the right spacing stops plants from crowding each other. Crowded plants get fewer nutrients and may stay small or have a weak harvest.
Transplanting Seedlings Outdoors
Transplants speed up your garden’s start by growing seeds indoors first. Move seedlings outside after the last frost date for your zone. Wait until the soil reaches 50°F for cool crops.
Warm-season crops need soil at 60°F or higher. Planting at the right temperature helps seed growth.
Dig a hole bigger than the seedling’s root ball. Set the transplant deep enough so the stem is covered up to the first leaves.
Space larger plants like tomatoes 18 to 24 inches apart to give them room. Smaller herbs like chives can be only 4 to 6 inches apart.
Hardening Off Seedlings Before Planting
Hardening off helps seedlings get used to outdoor sun, wind, and temperature changes. Start by putting plants outside for a few hours daily. Choose a sheltered spot that avoids harsh weather.
Increase time outside gradually over a week. Bring them inside at night to avoid cold or frost.
This process prevents shock when planting out. Sudden changes often stunt growth or cause leaf burn. A well-hardened seedling adjusts quickly and starts growing strong once planted in the garden soil.
7. Watering Your Vegetable Garden Effectively
Vegetables usually need about 1 inch of water each week, including rainfall. This amount is enough to keep most plants healthy and growing well. Set a rain gauge or small container in your garden.
Use it to measure how much water your plants get. This helps you track rainfall and watering amounts.
How often you water depends on the weather and the soil. During hot, dry spells, watering every day or every other day works best. Cooler or rainy weather means you can cut back to once or twice weekly.
Some vegetables need more water than others. Leafy greens like lettuce and spinach often prefer consistent moisture. So they might need extra watering.
Tomatoes and peppers need less water than some plants. They still require deep watering to reach the roots. Water them regularly, soaking the soil well.
Watering early in the morning is ideal. It helps the plants absorb moisture before the heat of the day and reduces evaporation. Wet leaves overnight can cause diseases, so avoid watering late in the evening.
Try using a soaker hose or drip irrigation to water your vegetable garden. These tools deliver water right to the soil around roots. This method saves water, cuts down on weeds, and keeps leaves dry, reducing plant disease.
Raised beds and containers usually dry out faster. Check soil moisture by pressing your finger an inch deep. When the soil feels dry, water your plants.
Water deeply to encourage strong root growth. Light sprinkling causes shallow roots that dry out fast. For example, soak each plant’s root zone until the top 6 inches of soil feel moist.
A common mistake is to overwater, which can drown roots and invite disease. Let the soil dry slightly between waterings. This balance helps your vegetables grow tall and produce well.
8. Feeding Your Vegetables: Fertilizers and Nutrients Explained
Vegetables mainly need nitrogen, phosphorus, and potassium from fertilizers. Nitrogen helps leafy growth, phosphorus supports roots and flowering, and potassium strengthens overall plant health. Organic fertilizers like compost release nutrients slowly.
This makes them safe for most vegetables. Well-rotted manure works the same way.
Heavy feeders like tomatoes and peppers need extra nutrients through the season. Apply a balanced fertilizer every 3 to 4 weeks once the plants have established. Light feeders like carrots need less fertilizer.
They might need only one feeding at planting. Rich soil can sometimes replace feeding.
Start by mixing organic fertilizer or compost into the soil before planting. Sprinkle granular fertilizer around established plants and water immediately to help it soak in. Liquid fertilizers allow feeding every 2 weeks.
They add nutrients directly to leaves or soil. This helps feed plants more often.
Organic fertilizers also support soil microbes, which help plants absorb nutrients better. Avoid over-fertilizing, as excess nutrients can burn roots or cause poor fruit development.
Watch for yellowing leaves or stunted growth. These can signal too little or too much feeding.
Use organic fertilizers to avoid harming soil microbes that help your vegetables grow strong.
You should test your soil every year to adjust fertilizer amounts based on what it lacks. Rich, dark soil needs less extra feeding than sandy or depleted soil. For container gardens, feed more often because nutrients wash away with watering.
Organic fertilizers like compost can cost $10 to $30. One bag lasts most of the gardening season. This makes them cost-effective.
Synthetic fertilizers usually run less but require careful timing to avoid plant damage. Choose what fits your gardening style and budget, with organic products safer for beginners.
9. Mulching and Weed Control for a Healthy Garden
Mulching is key to keeping your vegetable garden moist and weed-free. Use organic mulches like straw, wood chips, or compost to protect soil and improve plant health. Spread mulch thick enough to block sunlight, usually 2 to 4 inches deep.
Weeds won’t stop on their own. So regular removal helps keep them from taking over.
Spending 15 to 20 minutes every day or two pulling weeds will save you work later. Mulch helps reduce weed growth but doesn’t prevent all of them.
Follow these steps to mulch and control weeds efficiently:
- Clear the garden bed of existing weeds by pulling them out or using a hoe.
- Water the soil lightly so mulch sticks better and conserves moisture.
- Spread a 2 to 4-inch layer of organic mulch evenly over the soil.
- Keep mulch at least 6 inches away from vegetable stems to prevent rot.
- Check your mulch weekly and add more if it has thinned or decomposed.
- Pull up any weeds that appear through the mulch during your weekly checks.
- Remove old mulch yearly and replace it to avoid pests and disease buildup.
- If you want, add companion plants nearby to naturally reduce pests instead of pesticides.
Good mulch keeps soil moist longer, so you’ll water less often. It also hides fresh weed seeds, stopping most from sprouting. Mulch layers too thin let weeds through; too thick might cause water to pool.
Regular weeding prevents weeds from spreading seeds or choking your vegetables. Pull young weeds out when the soil is damp; they come out easier. Combining mulch with daily or every-other-day weeding gives your garden the best chance to stay healthy.
10. Managing Common Vegetable Garden Pests and Diseases
A few common pests can damage your vegetable garden, such as aphids, slugs, and cucumber beetles. Aphids are small, soft-bodied insects that cluster on new growth. Slugs leave slimy trails and chew uneven holes in leaves.
Cucumber beetles have yellowish bodies with black stripes or spots and feed on cucumbers and squash. Spot these early by checking leaves and stems regularly.
Hand-picking pests is a simple starting step. Remove slugs at night using gloves or a flashlight. Squishing aphids gently or spraying them off with water can cut their numbers fast.
Encouraging beneficial insects like ladybugs and lacewings helps keep pest populations down naturally. You can attract helpful insects by planting herbs near your vegetables.
Herbs like basil, thyme, and oregano work well. These plants bring in bugs that help your garden.
Diseases such as powdery mildew and blight attack many veggies. They cause leaves to wilt, turn yellow, or show powdery spots. These problems harm your plants’ health.
Rotating crops yearly helps keep diseases from building up in your soil. Avoid overcrowding plants by following spacing charts.
Crowded plants trap moisture and spread infection more quickly. Removing diseased leaves or plants immediately also limits damage.
Using organic sprays like neem oil or insecticidal soap can control pests without harmful chemicals. Apply these treatments on dry days to protect beneficial bugs and avoid leaf burn.
Mulching can reduce soil moisture fluctuations that stress plants and invite diseases. Keep your garden clean by clearing fallen leaves or debris where pests and diseases hide.
Good results mean healthy, green leaves with little damage from insects or spots. Check your garden weekly so you can catch pests or diseases in time. Try companion plants that repel or confuse pests with scents.
These plants help protect your vegetables naturally. Use them when pests keep coming back.
You don’t need expensive treatments. A small jar of neem oil costs about $10 and lasts through many treatments.
Using these natural methods protects your vegetables and keeps your garden eco-friendly. It takes a few minutes weekly to inspect and act. But that care helps your garden thrive.
Avoid crowding and sudden watering changes to keep plants strong and less vulnerable. Overusing chemical pesticides can harm pollinators and beneficial insects. So save them for serious outbreaks.
11. Using Companion Planting to Boost Your Vegetable Garden
Companion planting means growing certain vegetables near each other for mutual benefits. Some plants boost growth, while others help keep pests away. For example, planting tomatoes with basil can improve tomato flavor and reduce harmful insects.
Good companion pairs include carrots with onions, tomatoes with basil, and beans with corn. Onions and carrots repel pests that usually harm each other.
Beans fix nitrogen in the soil, helping corn grow better. Pairing plants strategically helps you use space well and keeps your garden healthier.
To use companion planting, plan your garden layout by placing these pairs close together. Sprinkle a pinch of bone meal into each hole before planting to give nutrients a boost.
Then gently fill soil around stems to settle plants in. This setup captures practical benefits without extra tools or expensive products.
Companion plants work partly by confusing or repelling pests, cutting down on insects that damage veggies. Strong-smelling herbs like basil prevent harmful bugs from settling on tomatoes. Growing plants that attract beneficial insects protects your garden more naturally than sprays.
Try this checklist when planning your garden. Pick plants that match your climate and taste. Group pairs that help each other nearby to fight pests.
Avoid mixing plants that compete for nutrients or attract the same pests. This approach keeps your planting neat and healthy.
Don’t plant heavy feeders like tomatoes next to each other. Mix them with nitrogen-fixing plants to prevent soil depletion.
12. Knowing When and How to Harvest Your Vegetables
Veggies give clear signs when they’re ready to pick. Look for size, color, and firmness matching seed packet details or gardening guides. For example, green beans snap firm but won’t be too thick.
Tomatoes turn their full color and feel slightly soft. Take a hands-on approach to check each plant.
Use clean, sharp scissors or pruning shears to harvest without hurting plants. Cut stems carefully, leaving a bit attached to the vegetable for longer shelf life.
Pulling or twisting can damage the plant and reduce future yields. This method especially helps delicate plants like lettuce or herbs.
Harvest in the cooler parts of the day, like morning or late afternoon. Cool temps keep vegetables fresh and reduce stress on plants.
After picking, store veggies in a shaded spot or fridge to keep crispness and flavor. This little extra care can stretch your harvest for days longer.
Try these steps to extend your harvest. Plant quick-growing crops like radishes and spinach after early ones finish.
This is called succession planting; it keeps your garden giving all season. Use row covers to protect crops from frost, insects, and animals, helping veggies last into fall.
Regularly check your garden every 2 or 3 days. Frequent harvesting encourages plants to produce more. Don’t leave ripe vegetables on the vine too long.
They can become tough or spoil. Smaller gardens benefit a lot from timely picks, as space and resources are limited.
Sometimes, vegetables might look ready but feel different due to weather or variety. For example, eggplants should be shiny and firm but not too hard.
When uncertain, taste test a small piece to check sweetness or bitterness. Adjust your picking habits as you learn your plants’ patterns.
Step-by-Step Action Plan for Starting Your Vegetable Garden
Use this plan to set up your garden quickly and see early progress. Each step has a clear action and result to check.
- Before you start: Choose a sunny spot with well-draining soil. Look for at least 6 hours of sunlight.
- Day 1: Decide on garden bed type, raised, in-ground, or containers. Pick one that fits your space and skills.
- Day 2: Prepare your soil by adding compost or organic matter. Soil should feel crumbly and rich.
- Week 1: Select vegetable seeds or transplants that match your season. Check seed packets for planting times.
- Week 2: Plant your seeds or transplants at recommended depths. Seeds should stay moist until sprouting.
- Ongoing: Water regularly to keep soil moist, not soggy. Aim for consistent, deep watering.
- After 3 weeks: Add mulch around plants to retain moisture and suppress weeds. Mulch looks fresh and covers bare soil.
- After 1 month: Watch your plants for pests and signs of disease. Treat problems early with safe methods.
Frequently Asked Questions
How Do I Set Up Irrigation for My Vegetable Garden?
Use drip irrigation or soaker hoses for even watering without wetting leaves. This reduces disease risk and saves water. Timing early morning watering reduces evaporation and helps plants soak it in.
How Can I Protect My Vegetable Garden from Animals?
Use fencing to keep out deer, rabbits, and other animals. Choose mesh size small enough to stop pests but large enough for air flow. Adding scent repellents can also help deter some animals.
What Tools Do I Need to Start a Vegetable Garden?
Basic tools include a spade, hoe, rake, and watering can or hose. These help with soil prep and daily maintenance. Consider gloves and a garden fork too for digging and aeration.
How Do I Plan Crop Rotation in a Small Vegetable Garden?
Rotate vegetable families each season to reduce pests and soil depletion. For example, plant beans where tomatoes grew last year. This keeps soil fertile and plants healthy without chemicals.
Can I Grow Vegetables Under Shade Cloth?
Yes, shade cloth protects plants from too much sun and heat. It can extend the growing season in hot areas. Choose cloth with 30-50% shading to keep plants happy.
How Do I Start Seeds Indoors for My Vegetable Garden?
Use seed trays with a good potting mix and keep them warm and moist. Place trays near a sunny window or use grow lights. Harden off seedlings outdoors before planting them in the garden.
The Bottom Line
Starting your own vegetable garden is a rewarding way to grow fresh food. Begin by selecting a good spot and planting easy vegetables. Next, take action today by preparing your soil for planting.