How to Create a Raised Bed Vegetable Garden: Step-by-Step Guide for Best Results
Wondering how to create a raised bed vegetable garden that thrives? Start by picking a spot with at least 6 to 8 hours of sunlight. Make sure the area drains well and is easy to reach for weeding and watering.
Keep your raised bed no wider than four feet. This lets you reach the center plants easily. Place your bed against a wall or fence?
Make it 2 or 3 feet wide. This gives you better access. Using good soil mix with topsoil, compost, and materials for drainage helps your plants grow strong.
Build your frame about a foot deep. This stops roots from getting cramped. It also stops them from drying out.
Cedar wood works well and will last longer than pine or fir. Adding compost on top annually gives your garden a fresh nutrient boost every spring.
Key Takeaways
- Choose a sunny spot with 6-8 hours of direct sunlight for your raised bed.
- Keep bed width under 4 feet for easy plant care and harvesting.
- Use a soil mix of 40% topsoil, 40% compost, and 20% drainage material.
- Build raised beds at least 12 inches deep to avoid root constriction.
- Cedar wood frames last longer than pine or fir in raised bed construction.
- Narrow beds to 2 to 3 feet wide when placed against walls or fences.
What Is a Raised Bed Vegetable Garden and Why Use One?
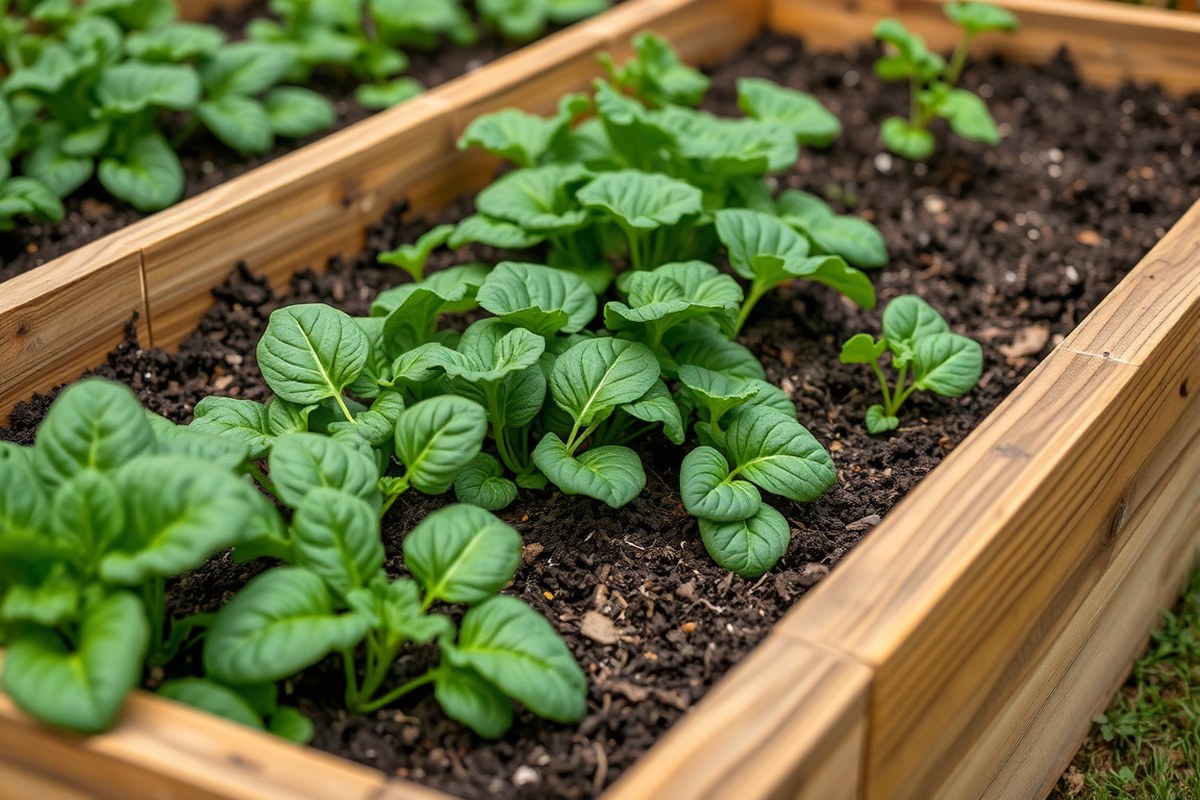
A raised bed vegetable garden is a freestanding box or frame perched above the ground. You fill it with high-quality soil to grow your vegetables and flowers. These beds are usually about 1 foot deep.
They are no wider than 4 feet. This size makes it easy to reach plants on all sides.
Raised beds improve growing conditions in several ways. Raised beds let you control the soil mix. Use about 40% topsoil and 40% compost or well-rotted manure.
Add 20% materials that improve drainage and moisture retention. This custom soil helps plants grow better than native ground. Native soil may be compacted or low in nutrients.
Better drainage is a big benefit of raised beds. Excess water runs off or drains away quickly, reducing root rot and other moisture problems. The soil also warms faster in spring.
So you can start planting earlier in cooler climates. Raised beds can extend your growing season by a few weeks. This extra time helps many vegetables grow better.
Using raised beds reduces weed issues too. Raised beds hold only the soil you add. This cuts down many weed seeds found in garden soil.
It’s easier to keep weeds down with less effort. Because they are raised, you don’t bend over as much. This helps if you have back or knee problems.
Compared to in-ground gardens, they’re neater and more organized. You can make small, easy-to-manage beds like 4’x4′ or 4’x8′. These fit nicely in limited garden spaces.
Although building raised beds takes time, the investment pays off. A well-built cedar raised bed costs around $100 to $150.
But can last 10 to 20 years. You quickly get fresh, homegrown vegetables while enjoying easier gardening.
Some gardeners try hugelkultur beds. These include rotting wood for extra nutrients and moisture. Raised beds give a better start if soil or drainage is poor.
Raised bed gardens work well for better soil and easy access. They also mean fewer weeds and more productivity.
Choosing Location and Size for Your Raised Bed Garden
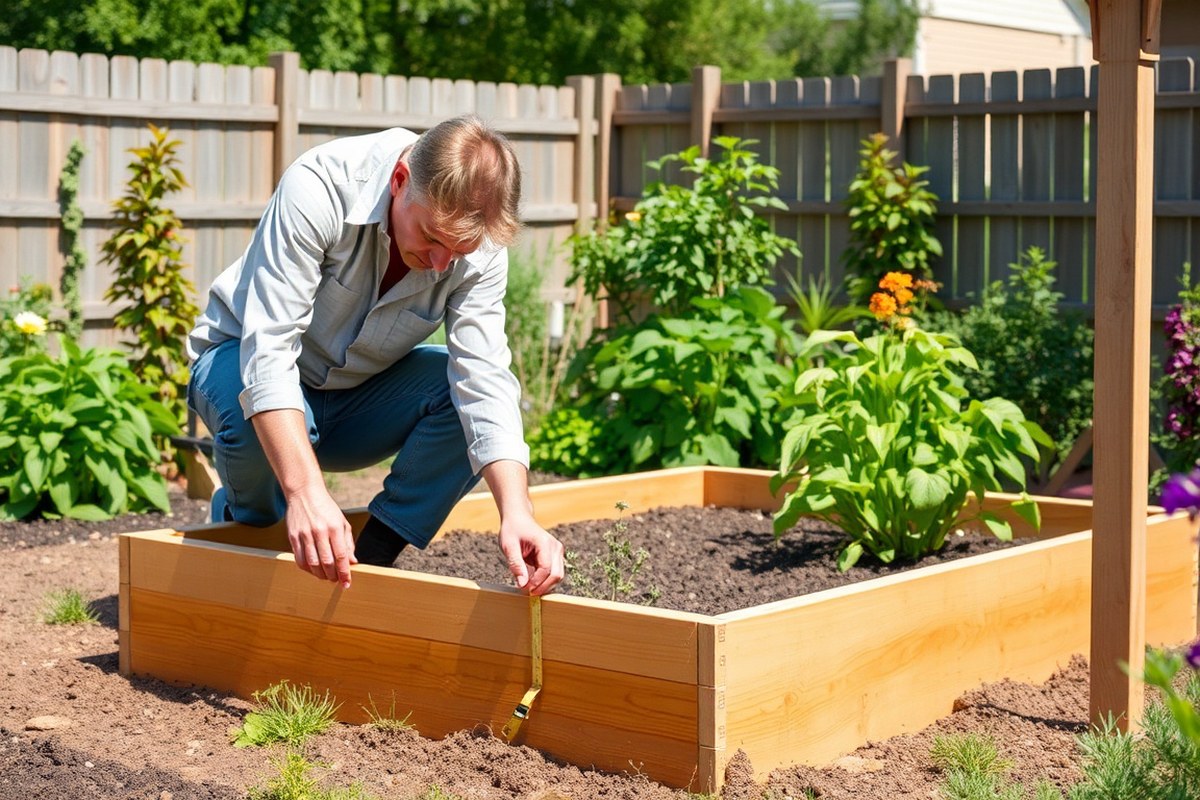
Pick a sunny spot with good drainage to build your raised bed. Make sure you can reach the plants easily for watering and harvesting. Aim for beds no wider than 4 feet to keep plants within easy reach.
Sunlight and Drainage Requirements
Vegetables need full sun for 6 to 8 hours each day. Pick a spot with strong afternoon sun. Avoid places shaded by trees, buildings, or fences.
Good drainage prevents waterlogging and root rot in your garden bed. Look for slightly improve or sloped areas where water doesn’t pool. Adding organic matter to the soil can also help with drainage.
Check the soil after a rain. Water standing for more than an hour means bad drainage. Choose a new spot or fix drainage before building the bed.
Size Guidelines by Access and Mobility
The best width for a raised bed is 4 feet (1.2 meters). This lets you reach the middle plants without stepping inside the bed.
Reach your bed easily by keeping it 3 feet wide or less. This works when you can only approach from one side.
Length can be as long as you want depending on space. A 4×8-foot bed fits well in most yards and supports plenty of vegetables. Plan the length so you can easily tend your plants without strain.
Consider access paths around your bed to move tools or wheelbarrows. Paths that are 2 to 3 feet wide help you get around easily. They stop soil from getting squished inside the bed.
Preparing the Site Before Building
Clear the area of grass, weeds, and debris before you build the frame. Level the ground or slightly slope it for drainage. Mark the bed’s outline using stakes and string for a straight build.
Look out for underground utilities or sprinkler heads before digging. Call your local utility locator service to avoid damaging pipes or cables. Making these checks saves headaches later on.
Prepare the site before building the frame for your bed. Then put the soil in and get ready to plant.
- Pick a sunny spot with 6-8 hours of direct sunlight
- Ensure good drainage; avoid wet, pooling areas
- Keep bed width to 4 feet or less for easy reach
- Choose a length that fits available space and access
- Provide paths around beds for tool and wheelbarrow access
- Clear the site of plants and debris before building
- Check for underground utilities before digging
Don’t put your raised bed in heavy shade or poor draining spots; plants won’t thrive.
Selecting Materials and Tools to Build Raised Beds
Wood works well for raised beds because it looks natural. It’s also easy to use and find. That’s why many gardeners choose it.
Cedar and redwood last longer naturally without harmful chemicals. Pine is cheaper but rots faster unless sealed properly. Galvanized steel and concrete blocks don’t rot.
They last longer but need tools and skills. Building with them can take more time.
Untreated wood can last a few years. But sealing extends life and protects from moisture. Avoid wood treated with arsenic or other toxic chemicals since you grow food.
For food safety, use natural oils or water-based sealants made for garden use. These sealants slow decay and keep your bed safer for vegetables.
| Material | Average Lifespan | Cost per 8 ft Board | Pros | Cons |
|---|---|---|---|---|
| Cedar | 10 to 15 years | $25 to $40 | Rot-resistant, natural, easy to work | Higher cost, can split if dry |
| Redwood | 10 to 15 years | $30 to $45 | Long-lasting, beautiful color | Expensive, sometimes hard to find |
| Pine (treated for garden use) | 5 to 7 years | $10 to $20 | Affordable, widely available | Needs sealing, shorter lifespan |
| Galvanized Steel | 20+ years | $30 to $50 per 8 ft panel | Durable, rot-proof | Can get hot, needs cutting tools |
| Concrete Blocks | 20+ years | $1.50 to $3 per block | Very durable, resistant to pests | Hard to move, needs leveling |
Basic tools for building wooden raised beds include a saw, drill, screwdriver, measuring tape, and level. Use rust-resistant screws designed for outdoor use.
A staple gun helps attach landscape fabric to keep weeds out. For steel or concrete, specialized cutters or masonry tools are required, raising cost and effort.
Materials to build a 4 ft by 8 ft wooden bed cost $50 to $200. Prices vary based on wood type and quality. Budget accordingly.
Higher-quality wood costs more upfront but cuts down on replacements. Steel and concrete options push the budget higher due to special tools and labor intensity. Using free or recycled items like old furniture helps save money.
Check if they’re safe for growing food first. Safety should always come first.
Step-by-Step Guide to Building a Durable Raised Bed Frame
Building a durable raised bed frame starts with cutting the lumber right. Assemble it square and strong. Then add reinforcements for support.
This will keep the bed stable and ready for healthy vegetables. Following exact measurements and braces helps avoid warping and sagging as soil presses against the sides.
Cutting and Preparing Lumber Pieces
Use 2×6 boards for the frame’s height, which gives about 5.5 inches per board. Stack three boards for a total height near 16.5 inches. The frame’s width should let you reach the middle easily, typically 3 to 4 feet wide.
Measure and cut four boards to your chosen length for the long sides. Cut four shorter boards for the widths.
Trim corner posts to the exact height of stacked boards to keep corners flush. Sand rough edges to reduce splinters before assembly.
Assembling and Squaring the Frame
Lay out the boards on a flat surface in a rectangle shape. Align edges and corners so they fit tightly. Apply waterproof wood glue on joining edges to add strength before screwing.
Use 3-inch deck screws to connect boards at corners. Add 3.5-inch corner posts to reinforce vertical strength.
To square the frame, measure diagonally from corner to corner. The distances must match within 1/8 inch.
Adding Reinforcements and Stakes
Longer frames over 6 feet need a mid-side support to prevent bowing. Attach a galvanized steel mending brace centered on each long side. For widths over 4 feet, add a middle support board running parallel inside the frame.
Drive wooden stakes into the ground at each corner. Place stakes every 3 to 4 feet along long sides.
Screw the frame to these stakes. This stops leaning and spreading when filled with heavy soil.
Adjustments for Different Bed Sizes
Beds shorter than 4 feet wide can use one board for height. For widths beyond 4 feet, include a center beam across the width. Frames longer than 6 feet benefit a lot from extra horizontal braces.
Taller beds can stack four or more boards. But plan for corner post height accordingly.
Too tall without proper bracing means the frame might bulge out over time. Keep your bed manageable for good soil care and plant access.
- Measure and cut three 2×6 boards per side for 16.5-inch high sides.
- Cut corner posts to match stack height of boards exactly.
- Lay long and short boards flat, arrange into a rectangle.
- Apply wood glue to joining edges and screw corners securely.
- Check corners by measuring diagonal distances; adjust if needed.
- Add galvanized steel braces or wood supports on long sides if longer than 6 feet.
- Drive stakes inside corners and long sides; screw frame to stakes.
- Smooth rough edges with sandpaper after assembly to prevent splinters.
Preparing, Filling, and Amending Soil for Raised Beds
The best soil mix for raised beds includes topsoil, manure, and sand. These ingredients create a balanced blend. This mix supports healthy vegetable growth.
Use equal parts of each, one part topsoil, one part composted manure, and one part sand. This mix holds water well, drains properly, and provides nutrients your vegetables need.
Fill your raised bed to about 12 to 18 inches deep. This depth lets most vegetable roots grow comfortably.
Start by removing grass and weeds from the area. Remove at least 6 inches of native soil to prevent root competition and flooding.
Adding a layer of coarse gravel or small stones at the bottom isn’t necessary. But loosening the native soil under the bed helps drainage.
When filling, mix the soil ingredients evenly. Avoid compacting; fluff the soil lightly with a rake so air can circulate.
Drainage improves because water flows downward through the loose, airy soil in raised beds. Raised beds dry out faster than garden soil. They drain well and sit above ground.
You’ll need to water more often. Water frequently during hot, dry spells and add mulch to keep moisture in.
Add organic matter like aged compost every year to maintain soil fertility. Avoid overusing peat moss as it may acidify the soil over time. Test soil pH and nutrients with a home kit.
You can also use a local extension service. Do this before you add anything to the soil.
Feed your vegetables after planting with organic liquid fertilizers. Use compost tea too.
Do this every 4 to 6 weeks in the growing season. Avoid heavy tilling after planting because it can disturb roots and soil structure.
Check soil drainage by digging a small hole and filling it with water. It should empty within an hour to be well-drained for raised beds.
Planting Vegetables and Companion Plants in Raised Beds
Pick vegetables that thrive in deep, well-drained soil. Plant companions that benefit each other and save space. Space the plants to match their size and water them right after planting.
Top Vegetables for Raised Beds
Vegetables like tomatoes, peppers, cucumbers, and carrots grow well in raised beds. They prefer soil at least 12 inches deep for roots to spread. Leafy greens and herbs also do great in raised beds with good drainage.
Raised beds with loose soil help avoid problems common in heavy clay soils. You can grow Mediterranean herbs like thyme and rosemary in gritty compost-filled beds. These veggies and herbs will stay healthy and produce better.
Companion Planting Combinations
Some plants protect each other and grow better when paired. For example, tomatoes grow well with basil and marigolds, which repel insects. Beans fix nitrogen in the soil, helping leafy greens like lettuce.
Mix these plants for strong growth and fewer pests:
- Tomatoes with basil and marigolds
- Carrots with onions or chives
- Cucumbers near radishes
- Beans with corn or lettuce
- Peppers with spinach or oregano
- Leafy greens with garlic or nasturtiums
Try to avoid planting potatoes and tomatoes close, as they share pests. Mixing flowers can also attract beneficial insects to your garden beds.
Proper Spacing and Planting Techniques
Give plants room to grow, usually between 12 and 24 inches apart. Tall plants like tomatoes need more space than small herbs. Crowding can lead to poor air flow and more disease.
Plan rows or clusters based on plant height and shape. Place taller plants on the north side of the bed so shorter ones get light. Keep raised beds spaced at least 28 inches apart to work comfortably.
Water your plants right after planting. Use a gentle spray or watering wand close to the soil. This stops roots from drying and helps plants settle into new soil.
Watering, Mulching, and Maintaining Your Raised Bed Garden
Water your raised bed garden deeply about once or twice a week. Each session should deliver roughly one inch of water.
Check soil moisture by pressing your finger an inch deep. Water again only if it feels dry.
Mulching helps keep soil moist and reduces weeds. Use organic materials like shredded leaves, straw, or grass clippings. Apply a 2 to 3-inch layer around plants, leaving stems clear for airflow.
Soil settles and compacts through the season, especially after watering. Every few weeks, gently loosen the top soil with a hand rake, being careful around roots. This boosts air and water flow for healthier plants.
Adding compost once or twice during the growing season replenishes nutrients. Spread a half-inch layer over the soil surface, then lightly work it in. Use high-quality compost from kitchen scraps or garden centers.
For those with limited time, drip irrigation or soaker hoses work well. They deliver water slowly at the soil level, reducing evaporation. Connect to a garden hose and run for about 30 minutes per zone for good coverage.
Seasonally, clear out old plants and fallen leaves. Add fresh compost and some balanced fertilizer if needed before planting again. This keeps your soil lively and ready for the next crop cycle.
Keep an eye on how fast the soil dries out, especially in hot, sunny weather. Mulch may need topping up or watering might get more frequent in warm periods. Adjust your routine based on plant size and weather conditions.
Preventing Pests, Weeds, and Common Raised Bed Problems
Common pests in raised bed vegetable gardens include aphids, cutworms, slugs, and squash bugs. Spotting these pests early helps you control them before they damage most of your plants. Use organic ways to reduce pests.
Handpick bugs or spread diatomaceous earth. You can also add helpful insects like ladybugs.
Weeds compete with your vegetables for water and nutrients. So preventing them is a key step. Lay cardboard or newspapers under soil first.
Use several layers to block weeds. This prevents weeds from growing up. Pull weeds regularly when you see them.
That stops them from spreading. Your garden will also look tidier.
Raised beds can face problems like poor drainage, soil compaction, and root diseases. Don’t use cardboard if soil drains poorly. It holds moisture and can cause root rot.
Avoid problems by checking drainage first. Adding organic matter like compost improves soil texture and supports plant health.
- Use barriers like cardboard to stop weeds but watch drainage.
- Pick off pests by hand or introduce beneficial insects.
- Water at the base to avoid attracting slugs and snails.
- Pull weeds before they go to seed.
- Check soil moisture levels to avoid overwatering.
- Apply mulch to keep weeds down and conserve water.
Call a professional when pests or diseases get very bad. They can help control serious problems better.
Local extension services offer advice, and licensed pest control can handle stubborn problems safely. Troubleshooting raised bed challenges early prevents wasted effort and protects your vegetables.
Blocking weeds with cardboard can trap moisture; ensure good drainage to keep plants healthy.
Step-by-Step Action Plan for Your Raised Bed Vegetable Garden
Follow this plan to build and start your raised bed garden quickly. Each step helps you see real progress.
- Day 1: Choose the garden spot with at least 6 hours of sun. Check it’s flat and clear of debris.
- Day 2: Gather materials like wood or bricks and tools such as a saw and drill. Lay them out for easy access.
- Day 3: Build your raised bed frame following the step-by-step guide. Make sure corners are square and sturdy.
- Day 4: Prepare the soil by mixing garden soil, compost, and fertilizer inside the bed. The soil should feel loose and rich.
- Day 5: Plant your chosen vegetables and companion plants. Space each seed or seedling according to instructions on the packets.
- Week 2: Water the bed deeply but not too often. The soil should stay moist but not soggy.
- Week 3: Apply mulch around your plants to keep moisture in and weeds out. Check regularly for pests and remove any you find.
- Every week: Weed your bed, prune as needed, and watch your plants grow. Adjust watering depending on weather and soil dryness.
Frequently Asked Questions
How Deep Should a Raised Garden Bed Be for Most Vegetables?
A depth of 12 inches is usually enough for most vegetables. Root vegetables might need deeper beds for good growth.
Can I Build a Raised Garden Bed Directly on Grass or Soil?
Yes, but you should remove grass or weeds first to prevent growth underneath. Adding a weed barrier fabric can also help reduce weed problems.
What Is the Best Wood to Use for a Raised Vegetable Garden Bed?
Cedar is a popular choice because it lasts long and resists rot naturally. Avoid treated wood that might leach chemicals into your soil.
How Often Should I Replace or Refresh the Soil in a Raised Bed?
Refresh the soil every year by mixing in fresh compost or garden soil. A full soil replacement is typically needed every 3 to 5 years.
Can I Add Irrigation Tubing or Drip Lines Inside My Raised Bed?
Yes, drip irrigation works well to water raised beds efficiently and reduces water waste. Lay tubing evenly under mulch for consistent moisture.
What Are the Benefits of Painting or Staining a Wooden Raised Bed?
Painting or staining can protect wood from rot and weather damage. Use non-toxic finishes safe for edible gardens to avoid contaminating soil.
Wrapping Up
Raised bed gardens make vegetable growing easier and more rewarding. Start by setting up your bed in a sunny spot today. Enjoy fresh veggies and learning along the way.