What to Put Under Raised Garden Beds: 8 Essential Materials and How to Use Them
Choosing what to put under raised garden beds depends on your soil and plants. You can use layers of leaves, grass clippings, or woody debris for the base. These materials help create compost naturally and lower how much soil you need to buy.
Start by checking how deep your raised bed is, since that affects your base choice. Beds 12 inches or deeper can hold thicker layers of compostable materials at the bottom. Avoid packing non-compostable stuff that blocks water drainage or invites pests.
Also, think about the plants you want to grow the first year. Half the bed might be spent breaking down materials below. So roots won’t spread deeply.
Put a few inches of grass clippings or logs at the bottom. This keeps critters away from your garden bed. Over time, it also helps to improve your soil.
Key Takeaways
- Fill the bottom of raised beds with 6-inch layers of leaves for slow composting.
- Use grass clippings 2-4 inches thick to improve soil and moisture retention.
- For beds 12-18 inches deep, fill completely with quality raised bed mix.
- Layer logs and branches in beds over 12 inches deep to add bulk and air space.
- Leave 6-8 inches at the top for nutrient-rich garden soil and mulch.
- Do not place impermeable barriers that block water at the base of beds.
Best Materials to Put Under Raised Garden Beds
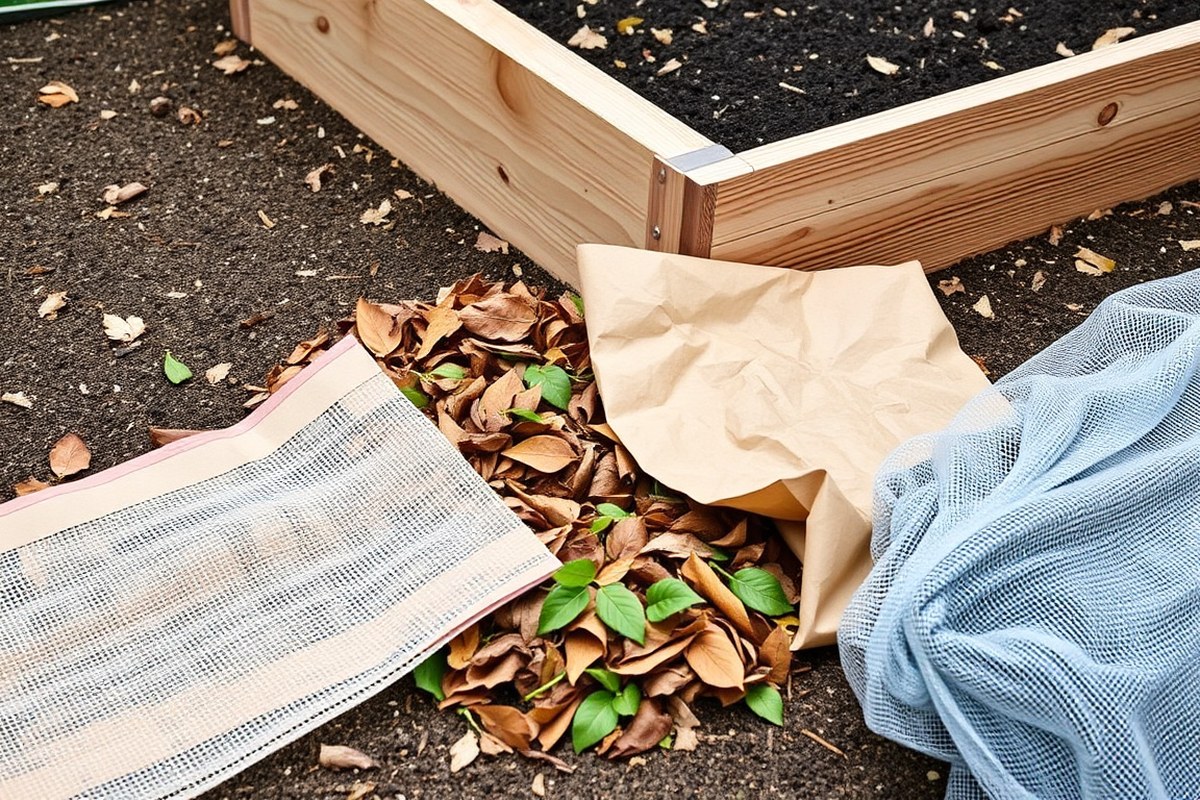
Good choices for materials under raised garden beds include cardboard, hardware cloth, and landscape fabric. These materials help stop weeds, improve drainage, and prevent pests. Adding some organic matter can also improve soil health as it breaks down.
Organic Materials for Weed Suppression and Soil Health
Plain brown cardboard works well under beds laid on grass or weedy areas. It blocks weeds while letting water soak through. Keep the cardboard moist to help it break down faster.
Leaves, straw, and wood chips add organic matter at the base of deep beds. They slowly decompose, saving you money on soil and improving soil structure over time.
Add these materials in layers about 6 inches thick. Then top with 6 to 8 inches of garden soil.
Grass clippings and shredded bark also work well. They hold moisture and encourage good microbes. Avoid thick layers at once to prevent compacting which hurts drainage.
Hardware Cloth and Pest Barriers
To stop burrowing pests like gophers or moles, use 19-gauge hardware cloth with ½ inch mesh. Cut it to fit the bed’s bottom and anchor it firmly in place. It blocks pests without stopping water flow.
Facing both pests and weeds? Start with hardware cloth. Lay cardboard on top next.
This double layer stops critters and weeds while allowing air and water in. The hardware cloth lasts for years, making it a cost-effective barrier.
Landscape Fabric and Its Limitations
Permeable landscape fabric suits beds over patios, decks, or concrete. It allows water to drain but holds soil inside the bed. Drill drainage holes in the bed sides or bottom to prevent water pooling.
Landscape fabric also helps reduce weed growth. However, it eventually degrades and leaves plastic bits in the soil. Avoid heavy plastic liners as they block airflow and water.
Avoiding Plastic Sheeting and Rocks
Plastic under raised beds blocks drainage and air, causing root problems. It can trap water and increase pests. It’s best to skip plastic unless you want a strict container, then add extra drainage.
Rocks are not recommended as base material. They do not improve drainage and make digging the bed difficult. Organic and mesh materials create better conditions for planting and soil health.
| Your Situation | Best Choice |
|---|---|
| Bed on native soil, no pest pressure | Leave open, no liner needed |
| Gophers, moles, or voles present | 19-gauge hardware cloth (½” mesh) |
| Placing bed over lawn or weedy ground | Cardboard (plain brown, keep moist) |
| Bed on patio, deck, or concrete | Permeable landscape fabric + drainage holes |
| Deep bed (12”+), want less fill | Pre-rotted logs + 8” soil above |
| Active pest pressure + weedy ground | Hardware cloth + cardboard on top |
| Never use | Rocks/gravels or plastic sheeting |
Choosing the right base material depends on your soil, pests, and bed setup. Using cardboard or straw works well to suppress weeds and add organic matter. Hardware cloth shields your plants from burrowing animals.
Landscape fabric fits well on hard surfaces but breaks down over time. Avoid plastic and rocks which harm drainage and plant roots. A good base keeps your raised bed healthy and productive for years.
How Soil Depth and Bed Height Affect Bottom Layer Choices

Raised garden beds should have soil depth between 6 and 12 inches. The exact depth depends on the plants you want to grow.
Shallow-rooted plants, like lettuce and radishes, need about 6 to 8 inches. Deep-rooted plants, like tomatoes or carrots, do better with 10 to 12 inches of soil.
The material you place underneath your soil affects usable soil depth. Adding a 3-inch layer of cardboard, wood chips, or leaves cuts soil depth by 3 inches. This layer goes at the bottom of your raised bed.
If your bed frame is 12 inches tall, a 3-inch base layer reduces soil space. That means 9 inches remain for soil. This can limit root growth for deeper-rooted plants.
To get the most out of your bed height, plan base layers carefully. You have 12-inch sides and want deep soil. Use 1 to 2 inches of cardboard or newspaper to block weeds.
Beds deeper than 12 inches can have logs or woody debris at the bottom. This adds volume and helps with soil drainage.
These materials decompose slowly and add nutrients over time. So you don’t lose much soil depth.
It helps to think of your bed in four vertical sections of equal size. A 12-inch tall bed can use coarse material at the bottom for 3 inches.
Add 3 inches of loose soil next, then quality topsoil on top. This structure supports strong root growth and healthy plants.
For a 24-inch-deep bed, add a thick layer of autumn leaves or shredded paper. Place this underneath the soil. This bulky, organic base reduces the amount of purchased soil you need.
Over 6 to 12 months, it breaks down and enriches the soil above. Thick organic layers slow soil settling but can use up nitrogen temporarily. Watch your plants carefully for growth issues.
Keep base layers thin if you need maximum soil for deep roots. Thick layers save soil but cut root space. Pick your base thickness based on what you’re growing.
Raised beds on concrete or patio need a solid base layer like cardboard. This base helps stop weeds from growing underneath. But that layer also reduces soil depth.
Beds set on native soil don’t need thick weed barriers, letting you keep soil depth higher. This means plants on native soil beds often have more room to spread roots.
Layering Techniques for Different Ground Types
Layering under your raised garden bed depends on the ground type. Grass needs a barrier to stop weeds.
Concrete requires materials that boost soil drainage. Each setup calls for specific layers and thicknesses to prevent problems.
Building Layers on Grass or Lawn
You want to block grass and weeds from growing up into the bed. Cardboard or a thick stack of newspaper works well here. They smother the grass and break down over time, enriching the soil.
Start with a layer of cardboard about 1/4 inch thick, covering the entire bed footprint. Use multiple newspaper sheets if you don’t have cardboard.
Wet them out well to keep them from blowing away. This layer should last 4 to 6 months.
Add a 2- to 3-inch layer of compostable material on top. Use leaves or straw for this layer. This adds nutrients and helps water retention.
Then fill the rest with good garden soil. This layering blocks weed growth and builds healthy soil under your plants.
Preparing Raised Beds on Concrete or Hard Surfaces
Concrete lacks natural drainage and can cause standing water under your garden soil. Use coarse gravel or crushed stone to create a 2- to 4-inch drainage layer. This prevents waterlogging and soil compaction.
To block pests burrowing under, first lay hardware cloth down. This stops them from entering under your raised bed.
This stays in place for many years and adds protection. Put a cardboard or newspaper layer above it to stop weeds growing downward.
Finish by adding a few inches of soil mix on top. This setup lets water drain through the gravel layer easily.
It also stops soil from washing into concrete gaps. This keeps the bed clean and stable.
Setting Up Beds on Bare or Compacted Soil
Bare soil is usually not a big weed problem. You can skip thick barrier layers unless you spot tough weeds. Gravel below helps if soil is heavy or clay-like and drains poorly.
Spread a 2-inch gravel or coarse sand layer for improved drainage. Avoid piling rocks directly as it traps moisture higher up. Then add 4 to 6 inches of compost or soil mix before filling the bed fully.
This method stops water from pooling and helps roots grow deep and healthy.
Combining Barriers and Compostable Materials
You can layer hardware cloth below cardboard to block pests while smothering weeds. Put the hardware cloth flat on the ground first for burrowing animal prevention. Then lay down a 1/4-inch cardboard layer on top.
Both layers work together to stop weeds and pests while breaking down to feed soil nutrients. Top this with at least 2 inches of compost or leaf mulch for moisture retention.
This combination costs more but handles patchy grass problems well. It also prevents damage from moles or voles. Ideal if you have both issues.
Follow these steps to layer your raised garden bed base properly:
- Clear the area of debris, rocks, and tall grass.
- Lay hardware cloth over bare or concrete ground if pests are a problem.
- Place cardboard or 10+ sheets of newspaper thickly on grass or weeds.
- Wet paper layers to keep them in place and speed breakdown.
- Add a 2- to 4-inch layer of gravel on concrete or compacted soil to improve drainage.
- Cover with 2, 3 inches of compostable material like leaves or straw.
- Fill the rest of the bed with quality garden soil or raised bed mix.
- Water the layers lightly to settle them before planting.
Preventing Weeds and Burrowing Pests Effectively
Hardware cloth stops burrowing animals like voles and moles. It blocks gophers from entering your raised bed. Use it under your bed to keep pests out.
It’s a metal mesh that you place under the bed frame, right on the ground. This barrier doesn’t block weeds but keeps pests from making tunnels below your plants.
Cardboard and newspaper block sunlight to stop weeds. They prevent grass and weeds from growing in your bed. Use these to keep your garden bed clear.
Lay a thick layer of newspaper or cardboard down first. Use 3 to 5 sheets of newspaper or one sheet of cardboard. Cover the entire base of the bed evenly.
These materials break down over months and improve soil. They add organic matter while stopping new weeds from growing. Your soil gets better as weeds stay out.
You should install weed and pest barriers before filling the bed with soil or compost. Smooth the ground before placing hardware cloth on the soil. Lay it flat if pests like burrowing animals are a problem.
This stops critters from entering your bed. Next, cover the hardware cloth with your cardboard or newspaper layers.
Finally, add your soil mix on top. This order creates a strong barrier that keeps weeds and pests out.
Don’t skip hardware cloth to save money if animals are a problem. This barrier protects your plants from being eaten underground. It’s worth the cost to avoid plant loss.
Hardware cloth costs about $1 to $3 per square foot. It can save plants from damage by burrowing pests later.
Spending now prevents losses and extra work later. For general weed control, cardboard or newspaper alone are cheaper and easier, costing around $0.10 to $0.50 per square foot.
One common mistake is placing cardboard directly on uneven ground. It tears and lets weeds through. Flatten the surface as much as possible first.
Another tip is to overlap cardboard pieces by 6 inches so weeds can’t sneak between gaps. Check the hardware cloth edges once a year for weeds.
Add more newspaper if weeds start growing up through gaps. This keeps your bed neat and weed-free.
Raised beds with these layers stay cleaner and require less weeding. Pests like voles won’t dig through metal mesh, so your plants stay safe. Using this setup means fewer bugs and weeds under the soil.
You spend less time fighting pests and more time gardening. It makes your gardening experience easier and more fun.
Common Mistakes When Choosing Base Materials
Plastic sheeting under raised beds often traps water instead of helping drainage. This trapped moisture can cause roots to rot and kill plants. Instead, use breathable materials that allow water to escape.
Rocks or gravel at the bottom don’t improve drainage as many think. They create a barrier that holds water above the rocks, leading to soggy soil. This condition starves roots of oxygen and causes poor plant growth.
Start by removing heavy base material if your bed drains poorly or water pools. Put 2 to 4 inches of organic matter at the bottom. Use grass clippings, leaves, or compost.
This helps improve soil quality and drainage. These materials break down over time and improve soil health and drainage naturally.
- Do not use plastic sheeting, as it traps water and air.
- Avoid gravel or rocks, they cause water to pool at the soil line.
- Spread a 2 to 4 inch layer of grass clippings or compost to help with drainage.
- Use scrap wood or cardboard layers sparingly to block weeds without blocking water.
- Choose untreated or safe wood materials to avoid toxic chemicals near food plants.
Never line the bed with plastic. It blocks air and creates a soggy root zone.
Fixing a bed with poor base prep may take a season. Remove part of the existing soil, replace the bottom with organic layers, then add fresh soil. This approach rebuilds soil structure and drains better over time.
Remember, avoiding drainage myths saves you time and plants. Good beds start with smart, breathable layers below. This costs nothing if you gather natural materials from your yard or kitchen scraps.
Filling Deep Raised Beds: Organic Layering and Composting
You can fill raised beds 12 inches or deeper by layering wood, leaves, and compostable materials. Using these organic layers helps you build fertile soil gradually while saving money. This method mimics hugelkultur, where buried wood holds moisture and feeds plants as it breaks down.
Starting with Logs and Branches for Moisture
Start by placing logs or branches at the base of your raised bed. This method saves soil and helps retain moisture longer.
Use untreated wood, as it naturally decomposes and enriches the soil. Keep a minimum of 8 inches of soil above the wood to stop nitrogen from being trapped near your plants.
Hardware cloth beneath these materials can keep burrowing pests out. The decaying wood acts like a sponge, holding water that plants can use during dry spells.
This setup is called a hugelkultur-lite bed. It’s a simple version of a wood-based raised mound.
Adding Leaves and Other Organic Matter
Add dry leaves, grass clippings, and kitchen scraps after the wood layer. This helps speed decomposition.
Leaves provide carbon, while green scraps supply nitrogen, balancing the composting process. Layer these materials loosely to allow air to circulate and prevent compacting.
This organic matter breaks down slowly, creating loose, fertile soil. Mixing some finished compost with these layers boosts nutrient content. Keep the layers moist but not soaked as you build up the bed.
Top Layers of Compost and Soil Mix
Finish with at least 6 inches of good compost or soil mixed with compost. This layer provides immediate nutrients and a good planting surface.
Use about half garden soil and half compost. This mix works well for most raised beds.
Water the bed thoroughly after filling to settle the layers. Expect the soil surface to sink slightly as materials decompose over several months. Add more soil later to maintain bed height and keep plants healthy.
Follow these steps to fill deep raised beds using organic layering:
- Lay untreated logs or branches evenly on the bed bottom, about 3 to 6 inches deep.
- Cover the wood with 3 to 6 inches of dry leaves and grass clippings. Mix in kitchen scraps too.
- Moisten each layer lightly to help start decomposition.
- Repeat layering if your bed is deeper than 18 inches.
- Spread 6 inches of mixed compost and garden soil over the top layer.
- Water the entire bed well to settle materials.
- Check soil depth periodically and add more soil over time as layers break down.
Materials and Methods for Raised Beds in Urban Areas
Raised beds on concrete or rooftops need a solid, clean base to protect plants. Use a layer of landscape fabric to stop weeds and let water drain through.
Add 2 to 4 inches of coarse gravel or crushed rock next. This keeps water moving and prevents root rot in tight spaces.
Soil contamination is a big concern in urban areas. Avoid using soil from your yard or local parks. It might contain lead.
Pollutants can make plants unsafe to grow. Instead, pick clean, commercial soil mixes that are labeled safe for food gardening. You can add organic compost to improve nutrients while keeping contaminants low.
Lightweight materials like expanded shale or pumice make good base layers in containers and rooftop beds. These reduce weight stress on building structures and still help drainage. Clean fill materials like washed sand or gravel work well.
These can be heavy too. Use them carefully in raised beds. Choose based on your bed’s size and support system.
Check the surface for cracks or drainage holes before placing a raised bed. This is important on balconies. Place a protective membrane if the surface touches your building’s wall to stop moisture damage.
Line the bottom with landscape fabric first. Then add drainage rock. This helps water flow away properly.
Make sure the rooftop deck can hold the weight of wet soil and plants. This can add hundreds of pounds per square foot.
Use a light drainage layer first, around 3 inches, before your soil mix. Check local building codes or talk to a structural engineer to be safe.
Use landscape fabric to block weeds. Add 2 to 4 inches of gravel for drainage. Choose clean, compost-rich soil for planting.
Avoid untreated soil from unknown sources to keep your vegetables safe. Always confirm that the surface under your bed supports its full weight when wet.
Good results mean your plants thrive without soggy roots or hidden toxins. Watch for standing water after rain or watering as this signals poor drainage below.
Smelly soil or leaf spots may show contamination or poor airflow. This means you might need to redo the base layers.
Choosing Base Materials Based on Site Conditions
Clay soil holds water and drains slowly. Heavy clay soil needs a base layer of gravel or small rocks. This helps drainage and keeps water from pooling.
Spread the layer evenly before filling with soil. This lets water flow through instead of pooling under your raised bed. Without good drainage, roots can rot, and plants struggle to grow.
Sandy soil drains fast but holds fewer nutrients. You don’t need added drainage material in sandy areas. Instead, focus on adding organic matter into your soil mix for better moisture and nutrient retention.
Cardboard can stop weeds from growing in your raised bed. But it won’t block water or pests from getting in. It works best as a simple barrier, not a full shield.
A solid, paved surface calls for a different approach. You can place plywood or thick cardboard to create a base. These materials keep weeds out but still allow air and water to move through.
Be sure they stay dry as wet cardboard rots after a few months. Add a few holes or gaps in the base layer to improve drainage.
Use a plastic barrier if you suspect soil contamination from past use. It stops harmful stuff from mixing with your new soil. This adds an extra safety layer for your plants.
Lay heavy-duty plastic under your bed to separate garden soil from harmful chemicals. Secure it tightly on the sides to prevent chemicals from leaching up. Avoid painted or treated wood in this case because those might add toxins.
High pest pressure, like moles or voles, means extra protection. Use hardware cloth or metal mesh layers beneath your bed. This stops pests from digging up through the base.
You can place mesh under your soil or between gravel and soil layers. This gives two levels of protection from pests. Choose the spot that fits your bed’s setup.
Always check your soil type first. Is it clay, sand, or a mix? Knowing this helps you plan the right drainage and filling for your bed.
Test drainage by digging a hole and filling it with water. Watch how quickly water soaks into your soil. This tells you if your soil drains well or holds water too long.
Water pooling for more than four hours means you need better drainage. Add gravel or layers to help excess water escape. This prevents root rot and soggy plants.
Look for signs of pests like tunnels or holes. Test soil or consult local records if contamination is likely.
Keep plastic or mesh barriers out of sunlight inside the bed. Sunlight can break down these materials fast. This helps them last longer and protect your soil better.
Step-by-Step Action Plan for What to Put Under Raised Garden Beds
Follow these steps to choose and apply the best base material under your raised bed. This will help control weeds, improve drainage, and protect plants from pests.
- Before you start: Clear the ground of grass and large roots. The base should be level and free of debris to help materials settle well.
- Day 1: Lay newspaper or cardboard over soil. Check that the layer fully covers the area to block weeds and allow water flow.
- Day 2: Add a 2- to 4-inch layer of coarse gravel if drainage is a concern. Test drainage by pouring water and observe how fast it drains.
- Day 3: Lay a 3- to 6-inch layer of compost. Cover the gravel or cardboard evenly with organic mulch. Use enough to fully protect the area. This supports healthy soil and attracts beneficial organisms.
- After 1 week: Install the raised bed frame carefully on the prepared base. Check for any spots where soil may settle unevenly.
- After placing the bed: Fill it with a loose, well-draining soil mix. Confirm soil drains well by watering and watching it soak in promptly.
- Within the first month: Monitor for emerging weeds or signs of pests. Add more mulch or fix gaps to keep the base protected.
Frequently Asked Questions
Can I Put Landscape Fabric Under Raised Garden Beds?
Yes, landscape fabric helps prevent weeds but allows water drainage. Choose a material that won’t block water or root growth for best results.
Should I Add Gravel Under Raised Garden Beds?
Gravel improves drainage but isn’t needed on all soils. Use it if your site has heavy clay or poor drainage to keep roots healthy.
Is It Okay to Place Raised Beds Directly on Grass?
You can set beds on grass but expect some weed growth. Lay cardboard or newspaper first to block weeds without harming drainage.
Does Putting Plastic Sheeting Under Raised Beds Help?
Plastic blocks water drainage and can cause root problems. Avoid plastic unless you need to stop burrowing pests and add drainage holes.
How Thick Should the Base Layer Be Under Raised Beds?
Base layers like leaves or cardboard should be about 6 inches thick. Add material in thin layers to prevent compaction and help decomposition.
Can I Use Wood Chips Under a Raised Bed?
Wood chips work but break down slowly and may draw nitrogen from soil. Mix them with compost or use sparingly at the bottom layer.
Key Points to Remember
Choosing the right material under your raised bed sets the stage for healthy plants. Blocking weeds, improving drainage, and stopping pests are key goals. Start by preparing your base well today to see better results tomorrow.