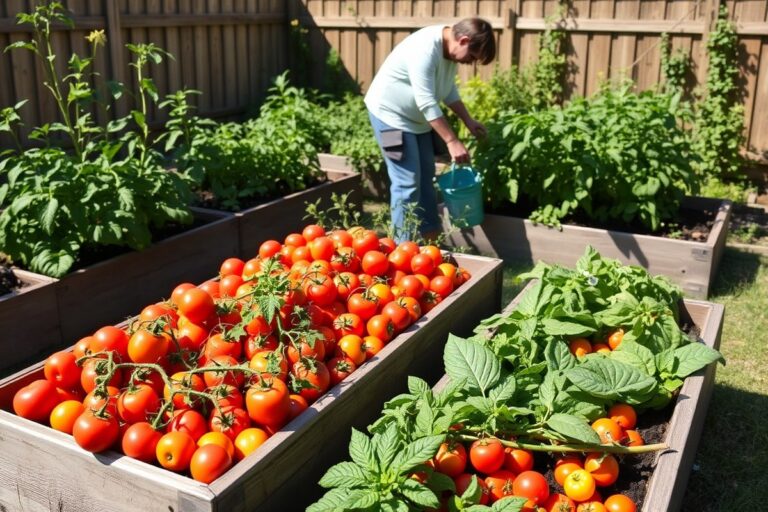
How to Create a Raised Garden Bed: Complete Steps and Expert Tips
Want to know how to create a raised garden? It’s easier than you think. Start by choosing the right spot with full sun to help your plants thrive.
Keep your raised bed no wider than 4 feet. This lets you reach the center easily. Avoid stepping inside the bed.
Use sturdy materials like cedar for a long-lasting frame that stands up to weather. Plan for a bed about 12 to 18 inches deep. This depth gives roots plenty of space to grow.
It helps your plants stay healthy. The soil warms faster in raised beds. So you get an earlier start each spring.
Build your frame first, then loosen the ground inside before filling it with rich soil mix. Leave two to three inches below the frame top to avoid soil spilling out. Assembly takes less than half an hour if you have basic tools on hand.
Key Takeaways
- Pick a sunny spot with 6-8 hours of direct sunlight daily.
- Keep your bed width to 4 feet so you can easily reach plants.
- Build raised beds 12-18 inches deep for most vegetables, deeper for root crops.
- Use durable wood like cedar to extend your bed’s lifespan.
- Loosen native soil 8-12 inches deep before adding soil mix.
- Fill soil to 2-3 inches below the top of the frame.
What Is a Raised Garden Bed and Why Use One?

A raised garden bed is a box that sits above the ground. It has a frame to contain the soil and plants around it. The typical size is 4 feet wide, 6 to 8 feet long, and 12 to 24 inches deep, filled with quality soil for better drainage and growth.
Raised beds drain water better than in-ground gardens do. This helps in wet or poorly drained soil.
They prevent water from pooling around plants, which helps reduce root rot and other moisture problems. This makes them especially good for leafy greens like lettuce and spinach that dislike soggy soil.
These beds also make gardening easier to manage. The improve height reduces bending, saving your back and knees.
Plus, you avoid compacting soil by stepping into the bed, letting plant roots grow freer. Keeping the bed no wider than 4 feet helps you reach all plants without stepping inside.
Raised beds extend your growing season by warming faster in spring and cooling slower in fall. You can customize the soil mix with compost and other amendments for healthy plants.
You can build raised beds over yard rubble or no soil. Add a base layer to help with drainage.
One drawback is that soil in raised beds dries out faster. So you must water more often. Mulching helps retain moisture.
Raised beds fit small spaces and hard surfaces easily. Use bricks or blocks instead of wood as supports.
How to Choose the Best Location and Size for Your Raised Bed
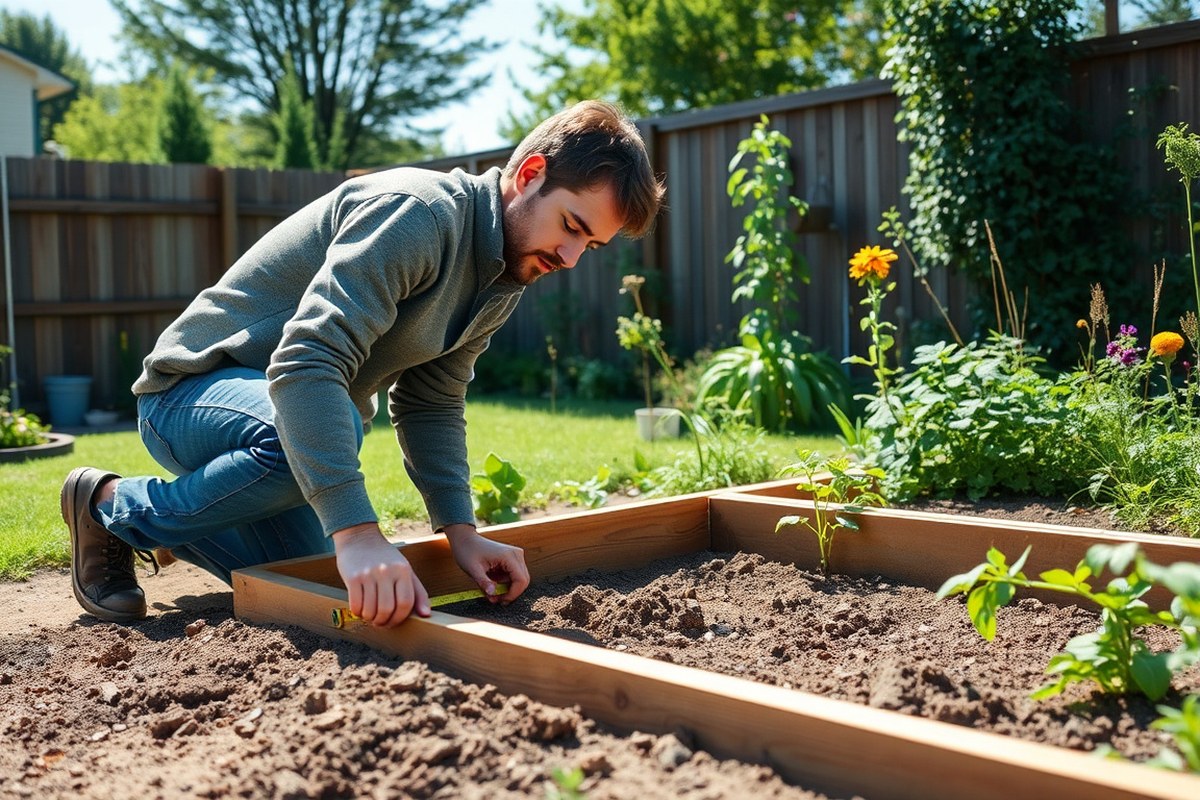
Pick a spot that gets 6 to 8 hours of direct sunlight daily. Choose open areas not blocked by tall trees or buildings. This sunlight helps vegetables and herbs grow strong and healthy throughout the season.
Make sure the ground is level and stable to support your garden bed. Place beds near a water source to save time when watering. Also, think about having enough room around the bed for easy access and maintenance.
- Keep the bed width at 4 feet or less for easy reach.
- Length can be 8 to 10 feet, but avoid longer beds.
- Height should be at least 12 inches for root vegetables.
- Space multiple beds about 3 feet apart for easy walking.
- Allow room for garden tools and wheelbarrows if needed.
Width matters because you want to reach the middle without stepping in. Beds wider than 4 feet get hard to tend properly. For height, 12 inches or more helps root crops grow deep and healthy.
Growing mostly leafy greens? Shorter beds around 8 to 12 inches work well. Taller beds, such as 18 to 24 inches, help if soil lacks nutrients.
They also give roots more room to grow deep. Keep paths wide enough to move freely between beds to avoid crushing plants.
Don’t place raised beds in shady spots; lack of sunlight slows plant growth.
Think about what plants you want when planning your garden size. Consider how much space you have available to use.
This way, gardening stays comfortable and productive. You’ll enjoy spending time in the garden without straining your back or shoulders.
Selecting Materials and Tools to Build Your Raised Garden Bed
Choosing the right materials affects how long your raised garden bed lasts. Wood is the most popular choice, but alternatives can work too. Your budget and local availability will guide your material choice.
Here is a quick comparison of common materials you can use for raised garden beds:
| Material | Lifespan | Cost | Food Safe | Notes |
|---|---|---|---|---|
| Cedar | 10, 20 years | $$ | Yes | Rot-resistant natural oils, most popular |
| Redwood | 15, 25 years | $$$ | Yes | Very durable, mainly available in western US |
| Douglas Fir (untreated) | 3, 7 years | $ | Yes | Affordable, shorter lifespan, good for starting |
| Pressure-Treated Lumber | 20, 30 years | $ | Yes* | ACQ treatment is food safe per EPA since 2004 |
| Composite/Recycled Plastic | 25+ years | $$$$ | Yes | Very durable, higher upfront cost |
Cedar lumber is a solid mid-level price and naturally resists rot. Redwood can last longer but costs more and is less common in some areas.
Pressure-treated wood has improved in safety and lasts long at a low price. Composite materials last decades but usually cost much more.
Besides wood, you can use concrete blocks, bricks, or recycled plastics if you want something different. Wood often looks better and is easier to cut and shape for DIY beds.
You need a few basic tools to build a raised garden bed. You need a handsaw or power saw to cut wood. Get a drill with screwdriver bits for screws.
Also, have a tape measure and square to check corners. A hammer and galvanized screws or deck screws will hold boards tight.
Building a bed without power tools is possible using a handsaw and screwdriver. Cutting the boards carefully by hand takes a little longer but costs less. Just take your time to get square corners and smooth cut edges.
- Handsaw or power saw for cutting boards
- Drill with screwdriver bits or manual screwdriver
- Tape measure to get accurate lengths
- Carpenter’s square for even corners
- Hammer and corrosion-resistant screws (galvanized or deck screws)
- Work gloves and safety glasses for protection
Always wear gloves and glasses to protect your hands and eyes from splinters and debris. Keep your fingers clear when using saws and drills. Working on a flat stable surface makes assembly easier.
Step-by-Step Guide: Building Your Raised Garden Bed Frame
Building a raised garden bed frame starts with measuring and cutting the lumber accurately. You then assemble the pieces, securing corners tightly with screws designed for outdoor use. Finally, place the frame on your prepared site.
Level it carefully. Make sure it sits flat and stays stable over time.
Measuring and Cutting Lumber Safely
Take exact measurements before you cut lumber to avoid waste and fit your design perfectly. Use a tape measure and mark the cuts clearly with a pencil. Work slowly using a power saw or handsaw.
Always wear safety goggles to protect your eyes. Take your time with each cut.
Common lumber sizes for raised beds include 2×6 or 2×12 boards. For a typical 4-foot by 8-foot bed, cut two 8-foot boards and two 4-foot boards. Cutting shorter sides 3 inches less can make your frame sit flush without extra width.
Assembling Corners and Securing the Frame
Start assembling the frame on a flat surface for precise alignment. Use galvanized or coated deck screws, around 3 inches long, to resist rot and rust outdoors. Pre-drilling holes prevents wood from splitting when you screw pieces together.
Follow these steps to build your frame:
- Lay out your cut lumber in the shape of your bed.
- Attach the short boards to the long boards using two or three screws per corner.
- Use angle brackets or corner braces for extra sturdiness if you like.
- Tighten all screws well but don’t overtighten to avoid crushing the wood fibers.
- Double-check corners for squareness using a carpenter’s square or measuring diagonals.
Leveling and Placing the Frame on Site
Clear the site of rocks, roots, and debris and rake it smooth. Use a level on the frame’s top edges to check if it’s flat. Adjust the soil under the frame using a shovel.
Add small amounts of sand to level uneven spots. Check that the frame is stable.
Once the frame is level, press it into place. This stops soil from escaping and helps keep the bed stable. A level bed frame means easier planting and irrigation.
Preparing and Filling Soil for Raised Garden Beds
Start by mixing garden soil, compost, and peat moss or coir. Use equal parts of each. Stir well to get an even blend.
This blend helps keep soil loose, moist, and rich in nutrients. Use high-quality topsoil mixed evenly with compost, as compost improves drainage and adds necessary nutrients.
Fill your raised bed with soil to about 12 inches deep. This depth suits shallow-rooted plants like lettuce. Make sure the level is even.
For deep-rooted vegetables, use soil at least 18 to 24 inches deep. This gives roots space to grow downward. It works well for tomatoes and carrots.
Deeper soil lets roots access enough water and nutrients. This results in healthier plants. You get bigger and better harvests.
Multiply your bed’s length, width, and soil depth in feet. This calculation gives you the cubic feet of soil needed. Use this to buy soil correctly.
For a 4-foot by 8-foot bed filled 1 foot deep, use 32 cubic feet of soil. Multiply 4 x 8 x 1 to get that number. This example helps with planning.
You can buy this as bulk soil or bagged mixes. Ask your local garden nursery. They often stock bulk compost and topsoil and will help figure your order.
Before filling, loosen the native soil under the bed 8 to 12 inches deep. Use a garden fork or broadfork for this. It helps improve drainage and root growth.
This lets roots reach down more easily and prevents soil compaction. Place the raised bed on hard clay or poor soil? Add compost first.
Till it well to improve fertility and drainage. Then add your soil mix on top.
Add fresh compost or soil mix every spring to top off your bed. This fixes nutrient loss and soil settling. It keeps your garden healthy year after year.
Plants can end up too deep if soil compacts, making root growth harder. Adding 2 to 3 inches of new compost yearly keeps soil fluffy and rich. It also helps maintain high plant productivity season after season.
Never fill soil right to the top of the bed. Leave 2 to 3 inches below the frame.
Raised beds warm up faster in spring by about 2 to 4 weeks. This is quicker than ground-level soil. Use this to your planting advantage early in the season.
This means you can plant earlier and extend your growing season. Avoid compacting the soil by stepping inside your bed. Use boards to spread your weight while working.
Choosing Plants and Planning Your Raised Garden Layout
Raised beds let you tailor the soil to your plants and control spacing for better growth. Choose plants that grow well in small spaces. Plan rows carefully.
Make sure you can reach every plant easily. Pick the right depth to match each crop’s needs for the best results.
Best Vegetables and Herbs for Raised Beds
Many vegetables and herbs suit raised beds well because you control soil quality and drainage. Leafy greens, tomatoes, and peppers grow well in raised beds. Cucumbers and bush beans do too.
Use at least 12 inches of soil. Herbs like basil, parsley, and thyme also thrive in these spaces.
Flowering perennials that die back each year add color and help border your raised bed nicely. They often grow well alongside vegetables without taking too much room or nutrients.
- Tomatoes, peppers, cucumbers need at least 16 inches deep soil
- Leafy greens like lettuce and spinach grow well in 12-inch beds
- Herbs such as basil, chives, and oregano flourish in raised beds
- Annual flowers require 8 to 12 inches of soil depth
- Perennials like lavender or coneflower make good borders
Matching soil depth to your plants helps them develop strong roots and yields. Vegetables with deeper roots, such as tomatoes, do better with more soil beneath.
Layout Planning for Easy Access and Growth
Arrange raised beds so you can reach every plant without stepping inside. Beds about 4 feet wide let you easily reach the center from both sides.
Keep paths between beds at least 28 inches wide. 36 to 48 inches works best for wheelbarrows and garden tools.
Plan rows or clusters of plants based on their space needs and sunlight preferences. Mix tall crops on the north side of the bed to avoid shading shorter plants. Group herbs and vegetables that need similar water and nutrient levels together.
- Build beds 4 feet wide for easy reach without stepping inside
- Leave 28 to 48 inches between beds for tool and wheelbarrow access
- Tall plants go on the north side to avoid shading smaller ones
- Group plants by water and sunlight needs for better growth
- Plant in rows or clusters depending on your space and preferences
This approach saves time and stops soil compaction on your beds. It also helps you spot pests or problems quickly and keep beds tidy.
Special Tips for Root Vegetables
Root crops like carrots, parsnips, and beets need deeper soil to grow straight and full. Aim for 18 to 24 inches of loose, rock-free soil. Raised beds give you control over soil quality.
This makes soil easier to keep healthy. You decide what goes inside the bed.
Shallow beds of 12 inches might restrict root growth, causing stunted or twisted roots. Try shallow-rooted greens or herbs if your bed isn’t deep.
These plants do better in less soil. This way, you get better results.
- Root vegetables need 18 to 24 inches of loose, rock-free soil
- Raised beds allow better control over soil quality for roots
- Shallow beds under 12 inches limit growth of root crops
- Choose shallow-root plants if deep beds aren’t an option
- Remove stones and debris to avoid root deformities
Providing proper depth and quality soil prevents common root problems. Your carrots and beets will grow straighter and larger with enough room underground.
Maintaining and Watering Your Raised Garden Bed Effectively
You should water your raised garden bed more often than other garden areas. The soil in raised beds dries out quickly. So check soil moisture every few days.
Water deeply about once or twice a week. Do this less often to grow strong roots. The amount depends on your local weather.
Using drip irrigation or soaker hoses helps target water right where plants need it. When watering by hand, soak the soil completely.
Keep watering until water comes out the bottom. Avoid shallow, frequent watering that keeps soil surface wet but roots dry.
Add 2 to 3 inches of compost every spring to replenish nutrients and organic matter. Raised bed soil shrinks yearly as organic matter breaks down.
So topping off keeps plants healthy. Spread compost evenly and lightly mix it in if possible for best results.
Prevent soil compaction by regularly loosening the soil with a hand fork or garden fork. Avoid walking inside the bed to keep soil fluffy, which helps roots breathe and absorb water. Mulching with organic materials like straw or shredded leaves also keeps moisture in and weeds down.
Mulches reduce water evaporation and protect soil from harsh sun. Apply a 2- to 3-inch layer of mulch after planting, avoiding direct contact with stems. In winter, a thick mulch layer can protect soil and roots from freezing temperatures.
Routine maintenance includes removing dead plants, checking for pests, and rotating crops each season. Crop rotation avoids nutrient depletion and disease buildup in the soil. Check your bed frames regularly.
Replace or fix pine or fir ones every 3 to 7 years. How often depends on your local climate.
Seasonal care means adjusting watering with the weather. Water more during hot, dry spells and less during rainy times. Test soil moisture regularly to keep your garden healthy.
Use your hand or a moisture meter. Do this all year long.
Avoiding Common Mistakes When Building Raised Garden Beds
Some common mistakes when building raised garden beds make your work harder. They often come from poor construction, bad soil preparation, or wrong bed size. Fixing these early saves time and helps your plants grow better.
Construction Errors and How to Fix Them
Building with the wrong materials can cause your bed to fall apart quickly. Use durable options like treated wood, bricks, or concrete blocks. Avoid thin plywood or untreated wood that warps in rain or sun.
Another mistake is not securing corners tightly. Loose joints let soil spill out and weaken the frame. Use corner brackets or screws designed for outdoor use for a strong hold.
You might also build the bed too tall or too short. A height of 12 to 18 inches suits most veggies and prevents strain when gardening. Taller beds need sturdier support to handle the soil’s weight.
Soil and Drainage Mistakes to Watch For
Skipping the grass removal below your bed leads to poor drainage. Cut and remove sod fully before adding soil to stop water pooling. Layer the bottom with coarse gravel if your soil drains slowly.
Using plain garden dirt without mixing can cause compaction. Mix compost and coarse sand into your soil mix for better air circulation. This stops soggy soil that suffocates roots.
Waterlogging is a big risk if your soil mix is too dense. Check drainage by filling the bed with water.
It should soak away in 15 to 30 minutes. Add more sand or organic matter to fix slow drainage.
Layout and Accessibility Pitfalls
Making your beds too wide reduces your reach and ease of care. Keep walkways between beds at least 18 to 24 inches wide to move easily with tools. Bed widths of 3 to 4 feet work well for comfortable access.
Incorrect bed length wastes space or makes maintenance harder. Design beds to fit your garden’s shape and meet your planting needs. Shorter beds let you quickly harvest plants without walking too far.
A common layout mistake is crowding beds too close together. This blocks sunlight and air flow, boosting disease chances. Spacing beds correctly promotes healthier plants and better growth.
- Choose durable, weather-resistant building materials.
- Secure bed corners with proper fasteners.
- Strip grass fully and check soil drainage.
- Mix compost and sand to avoid compacted soil.
- Keep beds 3 to 4 feet wide and leave 18 to 24-inch paths.
- Plan bed length to fit space and workflow.
- Space beds to ensure good light and airflow.
Check soil drainage and firmness before planting to avoid waterlogged roots.
Step-by-Step Action Plan
Follow these steps to build your raised garden bed and start growing. Each step shows you what to do and how to check your progress.
- Day 1: Pick your garden spot using sunlight and space as guides. Check if the spot gets at least 6 hours of sunlight.
- Day 2: Gather materials like untreated wood or composite boards and your tools. Make sure you have all tools before starting.
- Day 3, 4: Build the frame with your chosen materials. The frame should be square and sturdy to hold soil.
- Day 5: Prepare your soil mix with compost and topsoil and fill your frame. Soil should feel loose and crumbly.
- Day 6: Plan your planting layout based on your chosen plants’ space needs. Sketch it or mark soil spots.
- Day 7: Plant your seeds or seedlings carefully in the soil. Cover seeds lightly and water gently.
- After 1 week: Water the bed regularly and check soil moisture. Soil should feel damp but not soggy.
- After 2 weeks: Watch for plant growth and check for pests. Adjust watering if plants look dry or wilted.
Frequently Asked Questions
How Deep Should My Raised Garden Bed Be for Root Vegetables?
Raised beds for root veggies should be at least 12 inches deep. This depth lets roots grow well without hitting hard ground below.
Can I Build a Raised Garden Bed on Concrete or Pavement?
Yes, you can build raised beds on concrete with good drainage added. Drill holes or add gravel to avoid water pooling under plants.
What Is the Best Wood to Avoid Rot in Raised Garden Beds?
Cedar is great because it resists rot and lasts many years. Avoid treated wood that may leach chemicals harmful to plants.
How Much Soil Do I Need to Fill a 4×8 Foot Raised Bed?
You’ll need about 32 cubic feet of soil to fill a 4×8 foot, 1-foot deep bed. Order a little extra soil for settling after filling.
Can I Grow Shrubs in a Raised Garden Bed?
Yes, shrubs can grow well in raised beds and add structure. Just pick smaller shrubs suited to raised bed depth and size.
Are Bricks or Blocks a Good Material for Raised Garden Beds?
Bricks and concrete blocks work well and last long without rotting. They hold heat but may be heavier and harder to move than wood.
Before You Go
Raised garden beds help you grow healthy plants in controlled soil. Build one carefully, and you’ll enjoy fresh veggies and flowers. Start today by picking your garden spot.