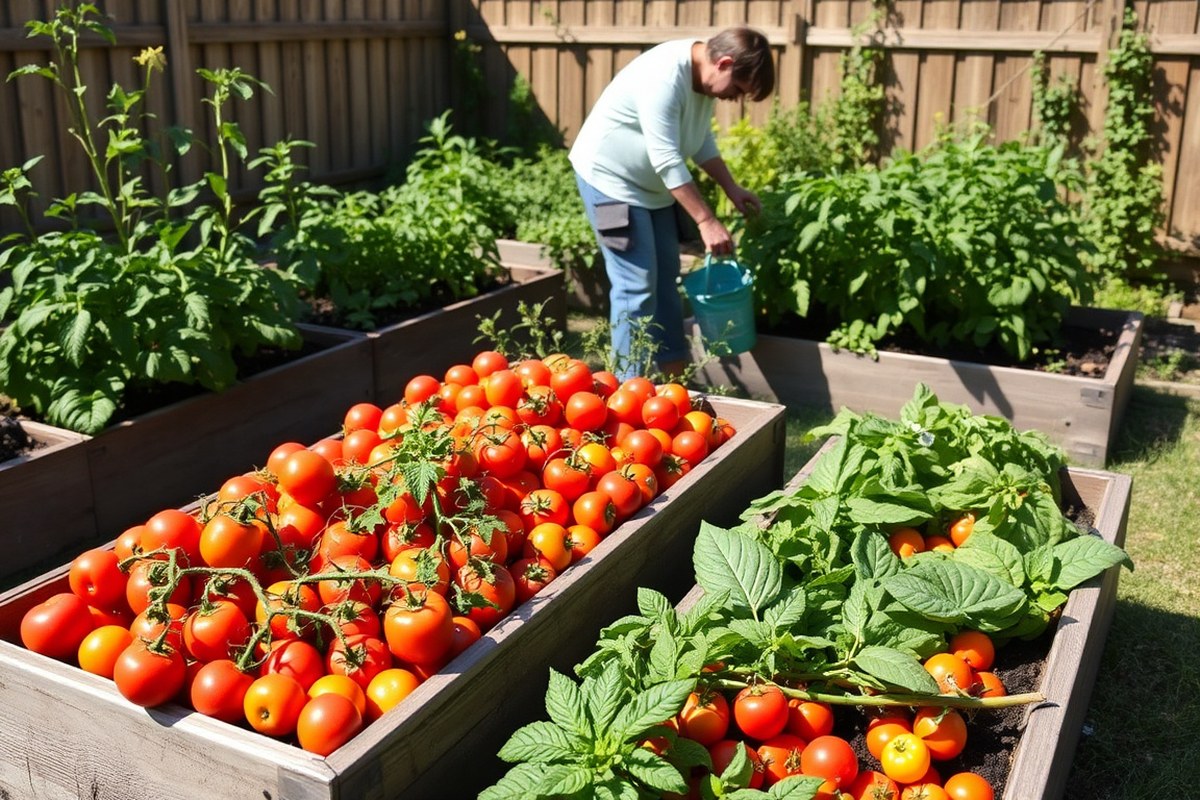
How to Plant a Vegetable Garden: A Complete Guide for Beginners
How to plant a vegetable garden starts with picking the right spot. Choose a sunny place that gets at least 6 hours of direct sunlight daily. Good sunlight helps your plants grow strong and healthy.
Next, prepare the soil by mixing in 2 to 3 inches of finished compost. Mix it into the top 6 inches of soil. Use a shovel or fork to do this.
It helps boost soil fertility. This makes it easier for roots to grow and absorb nutrients.
Keep garden beds no wider than 4 feet. This lets you reach the middle easily. Avoid stepping on the soil.
Stepping compacts the soil and stops roots from spreading. A 6×6-foot space is a perfect size to get started growing vegetables.
Key Takeaways
- Pick a garden site with at least 6 hours of direct sunlight daily.
- Mix 2-3 inches of finished compost into the top 6 inches of soil.
- Keep garden beds 4 feet wide to avoid soil compaction from stepping in.
- Start with a 6×6-foot plot to manage your first vegetable garden easily.
- Use a shovel or garden fork to loosen soil before planting seeds.
- Choose vegetables suited to your sunlight, like leafy greens for partial shade.
How to Start Your Vegetable Garden Successfully

Starting your vegetable garden means getting clear about size and setup. A garden around 4×4 or 4×8 feet works well for beginners. This size lets you manage care and harvest without getting overwhelmed or spending too much.
Think about what you want to grow first. Pick easy vegetables like tomatoes, leafy greens, or herbs.
These tolerate beginner mistakes better and still produce good yields. Your choice helps decide the garden’s size and how you arrange plants.
Gathering the right tools saves time and effort. Basic tools include a small trowel, a hand fork, a watering can, and gloves. Spend around $20 to $40 on these to get decent quality that lasts through multiple seasons.
Follow these steps to start your garden with confidence:
- Measure your space. Use a tape measure to mark out a 4×4 or 4×8-foot plot.
- Clear the area. Remove grass, weeds, and debris to prepare a clean planting spot.
- Gather tools and materials like soil, compost, seeds, or seedlings.
- Build raised beds if you want better soil control and drainage. Use untreated wood or recycled materials.
- Loosen soil with a fork or rototiller to help roots grow deep and strong.
- Mix in compost or well-rotted manure to add nutrients and improve soil texture.
- Plan your crops based on space and sunlight needs before planting.
- Plant your seeds or transplants following recommended depths and spacing.
Starting in March or April is best for many areas. Cool-season vegetables go in early spring, while warm-season plants wait until after frost. Right timing improves success and cuts down on frustration.
Keep your garden manageable by focusing on one bed and a few crops. As you gain experience, you can expand gradually. A small, well-tended garden teaches you soil, watering, and pest basics without extra stress.
Choosing the Best Location for Your Garden
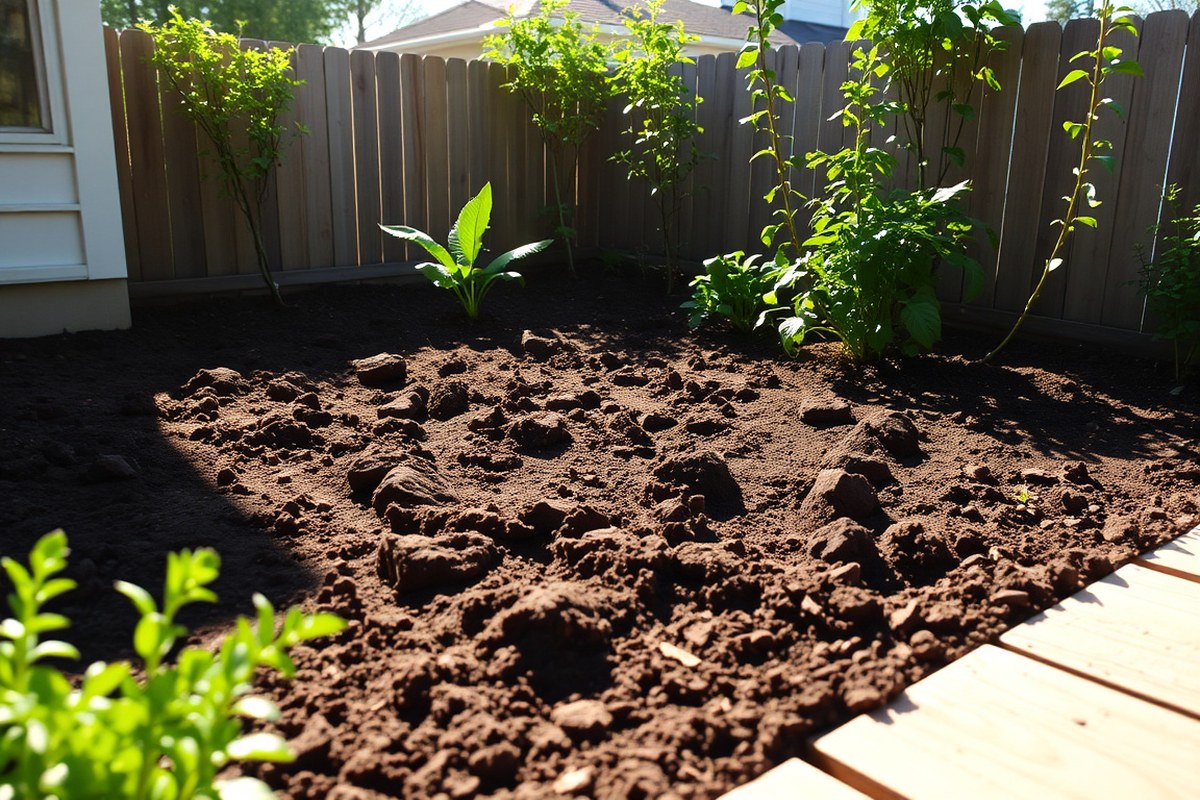
Choose a sunny spot that gets six to eight hours of direct sunlight. Find well-drained soil, avoiding areas where water collects. Make sure the spot is near a water source and has space for plants to grow.
Sunlight: How Much Do Vegetables Need?
Most vegetables grow best with six to eight hours of direct sun each day. Leafy greens can handle less sun, but fruiting plants like tomatoes need full sun. Check your yard throughout the day to find where sunlight hits longest.
Mark the sunny spots for planting. Avoid shaded corners near tall trees or buildings. The more sunlight, the better your garden will perform.
Soil and Drainage: Testing Your Garden Site
Good soil is loose and drains well. Press a handful of soil to check moisture.
It should hold together but crumble easily. Avoid soil that stays soggy or forms puddles.
Dig a small hole about 12 inches deep to test drainage. Fill it with water and watch how long it takes to drain.
Water that sits for more than an hour means drainage is bad. Poor drainage can damage your vegetable plants quickly.
Add compost or organic matter to improve soil texture if needed. Avoid bringing new soil from outside since it can compact and hurt drainage quality.
Water Access and Space Constraints
Choose a spot close to your water source, like a garden hose spigot. This makes watering quicker and less of a chore. Carrying water long distances can stress your plants and you.
Plan the garden size based on space you have. Small gardens are easier to tend and water. Make sure you leave room to walk between beds and for air circulation.
Assessing and Preparing Your Garden Plot
Clear the area of grass, weeds, and rocks. Rake the soil smooth and remove debris. This helps your vegetables take root easily.
Test soil pH with a simple kit. Most vegetables like pH between 6.0 and 7.0.
Adjust soil by adding lime or sulfur according to test results. This step ensures your plants absorb nutrients well.
After clearing and testing, add a layer of mulch to retain moisture and suppress weeds. Mulch also buffers temperature swings that can stress young plants.
Pick a sunny place near water for easy watering. Stay away from trees that take moisture and nutrients. Your plants will grow better without that competition.
Preparing Your Soil for Healthy Vegetable Growth
Your soil needs good care before planting vegetables. Start by checking your soil’s pH and nutrient levels.
Use a test kit or contact your local cooperative extension service. Knowing your soil’s condition helps you add the right amendments to feed your plants well.
Removing grass and weeds is important because they compete with your veggies for nutrients and water. Use a garden fork or spade to loosen the soil.
Turn the soil to about 6 inches deep. This helps roots grow easily and lets air and water reach the plant roots better.
Adding organic matter like finished compost or fully composted manure makes a big difference. Spread a 2 to 3-inch layer on top before mixing it into the soil. This improves soil texture, drainage, and nutrient supply, which your vegetables love.
Here’s how to prepare your soil step-by-step:
- Test your soil’s pH and nutrients using a kit. Or send a soil sample to your local extension service.
- Remove grass or weeds by pulling them out. If prepping in fall, cover with cardboard and compost.
- Spread 2 to 3 inches of finished compost or manure evenly over the planting area.
- Use a garden fork or spade to turn soil. Mix in compost thoroughly to a depth of 6 inches.
- Break up large clumps and remove stones and debris to make the soil loose and crumbly.
- Level the soil surface gently, creating a flat bed ready for planting.
Turning the soil with a fork or spade takes about an hour for a small plot. Expect some effort, but it helps greatly with root growth and soil health.
Don’t till soil when it’s too wet. It can compact the soil and damage its structure.
Adding too little compost won’t improve the soil much. Too much may cause nutrient imbalance.
Aim for those 2 to 3 inches, it’s enough to boost your soil without risk. Top-dress with mulch afterward to keep weeds down and moisture in.
Selecting Vegetables to Grow in Your Garden
Choose vegetables you enjoy eating and that fit your garden space and climate. Pick easier plants if you are new to gardening.
Consider whether you want cool-season or warm-season crops to match your local growing times. This helps you get the best harvest and avoid wasted effort.
Beginner-Friendly Vegetable Varieties
Start with easy-to-grow vegetables that need little fuss. Beans, radishes, and carrots produce reliably even if your skills are beginner level. Choose disease-resistant varieties labeled with “bush,” “compact,” or “dwarf” to fit small spaces and reduce problems.
Including quick growers like lettuce and spinach lets you harvest often. Plant small amounts every 2 to 4 weeks for a steady supply. Putting in these easier veggies builds confidence and ensures you enjoy your garden’s bounty.
Cool-Season Versus Warm-Season Crops
Knowing your climate’s cool and warm seasons guides what to grow when. Cool-season vegetables include lettuce, peas, and broccoli. They thrive in early spring or fall when temperatures run about 50°F to 70°F.
Warm-season vegetables like tomatoes, peppers, and cucumbers grow best above 70°F. Plant these after the last frost date in your area, usually late spring to summer. Growing both types stretches your harvest from spring through fall.
Vegetables for Partial Shade or Containers
Limited sun or space? Many vegetables grow well in containers on patios or balconies.
Look for varieties made for container growing, such as certain tomatoes and peppers. Plants labeled “compact” or “dwarf” fit containers better and save space.
Partial shade limits vegetable choices but some crops like leafy greens do fine. Spinach and lettuce tolerate less sun and still provide nutritious greens. Containers allow flexible placement, so you can move plants to better spots as needed.
Here’s a simple table to help pick vegetables based on space, season, and ease:
| Vegetable | Season | Space Needs | Ease Level |
|---|---|---|---|
| Lettuce | Cool | Small, container-friendly | Easy |
| Tomatoes (compact variety) | Warm | Container or garden | Moderate |
| Radishes | Cool | Small | Easy |
| Beans (bush) | Warm | Small to moderate | Easy |
| Spinach | Cool | Small, shady areas | Easy |
Choosing vegetables this way lets you grow food you enjoy without overloading your garden. It also matches your local growing conditions and space. Starting small with easier plants helps you learn and expand your garden over time.
How and When to Plant Seeds and Transplants
Seeds and transplants each have their place when planting a vegetable garden. Seeds offer more variety and cost less.
Transplants save time and reduce crop risk. How and when you plant each depends on the vegetable and your local climate.
Starting Seeds Indoors
Starting seeds indoors gives plants a head start before outdoor planting. This works best in cold climates to extend the growing season for slow-maturing crops. Use seed trays or small pots with seed-starting mix.
Begin 6 to 8 weeks before your last spring frost date. Keep seeds moist and warm until they sprout. Place seedlings in bright light or under grow lights to prevent leggy growth.
- Select seeds suited for indoor starting like tomatoes or peppers.
- Fill trays with seed-starting mix, not regular garden soil.
- Sow seeds at the depth listed on the seed packet, usually ¼ to ½ inch.
- Keep the soil moist but not soggy, using a spray bottle or gentle watering.
- Place trays in a warm spot (65°F to 75°F) until seeds emerge.
- Move seedlings to light once they sprout to keep stems strong.
- Harden off seedlings outdoors for 7 to 10 days before planting in the garden.
Slowly expose seedlings to outdoor conditions to avoid shock before planting.
Planting Seeds Directly Outdoors
Many vegetables grow well when seeded directly into prepared garden soil. This method is easier for quick-growing or cold-tolerant crops like lettuce, beans, peas, and squash. Direct sowing saves time and avoids transplant shock.
Check the seed packet for planting depth and spacing. Most seeds go about twice as deep as their size. Space plants according to their mature size to avoid crowding.
- Prepare the soil by mixing in compost to improve fertility.
- Plant seeds at the depth and spacing recommended on the seed packet.
- Cover seeds lightly with soil and gently firm the surface.
- Water the area well but gently after planting.
- Maintain consistent moisture until seedlings emerge.
- Thin seedlings by snipping extras when 2 inches tall to avoid crowding.
Peas and beans typically need 1 to 2 inches between seeds for best growth.
Transplanting Young Vegetable Plants
Buying or growing seedlings indoors speeds up harvest and improves survival for some crops. Transplants fit well for tomatoes, peppers, eggplants, and cabbages. Transplant after the last frost, when soil warms.
Plant seedlings deeply to support root development. Use this spacing formula for your plants: 1 extra-large plant per square foot.
Plant 4 large plants in one square foot. You can fit 9 medium or 16 small plants per square foot.
- Harden off plants for a week to reduce transplant shock.
- Choose a cloudy day or water the garden well before transplanting.
- Dig holes slightly larger than the root ball.
- Plant seedlings at the same depth or slightly deeper than they grew in pots.
- Fill soil around the roots and firm gently.
- Water thoroughly after planting.
- Add compost or balanced fertilizer if needed to support growth.
Planting deep encourages strong root systems, especially for tomatoes.
Planning Garden Layout and Plant Spacing
Garden beds should be no wider than 4 feet. This width lets you reach the middle easily from either side. Beds that are too wide make it hard to tend plants without stepping on the soil.
Dig holes twice as deep and wide as your plant’s root ball. This gives roots enough room to grow strong and healthy. Good spacing varies: leafy greens like lettuce need about 6 to 8 inches between plants.
Larger plants like tomatoes or peppers need space to grow. Give them 18 to 24 inches apart. This helps with air circulation and healthy growth.
Use a planting grid to fit plants efficiently. For example, in a 4-foot wide bed, make rows 12 inches apart.
Plant radishes or lettuce between slower-growing plants like carrots. Radishes mature fast and won’t crowd neighbors.
Companion planting can repel pests and improve growth. Plant marigolds near tomatoes to keep bugs away. Beans fix nitrogen in the soil.
So grow them near corn which needs more nutrients. Avoid placing onions and beans close since they may stunt each other’s growth.
Planting vegetables close saves space and boosts yield but watch for overcrowding. Crowded plants invite diseases and pests. Give each plant enough airflow and see clear soil to reduce weeds.
Your planting checklist: 1) Choose a bed no wider than 4 feet. 2) Space plants as labels recommend, usually 6-24 inches apart. 3) Include fast growers like radishes in between slow ones.
4) Add pest-repelling companions like marigolds. 5) Keep pathways so you can reach all beds easily. These steps help your garden stay healthy and productive.
Watering, Fertilizing, and Mulching for Productivity
Water your vegetable garden deeply about once a week to reach roots. Most gardens need 1 to 2 inches of water weekly. Water daily or every other day during hot, dry weather.
Keep the soil moist but not soggy. Check soil moisture often and adjust watering as needed.
Water early in the morning for the best results. This allows leaves to dry before evening, reducing disease risks. Avoid overhead watering late in the day since it can promote fungus growth.
Use organic fertilizers like compost tea or fish emulsion for steady growth. Dilute water-soluble fertilizers to one-third to one-half strength and apply every 10 to 14 days. Apply fertilizer around the base, not on leaves, to avoid burning plants.
Start fertilizing when plants show their first true leaves, usually two to three weeks after planting. Use compost by mixing some into soil before planting.
Add a light side dressing of compost during the season. Avoid over-fertilizing, which can cause leafy growth but fewer vegetables.
Mulching shields soil from drying and cutting down weeds effectively. Spread a 2 to 3 inch layer of organic mulch around plants. Use straw, shredded leaves, or grass clippings as mulch.
Mulch helps keep soil moist and reduce weeds. Mulch keeps soil cool in summer and warmer in early spring.
Put mulch on your soil after watering to lock in moisture longer. Keep mulch a few inches away from plant stems to avoid rot. Mulching also reduces hoeing and watering chores, saving time and effort.
Place your vegetable garden near a water source to make daily watering easier. Using drip irrigation or soaker hoses saves water and time compared to hand watering. These systems deliver water right at the roots, reducing disease risks on leaves.
In intensive planting setups, plants shade soil and reduce evaporation. This cuts watering needs and helps keep weeds down. It also means less mulching and less work overall for you in the summer heat.
Managing Weeds and Controlling Garden Pests Naturally
Weeds compete with your vegetables for nutrients and water, so keep them in check. Pull weeds as soon as you see them, grabbing close to the soil. This helps remove the whole root and stops them from growing back quickly.
Mulching is an easy way to prevent weeds. Spread 2 to 3 inches of straw, wood chips, or shredded leaves around plants.
Keep mulch a couple of inches away from stems to avoid rot. This blocks sunlight, so weed seeds can’t sprout while keeping soil moist.
Fencing your garden can keep out animals like rabbits and deer that munch on your plants. Use chicken wire or mesh at least 3 to 4 feet tall. Netting works great too, especially for berry patches or young seedlings.
Natural pest control starts with knowing which bugs harm vegetables. Look for aphids, which cluster on leaves and suck plant juices.
Caterpillars chew large holes, and beetles leave tiny holes in leaves. Removing these pests by hand early helps prevent infestations without chemicals.
Planting strong-smelling herbs like basil, mint, or marigolds near veggies can confuse pests. They dislike these smells and often stay away. Companion plants also attract helpful insects like ladybugs, which eat pests such as aphids.
Using row covers or lightweight fabric creates a physical barrier against insects. You can drape these over plants during the growing season. Just make sure to remove covers when plants start flowering so pollinators can do their job.
Keep your garden clean by removing plant debris and weeds regularly. This minimizes hiding spots for pests and reduces diseases. Good airflow between plants also helps keep pests and fungus at bay, especially in humid weather.
Pull weeds by the root before they flower to stop seeds from spreading in your garden.
Extending Harvest and Crop Rotation Strategies
Plant vegetables in stages every two to three weeks for steady harvests. For example, sow radishes or lettuce seeds in early spring, then repeat every couple of weeks. This method fills your garden with fresh, ready-to-pick crops throughout the season without overcrowding.
Crop rotation means changing vegetable families in each bed every year. It stops pests and diseases from building up in the soil. Don’t plant tomatoes or peppers in the same spot two years.
They share pests like tomato hornworms. They also share soil diseases.
Start by grouping plants into families, such as leafy greens, root vegetables, and legumes. Plan a four-bed rotation cycle: Year 1, plant leafy greens like Swiss chard. Year 2, follow with root crops like carrots or beets.
Year 3, grow legumes like beans or peas. Year 4, add fruiting crops like tomatoes or peppers. Repeat this cycle to keep soil nutrients balanced.
After a crop finishes, remove the plants quickly to prevent disease. Lightly till or dig the soil before planting new crops. Add compost or aged manure first.
This prepares soil for healthy plants. This keeps your soil rich and healthy. Expect to spend around 30 minutes per bed for this cleanup and soil refresh.
Don’t grow heavy feeders like tomatoes and corn consecutively in the same patch. They drain nitrogen and other nutrients rapidly.
Instead, planting legumes after them restores nitrogen naturally. Rotating crops helps prevent poor yields and stunted growth.
Cool-season greens like spinach or lettuce do well early and late in the season. Plant these in early spring, then again in late summer for a fall crop. This timing stretches out your harvest and uses garden space well across warm months.
Track your planting dates using a garden calendar or notebook. It helps you remember when to sow next. This keeps your garden on schedule.
Set reminders to plant every 10 to 21 days for fast-maturing crops. Keeping up steady work helps your garden last from April to October.
Many areas benefit from this long season. It provides fresh veggies for months.
Common Mistakes Beginners Make and How to Fix Them
One big mistake is planting too much at once. Overplanting crowds your garden and limits airflow. This can stress plants and cause disease.
Start with fewer seeds or seedlings, then add more later if space allows. Focusing on a few crops helps you care for them better.
Improper watering is another common slip-up. Too much water drowns roots, while too little causes wilting. To check soil moisture, stick your finger about two inches into the soil.
When soil feels dry, gently water your plants with a watering can. Avoid flooding and water early in the morning to reduce evaporation.
Soil preparation mistakes can stunt your garden too. Your soil should be fertile and drain well. Mix in compost or aged manure before planting.
Raised beds are a good fix if your soil is heavy clay or sandy. This gives roots a better start and improves drainage.
- Plant fewer seeds or seedlings to avoid crowding.
- Check soil moisture with your finger before watering.
- Water early in the morning and avoid soaking leaves.
- Add compost or aged manure for soil fertility.
- Build raised beds for poor or compacted soil.
- Mulch 2 to 3 inches to retain moisture and reduce weeds.
- Watch for yellowing leaves or drooping stems as stress signs.
Yellow or dropping leaves often show plants need water or nutrients. Adjust watering if soil is dry below the surface.
Plants that stay pale or grow slowly after weeks need balanced fertilizer. Keep an eye on plants after changes to avoid overwatering or nutrient burn.
Step-by-Step Action Plan to Get Your Garden Growing
Follow these steps to start your vegetable garden and keep it thriving. Each step shows how to check if you’re on track.
- Before You Plant: Pick a sunny, well-drained spot and test the soil for pH and nutrients. Your plants need balanced soil to grow well.
- Week 1: Clear all weeds and loosen the soil with a garden fork or tiller. Healthy soil looks dark and crumbly, and weeds are gone.
- Week 2: Mix in compost or aged manure to add nutrients. The soil should feel richer and hold moisture better.
- Week 3: Choose your seeds or transplants based on season and space. Make sure your plants are suited for your climate and garden size.
- Planting Day: Sow seeds or plant seedlings with the right spacing. Check seed packet instructions and leave room for each plant to grow.
- After Planting: Water your garden deeply but don’t soak it. Soil should be moist but not puddled.
- Weeks 3-6: Mulch around plants with straw or shredded leaves. This keeps weeds down and soil moist.
- Ongoing: Watch for pests and remove weeds by hand. Your plants will look stronger and leaf damage will be minimal.
Frequently Asked Questions
How Soon Can I Start Harvesting Vegetables After Planting?
You can usually harvest some vegetables in 30 to 60 days. Leafy greens and radishes grow fast.
You can harvest them many times. They give ongoing fresh veggies.
Do I Need to Prepare Garden Soil Every Year?
Yes, refreshing your soil yearly boosts plant health and yield. Adding compost or organic matter each spring supplies nutrients and improves soil texture for your vegetables.
Can I Plant Vegetables in Pots If I Lack Ground Space?
Yes, many vegetables grow well in containers on balconies or patios. Choose deep pots and use quality potting soil to support root growth and moisture retention.
How Do I Protect My Vegetable Garden from Deer and Rabbits?
Use physical barriers like fencing or netting to block animals. You can also try natural repellents or plant less attractive species around the garden perimeter.
Should I Start Seeds Indoors Before Planting Outside?
Starting seeds indoors 6 to 8 weeks before the last frost gives seedlings a head start. This helps you transplant stronger plants once the weather warms up.
Is It Okay to Mix Different Vegetables in One Raised Bed?
Yes, companion planting can improve pest control and growth. Just space plants properly to avoid overcrowding and competition for nutrients and water.
Key Points to Remember
Starting a vegetable garden takes patience, but the rewards are worth it. Get your hands dirty and plant your first seeds this weekend. Watch your garden grow and enjoy fresh veggies right at home.