Do It Yourself Outdoor Fountains: 12 Essential Steps for Stunning DIY Water Features
Do it yourself outdoor fountains add calming water sounds to your yard. You can build one using simple materials and a small pump for water flow. A DIY fountain brings charm and helps create a relaxing outdoor vibe fast.
Choose the right spot with easy access to electricity or sunlight for power. Pick a basin that holds enough water and a pump that fits its size. This keeps water flowing smoothly without wasting energy or water.
Making your own fountain means you control the design and cost to fit your garden. Heavy stones add stability but can be tough to handle. Plan your pump hole two inches deeper than the basin to prevent leaks and keep things neat.
Key Takeaways
- Choose a basin size that matches your pump power for steady water circulation.
- Dig the pump hole two inches deeper than the basin bottom to secure the setup.
- Use heavy stones cautiously; they add stability but can be hard to lift.
- Select a power source near your fountain location for easy setup.
- Seal all connections to prevent leaks and keep water where it belongs.
- Start with simple designs if this is your first fountain project.
1. What Is a DIY Outdoor Fountain and How Does It Work?
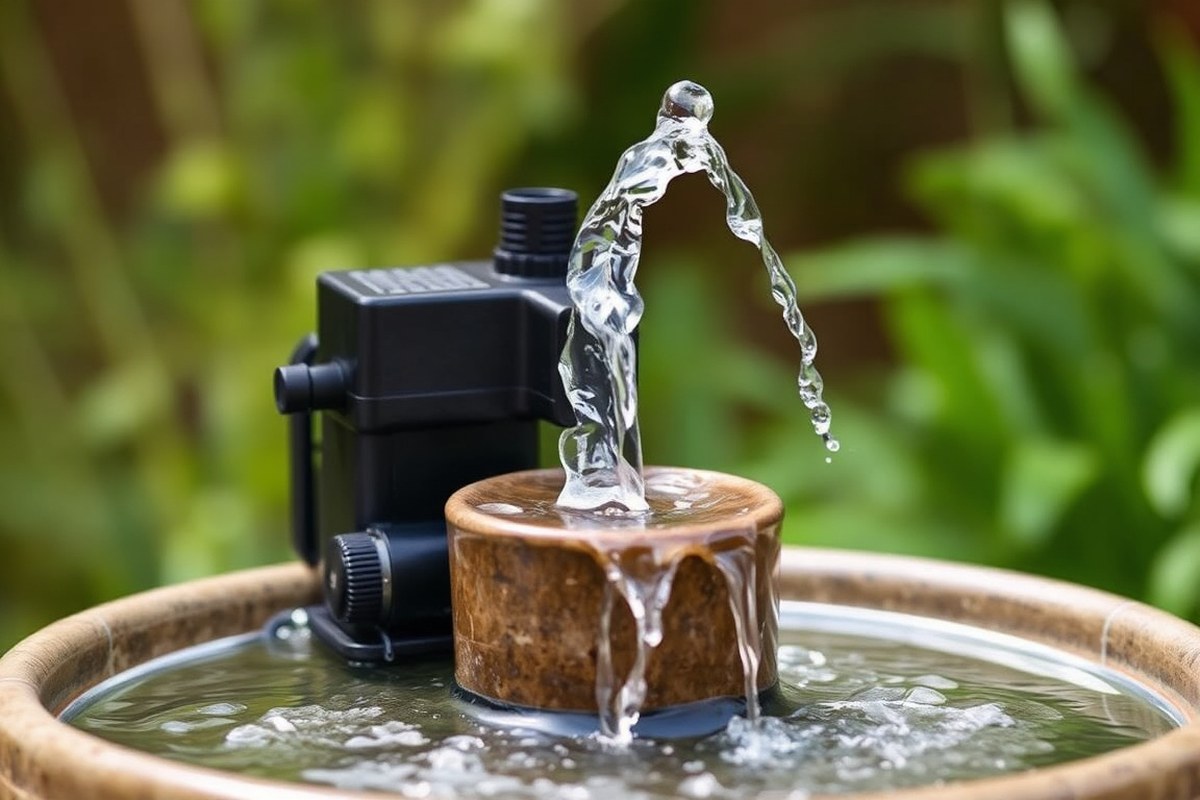
DIY outdoor fountains are water features you build yourself for your garden or patio. They add soothing sounds and a calm look to outdoor spaces. You can build fountains in many sizes and styles.
Some fit on tables. Others stand large in your yard.
A fountain works by moving water in a loop. A pump pushes the water. This keeps it flowing.
Water starts in a basin or reservoir at the bottom. The pump sends it up through tubing.
The water spills out over a designed surface or through decorative elements. Gravity then pulls the water back into the basin, repeating the cycle.
Every basic DIY fountain has a few main parts. You need a waterproof basin to hold the water. A submersible pump keeps it moving.
Tubing guides the water’s path. Stones, bowls, pots, or small statues shape the water flow.
These parts add decoration. They control how water falls.
When you pick a basin, it should be watertight and strong enough for outdoor use. Plastic or concrete basins are popular because they last and hold enough water for smooth circulation. Pump size depends on water volume you want to move.
Small pumps moving 100 to 300 gallons per hour fit well. Most garden fountains use this size.
The water circulation process starts by filling the reservoir with water. Plug in the pump, which pushes water up the tube.
The water flows out and spills back down into the basin, creating a continuous loop. This steady flow is what makes fountains so relaxing to sit near.
Smaller fountains need less water and a lower-power pump, making them ideal for decks or balconies. Larger fountains with more water and taller flows require stronger pumps and bigger basins. Leaks or clogs in tubes stop water circulation.
This will break the fountain’s flow. Watch for them often.
A DIY fountain is a simple system with clear parts. Each part works together smoothly. The pump and tubing create movement, while the basin holds water safely.
Use the right parts and setup to build your fountain. It fits your garden’s size and style well. You get a peaceful water feature.
A good fountain runs quietly and steadily. It adds a soothing touch to your outdoor space. It can work all year.
2. Materials and Tools Needed for Building Outdoor Water Features

To build a DIY outdoor fountain, you need a few key materials and tools. Choosing durable parts ensures your fountain lasts and works smoothly.
The right basin, pump, tubing, and sealant form the base. Simple tools help you assemble everything.
Water Basins and Containers
You can use an old wheelbarrow, a stock tank, or a large pot as your basin. The basin must hold enough water to support continuous flow without emptying quickly. Durable materials like ceramic, metal, or tough plastic resist outdoor wear and weather.
Look for basins with no cracks or holes to prevent leaks. A shallow basin might require refilling more often.
You should clean and seal recycled materials well before use. Doing this helps avoid damage to the materials.
Types of Water Pumps and Tubing
A submersible water pump works best for circulating water smoothly in your fountain. Pick a pump with the right flow rate for your fountain. Around 100 to 400 gallons per hour usually works best.
This range suits small to medium water fountains. Solar-powered pumps cut electricity costs and are easier to maintain. But electric pumps offer steadier power.
Use flexible vinyl tubing for routing water from the pump to the fountain head. Tubing size should match your pump outlet, usually ½ inch or ¾ inch diameter works well. Durable tubing resists cracking under sun and weather changes.
Seal connections tightly with waterproof sealant or plumber’s tape to stop leaks. Check that tubing isn’t kinked or bent sharply, which can reduce water flow.
Basic Hand and Power Tools Needed
Keep some basic tools close by when building a fountain. A drill with bits makes holes easily. Pliers help with bending and gripping parts.
A utility knife cuts tubing neatly. These cover most tasks when building and installing your fountain parts. Having a screwdriver and waterproof gloves is useful too during assembly.
You may want a level to ensure your basin sits flat. Sealant brushes help spread waterproof glue neatly without mess. Solar pumps sometimes need small wrenches to secure fittings.
- Drill with assorted bits for making drainage and pump holes
- Pliers to bend or hold small parts
- Utility knife for cutting tubing accurately
- Screwdrivers for assembling fountain components
- Waterproof sealant and brushes
- Level to keep parts even
- Gloves to protect your hands
Test pump and tubing connections before sealing to avoid leaks that waste time.
3. Choosing the Right Pump and Basin for Your Fountain
Choosing the right pump depends mostly on the size of your fountain and the water basin. Pumps come in different flow rates, usually measured in gallons per hour (GPH).
For small fountains, a pump between 300 and 600 GPH works well. Larger fountains may need 1,000 to 3,000 GPH.
The basin must hold enough water to keep the pump submerged and prevent overheating. It should be waterproof and durable. Good choices are galvanized metal or thick plastic.
Ceramic pots with a waterproof sealant also work well. Avoid porous materials without sealant, because they will leak and dry out fast.
Here is a quick table for pumps and basins. It lists common materials and their pros. It helps you pick the best one.
| Material | Purpose | Pros | Cons |
|---|---|---|---|
| Electric Pump | Circulates water continuously | Strong, reliable flow; works anytime | Needs electrical outlet; higher cost |
| Solar Pump | Pump powered by sunlight | Eco-friendly; easy setup; low cost | Limited flow; stops without sun |
| Galvanized Metal Basin | Holds water | Durable; weather-resistant | Can rust if scratched; heavy |
| Ceramic Pot with Sealant | Holds water | Decorative; holds water well if sealed | Fragile; sealant may wear over time |
| Plastic Basin | Holds water | Lightweight; inexpensive; waterproof | Less durable in sun; looks plain |
Electric pumps are your best bet if your fountain is large or runs constantly. They circulate enough water for taller and wider displays. Most range from 300 to 3,000 GPH, with higher power costing $30 to $100.
Solar pumps need direct sun and usually spray water up to 27 inches. They start working in about three seconds under sunlight but stop when clouded or at night. These cost less, about $15 to $30.
They suit small fountains well. They also work where there is no power access.
Pick your basin size to fit the pump and fountain design. A basin at least 2 inches deeper than the pump keeps it safely underwater. Seal all joints and cracks with waterproof epoxy or silicone.
Check basins yearly for leaks and reseal if needed. This keeps water inside and prevents damage to your setup or garden area.
4. Simple DIY Fountain Designs for Beginners
Starting simple is the best way to build your first outdoor fountain. Small fountains won’t need big budgets or fancy skills. You can use common items and simple supplies.
These create water features that relax. They fit small yards or decks.
Repurposed Watering Can and Birdbath Fountains
A watering can makes a rustic, charming fountain base without extra work. Fill it with a small pump and some water. Add stones or moss for a natural feel.
These help your fountain look real. Birdbaths are also ready-made basins perfect for smaller fountains.
Place the pump inside the watering can or birdbath. Then connect it to a power source. This sets your fountain up.
Let water trickle out gently, either from the spout or a small hole you add. These fixtures save money and add personality.
Stacked Rocks and Container Fountains
Stacked rocks create natural-looking fountains that blend with garden landscapes. Use flat stones and a waterproof layer like cement to hold them in place. Then, install a submersible pump that recirculates the water.
Containers like small pots, mason jars, or even tires serve as affordable fountain bases. Mason jars are inexpensive and look appealing filled with pebbles and water. Garden pots lend themselves well to combining with plants for an outdoor fountain pot.
- Gather flat rocks or smooth pebbles for better stacking stability
- Use waterproof sealant or cement between rock layers
- Start with a small submersible pump rated for your basin
- Place the fountain in a spot that drains well
- Try stacking stones at different heights for visual interest
This style suits small spaces and gives you control over the size and shape. It’s a good way to reuse found or inexpensive natural materials.
Mini Solar-Powered Tabletop Fountains
Solar pumps work well in mini fountains. You can place them on decks, patios, or tables. They fit small garden spaces perfectly.
These need no electrical setup, making them simple and green. A small pot or jar, a solar pump, and some pebbles are enough to start.
Put the solar panel where the sun shines. Hide the pump inside the jar or pot. This keeps your setup neat and working.
Water bubbles up through stones or a small statue, then gently spills back. They usually cost under $30 for basic solar pump kits, keeping projects wallet-friendly.
Mini fountains add soothing sounds without cluttering space or requiring wiring. You can switch up the design easily for seasonal decoration or quick refreshes.
5. Step-By-Step Building Process for a Basic Outdoor Fountain
Start by picking a flat, stable spot for your fountain. Level the ground and prepare the basin to hold water without leaks. Positioning the pump correctly helps your fountain run smoothly and last longer.
Preparing the Basin and Pump Hole
Clear the area of debris and level the soil for a sturdy base. Set the waterproof basin first; it holds the water the fountain recycles. Dig a small hole beside or inside the basin to fit the pump snugly without tilting.
Place the basin on the leveled ground, then check its level with a carpenter’s bubble level. This prevents uneven water flow or tipping of the stacked pots. Make sure the basin’s rim is above ground to avoid water loss through soil absorption.
Connecting the Pump and Routing Tubing
Set the submersible pump inside the basin and attach flexible tubing to its outlet. The tubing moves water from the pump to the highest point of your fountain. Use piping sized to fit firmly on the pump outlet to avoid leaks or slipping.
Pass the tubing through the stacked pots or containers for your fountain. Hide the tubing inside or behind stones. This keeps it out of sight.
This makes the water source invisible and maintains a clean look. Keep enough tubing length to reach the pump and the top pot comfortably.
- Check pump instructions for recommended tubing size and connection details.
- Attach tubing to pump outlet tightly and secure with a zip tie if needed.
- Feed tubing up through the center of your stacked pots or jars.
- Position the top vessel so the tubing delivers water directly into it.
- Place decorative stones around tubing to hide it and add natural look.
- Ensure the tubing isn’t kinked or sharply bent to keep water flowing well.
- Test the pump in a bucket first to measure water flow and pump sound.
Keep a bucket of water handy to test the pump before final assembly.
Sealing and Testing the Fountain
Use silicone sealant around joins and holes to prevent leaks. Apply it carefully to the basin’s edges and any tubing connections that stick out. Wait 24 hours to let the sealant dry fully before adding water or running the pump.
Fill the basin with water and plug in the pump to watch the water flow. Adjust the tubing or container placement if water leaks or splashes outside the intended path. Tighten all connections and reseal spots that drip or show weak flow.
6. Creative and Unique DIY Fountain Design Ideas
Try using unusual materials like old tea pots, whiskey barrels, or recycled buckets. These give your fountain a distinct, rustic look and reduce costs. A tea pot fountain uses just a pot, basin, and tubing.
These parts recirculate water. Supplies cost about $20 to $40.
Incorporating plants adds life and contrasts the water’s movement. Place moisture-loving plants like ferns, hostas, or ivy near the fountain sides. Use small pots or create pockets in the fountain structure where plants can grow.
Lights, especially waterproof LEDs, highlight water flow at night. Wrap LED strips around bricks or inside see-through basins.
This makes a glowing effect. The LEDs have no heating risk.
- Tiered terra cotta pots for classic cascading water fountains
- Stacked bricks with LED lights inside for a rustic glow
- Iron tea pot spouting into a whiskey barrel basin
- Glass bottle fountains for colorful, recycled bottle art
- Small rock gardens with built-in water streams and lighting
- Birdbath fountains with shallow basins for watching wildlife
Themed fountains can suit various garden styles, such as modern minimalism or whimsical fairy gardens. For modern setups, use sleek metal basins with geometric shapes and cool white lights. Fairy garden fountains often have small bridges or tiny ceramic mushrooms.
They also use miniature houses with soft yellow lights. A good design blends well with your garden plants and furniture. It makes the fountain feel part of your outdoor space.
7. Solar-Powered Versus Electric Pumps: Choosing the Best Option
Solar-powered pumps save you money on electricity. They run on energy from a 20W high-power solar panel. So there’s no electric bill.
These pumps work best for small fountains that get direct sun. For example, a planter inside a galvanized tub fits well. A compact solar pump suits this setup perfectly.
Electric pumps offer steady power anytime and suit bigger fountains or shady spots. They usually require plugging into an outlet but can handle larger water volumes. Expect some ongoing electricity cost and a bit more maintenance, like checking cords and filters.
Maintenance differs by type. Solar pumps need you to keep panels clean and allow sun access daily. Electric pumps require seasonal checks and occasional filter cleaning.
Solar pumps are easier to install. Just place the pump in the sunniest spot. Then, fully submerge it in water before use.
| Feature | Solar Pump | Electric Pump |
|---|---|---|
| Power Source | 20W Solar Panel | Electric Outlet |
| Cost | Lower upfront; no running cost | Higher upfront; ongoing electricity |
| Maintenance | Clean panels; sun exposure needed | Check cords, filters; seasonal care |
| Suitability | Small to medium fountains in sun | Any size; works well in shade |
| Installation | Simple, place where sun shines | Needs electric outlet access |
Pick a solar pump if you want an eco-friendly fountain and your site gets enough sun. These pumps fit small, cozy fountains and can save power costs over time. Electric pumps work better for fountains needing stronger flow or located in shady yards.
For solar pumps, aim to place the panel in full sun for several hours. Wipe dirt off monthly to keep them efficient. Electric pumps need a nearby safe power outlet.
Unplug them before winter in cold climates. This prevents damage from freezing temperatures.
8. Maintaining and Troubleshooting Your DIY Outdoor Fountain
Clean your outdoor fountain at least once a month to keep it running well. Dirt and leaves can clog the pump and harm water flow. Wipe down surfaces and scoop out debris to avoid buildup.
Top off the water weekly during warm months or after heavy sun. Keep the pump underwater to prevent it from running dry and burning out. Check the water level often, especially if your fountain is small or in a hot spot.
Leaks usually show as water pooling under or around the fountain. Look for cracks in the basin or tubing.
Patch small cracks with waterproof sealant made for outdoor use. For bigger damage, replacing parts may be necessary.
- Remove leaves and debris weekly to protect the pump
- Flush out water and pump monthly to prevent clogs
- Refill water often so the pump stays submerged
- Check tubing and basin for cracks or holes
- Use waterproof sealant to fix small leaks
- Inspect electrical connections for safety and dryness
- Turn off and cover the fountain during heavy storms
When the pump stops working, unplug it first and then clean it. Remove debris from the impeller and tubing. Cleaning not working?
Try testing the pump with a different outlet. Solar pumps may stop if they’re shaded too much. Make sure your pump matches the fountain size to avoid overwork or failure.
Never run your pump without water; it can overheat and permanently damage the motor.
Maintaining your water fountain regularly keeps it quiet and fresh. The effort is low but pays off with longer pump life and beautiful water flow. A little care extends the fun and charm of your fountain season after season.
9. Safety Tips and Considerations for Outdoor Water Features
Electric pumps need to run on ground-fault circuit interrupters (GFCI) to prevent shocks. Use outdoor-rated extension cords and keep all wiring above ground. Keep cords, plugs, and outlets dry at all times.
Avoid placing electrical parts where water may splash. This helps prevent damage and hazards.
Slippery surfaces around fountains cause falls, especially when wet. Keep walkways clear and use slip-resistant materials like textured stone or rubber mats. Shallow basins reduce drowning hazards, but keep small children supervised near any water.
- Use waterproof electrical enclosures and weatherproof connectors
- Check cords and plugs regularly for damage or wear
- Place fountain away from busy paths or steps to prevent trips
- Install a drain to prevent standing water and reduce algae growth
- Choose BPA-free and rust-resistant materials like stainless steel or concrete
- Use smooth, rounded edges on all fountain parts to avoid cuts
Materials that resist corrosion and mold hold up best outdoors. Stainless steel, sealed concrete, and high-grade plastics avoid leaks and harmful chemicals. Stay clear of untreated metals, rough wood, or low-quality plastics that degrade or leach.
Regularly inspect your fountain for cracks or leaks that could cause water damage or electrical shorts. When wiring, follow label instructions exactly and shut power off before any work. Use licensed electricians if unsure about local electrical codes or complex installs.
10. Cost Factors and Budgeting Your DIY Outdoor Fountain Project
Typical costs for a DIY outdoor fountain vary. But expect to spend between $50 and $300. Pumps alone usually cost from $30 to $150 depending on size and power.
Materials like concrete, stone, or ceramic cost from $20 to over $100. The price depends on what you pick and how much you need.
Stretching your budget without cutting corners means planning ahead and picking the right materials. Repurposing items like old birdbaths, ceramic bowls, or bricks can save you a lot. Secondhand pumps and basins come from thrift stores or online resale sites.
They help cut costs. Quality stays good this way.
- Choose a mid-range pump with adjustable flow to balance cost and durability
- Use locally sourced stones or concrete mix for cheaper, sturdy materials
- Look for used outdoor basins or containers that fit your design
- Buy tubing and fittings in bulk or kits for better deals
- Repurpose household items like planters or old cookware as fountain parts
- Check clearance sales at garden centers for discounted supplies
- Set a clear budget fixing maximum spend on pump and materials separately
Match pump size to basin volume for good results. Too big makes the pump work too hard. Too small causes weak water flow.
Buying the cheapest pump often leads to breakdowns within months and added replacement costs. Spend a bit more on reliable pumps to save headaches. Choose weather-resistant materials for your fountain.
They must handle freezing winters or hot summers. Your local climate decides what fits best. Budget about 20% extra for unexpected needs or small upgrades.
Buying secondhand parts sometimes means dealing with missing pieces or less warranty coverage. Inspect used pumps carefully to avoid immediate repairs. Find a solid basin shape to start.
You can freshen it up with paint or sealant. Local garden clubs or forums often have members selling used fountain gear. So checking those can land you a deal close to home.
11. Winterizing and Protecting Your Outdoor Fountain in Cold Climates
Protecting your fountain against freezing temperatures prevents cracks and pump damage. When water freezes, it expands and can break your basin or pipes. Drain all water from the fountain to prevent ice damage.
Store delicate parts where they won’t freeze. Cover the fountain to protect it during winter months.
How you winterize depends on whether your fountain is portable or built-in. Built-in fountains may need extra steps like sealing joints or covering pumps without removing them. Portable fountains, usually easier, often require full disassembly and storage indoors.
Follow these steps to get your outdoor fountain ready for cold weather:
- Turn off the fountain pump before unplugging it from the outlet. Use an outdoor-rated extension cord if you need one. Make sure the power source is off before proceeding.
- Drain all water from the basin, pipes, and pump housing completely to avoid freezing inside.
- Take out the pump and clean it as the manual says. Let it dry completely before storing it indoors. Choose a dry place to keep the pump safe.
- Clean the fountain basin with a soft cloth and mild detergent. Remove all dirt and algae buildup carefully. Rinse well to avoid leftover soap residue.
- Use a waterproof and breathable cover made for garden fountains. Secure it firmly to stop the cover from blowing away. Check the cover fits snugly around the fountain.
- Put sealant on any visible cracks to stop water getting in. Cover porous stone surfaces to prevent freeze damage. Follow the product instructions for best results.
- Bring indoor any removable fountain parts like statues or tiles. Wrap each piece in bubble wrap or cloth for safety. This prevents chips and cracks during storage.
Using durable covers costs about $20, $40 depending on size. Sealants may run $10, $25 per tube. The investment protects your fountain and saves repair money later.
Never pour hot water into a frozen fountain basin. It can cause thermal shock and cracking.
12. Landscaping and Decorating Tips to improve Fountain Appeal
Plants soften the edges of a fountain and add color and texture. Pick plants that enjoy moist soil near your water feature. Ferns, hostas, or water-loving grasses work well.
These plants will thrive in damp conditions by the fountain. They create a natural, refreshing vibe around your fountain.
Stones and pebbles frame the fountain and create a natural feel. Use smooth river rocks or paver stones to keep it simple and durable. Paver stones last long and blend well with garden paths or patios.
Stones are heavy, so handle them with care. Think about how much weight your fountain base can hold. Avoid placing too many stones on weak surfaces.
- Place large flat stones around the fountain’s base for stability
- Scatter smaller smooth pebbles to fill gaps and catch water splashes
- Use natural-colored stones to match the garden’s overall palette
- Avoid sharp-edged stones that can be dangerous or damage the fountain
- Group stones in odd numbers for a more organic look
- Leave some soil exposed to help plants spread naturally
Lighting helps your fountain shine, especially in the evening. Solar-powered LED lights are easy to install and save energy.
Position them to highlight the water flow or to create shadows on nearby plants. Waterproof string lights or small spotlights work too, depending on your style and budget.
Arrange lighting about a foot from the fountain to prevent glare and highlight textures. Use warm white bulbs, roughly 2700, 3000K, for a cozy atmosphere. Test your lighting at night before fixing the setup to be sure you like the effect.
Step-by-Step Action Plan for Your DIY Outdoor Fountain
Building a fountain takes some planning and care. Follow these steps to see steady progress.
- Before you start: Gather all materials and tools to avoid delays. Check that your pump and basin fit your design.
- Day 1: Set up the basin in your chosen spot on level ground. Confirm it sits securely without tilting.
- Day 2: Install the pump according to the instructions. Test it by plugging it in to check water flow.
- Day 3: Attach tubing or connectors and build the fountain structure. Make sure it is stable and aligned.
- Day 4: Fill the basin with water and run the pump. Look for leaks or blockages and fix as needed.
- After 1 week: Observe fountain operation regularly. Adjust water flow or reposition elements if the water isn’t circulating well.
- After 2 weeks: Add surrounding rocks or plants for decoration. Confirm no damage or water loss after heavy wind or rain.
- Ongoing: Clean pump and basin monthly. Check electrical connections and winterize if cold weather is near.
Frequently Asked Questions
How Do I Protect My DIY Outdoor Fountain from Weather Damage?
Use a heavy-duty waterproof cover made from durable Oxford fabric. This protects against rain, snow, dust, and debris to keep your fountain safe and clean.
Can I Use Recycled Materials for Building an Outdoor Fountain?
Yes, recycled items like mason jars or old galvanized water jugs work well. They add charm and keep costs low while making your fountain unique.
What Is the Best Way to Hide Fountain Pump Wires Outdoors?
Conceal wires with landscaping stones, mulch, or garden plants. It keeps your setup neat and protects cables from sun or water damage.
How Often Should I Clean My Outdoor Fountain Pump?
Clean the pump every 1 to 3 months depending on debris buildup. Regular cleaning prevents clogs and keeps your fountain running smoothly.
Are Solar-Powered Pumps Strong Enough for Large Garden Fountains?
Solar pumps work well for small to medium fountains but may lack power for big setups. Consider electric pumps if you need a stronger water flow.
How Do I Stop Algae Growth in My Outdoor Fountain?
Use a cover to reduce sunlight exposure and clean the basin regularly. Adding a small amount of safe algaecide can also help control algae buildup.
Wrapping Up
Your DIY outdoor fountain will bring calm and beauty to your garden. Start by picking a pump and basin that match your space. Then, build and maintain with care to enjoy your water feature all year.