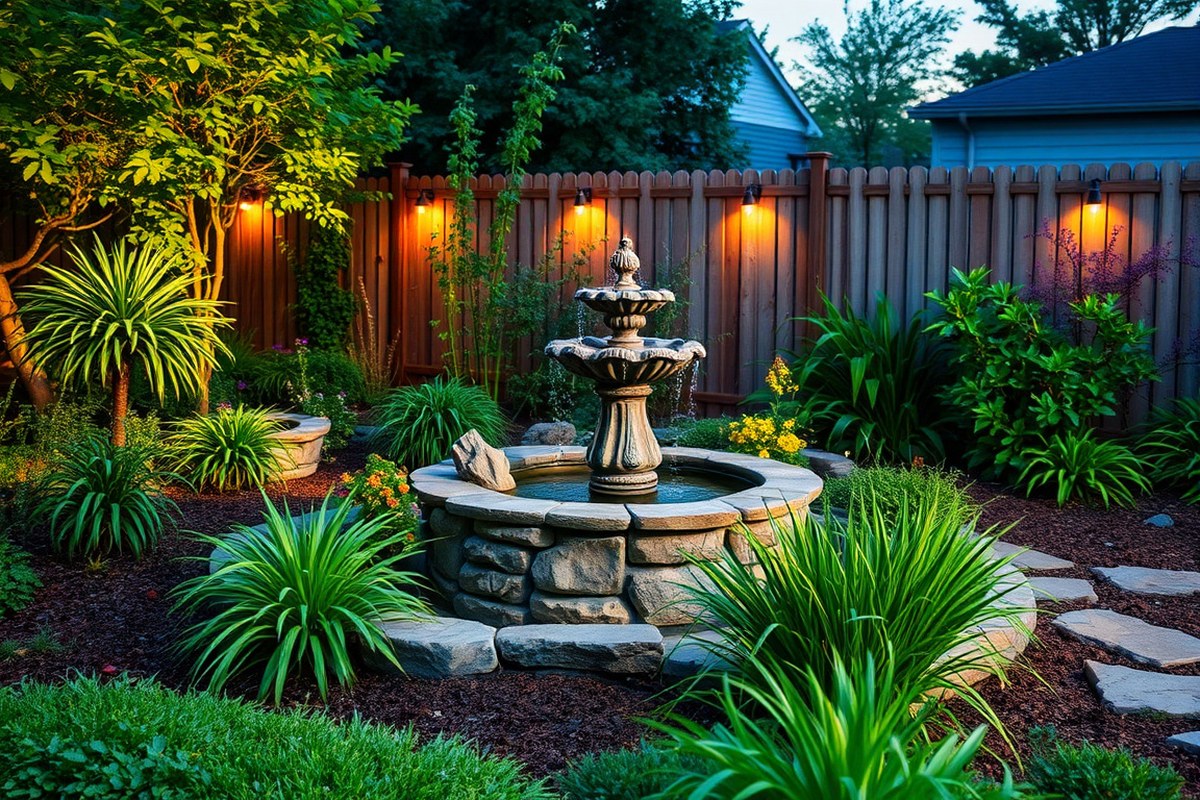
How to Create a Fountain: A Complete Guide with Materials, Steps, and Tips
How to create a fountain starts with gathering the right materials. Get a water pump, basin or container, and plumbing parts. The pump size matters for the water flow you want.
Choose an outdoor spot near an electrical outlet. Pump cords usually reach about 50 feet. Plan your fountain size to fit your space, from decks to gardens.
Dig a shallow hole about 2 inches deeper than the basin. This ensures proper basin placement. Seal all connections well to avoid leaks and let sealants cure 24 to 48 hours.
Clean your fountain every 2 to 4 weeks. This keeps water clear and extends pump life. These steps help you create an affordable, charming water feature quickly.
Key Takeaways
- Choose a pump that moves between 100 and 500 gallons per hour for good flow.
- Locate the fountain near an outdoor outlet to avoid using unsafe extension cords.
- Dig the pump hole 2 inches deeper than your basin for proper installation.
- Clean your fountain every 2 to 4 weeks to prevent algae and buildup.
- Allow sealant to dry fully before filling the fountain with water.
- DIY fountains usually cost between $30 and $300, saving up to 70% compared to store-bought.
What You Need to Build a Fountain: Materials and Tools

Constructing a fountain needs a few essential parts for water flow. A pump moves the water, while a reservoir stores it securely.
Tubing links the pump to the fountain’s outlet or decorative part. Various materials like stone, concrete, or garden pots make up the fountain body.
Choosing the right pump matters because it controls water flow and pressure. Look for a pump that matches your fountain’s size. A small pump works for tiny fountains.
Larger projects need pumps with stronger flow rates. Waterproof sealants keep water from leaking.
So select one rated safe for outdoor and pond use. Applying sealant carefully around joints and edges helps your fountain last longer without drips or stains.
You can reuse materials for a fountain to save money and help the environment. Old pots, buckets, and even scrap wood or stone make excellent bases or decorative parts. Just make sure any recycled materials are sturdy and safe for water contact.
A metal tub, solar pump, and stones can create a charming fountain with minimal new parts. This approach keeps costs down and adds character to your fountain.
- Fountain pump sized for your fountain’s capacity and height
- Water reservoir or basin to store the water
- Flexible tubing to connect the pump and fountain outlet
- A choice of structure materials like concrete, stone, pots, or recycled items
- Waterproof sealant rated for outdoor use
- Basic tools: a drill, screwdriver, measuring tape, and utility knife
- Optional: waterproof gloves and a small bucket for water handling
Most tools you need are common household ones, like a drill or screwdriver. Having a tape measure helps you fit parts correctly so everything lines up and looks neat. Sealant application requires steady hands; keep the surface clean and dry before you start.
Using recycled parts can cut costs but check for cracks or rust first. Quality parts and careful assembly ensure your fountain runs quietly and looks great.
How to Choose the Best Location for Your Fountain
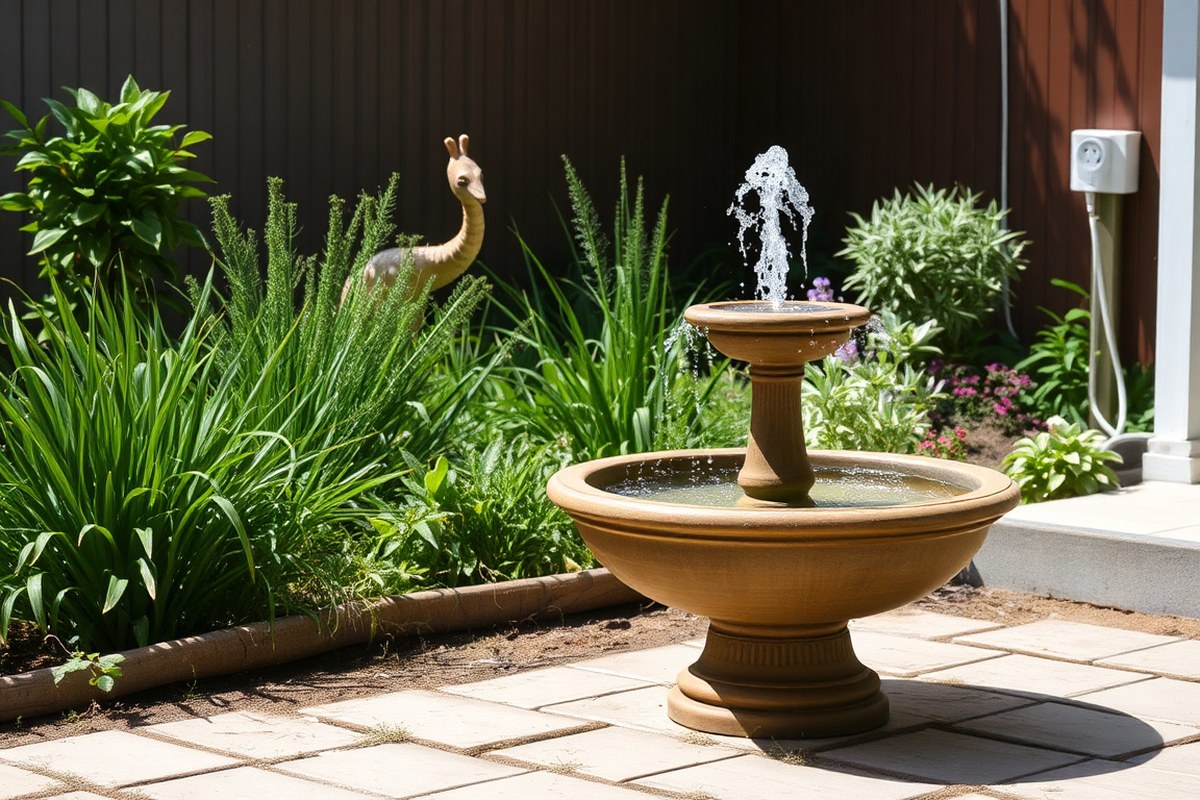
Find a Visible, Level Spot That Fits Your Garden
Pick a spot you’ll see often and enjoy from different angles. A fountain looks best where it stands out as a garden feature. The surface must be flat and able to hold the fountain’s weight without tipping or sinking.
In smaller gardens, center the fountain where paths or seating areas meet. For larger gardens, think about creating a focal point near walkways or patios.
This way, you improve your outdoor space’s flow and style. Your fountain remains easy to access and enjoy.
Place Near a GFCI-Protected Power Outlet
Your fountain’s pump needs power, so keep it close to a grounded outdoor outlet. Cord lengths usually max out around 50 feet.
Extension cords can cause electrical hazards. Use a GFCI outlet for safety, as it cuts power if water or ground faults appear.
Mark the fountain’s footprint before plumbing or wiring work. This ensures enough space for the pump cord and keeps it from stretching or tangling. Proper cord management will reduce wear and trips while making maintenance faster and safer.
Consider Sunlight and Weather Exposure
Sunlight affects both the look and upkeep of your fountain. Morning sun warms the water without overheating it, which can control algae growth better. Avoid direct hot afternoon sun to protect pump life and reduce water evaporation.
Look for spots sheltered from strong winds or heavy rain. Wind can blow water out and make the pump work harder. Too much rain can flood your basin and cause dirt and leaves to clog the system.
Plan for Maintenance and Cleaning Access
A fountain needs regular cleaning every 2 to 4 weeks to stay fresh. Choose a setting where you can get close easily with buckets and brushes. Don’t block the fountain with plants or hardscaping that blocks access.
Give yourself at least 2 feet of clearance around the fountain’s edges for cleaning and repairs. You’ll handle the pump or filters comfortably without disturbing the rest of the garden. Easy access prevents skipped maintenance that could damage your fountain.
Match Plant Placement to Improve Your Fountain
Surround your fountain with plants that complement its style without crowding it. Mix heights and colors for a calm, natural look. Use low-growing plants or stones near the fountain’s base to keep the area tidy.
Select foliage that sheds little debris and thrives in your climate. Avoid trees or bushes that drop lots of leaves into the water, making cleaning harder. Good plant choices improve your fountain’s tranquility and general appeal.
Only use a GFCI outlet for your outdoor fountain pump. This prevents electrical hazards and protects your pump.
Pump Selection and Water Flow: Matching Your Fountain Scale
Selecting the right pump and water flow makes your fountain work well and look good. You need a pump that matches your fountain size and how high the water will rise. The pump’s flow rate sets your water effect’s style.
It can create a gentle trickle. Or make a lively spray.
Types of Pumps for DIY Fountains
Most DIY fountains use submersible pumps. These sit in the basin and push water back up through the fountain. They are easy to hide and maintain.
Solar-powered pumps run without electricity by using sunlight. They’re small and perfect for low sprays but usually work best in direct sun. Electrical submersible pumps offer higher flow and can handle taller fountains.
| Pump Type | Flow Capacity (GPH) | Use case |
|---|---|---|
| Small Submersible Pump | 300, 700 | Mini fountains, small birdbaths, gentle water flow |
| Medium Submersible Pump | 700, 1500 | Medium garden fountains, moderate spray height |
| Large Submersible Pump | 1500, 3000 | Large outdoor fountains, high sprays, waterfalls |
| Solar Pump | Varies (10, 70 cm spray) | Small birdbaths, zero-electricity gardens, sunny spots |
Choosing the pump size depends on water volume. It also depends on how high you lift the water.
This height is called the pump’s “head.”” Submersible pumps are popular because they recirculate water quietly and efficiently.
Calculating Required Flow Rate
Start by measuring your fountain’s basin size and the height water needs to reach. Water flow is measured in gallons per hour (GPH). Larger fountains need pumps with higher GPH and enough power to lift water that high.
A medium garden fountain holds about 20 gallons. It lifts water about 2 feet high.
It needs a pump with around 800 GPH. This keeps a steady, attractive flow without overworking the pump.
The formula is simple: match your pump flow rate to your basin volume and height. Your fountain is taller or wider; increase flow rate.
Adjust pump strength to match your fountain size. Too much flow causes splashing and water loss; too little makes the fountain dull.
Advantages of Solar-Powered Pumps
Solar pumps don’t need wiring or electricity, making them safe and eco-friendly. They start working in direct sunlight within seconds and are ideal for small setups like birdbaths.
These pumps provide a gentle spray, usually between 4 and 27.5 inches tall. They save on power bills but stop working when it’s cloudy or at night.
Choose solar pumps if your fountain is small and placed in full sun. For taller fountains or constant flow needs, electrical pumps are more reliable.
Step-by-Step Process to Build Your Fountain
To build your fountain, start with preparing the site and installing a water basin. Next, put in the pump and connect the tubing to circulate water. Seal all surfaces well to stop leaks.
Test plumbing and water flow. Run the fountain to check for problems.
Preparing the Site and Basin
Clear the area of debris and level the ground where the fountain will sit. A flat, stable base helps keep the fountain steady throughout use. Lay down a gravel bed to aid drainage and prevent water pooling beneath the basin.
Place a waterproof basin or container to hold the water at the lowest point. The basin must be large enough to conceal the pump fully and hold sufficient water volume. This setup avoids pump running dry and extends the fountain’s life.
Installing Pump and Tubing System
Submerge the water pump inside the basin. Connect the pump outlet with flexible PVC tubing. Attach it to the water spout or top tier.
Make sure the tubing fits snugly. Ensure the tubing fits snugly to avoid leaks or disconnections.
Route the tubing neatly through any hollow spaces or grooves in your fountain structure. Keep tubing accessible in case you need repairs or adjustments. Use a waterproof outlet for the pump.
Or plug it into a GFCI-protected extension cord. This keeps the pump safe from water.
Sealing and Testing the Fountain
Apply waterproof sealant to all concrete or stone parts that touch water. Cover joints, seams, and inside surfaces thoroughly. Use a sealant made for outdoor water features to withstand weather and water exposure.
Allow the sealant to dry for 24 hours over 50°F. Then, fill the basin with water. Turn on the pump and run the fountain for a full day to find leaks and ensure smooth water flow.
- Clear and level your chosen fountain site.
- Lay gravel to improve drainage beneath the basin.
- Place a waterproof basin or bucket as the water reservoir.
- Position the submersible pump fully submerged inside the basin.
- Attach flexible PVC tubing to the pump outlet, securing it tightly.
- Route tubing to the fountain outlet or tiers, avoiding kinks.
- Seal all water-contact surfaces and joints with waterproof sealant.
- Allow sealant to fully cure for 24 hours before filling.
- Fill the basin with water, power the pump, and test the system.
Maintenance Essentials: Cleaning, Winterizing, and Troubleshooting
Cleaning your fountain regularly keeps it working well and looking nice. Remove leaves and debris weekly, especially in spring and fall. Check the water level daily during summer to prevent the pump from running dry.
Follow a simple maintenance timeline to stay on top of tasks. Monthly, clean the pump and check the filter for clogs.
Every few months, scrub algae from the basin. Also, clean mineral deposits to prevent pump harm.
- Weekly: Remove leaves and debris
- Daily (summer): Check and refill water levels
- Monthly: Clean pump and filter system
- Seasonally: Deep clean basin and remove mineral buildup
- Fall: Clear fallen leaves regularly
- Winter: Drain water and remove pump for storage
Winterizing is important in freezing climates. Drain all water to stop ice damage and unplug the pump. Remove and store the pump indoors in a dry place.
In areas with mild winters, cover the fountain. Check water levels often to keep it safe.
Leaks usually come from cracked basins or loose fittings. Check hoses and seals and tighten or replace them when needed.
When the pump stops working, check the intake and impeller for clogs. Cleaning these parts gently with a brush often solves the problem.
Never leave your fountain running during freezing weather without draining it first. Ice can crack it.
A little care prevents expensive repairs later. Spending 10 to 15 minutes weekly on cleaning pays off big over time. A replacement pump can cost $50 to $150.
The price depends on its size. Regular checks save you from surprise costs and keep your fountain a garden highlight.
Improving Your Fountain: Lighting, Plants, and Landscaping Ideas
Lighting can change your fountain’s look, especially after dark. LED underwater lights are popular and cost about $20 to $50 per unit. They use less electricity and come in colors you can switch using a remote.
Solar-powered lights are easy to install without wiring but depend on sunlight. So they work best in sunny spots.
Plants add life around your fountain and soften hard edges. Water-loving plants like ferns or hostas thrive near fountains in shady areas. For sunny spots, try flowering plants like lavender or daylilies.
Aquatic plants like water lilies can live in your fountain’s basin. The basin must be big enough.
It also needs enough sunlight. Avoid plants that shed a lot of leaves, as they can clog your pump.
Stones and landscaping elements help your fountain blend with your garden’s style. Flat stones or pavers create a neat, level base around the fountain. They cost $5 to $10 per square foot.
This makes the area look tidy. Rounded river rocks add a natural look and help hide water splashes. Mulch around plants helps keep weeds down and holds moisture.
Do not put mulch too close to the fountain. It might float into the water.
Mix different textures for the best effect. Smooth tiles around the fountain’s edge contrast nicely with rough stones or bark mulch. You can add a few decorative pieces like small sculptures or ceramic pots for personality.
Match the style to your fountain’s look. Modern fountains look good with concrete or slate stones.
This keeps the design consistent. Rustic fountains fit better with terracotta pots and natural rocks.
Plan your lighting to highlight water movement and nearby plants for a drama effect. Position lights at the fountain’s base aiming upwards to catch water sprays and shadows. Use low-voltage lights to keep things safe near water.
Also, try colored lights carefully. Try warm whites for a cozy feel or blues for a cool effect. Think about timers or sensors so lights come on only at dusk.
Choosing the right plants depends on your climate and how much sun the area gets. In hot climates, drought-tolerant plants like succulents can survive near your fountain. Cooler, damper climates support mosses and shade-loving orchids.
Test small groups first. So you see how plants and fountain water interact before planting a big area.
Budget and Time Investment: Planning Your Fountain Project
Costs for building a fountain vary a lot based on size, design, and parts. A small fountain can cost as little as $100. A larger, concrete project might approach $1,000 or more.
Pumps, filters, and decorative materials add up quickly. So plan your budget carefully before starting.
The time needed depends on the complexity. A simple fountain might take a weekend to build.
More complex projects can stretch to several weekends or even longer. Planning your timeline helps prevent rushing and mistakes during construction.
Using budget-friendly materials can save money and still look great. For example, use resin or plastic molds instead of concrete. These materials need less skill to work with.
Plus, they dry faster than concrete. You can reuse stones or bricks from your yard.
This saves money and adds a personal touch. It makes your fountain unique.
| Cost Factor | Typical Price Range | Impact on Budget & Time |
|---|---|---|
| Fountain Base Materials (Concrete, Stone, Resin) | $50 – $500 | Heavier materials cost more and need longer cure times |
| Pump System | $40 – $200 | Higher quality pumps extend lifespan but cost more upfront |
| Filters & Plumbing Parts | $20 – $100 | Essential for clean water; cheaper parts may clog more |
| Decorative Elements | $15 – $150 | Costs vary wildly by style and source |
| Labor and Time Investment | Varies | More complex designs need more hours or help |
A sample project timeline starts with gathering materials in day one. Excavation, base pouring, and pump installation take the next two to three days. Afterward, decorations and water feature testing can fill one to two more days.
Adjust timelines based on your experience and weather. Cold or wet conditions slow drying and extend build time. That’s why simple designs and materials often work best for first fountains.
Planning your budget and timeline lets you avoid surprises. Write down must-have parts and estimate costs before buying. Also, set aside extra funds and days for unexpected needs or small changes.
When to Hire a Professional vs. DIY Your Fountain
Simple fountains often work well with a ready-made pump and container. They are easy projects for most DIY enthusiasts. Projects that need precise concrete pouring, plumbing, or electrical wiring usually call for a pro.
Don’t try measuring and mixing concrete if you’re unsure. Avoid working with electricity unless you know how to stay safe. Get help when needed.
DIY saves money but can stretch longer and risk mistakes like leaks or uneven water flow. Professionals charge $300 to $1,500 or more, depending on size and design. But they ensure the foundation is level, wiring is safe, and the water flows right.
Hiring a pro pays off when fountains get big or complex. They handle tasks like rebar framing and water-tight plumbing. It keeps the job safe and lasting.
Test your skills by asking: can you level the base? Do you know how to use rebar before pouring concrete? Do you know local electric codes for outdoor water features?
Saying no means you should hire a pro. It helps avoid risks like water damage and short circuits. Pros also help with permits or inspection needs, which vary by state and city.
Decorative touches like rocks or greenery are easy to add yourself after setup. Getting the main structure and pump right matters most for function and safety. Expect a pro to spend about a day installing a basic concrete fountain.
DIY might take several weekends. That’s a trade-off between cost and time.
Check that your fountain base is level and solid first. This helps prevent spills and damage when you add water.
Step-by-Step Action Plan for Your Fountain Project
Follow these steps to build your fountain confidently and check your progress at each phase.
- Before you start: Gather all materials and tools listed earlier. Check boxes and count items to avoid missing parts.
- Day 1: Choose your fountain location and prepare the ground. Ensure the area is level and clear of debris.
- Day 2: Assemble the fountain basin and install the pump. Test the pump by filling the basin with water and switching it on.
- Day 3: Connect the plumbing and secure all pipes. Look for leaks by running water through the system.
- Day 4: Add decorative elements and secure them in place. Step back and confirm the fountain looks balanced and stable.
- Day 5: Install lighting or plants around the fountain to improve the design. Switch on lights or check plant placement for best effect.
- Week 2: Perform a full cleaning and fine-tune water flow. Adjust pump settings until water flows smoothly without splashing.
- After 1 month: Inspect the fountain for any wear or maintenance needs. Look for algae build-up, loose fittings, or decreased water flow.
Frequently Asked Questions
How Do I Create a Stable Base for My Fountain?
You build a sturdy base using concrete or bricks to support your fountain structure. A strong base prevents tipping and holds your fountain safely over time.
What Type of Waterproof Sealant Should I Use?
Use a waterproof silicone sealant to keep water from leaking out of the fountain. This sealant sticks well to stone and ceramic surfaces.
Can I Use Recycled Materials for My Fountain?
Yes, recycled pots or stones can make unique fountain parts and save money. Just check they don’t crack or leak when wet.
How Do I Hide the Fountain Pump and Tubing?
Hide the pump and tubing under decorative rocks or inside fountain stones for a clean look. Keep them accessible for maintenance.
What Lighting Works Best for an Outdoor Fountain?
LED lights are energy-efficient and durable for outdoor fountains. They come in many colors to match your garden style.
Is It Okay to Run the Fountain Pump 24/7?
Pumps can run continuously but check the manufacturer’s guidelines first. Running nonstop uses more electricity and might shorten pump life.
Wrapping Up
Your fountain will bring beauty and calm to your outdoor space. Start by setting up the pump and basin today. Keep exploring small improvements as you go to enjoy your project more.