How to Shorten Water Hose: Simple Steps for Fast, Leak-Free Results
How to shorten water hose without leaks or kinks can be simple. Cut the hose straight at the needed length and add proper fittings.
Doing this keeps water flow smooth and avoids wasting hose material. Proper tools and preparation make a big difference in the final result.
First, measure the actual length you need by laying the hose flat in place. Always turn off water and drain the hose fully before cutting. This prevents a mess and helps you make a clean cut.
Use a sharp utility knife or hose cutter. Cut the hose at a perfect 90-degree angle in one smooth motion. This step stops leaks and allows fittings to seal tightly after installation.
Next, choose the right fittings designed for your hose diameter. Push or clamp them firmly onto the cut ends. Test the hose for leaks by turning on the water slowly and checking the joints.
Key Takeaways
- Measure the hose length carefully before you start cutting it.
- Drain all water from the hose to avoid spills during work.
- Use a sharp blade and cut straight at a 90-degree angle.
- Choose fittings that match your hose size to stop leaks.
- Install hose clamps tightly without over-tightening to secure fittings.
- Test the hose by running water through and watch for leaks.
How to Shorten a Water Hose Accurately and Safely
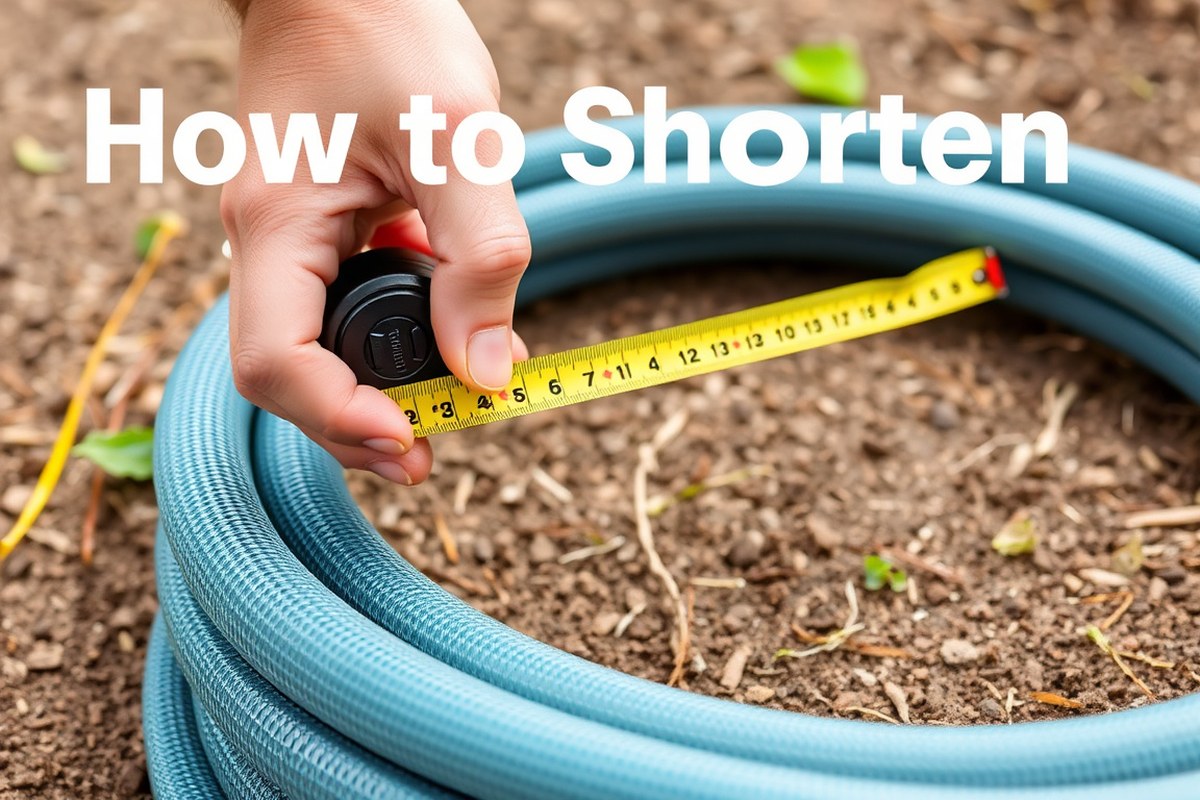
Shortening a water hose gives you a neat, functional length for your garden. Doing it carefully avoids leaks and keeps water pressure steady. Follow each step exactly to get a clean cut and a tight seal on the fittings.
- Lay the hose flat and measure the length you really need. Mark the spot clearly with a waterproof marker.
- Drain all the water from the hose. This stops a mess and lets you cut without bending or twisting.
- Use a sharp utility knife or hose cutter to cut straight along the mark. Work slowly and firmly to prevent rough, uneven edges.
- Clean the cut end by trimming any rough spots or loose material. This helps fittings seal tightly and stops leaks.
- Attach a new hose end fitting or hose mender to the freshly cut pipe. Slide it on fully and tighten all clamps securely.
- Reconnect the hose to the spigot or nozzle. Make sure all connections are tight but don’t overtighten and damage threads.
- Turn on the water slowly and check your work for leaks. Watch the cut end and fittings carefully during the first few minutes.
- Tighten any loose fittings if you find drips. Repeat the test until no leaks appear and water flows clear and steady.
These steps take about 15 to 30 minutes depending on your tools. You can shorten most garden hoses yourself with just a few common items. Doing the job right keeps your water flow strong without awkward hose tangles or lost pressure.
Choosing the Right Tools and Materials Before Cutting
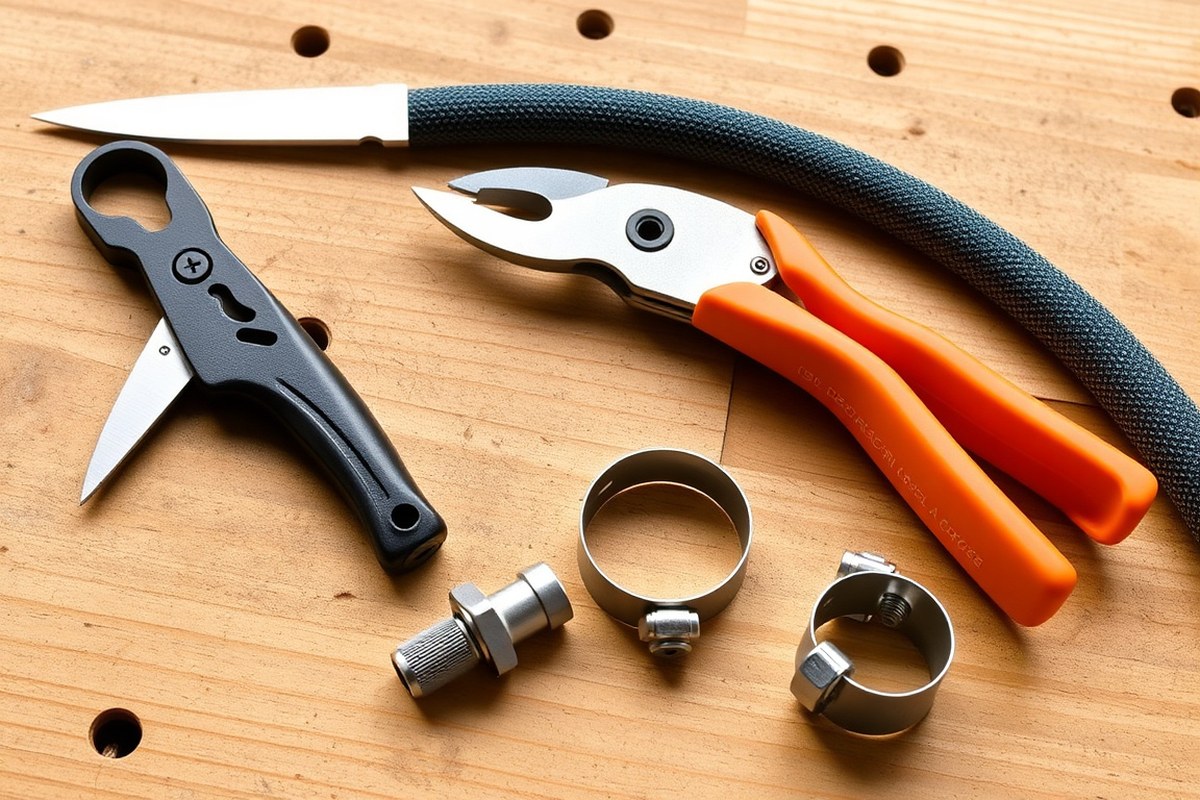
To shorten a garden hose, you need a few key tools and materials ready. These help you get a clean cut and avoid leaks afterward. You’ll also need safety gear to protect your hands and eyes while working.
Essential Cutting Tools
Use a sharp utility knife to cut garden hoses. Strong scissors also work well for this. Make sure the blade is sharp to get a clean cut.
Utility knives give a precise cut, especially if your hose walls are thick. Keep your blade fresh by changing it if it’s dull to avoid ragged edges.
Pliers or a crimping tool help when you’re attaching new fittings or clamps. These tools securely fasten the hose ends to prevent leaks. Avoid using dull or mismatched pliers that can damage the hose or fitting.
Hose Fittings and Connectors
Find hose fittings that fit your hose’s diameter first. The common sizes are 3/4 inch or 5/8 inch. Get those ready before you start cutting.
Check the inside diameter with a tape measure if unsure. Fresh hose clamps or compression fittings work best for securing cut ends.
Consider a garden hose repair kit with barbed connectors and clamps for easy installation. They usually cost between $5 and $15 at hardware stores. Thread-sealing tape can help ensure watertight connections on threaded fittings.
- Sharp utility knife or strong scissors
- Pliers or crimping tool for fittings
- Measuring tape to check hose diameter
- Replacement hose clamps or compression fittings
- Barbed hose repair kit for connectors
- Thread-sealing tape for threaded fittings
Do not reuse old clamps after cutting. They may not hold securely and cause leaks.
Safety Equipment
Wear heavy-duty gloves to protect your hands from sharp edges when cutting and handling fittings. Eye protection is also important if you use any tools that might cause flying debris. Clear goggles keep dirt and fragments away from your eyes.
Keep your workspace clear and well-lit to avoid accidents. Working outdoors in daylight helps you see where you cut and attach fittings cleanly. Also, ensure your utility knife has a safety lock when not in use.
Understanding Different Hose Types and How They Affect Shortening
Not all garden hoses shorten the same way. Rubber, polymer, and expandable hoses differ in flexibility, thickness, and fittings. These differences affect how you cut and attach new ends for a secure fix.
Rubber hoses are common and thick. They tolerate clamps and need strong barbed fittings that reach deep inside. Polymer hoses are lighter and less tough.
So fittings require gentle clamps or tape for sealing. Expandable hoses stretch when filled, making cutting tricky since they contract when empty.
| Hose Type | Material | Shortening Method | Fittings Needed | Special Notes |
|---|---|---|---|---|
| Rubber | Dense rubber | Cut with hacksaw or pipe cutter | Long barb fittings, metal clamps | Use washers on threaded ends, deep insertion needed |
| Polymer | Lightweight polymers | Snip with sharp scissors or pruners | Plastic clamps or strong tape | Clamp tightly to prevent leaks |
| Expandable | Elastic fabric and inner tube | Measure carefully, cut with scissors | Specific expandable hose fittings | Cutting too short reduces function; tricky to seal |
| Metal | Stainless steel or aluminum | Requires specialized pipe cutter | Metal to metal fittings | Highly durable, difficult to shorten |
Polymer and expandable hoses are easier to cut but need careful fitting. Rubber hoses take more effort but offer better durability. Expandable hoses risk leaks if cut too short or fitted poorly.
Matching the right fittings and clamps ensures no leaks after shortening. Tight clamps on polymer or rubber hoses keep joints water-tight. Expandable hoses often come with their own fitting kits to handle their stretch.
How to Measure the Hose Length for Precise Cutting
Use a measuring tape to find the exact length you want your hose to be. Lay the hose flat and pull it straight to avoid kinks or twists. Mark the spot for cutting with a marker or chalk.
Use it as your clear guide. Make sure the mark is visible.
Give yourself extra length for the fittings. Allow about 2 to 3 inches beyond your measured point. This space is needed for inserting hose fittings that connect to faucets or other hoses.
Walk along the hose length while it connects to the water supply. This method helps you measure the precise hose length you actually use. Mark your cutting spot carefully while the hose is pressurized to avoid guessing wrong.
For hoses that carry thick or flexible materials, double-check your measurement. Bend the hose slightly in typical use positions and measure again. This prevents cutting the hose too short after it naturally stretches or curves.
Avoid cutting too close to the fitting area to prevent leaks. Check that the fitting sizes match your planned extra hose length. Some fittings need more room, so check instructions if unsure.
Hold the hose steady on a flat surface when measuring and marking. This helps with accuracy and ensures the cutting line is straight. A crooked mark can lead to uneven cuts and poor hose performance.
Mark the cutting line clearly on both sides of the hose if possible. This way you can see the line from any angle and keep your cut straight. Use a bright marker or chalk that won’t fade while you work.
Techniques for Making a Clean, Straight Hose Cut
Cutting a garden hose cleanly and straight helps prevent leaks and makes fittings easier to attach. Secure the hose firmly before cutting to stop it from moving or rolling. After cutting, smooth the rough edges carefully.
This keeps debris out of the hose. It also helps create a tight seal.
Secure the Hose to Prevent Slipping
Holding the hose steady is key for a clean cut. Place it on a flat surface and straighten it out to remove any twists or kinks.
You can use a clamp or hold the hose firmly with one hand while cutting. Keeping the hose from shifting avoids crooked edges that cause leaks later.
Cut the Hose Squarely at the Mark
Mark the spot clearly on the hose with a permanent marker. Use two marks on opposite sides to ensure your cut stays straight all the way around.
Use a sharp utility knife or a hose cutter to slice through the hose. Hold the blade perpendicular at a perfect 90-degree angle to avoid angled cuts.
- Lay the hose flat and smooth near the cut mark.
- Make two marks across the hose for alignment.
- Hold the hose firmly to prevent movement.
- Position the blade straight up at 90 degrees.
- Cut in one steady, smooth motion.
- Check the cut edge for any uneven spots.
Be patient during cutting; rushing often leads to crooked cuts and leaks.
Deburr and Smooth the Edges
The cut end of the hose can have rough or fuzzy edges that weaken the seal. Use 220-grit sandpaper or an emery board to gently sand the edges.
Sand evenly around both sides of the hose until the cut edge matches the hose surface. This extra step stops debris buildup and helps the fitting slide on easily.
Selecting and Installing the Best Fittings for Your Hose
Choose hose fittings that match your hose diameter and type. Brass fittings last longer and seal better than plastic ones. Proper fittings prevent leaks and make your shortened hose work well.
Types of Hose Fittings Available
You can find two main fitting types: threaded and push-on. Threaded fittings screw onto the hose end securely. Push-on fittings slip over the hose, usually held by clamps.
Threaded fittings work best for a tight, durable connection. Push-on fittings are faster to install but may leak if clamps aren’t tight. Brass is common for threaded fittings, while plastic often comes with push-on types.
Choosing the Right Size for Your Hose
Check your hose diameter before buying any fittings. Standard garden hoses are usually 5/8 inch wide.
But some measure 1/2 or 3/4 inch. A wrong size fitting won’t seal properly and will leak.
Look at your old fittings if you still have them. They show the size and thread direction.
Male fittings have threads on the outside; female fittings have threads inside. Match the threads so both ends fit together well.
Step-by-Step Installation Process
Follow this guide to install new hose fittings properly on your shortened hose. Use clamps to keep fittings secure and prevent leaks.
- Cut your hose squarely with a sharp knife or hose cutter.
- Pick a fitting that matches your hose size and thread type.
- Push the hose end over the fitting’s barbed section firmly.
- Slide a metal hose clamp over the hose joint.
- Tighten the clamp with a screwdriver or pliers until it’s snug.
- Attach any additional fittings, such as sprayers or valves.
- Turn on water and check each connection for leaks.
- Tighten clamps or fittings more if you see any leaks.
Keep hose clamps evenly placed over the fitting collars to avoid water sprays. Brass fittings cost more upfront but last for years without cracking. Plastic fittings are cheaper but might crack in extreme temperatures or after rough use.
How to Test and Prevent Leaks After Shortening Your Hose
After you shorten the garden hose, attach the new fitting. Then, slowly turn on the water supply.
Watch closely for any leaks at the connection points. Leaks often appear as small drips or wet spots near the fitting or cut end.
Once water flows without drips, gently bend the hose near the new fitting. This movement tests if pressure causes leaks you might miss when the hose is straight.
See water escaping? Tighten the hose clamp more or reinsert the fitting.
- Check the fitting is fully pushed into the hose while it’s still soft.
- Tighten hose clamps with a screwdriver or pliers until snug, not overly tight.
- Cover cut end with electrical tape if you can’t install a fitting immediately.
- Run the water at full pressure for 2 minutes to simulate typical garden use.
- Inspect connections again after the test, especially if your hose is older.
Leaks still there after tightening? Take off the hose end and check for damage. Sometimes uneven cuts cause poor seals.
Trim the hose end clean and straight to get a better seal. Warm water softens the hose end. This helps push the fitting in tight.
Keep a bucket or towel nearby during testing to catch stray drips. This prevents slipping or water damage nearby.
After confirming there are no leaks, drain your hose completely. Proper draining prevents freezing damage in cold months and keeps your hose ready for next use.
Maintaining and Storing Your Shortened Hose for Longevity
After shortening your water hose, proper care helps it last longer. First, always turn off the water and disconnect the hose before storing it. This stops pressure from building and protects your fittings from damage.
Drain the hose completely by raising one end and letting the water flow out. Leaving water inside can cause leaks or cracks, especially in cold weather. Next, rinse the hose ends clean to remove dirt and debris that clog fittings over time.
Coil your hose loosely in large loops. Tight coils make kinks or weak spots that shorten its life. Store the hose off the ground to stop pests and wet damage.
Use a hose reel or rack made for garden hoses. This keeps it clean and ready for use.
Keep your shortened hose in a cool, shaded spot away from direct sun and freezing temperatures. Heat degrades the rubber, making it brittle. Cold can cause the water inside to freeze and expand, leading to cracks.
Regularly check your hose for leaks or cracks, especially near the shortened ends. Tighten fittings if they start leaking and replace washers if needed. Spot any damage?
Fix it quickly. That stops bigger problems later.
Drain your hose all the way during winter or long breaks. Store it inside, like a garage or shed. This keeps it from freezing and cracking.
Indoors, the hose avoids harsh weather that causes faster wear. Space tight?
Put the hose in a big plastic bag. Seal it well to keep out dirt and moisture.
Always drain your hose completely before storing it to avoid freezing damage and mold growth.
Step-by-Step Action Plan
Follow these steps to shorten your water hose safely and accurately. Each step helps you check your progress and avoid mistakes.
- Before you start: Gather your cutting tool, measuring tape, hose fittings, and clamps. Having everything ready saves time and prevents errors.
- Measure and mark: Use a tape to measure the desired hose length. Mark it clearly with a permanent marker or tape.
- Cut the hose: Mark the spot where you want to cut. Use a sharp utility knife or hose cutter to cut the hose straight at the mark. Ensure the cut edge is clean to prevent leaks.
- Attach hose fittings: Insert the right fittings into the cut ends. Push firmly and use clamps to secure fittings tightly.
- Test for leaks: Turn on the water and check the cut area. Fix any drips by tightening fittings or reseating them.
- Store properly: Coil your hose without kinks and keep it in a cool, dry place. This prevents cracking and extends hose life.
- Regular check: Inspect the hose monthly for splits or leaks. Early detection helps you repair it before damage spreads.
Frequently Asked Questions
Can I Shorten a Hose Without Cutting It?
You can coil or fold the hose to shorten it temporarily. This avoids messing with the fittings or risking leaks from cutting it wrong.
How Do I Prevent the Hose from Kinking After Shortening?
Choose a hose with kink-resistant features or add hose guides. Avoid sharp bends when laying it out after cutting.
What Tools Do I Need to Cut Through Reinforced Hoses?
Heavy-duty scissors or a hose cutter work best for reinforced hoses. Regular scissors may not make a clean cut.
How Much Length Should I Leave for Fittings When Measuring?
Allow an extra 2 to 3 inches for fittings and connectors. This ensures a snug fit without causing leaks.
Can I Shorten an Expandable Hose the Same Way as a Regular One?
No, expandable hoses require special steps and often can’t just be cut. Follow manufacturer instructions for those hoses.
Do Shortened Hoses Affect Water Pressure Noticeably?
Cutting too much off can reduce water pressure and watering efficiency. Keep length appropriate for your water source and plants.
Before You Go
Shortening your water hose with the right tools and steps prevents leaks and saves money. Take your time cutting and fitting for the best results. Your next task is to test the hose under pressure before use.