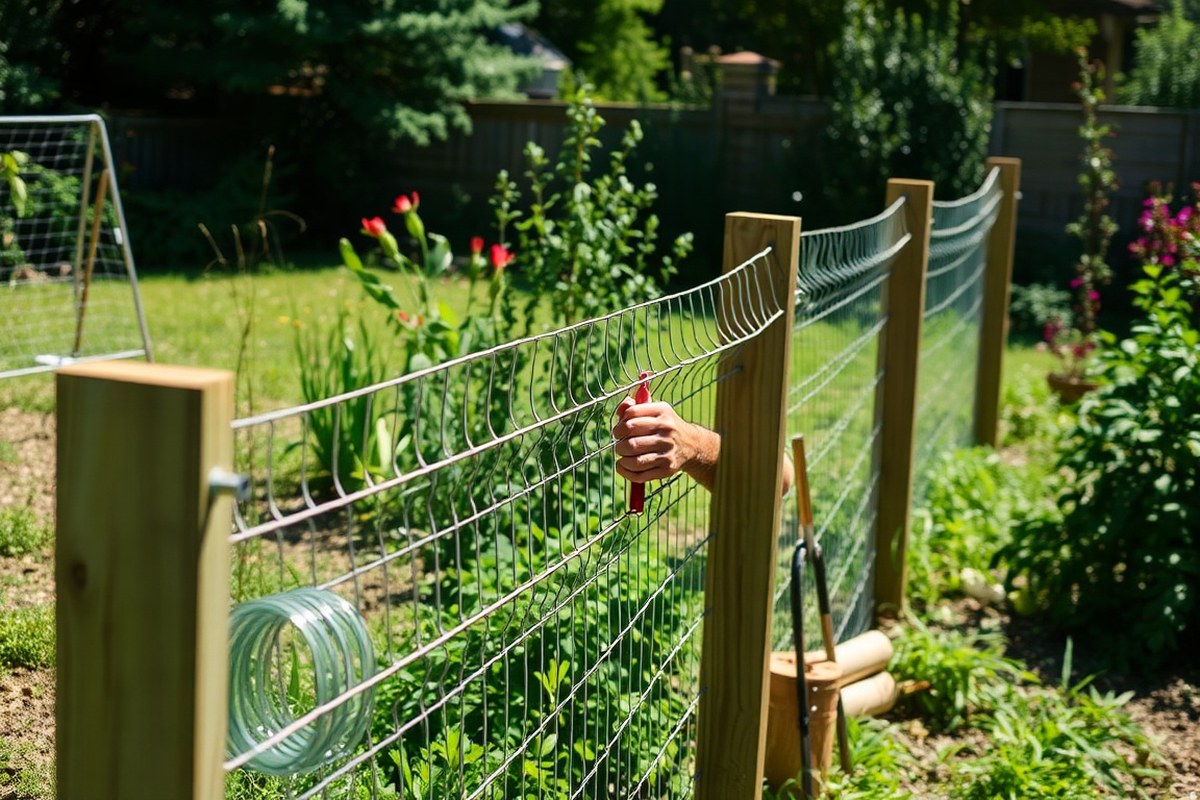
How to Install Chicken Wire Fence: A Complete DIY Guide with Expert Tips
Knowing how to install chicken wire fence starts with getting the right posts and wire. You’ll space posts about 6 to 8 feet apart to keep the fence strong and steady. Next, dig holes deep enough to hold the posts firm, usually around 2 feet.
Attach the chicken wire tightly, making sure it runs smoothly along the posts. Bury at least 6 inches of the wire underground to stop animals from digging in beneath. Using 1-inch mesh helps keep small critters out while letting sunlight through.
Plan your fence layout carefully before you start. Mark where the posts go so the wire stays straight and tight. This way, your fence lasts longer and does its job well.
Key Takeaways
- Space fence posts 6 to 8 feet apart for strong support.
- Dig post holes about 2 feet deep for stability, especially if the fence is tall.
- Attach chicken wire firmly and keep it tight between posts.
- Bury the bottom 6 to 10 inches of wire to block burrowing animals.
- Use 1-inch mesh wire to balance pest control and visibility.
- Plan and mark your fence layout before digging post holes.
Essential Tools and Materials for Chicken Wire Fencing

You’ll need a few key materials to build a chicken wire fence. Start with chicken wire, sometimes called poultry netting. Choose galvanized wire with 1-inch or smaller mesh size.
Pick a height between 36 and 48 inches. This size keeps your animals safe and predators out.
Next, select your fence posts. For most gardens, steel T-posts or wooden 4×4 posts work well. Space metal T-posts about 6 to 8 feet apart for steady support.
Corner posts need to be stronger and deeper. Set them 2 to 3 feet into the ground. This anchors the fence firmly.
Fasteners like galvanized staples suit wooden posts, while UV-resistant cable ties fit metal ones. You will need a posthole digger for wooden posts.
A manual hammer set also helps for setting posts. Wire cutters come in handy for cutting and trimming the chicken wire exactly to size.
Wear thick work gloves to avoid wire cuts or scrapes during handling. Eye protection is smart too because the tensioned wire can snap back unexpectedly. Long pants and sturdy shoes will protect you from thorny plants and dropped tools while working.
Hardware stores and online retailers usually sell these materials, and prices vary. Chicken wire costs about $20 to $50 per roll, depending on length and height.
T-posts generally run around $5 to $10 each. The entire setup for a small garden fence often costs between $100 and $300.
Hardware cloth can replace chicken wire for more protection. It works well where burrowing animals dig. Its smaller ¼-inch to ¾-inch mesh stops even rodents.
Hardware cloth costs more and is harder to stretch. But it adds strong protection at your fence base.
Using a manual staple puller helps with easier installation. A radisseur tool can also save you time. These help hold the wire tight and secure, reducing sagging later.
Without special tools, strong hands and patience will work fine. Take your time and keep a firm grip. But the fence might sag more over time.
Planning Your Fence Layout and Post Placement

Start by measuring the area where your chicken wire fence will go. Mark the perimeter clearly before you begin digging or placing posts. Plan post placement carefully to keep the fence strong and secure.
Measuring and Marking Fence Perimeter
Use a long measuring tape to trace the entire boundary of your fence area. Walk the perimeter, measuring each side and noting corners. Mark the ground with spray paint or flags where you want your fence posts.
Make sure the path is smooth and follows the area you want enclosed. Avoid sharp twists or tight curves to make the fence easier to build. Measure the total length and jot it down to estimate how much wire you’ll need.
Determining Post Spacing and Hole Depth
Space your fence posts 6 to 10 feet apart. This depends on wire strength and soil type. Use stronger wire or closer posts for soft soil.
Closer spacing adds strength but uses more materials. Line posts every 6 to 8 feet work well for most garden fences.
Dig post holes about 1½ to 2 feet deep or one-third the length of your post. This depth helps keep posts stable, especially in soft or loose soil. Digging below the local frost line helps protect posts from shifting in winter.
For the chicken wire, plan on burying the bottom edge about 1 foot underground. This buried trench discourages animals from digging under the fence. You can dig this trench between posts after setting them.
Adjusting for Terrain and Obstacles
Uneven ground can change how you space and place posts. Use shorter intervals on slopes or rough soil to keep the fence tight. Stakes might need leveling or shimming on hills.
Clear or work around obstacles like trees and rocks. You may need to bend the wire slightly or add extra posts at awkward points. Adjust your fence line to keep a uniform height where possible.
Mark and recheck your measurements before digging to avoid costly mistakes later.
Proper Installation of Fence Posts
Digging and setting posts correctly makes your chicken wire fence strong and stable. Post holes should be deep and wide enough to hold posts firmly. Choosing the right depth and spacing depends on your fence height and wire gauge.
Digging Holes for Wooden Posts
Dig holes at least one-third the post length deep for stability. For a 4-foot fence, that means holes about 18 inches deep. The hole should be 8 to 12 inches wide.
It needs to hold the post firmly. Add concrete if you want more support.
Use a post hole digger or an auger to make clean holes quickly. Keep the edges straight and remove loose dirt at the bottom. This helps the post sit flat and stand firm once set.
Installing Metal T-Posts
T-posts are easier to install with a post driver or mallet directly into the ground. You don’t usually need to dig a hole. Drive the post at least 18 inches deep.
This depth helps keep it steady. Wooden posts need about the same depth.
Mark a straight line before setting T-posts to keep your fence even. Space the posts every 6 to 10 feet depending on wire gauge.
Closer posts are better for lighter, thinner wire. Use galvanized wire ties to attach chicken wire securely.
Setting and Securing Posts Properly
Set wooden posts in soil or concrete for corners and high-tension areas. Concrete adds strength and prevents shifting.
But let it cure 24 to 48 hours before attaching wire. Fill around the post with tamped soil if not using concrete.
Keep posts vertical by checking with a level while setting. Brace loose posts with stakes until the concrete or soil fully supports them. This keeps your fence straight and prevents sagging or leaning over time.
Space posts 6 to 10 feet apart for most chicken wire gauges. Closer spacing works best for lighter mesh, which doesn’t hold tension as well. Wider spacing suits heavier mesh but requires sturdier posts and careful attachment.
Attaching and Tensioning the Chicken Wire Fence
Start by unrolling the chicken wire slowly along the fence line. Position the wire next to the posts and keep it as straight as possible. Pull it tight as you go to avoid sagging or bulges later.
Unrolling and Aligning the Wire
First, roll out the chicken wire beside the fence posts on the ground. Make sure the wire extends slightly past the end posts for secure fastening. Avoid letting the wire coil back on itself, which creates kinks and twists.
Keep the wire flat and straight by holding it against the posts as you unroll. Ask a helper to hold the roll while you guide the wire. This step reduces the chance of bulges and keeps the fence line neat.
Stapling and Tying to Posts
Use galvanized fencing staples or zip ties to attach the wire to wooden posts. Space fasteners every 12 to 18 inches for consistent tension and to prevent sagging. Avoid driving staples too hard, which can damage the wire and posts.
Staple the wire while pulling it taut using pliers or by hand. Start at one end and work toward the other, securing the wire firmly at each post. Reinforce corners by adding extra staples or zip ties to keep the wire from loosening.
Zip ties work well for temporary fixes or on metal posts. Colorful zip ties can also add a clean look. Tighten any loose fasteners during your final inspection to keep the fence durable.
Using Tension Lines for Extra Support
Install horizontal tension wires on longer fences or between corner posts. These cables or wires run parallel to the ground, helping the chicken wire stay taut. Attach the tension lines about midway or at two-thirds fence height.
Use a come-along tool or strong pliers to stretch the wire. Pull the tension wire tight before fixing it in place. Secure it using wire clips or staples.
Connect the chicken wire to these tension lines by twisting short pieces of wire around both. This method reduces sagging over time.
At fence corners, place wooden stakes on both sides for extra support. Tie the tension wire tightly between the stakes. Wrap the chicken wire around the wire and stakes.
Make sure there are no gaps. This keeps the fence stable during windy or harsh weather.
Preventing Burrowing and Digging Under the Fence
Dig a trench along the fence line about 4 to 6 inches deep and wide. Then tuck the bottom edge of the chicken wire vertically into the trench. Backfill the trench with soil.
This holds the wire firmly in place. It also blocks any gaps under the fence.
Another method is making an L-shaped barrier. It stops animals from digging under the fence. This blocks their entry well.
Extend 6 to 10 inches of wire flat on the soil. Do this on the garden side. It helps keep animals out.
Pin this apron down every 2 to 3 feet with staples. Cover it with soil or mulch. This keeps it flat and secure.
This apron works best in dense soil where digging is hard. It also spreads the digging area outside the fence to discourage persistent animals.
You can use landscape staples alone if trench digging is difficult. But a trench creates a stronger, more durable barrier.
Add an L-shaped apron or bury more wire if animals dig under the fence. These steps help block their tunnels.
Check the fence line for loose wires and re-secure them with extra staples or backfill. Regularly inspect the fence base to catch new holes before animals get through.
Keep the wire’s bottom edge flush with the ground. This stops small animals from squeezing under. Secure it well to avoid gaps.
Installing Gates and Access Points in Chicken Wire Fences
Wood suits gate frames best because it’s strong and easy to cut. It also holds screws well. Use 2×2 or 2×4 lumber for a sturdy frame that won’t warp over time.
Cut the wood pieces to the right size first. Then screw them into a rectangle. Make sure to square the corners.
Attach chicken wire to the gate frame with staples or galvanized fencing staples to prevent rust. Pull the wire tight before stapling it down. Staple every 3 to 6 inches.
This helps the wire stay flat and avoid sagging. Use wire cutters to trim off extra wire neatly.
Fold sharp wire ends away from places people touch. This prevents injuries.
Heavy-duty hinges support the gate and help prevent sagging. Use strap hinges or T-hinges made of steel with rust-resistant coating. Firmly attach hinges to the gate frame and fence post.
Check that the gate swings freely without wobbling. Install a strong latch to keep the gate shut. Slide bolts or spring-loaded latches work well.
Add a diagonal brace inside the frame to keep the gate straight. Run it from the bottom hinge corner to the opposite top corner.
This brace stops sagging by distributing weight effectively. Check the gate periodically and tighten any loose screws or staples to maintain tension.
Decide on gate number and size by how often you use it. Also consider the size of equipment or animals going through. A typical garden gate is about 3 to 4 feet wide for easy entry and exit.
For larger animals or tools, consider wider gates around 5 feet. Avoid too many gates as each one requires extra work and materials to secure properly.
Common Installation Challenges and How to Fix Them
Chicken wire often sags because it lacks enough support between posts. To fix this, add intermediate support posts or use horizontal braces every 4 to 6 feet. This keeps the wire tight and prevents animals from pushing it down.
Posts can tilt or shift mainly because of soft or poorly compacted soil. Notice leaning posts? Dig near the base and add gravel or concrete.
This will help keep the posts stable. For loose posts, drive them deeper or replace with stronger wooden or metal posts.
Rust forms on chicken wire over time from moisture. It gets worse without galvanized coating. Salt and rain speed up rusting.
To slow this, choose galvanized wire upfront and keep it clear of soil contact. Spot rust?
Sand it lightly. Then paint with rust-resistant metal fence paint.
Loose staples or torn mesh are common where animals push or scratch. Fix loose staples by hammering them back gently or replacing them with weather-resistant staples. Cut away small tears in the mesh.
Overlap new wire by 4 to 6 inches. Staple the new wire tightly.
Animals getting through usually means holes or weak spots, especially near the ground. Check for gaps caused by burrowing or wire pushed up. Press the wire tight into the soil.
Bury extra wire 6 inches deep at the base. This stops digging under the fence. Use hardware cloth for extra strength if critters keep breaking through.
Prompt repairs save time and keep your fence working right. Repair costs usually stay under $20 for small fixes. This assumes you already have some tools and wire.
Buying new tools or more wire costs more. Fixing problems fast stops more damage.
Do repairs within a day or two. This keeps your garden and animals protected.
Time, Cost, and When to Hire a Professional
Installing a chicken wire fence usually takes between 4 and 8 hours. This depends on your fence length, terrain type, and how many people help you.
Flat, clear land with a short fence cuts the time. Steep slopes or thick brush slow you down and might need extra tools.
Material costs vary based on the wire type and post choice. Standard galvanized wire suits dry areas and costs about $0.50 to $1.50 per foot. Heavy-duty galvanized wire works for wet climates and adds $0.30 to $0.60 more per foot.
PVC-coated wire suits salty air places and costs 15% to 20% above heavy-duty. Fence posts typically cost $5 to $20 each depending on wood or metal. Tools you don’t have, like a post driver or wire cutters, cost $20 to $50.
This adds to your start-up costs. Be ready for this extra expense.
Terrain and fence size change cost and time. Rough ground needs more work. Setting posts takes longer there.
A longer fence uses more wire and posts, making the job pricier and slower. Small gardens might take one afternoon to finish. Larger enclosures could take a full weekend or two days with help.
You can DIY with basic tools and some skills. Plan for a full day to finish. This project needs a full day set aside.
Hire a pro if your land is very rocky. Also if you have lots of acres or need permits. Some places require inspections and permits.
Check with city or county offices. Many areas want fences checked for safety or property-line accuracy before you finish. A pro helps with hard-to-build gates.
They also make fences safer from predators. This adds extra security for your animals.
Use this rule: fences under 100 feet on flat ground are good for DIY. Bigger or uneven fences may need pros. Keep your project simple to DIY.
Longer or uneven fences may need a pro’s help. Professionals charge $1.Expect to pay 50 cents to $4 per foot for materials and installation.
Prices vary by materials and local labor rates. Check your local costs first.
Double-check local rules before you start. Ignoring permits can lead to fines or fence removal.
Step-by-Step Action Plan to Install Your Chicken Wire Fence
Follow these clear steps to get your fence up quickly. You’ll see progress after each task is done right.
- Before you start: Gather all tools and materials listed. Check everything matches the planned fence size and type.
- Day 1: Mark your fence layout with stakes and string. Walk the line to make sure it fits your space perfectly.
- Day 2: Dig holes and set posts firmly in the ground. Test each post by pushing it to confirm it won’t wobble.
- Day 3: Attach the chicken wire to the first post. Pull tight and secure it with staples or clips along the post.
- Day 4: Stretch the wire between posts using a fence stretcher or come-along. Check for sagging and tighten as needed.
- Day 5: Bury wire apron or hardware cloth at the fence base. This prevents animals from digging underneath.
- Day 6: Install gate frames and hang gates. Open and close each gate to ensure it moves smoothly and locks securely.
- After 1 week: Inspect your whole fence line. Look for any loose areas or spots that need restapling or tightening.
Frequently Asked Questions
How Do You Brace Corner Posts for a Chicken Wire Fence?
You brace corner posts by adding diagonal supports or wooden braces. This helps the fence stay stable when it faces wind or pressure from animals.
What’s the Best Way to Keep Chicken Wire from Sagging over Time?
Tension the wire tightly when attaching it and use additional ties along posts. Check regularly and tighten lost tension to avoid sagging.
Can I Install a Chicken Wire Fence on Uneven or Sloped Ground?
Yes, but you’ll need to step the fence down the slope or contour it. This keeps the wire tight and prevents gaps near the ground.
How Deep Should I Set Posts for a Chicken Wire Fence?
Posts should be buried at least 18 to 24 inches deep. That depth keeps them stable enough to hold the wire without shifting.
How Can I Prevent Rust on My Chicken Wire Fence?
Use galvanized chicken wire to resist rust or spray it with rust-inhibiting paint. Make sure the fence dries after rain to slow corrosion.
What Type of Gate Hardware Works Best on Chicken Wire Fences?
Simple hinge kits and latch systems designed for light fences are best. Pick hardware that matches your post material for easy installation.
Before You Go
Building a chicken wire fence yourself gives your garden or animals good protection. Start by marking your fence line today. Small steps quickly lead to a sturdy and lasting fence.