How to Plant a Pear Tree from Seed: A Complete Guide with Proven Steps
Knowing how to plant a pear tree from seed gives you a fun challenge. You can grow a unique tree, but it takes patience.
Pear seeds can take 5 to 10 years to bear fruit. So start with a clear plan.
First, prepare your seeds correctly to boost germination chances. Only about half of pear seeds sprout.
So handle them well and don’t get discouraged. Using a cold stratification method helps wake up dormant seeds for better growth.
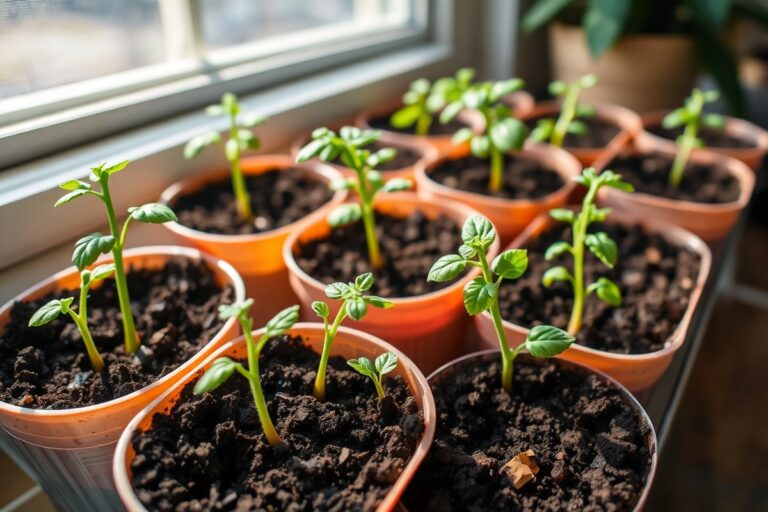
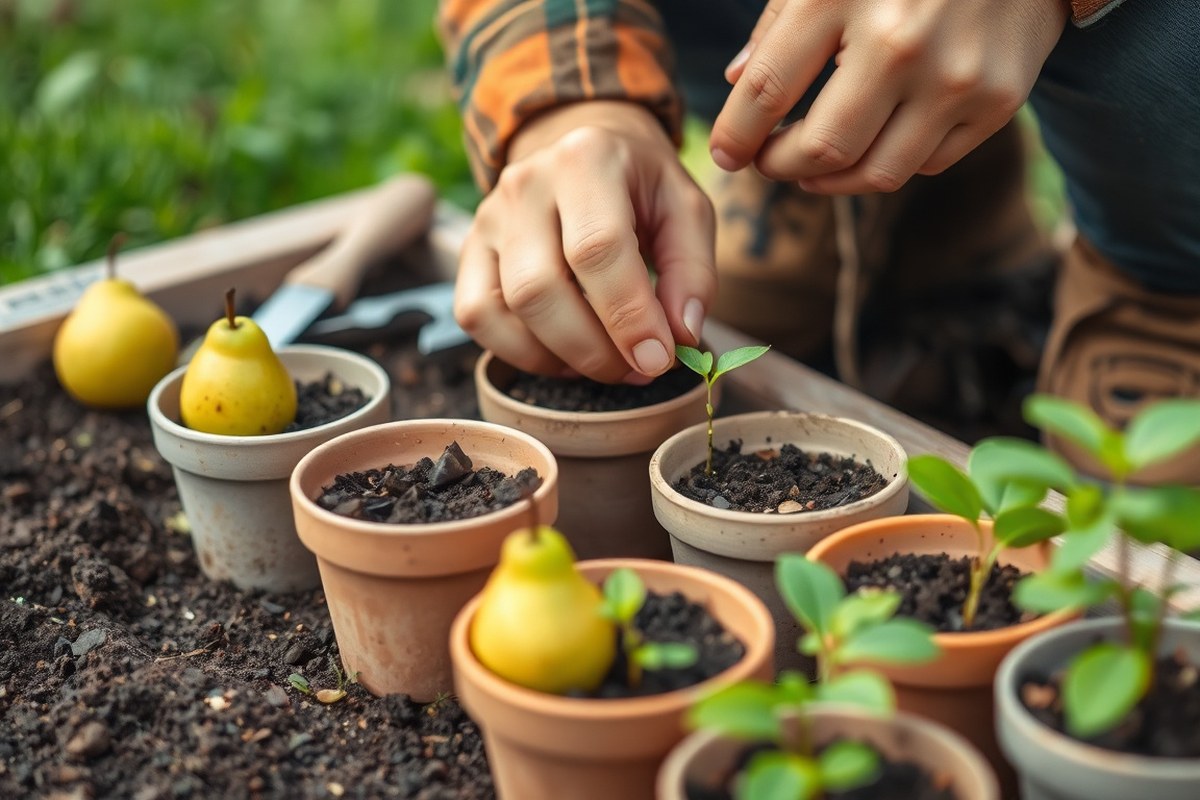
Choose a proper container and soil to help your seeds take root. Make sure the pot is big enough to support growth for a while. Keep seedlings spaced 2 to 3 inches apart until ready to go outside.
Key Takeaways
- Prepare pear seeds by cold stratifying them for 3 to 4 months.
- Use a pot between 18 and 24 inches wide for planting seeds.
- Space pear seeds 2 to 3 inches apart to avoid crowding.
- Keep soil temperature between 60 and 80 degrees Fahrenheit for germination.
- Transplant seedlings outdoors when they reach 6 to 12 inches tall.
- Expect 5 to 10 years before your seed-grown pear tree fruits.
Can You Successfully Grow a Pear Tree from Seed?

Growing a pear tree from seed is possible, though it demands patience. It typically takes 5 to 10 years for the tree to bear fruit. This period covers seed sprouting and tree growth until it blooms and produces fruit.
The fruit may not taste or look like the pear you got the seed from. Pear trees are heterozygous. So the seed’s genetics mix traits from the mother and pollinator trees.
This means the fruit’s quality and size can vary a lot. Sometimes the taste is different or less sweet.
Seed-grown pear trees often need a pollination partner to bear fruit. Like most pear trees, they rely on cross-pollination by another tree of a different variety. Without this, you might not get any fruit, even if the tree flowers every year.
| Feature | Seed-Grown Pear Tree | Grafted/Nursery Pear Tree |
|---|---|---|
| Genetic Consistency | Unpredictable – genetic mix | Identical to parent – clone |
| Fruit Quality | Variable, often smaller or tarter | Consistent, high quality |
| Growth Rate | Slower – 5 to 10 years to fruit | Faster – fruits in 2 to 4 years |
| Root System | Original strong rootstock | Grafted onto specific rootstock |
It takes around 7 to 10 years for a seed-grown pear to bloom and bear fruit. Nursery trees or grafted ones mature faster, usually fruiting in 2 to 4 years.
Growing from seed is a longer commitment, but it can be rewarding. Your tree might become a unique variety, which adds fun to the process.
How to Extract and Prepare Pear Seeds for Planting

To prepare pear seeds, first take them from ripe pears. Then, remove all the fruit pulp around each seed. Make sure the seeds are clean before you plant.
After cleaning, test the seeds by soaking them in water to pick viable ones. This process helps you plant healthy seeds that have a better chance of sprouting.
Extracting Seeds Safely and Carefully
Start by cutting the pear in half lengthwise to access the core and seeds. Use a sharp knife to make a clean cut without crushing the seeds inside. Use a spoon or your fingers to scoop out seed pods carefully.
Keep the seeds whole and undamaged. Handle them gently to avoid breaking any seed.
Take extra care not to nick or scratch the seeds during extraction. Scratches can cause the seeds to rot later. Collect at least four seeds to increase your chances of growing a tree.
Use a sharp knife and a gentle scoop to avoid damaging pear seeds.
Cleaning and Removing Sticky Coating
Rinse the seeds under cool running water using a fine-mesh sieve. Rub each seed very gently to remove the sticky, slippery coating called mucilage. This step helps prevent mold and improves germination chances.
After rinsing, soak the seeds in clean water for 24 hours. Soaking softens the seed coat and prepares them for the next stage. Drain and dry the seeds lightly before testing viability.
Viability Testing by Float Method
Put the clean seeds into a bowl filled with water. Seeds that sink are good and ready to grow. Throw away any that float, as they likely won’t sprout.
This quick water test is simple and effective for sorting good seeds from bad ones. Use only the sunken seeds for planting. The more viable seeds you gather, the better your chances of success.
- Cut the pear in half lengthwise with a sharp knife.
- Scoop out the seed pods carefully to avoid damage.
- Rinse seeds in a fine-mesh sieve under cool water.
- Rub seeds gently to remove the slippery mucilage coating.
- Soak seeds in clean water for 24 hours to soften them.
- Drain and lightly dry seeds before viability testing.
- Drop seeds in a bowl of water and select the sunk seeds.
- Set aside viable seeds for stratification and planting.
Why and How to Stratify Pear Seeds Before Planting
Stratification is a cold treatment that pear seeds need before sprouting. It tricks seeds into thinking they’ve gone through winter. Without stratification, pear seeds may not germinate well or at all.
Cold Stratification in the Refrigerator
Most gardeners use cold stratification in the fridge. Place pear seeds in a damp paper towel or moist potting mix inside a sealed bag. Store it at about 34 to 41°F for 3 to 4 months.
This method mimics winter’s cold and moist conditions. Check seeds occasionally to avoid mold or drying out. If you see mold, rinse and replace the mix immediately.
After this chilling period, seeds become ready to sprout once planted. It’s the easiest and most reliable way at home for good germination.
Alternative Stratification Techniques
Besides the fridge, some gardeners bury seeds outside in cold soil during winter. This works if you live where the ground freezes well. Plant seeds in a protected spot and mark it carefully.
You can also use a cold garage or unheated basement. Keep seeds in a moist medium like sand or peat moss. Just ensure it stays cold but not frozen, around 34 to 41°F.
These alternatives take more care and depend on your climate. The fridge method stays controlled and clean most of the time.
Timing Stratification for Your Climate
Start stratifying 3 to 4 months before the last expected frost. For example, if your last frost is early April, begin around early January. It aligns seed dormancy with spring planting.
This timing ensures pear seeds break dormancy just as outdoor conditions improve. You won’t risk sprouting seeds too early or too late in the season.
Cold stratification is especially important for gardeners in cold zones. It also helps ensure even sprouting and stronger seedlings once planted.
Planting Pear Seeds: Soil, Depth, and Container Choices
Use soil that drains well but stays moist for planting pear seeds. Mix organic compost into potting soil to improve nutrition and texture. Break up the soil area.
Make it twice the peat pot size. This helps the seedling grow better.
Plant pear seeds about half an inch deep into the soil. This shallow depth lets enough light reach the seed, helping it sprout. Don’t plant seeds deeper than one inch, or they may fail to emerge.
Keep seeds 2 to 3 inches apart in containers or seed trays. This spacing prevents crowding and allows roots room to grow.
Plant two or three seedlings together for better cross-pollination. Space them properly to avoid crowding.
Choose containers at least twice as big as the seedling’s root ball. Small pots or seed trays work well for early growth.
Use pots 18 to 24 inches wide for mature trees in containers. This size supports full root growth.
Fill pots with sterile potting mix when planting. Make shallow holes about a quarter-inch deep. Plant each seed in a hole.
Carefully cover seeds with soil without pressing too hard. This avoids compacting the soil, which can block root growth.
Monitor moisture levels to keep soil evenly damp but not soaked. Overwatering leads to root rot, while dry soil slows seedling growth. Aim for soil pH between 6.0 and 7.0 to support healthy pear roots.
How to Provide the Right Light and Temperature for Germination
Pear seeds germinate best when kept between 60 and 80 degrees Fahrenheit. This warm range helps the seed’s enzymes activate, kickstarting growth. Avoid temperatures below 60°F; the seed may stay dormant or grow slowly.
Seedlings require 6 to 8 hours of direct sunlight daily. Use grow lights when natural sunlight is unavailable. Keep the light 2 to 4 inches above seedlings for 12 to 16 hours each day.
Maintaining moisture without overwatering is key. The soil should be damp but drain well to avoid soggy roots. Spray water gently on the soil surface when it feels dry.
Avoid soaking the soil completely. Light watering keeps seedlings healthy.
Too much water leads to yellow leaves. Too little causes drooping and slow growth.
Humidity also affects seedling health. Place a clear plastic cover or humidity dome over seedlings.
But vent it daily to prevent mold. Keep temperature steady around 65 to 75 degrees Fahrenheit for best results.
At first, keep seedlings in indirect sunlight until they grow sturdier. Start with 2 to 3 hours of sun in a shaded area. Increase sun time gradually over 10 days.
This helps seedlings adjust without stress. This prevents shock from too much light too soon.
Good signs include firm green leaves and steady growth. Pale, stretched stems signal the plant needs more light. Provide brighter conditions to fix this.
Yellow or wilted leaves mean check moisture and temperature. Catch problems early to save your plants.
When and How to Transplant Pear Seedlings Outdoors
You can transplant pear seedlings outdoors when they reach 6 to 12 inches tall. Before planting outside, harden them off gradually over 1 to 2 weeks. Plant seedlings in full sun with well-draining soil and space them properly to help them thrive.
Checking Seedling Readiness for Transplant
Wait until your pear seedlings are at least 6 inches tall and have several true leaves. True leaves are those that come after the initial seed leaves. Seedlings closer to 12 inches tall handle transplanting better because they are stronger.
Make sure the risk of frost is gone before moving seedlings outdoors. Frost can kill young pear trees, so check your area’s average last frost date. A healthy seedling will have firm stems and vibrant green leaves.
Hardening Off over 1-2 Weeks
Hardening off means slowly introducing seedlings to outside conditions. This process lasts from 7 to 14 days and prevents shock. Start by placing seedlings outdoors in a shaded, protected spot for a few hours.
Increase outdoor time daily and expose seedlings to more sun and wind. Bring them back inside overnight until they’re fully adjusted.
When the weather nears freezing or heavy rain hits, protect them. Keep them safe until the weather returns to normal.
Planting Pear Trees in the Garden
Choose a sunny spot with at least 6 hours of direct sunlight daily. The soil must drain well to prevent root rot. Clear weeds and loosen the soil with a garden fork or pick before planting.
Space pear trees 15 to 20 feet apart to give their roots room to grow. Plant seedlings at the same soil depth as they were in their pots. Water thoroughly after planting to settle the soil around roots.
Follow these steps to plant your pear seedlings outdoors:
- Pick a sunny spot free of weeds with well-draining soil.
- Loosen soil 12 inches deep and clear away rocks or roots.
- Dig a hole twice as wide and a bit deeper than the seedling’s root ball.
- Remove the seedling gently from its container, keeping roots intact.
- Set the seedling in the hole at the original soil level.
- Backfill with soil, firm it gently around the roots.
- Water deeply to remove air pockets and hydrate roots.
- Mulch around the base with 2 to 3 inches of bark or straw.
Water the young tree one or two times a week if dry. Do this for the first few weeks after planting.
Watch for signs of stress like droopy leaves. Avoid letting the soil dry out or get waterlogged during this important time.
Long-Term Care: Watering, Fertilizing, and Pruning Young Pear Trees
Pear trees need steady watering through their first few years. Water them once or twice a week, giving about 1 to 2 inches each time. During hot and dry spells, increase watering to keep the soil moist but not soggy.
Fertilize your young pear tree starting in early spring, after the last frost. Use a balanced fertilizer like 10-10-10 or one formulated for fruit trees. Apply about half a cup around the base once a month.
Do this through the growing season but stop by late summer. Stopping prevents new growth that cold weather can harm.
Pruning should wait until the tree is at least 3 years old. At that point, prune in late winter or early spring while the tree is dormant. Cut back crossing or dead branches to shape the tree.
Remove weak shoots to improve airflow. This keeps your tree healthy and balanced. Avoid heavy pruning, which can stress the young tree.
Seasonal care improves your tree’s health and fruit production. In fall, clear away fallen leaves to prevent disease.
Mulch around the base to protect roots from winter cold and retain moisture in summer. Watch for pests and treat problems early with appropriate, safe methods for your area.
Make watering a regular habit, adjusting for weather and soil type. Stick to a simple fertilizing schedule starting after planting and ending before fall.
Follow basic pruning rules just once the tree is mature enough. These steps will help your pear tree grow strong and healthy over time.
Common Challenges and How to Troubleshoot Pear Seed Growing
Poor germination often happens when seeds don’t get enough warmth or moisture. Pear seeds sprout best between 60 and 70°F. Too cold or too dry soil can keep them from waking up.
Make sure you keep the soil moist but not soaked and maintain consistent warmth. Also, allow 3 months for germination, since pear seeds can be slow to start.
Seedlings face fungal diseases like damping-off, which kills young plants quickly. This happens from too much water or poor air flow. Avoid overwatering and use sterile soil when you plant seeds.
Give seedlings space so they don’t crowd each other. Water gently. Keep soil damp, not soggy.
Young pear trees attract pests such as aphids, coddling moths, and Japanese beetles. These eat leaves or bore into fruit and stems. Check leaves often for sticky spots or holes.
Watch for tiny green bugs or brown larvae. Wipe off aphids by hand.
Spray neem oil every 7 to 10 days to stop pests. Insecticidal soaps work well, too, and cost around $10 to $15 per bottle at garden stores.
Environmental stress shows up as wilting, sunburned leaves, or stunted growth. Hot sun and irregular watering cause this. Keep seedlings in a spot with morning sun but afternoon shade.
Water deeply and regularly, about 1 inch per week, to keep roots healthy. Using a layer of mulch around young trees helps keep soil cool and moist.
Water new seedlings gently and regularly; overwatering leads to root rot and fungus.
Step-by-Step Action Plan for Growing Pear Trees from Seed
Follow these simple steps to plant pear seeds and care for young trees. This plan will guide you through starting seeds to planting outdoors.
- Before planting: Extract seeds from ripe pears, rinse off pulp, and dry them. Healthy seeds look firm and clean.
- After extraction: Place seeds in a damp paper towel inside a plastic bag. Keep it in the fridge for 8 to 12 weeks to stratify.
- After stratification: Plant seeds about 1 inch deep in seed-starting soil in small pots. Keep soil moist but not soggy.
- Week 1 to 3: Put pots where they get bright, indirect light. Keep the temperature between 65°F and 70°F. This helps the seeds grow well. Look for seedlings sprouting.
- Week 4 to 8: Start moving seedlings outside for a few hours each day. Do this slowly to get them used to outdoor conditions. This hardens them off. Watch for healthy growth.
- 2 to 3 months after germination: Move seedlings outside once they grow 6 to 8 inches tall. Make sure they have real leaves before transplanting. This is the right time for transplanting. Choose a sunny spot with well-drained soil.
- Ongoing care: Water young trees often to keep the soil moist. Use a light fertilizer every 4 to 6 weeks. This helps them grow healthy. Prune dead or weak branches in late winter.
- Watch for issues: Monitor for pests or diseases. Treat any problems early with suitable natural controls or consult a local nursery.
Frequently Asked Questions
How Long Does It Take for a Pear Tree from Seed to Bear Fruit?
Growing a pear tree from seed usually takes 5 to 10 years to produce fruit. This slow process means you need patience and consistent care for several growing seasons.
Can You Grow a Pear Tree Indoors from Seed Before Planting Outside?
Yes, you can start pear seeds indoors to control conditions better. Keep seedlings under grow lights or by a bright window.
This helps them grow strong. Wait until they are ready to transplant.
What’s the Best Way to Harden Off Pear Seedlings Before Moving Them Outdoors?
Hardening off means slowly exposing seedlings to outdoor weather for 7 to 10 days. This prepares them for real outdoor conditions and reduces transplant shock.
Do You Need to Prune Pear Seedlings Right After Transplanting?
It’s best to wait until the tree is stable after transplanting before pruning. Gradually start training the tree shape a year or two after planting outside.
Can Pest Problems Arise During Pear Seedling Growth?
Yes, young pear seedlings can attract pests like aphids or caterpillars. Regularly check leaves and use safe pest controls early to prevent damage.
Is It Normal for Some Pear Seeds to Not Germinate?
Yes, not every seed will sprout because of seed quality or storage. Plant multiple seeds to improve your chances of successful growth.
Wrapping Up
Growing pear trees from seed can be a rewarding project with patience and care. Start by extracting and stratifying seeds properly today. Watch your young seedlings closely and enjoy helping them grow strong outdoors.