How to Plant Tomato Seeds in Containers: Complete Step-by-Step Guide
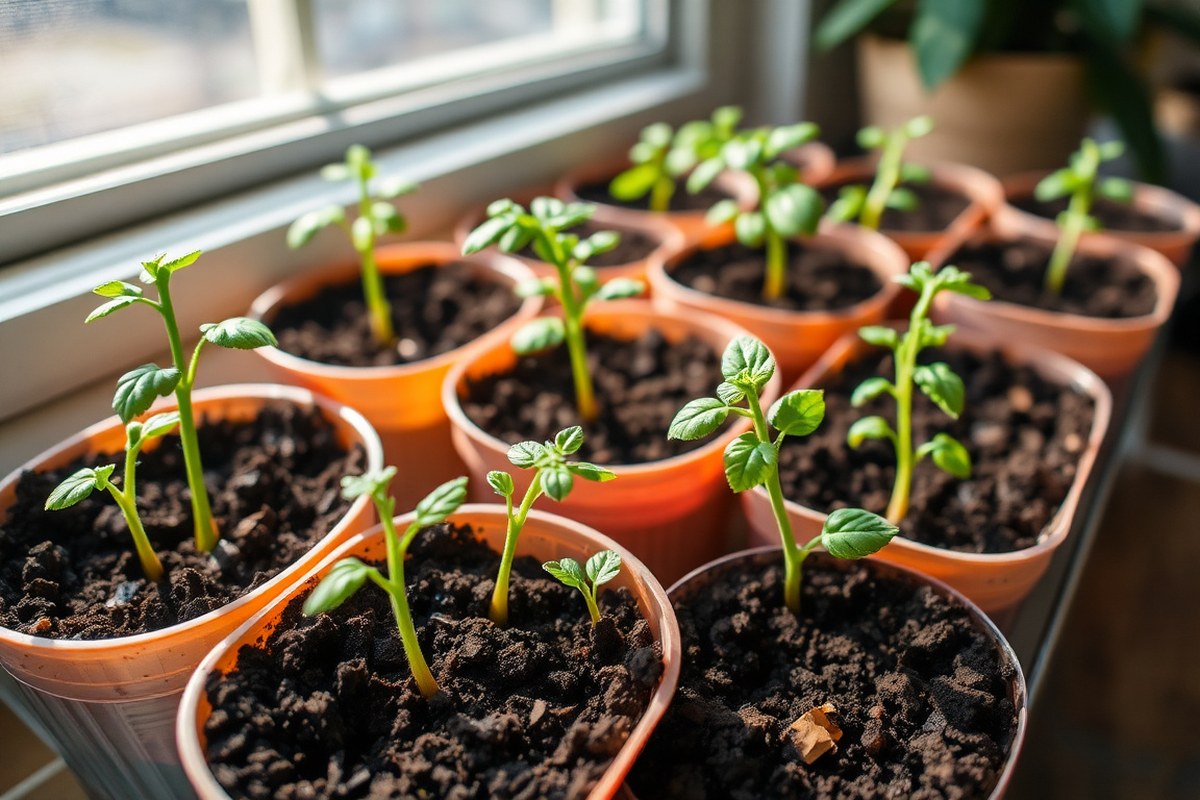
Knowing how to plant tomato seeds in containers is the first step to fresh, homegrown tomatoes. Start by choosing the right container and soil that drains well. Plant seeds one-quarter inch deep into the soil.
Keep soil warm. Water the soil regularly to stay moist for faster sprouting.
Place your containers in a warm spot between 70 and 75 degrees Fahrenheit. Using a heat mat under the containers speeds up germination. Covering them with a humidity dome keeps moisture in and helps seeds grow faster.
Use containers that hold at least 5 gallons for most tomatoes. This size lets roots grow well.
Keep the soil evenly moist but not soggy to avoid seed rot. You’ll want to provide plenty of sunlight once seedlings appear for strong growth.
Key Takeaways
- Choose 5 to 10-gallon containers depending on tomato size.
- Plant seeds ¼ inch deep in well-draining potting mix.
- Keep soil temperature around 70-75°F using a heat mat.
- Cover containers with a humidity dome to retain moisture.
- Water consistently to keep soil evenly moist without soaking.
- Provide at least 6 hours of direct sunlight daily for seedlings.
How to Plant Tomato Seeds in Containers Step-by-Step
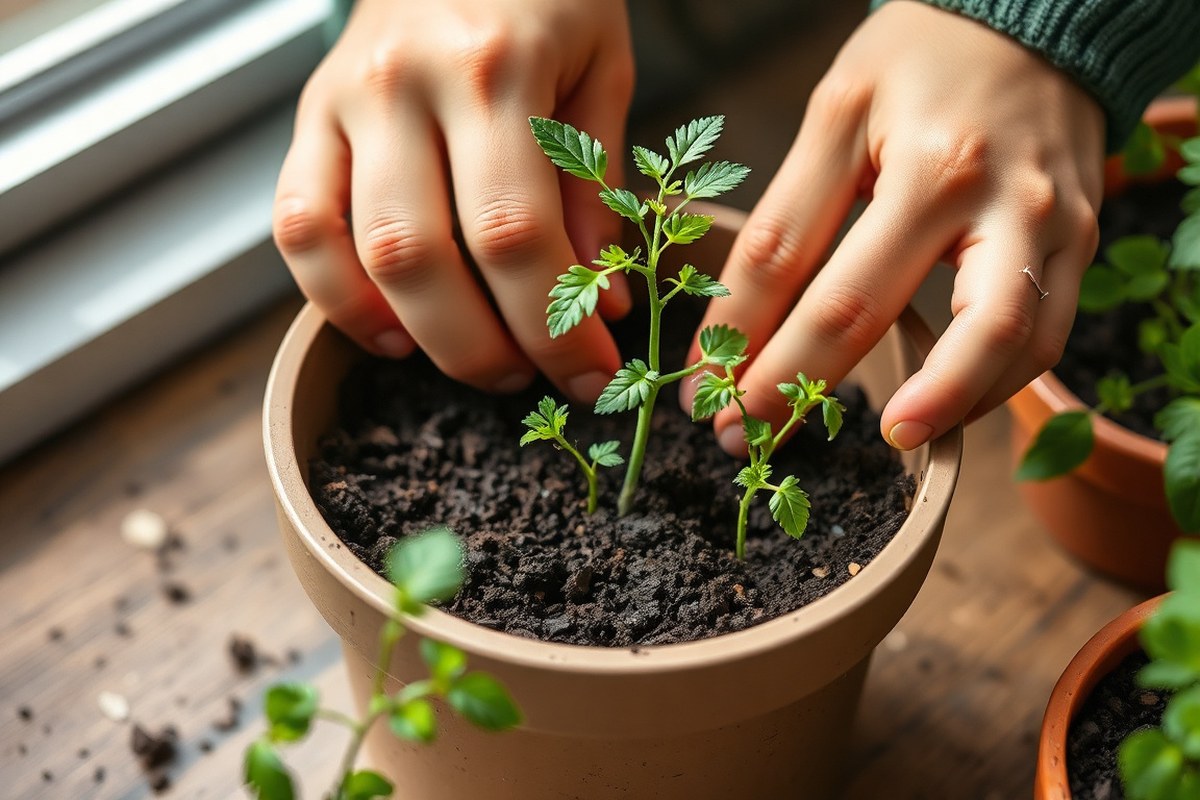
Planting tomato seeds in containers is easy when you follow a simple step-by-step method. Using a suitable container and fresh potting mix ensures healthy seedlings. Planting seeds about a half inch deep helps them sprout well.
Use containers that drain well to avoid water buildup. Fill them with a light potting mix made for seed starting, not garden soil. Water the soil gently after planting but avoid soaking it.
- Pick a container with drainage holes. Fill it with seed-starting potting mix. Leave about half an inch at the top.
- Make small holes about ½ inch deep in the soil. Space 3 or 4 holes evenly if planting multiple seeds.
- Drop one seed into each hole. Cover gently with soil without packing it tight.
- Lightly water using a spray bottle or a watering can with a fine rose nozzle.
- Place the container in an area with consistent warmth around 70-75°F. A heat mat helps speed germination.
- Keep soil moist but not soggy. Check daily and water gently when the surface feels dry.
- After seeds germinate, thin seedlings by snipping weaker ones at soil. Keep the strongest plant in place.
- When seedlings grow their first true leaves, give lots of bright light. This keeps them strong.
Planting seeds deeper supports strong root growth as tomatoes form roots along buried stems. Use about 3 to 5 gallons of soil for smaller tomato types. This lets roots grow well.
Bigger tomatoes may need 5 gallons or more. Avoid overwatering early on; the soil should be moist, not soggy.
Stirring the soil surface lightly after watering prevents crusting and helps air reach seeds. Watch out for splashing soil on any leaves to stop diseases. Gradually increase watering as seedlings grow and weather warms.
Which Containers Work Best for Tomato Seed Starting and Growing?

Choose containers with drainage holes and the right size for your tomato type. Plastic, fabric, and wooden containers suit tomatoes but differ in heat and moisture control. Container size affects root growth, while material influences temperature and durability.
Ideal Container Sizes for Different Tomato Varieties
Small seed-starting containers are fine for initial germination but don’t support mature plants. After seedlings grow their first true leaves, transplant them into larger pots for stronger roots. Indeterminate tomato plants need at least 10 gallons to grow well in containers.
Determinate varieties require about 5 gallons. Choose containers at least 12 inches deep for determinate tomatoes. For indeterminate types, use pots 18 inches or deeper.
This helps roots grow strong and healthy. Avoid 1- or 2-gallon pots for mature tomatoes.
The roots won’t get enough space in these small pots. Bigger containers support better fruit development.
| Tomato Variety | Minimum Container Volume | Recommended Pot Depth |
|---|---|---|
| Determinate | 5 gallons | 12 inches |
| Indeterminate | 10 gallons | 18 inches or more |
| Seed Starting | Small seed trays or 4-inch pots | 3 to 4 inches |
Picking the right container size helps tomato roots grow strong and keeps soil moist longer. Bigger pots reduce drying stress, which supports better yield. Small pots dry out fast and stunt growth as the plant gets bigger.
Pros and Cons of Common Container Materials
Plastic pots are lightweight, inexpensive, and hold moisture well. They heat up quickly in the sun but may overheat roots on hot days. Drill drainage holes if they aren’t already present.
Fabric grow bags offer excellent breathability and aeration. They keep roots cooler and prevent overwatering.
But they dry out faster and need more frequent watering. Fabric bags fold for easy storage and can be expensive but last longer with gentle use.
Wooden planters provide natural insulation and can look nice outside. They drain well but are heavy and may rot over time if untreated. Adding plastic liners inside wooden boxes slows water loss and protects the wood.
Drainage and Self-Watering Considerations
Drainage holes are essential to avoid waterlogged soil, which can kill tomato roots. Always check containers and drill holes if missing. This ensures excess water can escape and oxygen reaches the roots.
Self-watering containers regulate moisture and reduce watering frequency. They can prevent soil from drying out completely but cost more upfront. Check the reservoir often in self-watering pots.
Keep it filled and clean. This helps prevent root disease in your tomatoes.
Never plant tomato seeds or seedlings in containers without drainage holes to prevent root rot.
The Best Soil and Potting Mix for Tomato Seeds in Containers
Use a high-quality potting mix designed for containers to start tomato seeds. It should retain moisture without becoming soggy and offer good drainage to prevent root rot. Soilless mixes have peat moss, vermiculite, and perlite in them.
They hold water well and drain freely. This makes them great for container gardening.
Tomato seeds need a light, fluffy mix to sprout easily and develop healthy roots. Don’t use garden soil or heavy potting soil with clay. They hold too much water.
That can cause problems for your tomatoes. A compost-enriched mix provides nutrients but remember container soil loses nutrients fast from frequent watering.
Adding fertilizer before planting helps if your potting mix isn’t already enriched. Use a balanced vegetable fertilizer or aged compost. Mix it into the soil for seedlings.
This gives them food for the first weeks. Avoid too much fertilizer at once since seedlings can burn from strong doses.
Fill your container with potting mix. Moisten the mix so it feels lightly damp. This prepares the soil for planting seeds.
Plant seeds about 1/4 inch deep and cover gently with soil. Press the mix lightly to hold seeds in place.
Avoid compacting the soil too much. Tight soil can stop sprouts from breaking through.
Heavy containers with moist soil can weigh 50 to 80 pounds. This is for 20-gallon containers. Plan for this weight before moving them.
Choose a lightweight potting mix if you need to move containers often or have limited strength. Larger containers hold more moisture and nutrients.
This makes tomato care easier. Keep this in mind when choosing container size.
When and How Long to Start Tomato Seeds Indoors
Start tomato seeds indoors six weeks before the last frost date. This timing helps seedlings grow strong for container transplanting later. You can find your last frost date by asking local gardeners or your Master Gardener program.
Tomato seeds generally take five to ten days to germinate when kept at 70 to 80°F. Keep the soil moist but not soggy during this time. Move seedlings to a bright spot once they sprout.
Use grow lights if natural light is too weak. This keeps the seedlings healthy and growing well.
Transplant your tomato seedlings outdoors into containers one to two weeks after the last frost date. Nighttime temperatures should stay above 50°F for best growth. Waiting ensures the young plants won’t get damaged by cold weather or frost.
How to Provide Proper Light and Temperature for Tomato Seedlings
Tomato seedlings need 12 to 16 hours of light daily to grow healthy. Keep soil temperature close to 70, 75°F for germination. Using grow lights indoors helps provide steady light and warmth early on.
Recommended Light Duration and Intensity
Tomato seedlings need 12 to 14 hours of daily light for healthy growth. This keeps them short and strong by stopping them from stretching toward light.
Place your containers near a south-facing window to get natural sun for six hours or more. Use grow lights for 12 to 16 hours when natural light isn’t bright enough.
Ideal Temperatures for Germination and Growth
Keep soil temperature between 70 and 75°F for the best seed germination. Use a heat mat if your home is cooler than this range. Once seeds sprout, lower air temperature to about 65°F. Cooler air helps seedlings grow stockier and stronger, not stretched out.
Using Grow Lights Effectively Indoors
Use grow lights positioned 2 to 4 inches above seedlings to provide consistent light. Keep lights on for 14 to 16 hours each day.
Turn off heat mats and remove humidity domes once seeds sprout. Seedlings grow best with light and cooler air temperatures without too much humidity.
Adjust the light height every few days so it stays close as seedlings grow. This prevents them from leaning or getting weak. Follow these steps for light and temperature care:
- Place containers in a south-facing window if possible, for natural light.
- Set up grow lights about 3 inches above seeds before germination.
- Use a heat mat to keep soil temperature near 72°F until seeds sprout.
- Once seedlings appear, remove the heat mat and humidity dome.
- Adjust grow lights for 14, 16 hours a day, keeping them close to plants.
- Lower room temperature to about 65°F to encourage strong seedling growth.
- Move containers to follow sunlight or adjust lights as seedlings grow taller.
Avoid letting seedlings stretch by keeping lights close and on enough hours daily.
How and When to Thin and Transplant Tomato Seedlings
Thin tomato seedlings once they have 2 to 3 sets of true leaves. At this point, transplant them into bigger containers, planting deeper than in the starter pot. This helps the plants grow strong roots and healthy stems.
Signs Seedlings Are Ready for Thinning
Look for seedlings that have grown 2 to 3 sets of true leaves. True leaves are the second set after seed leaves. When they reach this stage, they need more space to grow.
Seedlings crowding each other can weaken growth and cause disease. Thinning means removing smaller or weaker plants so the strongest ones thrive. Crowded seedlings compete for light and nutrients, which slows their progress.
Step-by-Step Transplanting Process
Transplant seedlings when they show 2 to 3 true leaves and roots fill their container. Move them to pots holding at least 5 gallons for small tomato types. Larger varieties need 10 to 15 gallons pots for enough room.
Follow these steps to transplant:
- Prepare larger containers with fresh, loose potting mix.
- Water seedlings lightly to keep roots moist.
- Gently remove seedlings by loosening soil around roots.
- Choose the strongest seedlings to keep; discard weaker ones.
- Dig a hole deeper than the seedling’s current root zone.
- Place seedling at an angle or bury up to its first leaves.
- Fill the hole with soil and gently press to remove air pockets.
- Water thoroughly to settle the soil around roots.
Correct Planting Depth and Soil Firming
Plant seedlings deeper than before, covering stems up to their first set of leaves. Tomatoes can sprout roots along buried stems. This encourages a stronger root system.
Press soil gently around the seedling to remove air pockets. Avoid packing soil too hard, which can block water and root growth. After planting, water right away to keep soil moist and help roots settle.
Choosing Tomato Varieties Suited for Container Growing
Choosing the right tomato variety depends on your container size. It also depends on how much space you have. This helps your plants grow well in containers.
Determinate tomatoes work best in small pots. They grow to a set size.
They produce fruit all at once. Indeterminate varieties grow taller and keep producing fruit, needing bigger pots and more care.
Dwarf and cherry tomato varieties are great for small containers. They stay compact and deliver good fruit with less effort. “Tiny Tim” is a dwarf cherry tomato.
It grows about 12 inches tall. It fits containers under 12 inches wide.
Here’s a comparison table of some popular tomato varieties suited for container growing. It shows growth habit, mature plant size, and recommended pot size.
| Variety | Growth Habit | Mature Plant Height | Type of Tomato | Recommended Pot Size |
|---|---|---|---|---|
| Patio V | Determinate | About 2 feet | Small slicing | 18-inch diameter |
| Tiny Tim | Dwarf (determinate) | 1 foot | Cherry | 12-inch diameter |
| Totem | Dwarf (indeterminate) | 18 to 24 inches | Cherry | 12 to 18-inch diameter |
| Typical indeterminate tomato | Indeterminate | 6 feet or more | Varies | 24-inch diameter or larger |
Decide based on your container size and how much space you want. Use pots about 18 inches wide for determinate types. These tomatoes grow 2 to 3 feet tall.
This size pot supports their growth. Bigger pots, about 24 inches wide, work for indeterminate tomatoes.
Prune them often to keep their size down. Otherwise, they need twice as much room.
Small containers, 12 inches or less, suit dwarf or cherry tomatoes best. Choose these for limited space and smaller pots.
These varieties produce well without crowding. They also finish producing fruit sooner, so you get tomatoes faster.
Watering Tomato Seeds and Seedlings in Containers Correctly
Tomato seeds in containers need just enough water to keep the soil moist, not wet. Water the container lightly once or twice a day, especially if the weather is warm. Avoid soaking the soil, because too much water can drown the seeds and cause rot.
Seedlings need steady moisture but not soggy soil. Check moisture by touching the soil surface with your fingertip. The top is dry or cracked; it’s time to water your plants.
The soil feels damp. Wait before watering to avoid root rot.
Containers do dry out faster than garden beds because the soil is shallow and exposed. Your pot is in full sun all day. Water daily in heat.
This lowers stress on young plants. It stops problems like blossom end rot. This rot happens from uneven moisture.
Set your container near a water source to make daily watering easier and more consistent.
Water each time until you see some drain out of the container’s holes. This ensures the roots get moist without sitting in water.
Pots without drainage risk water building up and killing the roots. So check drainage before watering deeply.
Morning is the best time to water tomatoes because the surface can dry by afternoon. Don’t water late in the day or at night.
Wet plants risk disease. Also, do not pick tomatoes when the plant is wet, as this can spread issues.
Yellow leaves often mean overwatering or lack of nutrients. Check your care. Cut back watering just enough and feed with a balanced fertilizer.
Keep soil moisture even for blossom end rot. Add eggshells or calcium supplements.
Fertilizing Tomato Seedlings Started in Containers
Start fertilizing tomato seedlings once they have their first true leaves. This usually happens about two weeks after sprouting. Use a liquid fertilizer diluted to half strength to avoid burning the delicate roots.
Choose a balanced soluble fertilizer like 15-30-15 or 20-20-20. These numbers stand for nitrogen, phosphorus, and potassium. They provide the key nutrients young tomatoes need for healthy leaf and root growth.
Feed seedlings every one to two weeks with the diluted fertilizer. Water the soil lightly before feeding to prevent root damage. Applying fertilizer too often or too concentrated can cause leaf curl and burn the roots.
Adding compost or slow-release organic fertilizer means you can delay liquid feeding. These provide nutrients gradually and reduce the risk of fertilizer burn. Check your plants weekly and start feeding liquid fertilizer if growth slows.
Once your seedlings start forming flowers, switch to a tomato-specific fertilizer. Apply it every 10 to 14 days to support fruit development. Stick with liquid formulas, as foliar feeding helps deliver nutrients directly.
After a feed, watch your seedlings for signs of stress. Brown leaf tips or wilting indicate overfeeding.
When you notice this, rinse the container with water to remove extra fertilizer. Adjust your feeding schedule and dilution accordingly.
For example, mix 1/2 teaspoon of 20-20-20 fertilizer in a gallon of water. Use about 4 to 8 ounces per small seedling container. This amount feeds the plants without overwhelming the small root zone.
Fill a spray bottle with the diluted fertilizer to apply evenly. Fertilize in the morning or evening to prevent sun damage on wet leaves. Keep a routine and note how your seedlings respond to refine your approach.
Supporting Tomato Plants in Containers as They Grow
Tomato plants in containers need strong support to stop stems from breaking as they grow. Stakes, tomato cages, or small trellises are the best tools to keep plants upright and tidy. Use a tomato stake or cage with 4-inch wide mesh.
This size lets you reach the fruit easily. Pick tomatoes without struggle.
Add supports when seedlings have their first true leaves. Or wait until they reach 6 inches tall. This helps plants grow straight.
Waiting too long makes plants heavy and fragile. This risks breaking stems when you add support. Protect your plants early.
Push the stake near the main stem gently. Avoid hurting roots while placing it. Or place the cage carefully around the seedling.
Use one sturdy stake or cage per container plant. Large tomato plants in big pots need strong support. Use bamboo stakes or thick wire cages.
These hold heavy plants safely. If tall cages tip, secure them to the pot’s base. Use extra stakes to keep cages steady.
This works during wind and watering. Tie smaller pot plants loosely to supports.
Use soft ties, string, or cloth strips. Re-tie every few inches as the plant grows.
Compact tomato varieties designed for containers sometimes need little or no support. But it’s safer to add a small cage or short stake anyway. This keeps fruit off the soil and protects against pests.
For sprawling tomatoes, try a tomato cage or wire fencing bent into a cylinder. Extra support lets your plant spread without bending and breaking.
Tomato cages and stakes usually cost $5 to $15. You can find them at garden centers. They are an affordable tool for gardeners.
Proper support helps your tomato plants grow healthier. Plants use energy to grow fruit, not to hold themselves up.
This boosts harvest size. Check the ties weekly and adjust as the plant thickens, loosening them to prevent stem damage.
Common Problems When Growing Tomatoes in Containers and How to Fix Them
Tomatoes in containers often face problems caused by inconsistent watering. Overwatering can drown roots, while underwatering stresses plants and causes fruit issues. One common problem is blossom end rot.
It looks like a dark, sunken spot. This spot appears on the bottom of the tomato.
Blossom end rot happens when the plant lacks calcium, mostly from uneven moisture in the soil. To fix it, keep soil evenly moist but not soggy.
Water your container whenever the top inch of soil feels dry. Avoid letting soil dry out fully, which leads to cracking and rot.
Leaves may yellow if your tomato gets too much water or too little. Yellowing due to overwatering means roots can’t breathe and start to rot.
Less water can also cause yellow, droopy leaves if seedlings dry out. Adjust your watering to keep soil damp like a wrung-out sponge.
- Water containers when the top inch of soil is dry
- Use pots with drainage holes to prevent water buildup
- Add mulch on top to keep soil moisture steady
- Apply a balanced fertilizer if yellowing persists
- Check for pests or disease causing leaf damage
- Remove fruit with blossom end rot to help others grow
- Keep plants out of hot afternoon sun to reduce stress
Tomato seedlings may wilt if they dry out or get too hot. Move containers to a shaded spot during heat waves.
Also, avoid sudden watering after dry spells, as this can shock roots. Gradually adjust soil moisture instead for healthy growth.
In container growing, consistent watering is your main defense against common tomato problems.
Step-by-Step Action Plan for Growing Tomatoes in Containers
Follow these clear steps to get your tomato plants growing strong in containers. Each step shows when to do it and what success looks like.
- Before you start: Choose a container at least 12 inches deep with drainage holes. It should hold enough soil for roots. Heavy containers like ceramic help steady tall plants.
- Day 1: Fill the container with seed-starting mix and moisten it lightly. Press seeds 1/4 inch into the soil and cover. The soil should feel damp, not soggy.
- Week 1: Place the container in a warm, bright spot or under grow lights. Keep soil at 70 to 75°F for fastest germination. You’ll see sprouts in about 5 to 10 days.
- Week 2: Thin seedlings by snipping the smallest ones at soil level. Keep one strong seedling per container. The seedling should stand firm and have two sets of true leaves.
- Week 3: Start a light daily feed with diluted liquid fertilizer. Look for steady growth and healthy green leaves. Avoid overwatering; soil should dry between waterings.
- Week 4: Begin supporting seedlings with small stakes or cages if they lean or grow tall. This helps avoid stem damage. The plants should stand upright easily.
- After 6 weeks: Start hardening off seedlings for one week. Move them outside for a few hours every day. This helps seedlings adjust before planting outdoors. This prepares plants for transplanting outside or into larger pots. Leaves should stay green without wilting.
Frequently Asked Questions
Can I Reuse Soil from Last Year’s Tomato Plants in My Containers?
It’s best not to reuse old soil due to disease risk. Fresh potting mix supports healthy seedlings and better growth.
How Deep Should I Plant Tomato Seeds in the Container Soil?
Plant seeds about a half inch deep in moist soil. This depth protects seeds while allowing easy sprouting.
Can I Start Tomato Seeds Directly Outdoors in Containers?
Starting indoors is better for tomatoes since frost harms them. Move seedlings outdoors after all frost risks are gone.
Should I Cover Tomato Seed Containers with Plastic Wrap During Germination?
Covering with a humidity dome or plastic helps keep moisture. Remove it once seedlings emerge to prevent fungal problems.
How Often Do Tomato Seedlings in Containers Need Fertilizing?
Begin fertilizing after seedlings have true leaves, about 2-3 weeks in. Use diluted, balanced fertilizer every couple of weeks to avoid nutrient burn.
What Temperature Range Is Best for Tomato Seed Germination?
Keep seeds warm, around 70 to 75 degrees Fahrenheit, to speed germination. Consistent warmth helps seeds sprout evenly and quickly.
Before You Go
Growing tomatoes in containers is simple when you follow clear steps. Start with good soil, proper containers, and light. Next, get your seeds planted today and watch them sprout in the first week.