How Many Potatoes from One Seed Potato: A Complete Guide for Gardeners
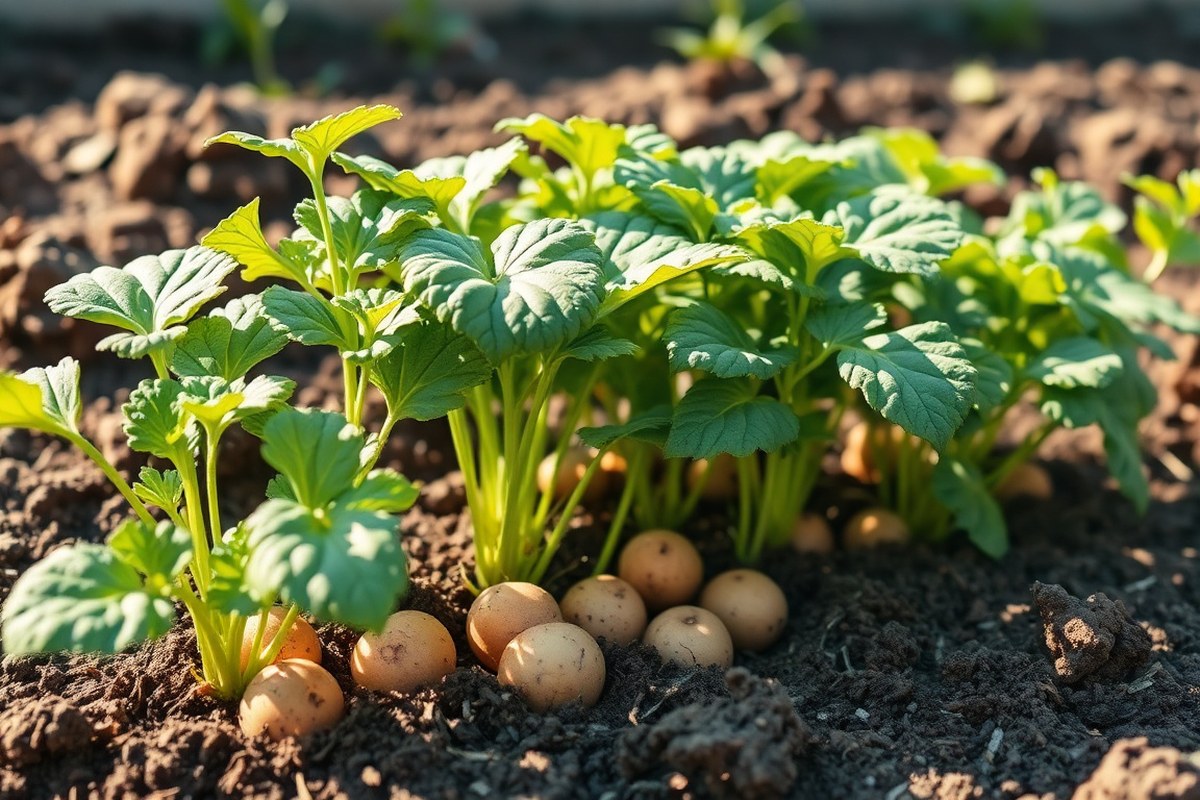
Wondering how many potatoes you can get from one seed potato? You can expect about 3 to 5 pounds of potatoes under good conditions with proper care. This usually means roughly 4 to 5 new potatoes from each seed piece.
To hit those numbers, start by selecting healthy seed potatoes with several eyes each. Plant them about 4 to 6 inches deep and keep them spaced about 12 inches apart. This setup helps roots spread and tubers grow bigger.
Watching soil moisture and feeding your plants well boosts your yield, too. Keeping an eye on temperature around 60°F during sprouting can improve emergence and growth. These simple steps make a big difference in your final harvest.
Key Takeaways
- Expect 3 to 5 pounds of potatoes from one well-cared-for seed potato.
- Plant seed potatoes 4 to 6 inches deep to support good tuber growth.
- Space seed pieces 12 inches apart to allow enough room for expansion.
- Choose seed potatoes with 3 to 5 eyes for higher yield potential.
- Maintain soil moisture consistently to help tubers develop properly.
- Keep soil temperature near 60°F for ideal seed potato sprouting.
How Many Potatoes Grow from One Seed Potato?

One seed potato usually grows one plant, which produces 5 to 10 new potatoes. USDA data show you can get about 4 to 6 potatoes per seed potato. This applies to normal home garden growing.
Results depend on your garden conditions. The exact number varies depending on factors like variety, soil, moisture, and care.
The weight of potatoes you harvest depends on seed size and growth. Bigger seed potatoes can grow heavier harvests. Growing conditions also change the total weight.
A good rule is one pound of seed potato gives about 25 pounds harvested. This is an average yield for home gardens. Individual results can vary.
Plant an 8-ounce seed potato piece, which is half a pound. You might harvest about 12 pounds of potatoes from it. This depends on garden conditions and care.
To illustrate, say you plant one seed potato weighing 8 ounces. The plant yields 8 potatoes, each about 6 ounces in weight. That adds up to roughly 3 pounds of total harvest.
This is an example of average sizing. This is a fair average for home gardeners. Potato yields per seed potato usually range from 2 to 6 pounds.
This depends on how well the plants grow. The variety of potato also affects yield.
How Potato Variety Influences Yield and Number of Tubers
Different potato varieties produce different numbers of tubers. Early varieties mature faster, usually in 60 to 90 days. But they generally produce fewer potatoes.
Late varieties take longer than 120 days to mature. They usually produce more tubers per seed potato.
High-yielding varieties can produce about 20 to 30 tubers or more per seed potato. Nicola, for example, is known to give 40 to 50 tubers.
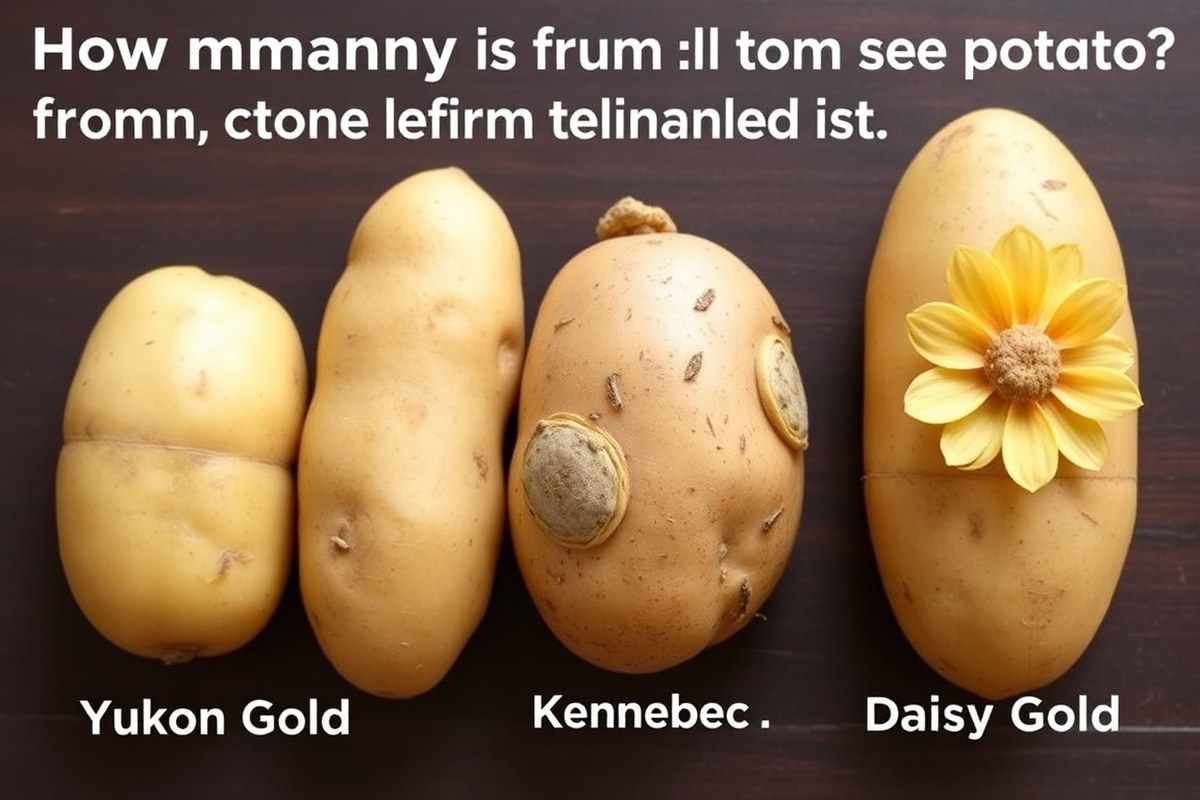
Midseason types like Daisy Gold or Kennebec give 3 to 8 pounds each. This yield comes from one seed tuber.
| Variety | Maturity Time | Typical Number of Tubers | Estimated Yield per Seed Potato |
|---|---|---|---|
| Desiree | Mid | 20-30 | 5-7 lbs |
| Maris Piper | Mid | 20-30 | 5-7 lbs |
| Nicola | Late | 40-50 | 7-9 lbs |
| Daisy Gold | Mid | 15-25 | 5-8 lbs |
| Kennebec | Mid | 15-25 | 5-8 lbs |
| Almera | Late | 20-30 | 6-8 lbs |
Choosing your variety depends largely on what you want from your crop. Picking an early type works well if you want small potatoes quickly. A late variety is better if you want higher total yields and bigger tubers.
Seed potato quality changes tuber count. Fresh, healthy tubers sprout more and yield bigger crops.
Spacing and care can affect tuber numbers too. For many small potatoes, grow early varieties with moderate to higher stem counts. To get bigger baking potatoes, space your plants farther apart.
Plant only one good tuber at each spot. This reduces competition among stems and encourages bigger tubers to form.
Use fresh, certified seed potatoes to get the best tuber count and healthy plants.
Preparing Seed Potatoes for Maximum Growth
Prepare seed potatoes by cutting large ones into pieces with at least one or two eyes. Cure these pieces for several days to heal cuts and dry the skin. Sprout or chit them for 2 to 4 weeks before planting to encourage strong growth.
Cutting Seed Potatoes Correctly
Start with healthy, firm seed potatoes free from disease or blemishes. Larger tubers can be cut into pieces weighing 1.5 to 2 ounces, each with 1 to 2 eyes. These eyes are the growing points that sprout into new plants.
Cutting lets you get more plants from fewer potatoes. Don’t make seed pieces smaller than about 1.5 ounces, or they may struggle to grow strong sprouts and roots.
- Wash seed potatoes to remove dirt and debris.
- Use a clean, sharp knife to cut potatoes into pieces.
- Ensure each piece has at least one or two eyes.
- Weigh pieces to keep them between 1.5 to 2 ounces each.
- Mark large cuts for quick identification if needed.
- Place cut pieces in a cool, dry location immediately.
Curing and Drying Seed Pieces
After cutting, leave seed pieces to dry at room temperature. Let them cure this way for 2 to 3 days. This helps prevent rotting when you plant them.
This helps the cuts form a protective layer, reducing rot and infections. Good air circulation speeds up this process and keeps pieces from molding.
A cured seed piece has a dry, tough skin over cut areas. Pieces that stay wet or soft may rot once in the soil. Avoid curing at temperatures above 70°F, as high heat stresses the tubers.
Chitting to Promote Strong Sprouts
Chitting means letting seed potatoes grow short sprouts before planting. Place your seed pieces in a bright spot with indirect sunlight at 50, 60°F. This usually takes 2 to 4 weeks and boosts the number and length of sprouts.
Use shallow trays or egg cartons to stand pieces eye-side up. Avoid exposing seed pieces to direct sunlight or temperatures below 50°F. Healthy sprouts should be short, firm, and ½ to 1 inch long before planting.
Optimizing Planting Depth and Spacing for Better Yield
Plant seed potatoes 3 to 4 inches deep for best results. Space them 12 inches apart in rows 3 feet apart. This setup gives a better chance of a good harvest.
Setting seed pieces too shallow or too close reduces tuber growth and lowers your total yield. Proper depth and spacing let each plant develop roots and tubers without crowding or wasting space.
Choosing the Right Planting Depth
Plant seed potatoes 3 to 4 inches deep to balance moisture and air flow. Planting at this depth protects tubers from drying out. It keeps them close enough to the surface too.
This helps shoots reach sunlight easily. In heavy, moist soil, start with shallower planting to avoid rot.
Sandy soil needs deeper planting to keep moisture longer. Adjust depth based on your soil type.
After planting, hill soil around the stems to encourage tubers to form along the buried stems. This method increases your total yield by expanding tuber-producing areas. Don’t bury seed potatoes too deep at first.
Deep planting slows sprouting. Fewer plants may emerge this way.
Spacing Seed Potatoes Within Rows
Keep seed pieces 12 inches apart in each row. This spacing allows roots and tubers enough room. It helps plants grow healthy.
Too close spacing crowds the roots and cuts down on tuber size and number. Spacing seed potatoes farther than 12 inches usually lowers total harvest.
Each plant may have more potatoes, but the garden yield is less. It’s better to stick to 12 inches spacing.
Bigger potato varieties like some short day Andean types need more space. Space rows up to 15 inches apart to manage their size. This helps plants grow well.
Smaller varieties do well with 10 to 12 inches between seed pieces. This spacing maximizes their yield. It fits their smaller size perfectly.
Row Spacing Effects on Potato Yield
Rows spaced 3 feet apart give plants room for sunlight and air circulation. This spacing helps prevent disease and lets you easily hill soil around growing plants. Keeping rows too narrow reduces airflow and light.
This can limit tuber growth. Disease risks also increase in narrow rows.
In small gardens, 3-foot rows work well for hand planting and care. Larger gardens get better yield and easier maintenance with this row spacing too.
You can fit more seed potatoes per square foot by adjusting spacing carefully. But 3 feet remains the balance point for healthy plants and high yields.
Adjusting Depth and Spacing by Soil and Variety
Light, sandy soils need deeper planting of seed potatoes. Plant about 4 inches deep to hold moisture better. This helps during dry spells.
Heavier, clay soils stay moist. So planting 3 inches deep prevents rot and helps the seed tubers sprout well. Take a soil test if you’re unsure; it guides your depth choice.
Big growing varieties need up to 15 inches between plants. More space avoids crowding and helps tubers grow larger. This spacing improves your harvest.
Small varieties or seed potatoes with fewer eyes do better closer. Space them about 10 to 12 inches apart.
This helps them grow strong. Adjust spacing depending on how the potato type grows and the soil texture.
Planting Layout Tips for Gardens
For small gardens, mark rows 3 feet apart and space seed potatoes evenly every 12 inches. Use a string line to keep rows straight and spacing consistent. This organization helps you hill soil easily and manage weeds along tidy rows.
In large gardens, arrange wider rows if your potato type grows large. Space plants evenly to maximize tuber growth. Avoid spots where water pools.
Also skip soil that stays wet too long. A good layout gives each plant enough sunlight and soil nutrients while making your work easier.
Soil, Moisture, and Nutrition Effects on Potato Production
Good soil quality boosts potato yield by supplying nutrients and good drainage. Potatoes grow best in loose, sandy loam or loam soil with a pH around 5.8 to 6.5. Too much clay or poor drainage leads to smaller tubers and disease.
Potatoes need steady moisture, especially during tuber formation. Keep soil evenly moist with about 1 to 2 inches of water weekly. Adjust watering amounts depending on how much rain you get.
Avoid letting the soil become soggy or too dry. Overwatering causes rot and underwatering reduces tuber size and number.
Fertilizing potatoes depends on soil test results. But typical needs include nitrogen, phosphorus, and potassium.
You want a balanced start, then boost nitrogen mid-season to encourage growth. Avoid overfertilizing, which can grow vine at expense of tubers.
- Test soil before planting for pH and nutrient levels.
- Loosen soil 8-12 inches deep for root expansion.
- Apply a starter fertilizer low in nitrogen, around 5-10-10 ratio.
- Water deeply once or twice a week to maintain even moisture.
- Side-dress with nitrogen fertilizer (about 1/4 cup per 10 feet) after shoots appear.
- Avoid waterlogging by checking drainage and planting on raised beds if needed.
Potatoes form tubers best at soil temperatures around 60°F to 70°F. Mulching can help keep soil cooler and moisture steady. Soil that is too dry or too hot leads to small, few tubers. Consistent watering and feeding pay off in higher yields.
Too much water early on slows tuber growth; reduce watering until shoots appear strong.
Testing your soil costs about $10 to $20 and saves money on unnecessary fertilizer. Expect healthy plants to produce 3 to 5 pounds of potatoes from one seed piece. Small and sparse tubers usually mean uneven moisture or nutrient problems.
Temperature, Sunlight, and Environmental Factors Impacting Yield
Potatoes grow best in cool temperatures between 60 and 70°F (15 to 21°C). This range supports healthy tuber formation and steady growth. When temperatures climb above 80°F (27°C), potato plants may suffer heat stress, reducing yields.
Potatoes need at least six hours of full sunlight every day. Sunlight helps plants produce energy for growing tubers. Less than six hours slows growth and can lead to fewer or smaller potatoes.
| Factor | Optimal Range | Effect on Potato Yield |
|---|---|---|
| Temperature | 60-70°F (15-21°C) | Best tuber growth; steady yields |
| Sunlight | 6+ hours daily | Good energy for tuber production |
| Cold Exposure | Below 50°F (10°C) | Slows growth; risk of frost damage |
| Heat Stress | Above 80°F (27°C) | Reduces yield; tuber defects |
Cold weather below 50°F (10°C) during early growth slows tuber development. Frost risk can kill sprouts and harm roots. Cover young plants with frost blankets or cloches if a cold snap threatens.
Hot weather stresses potato plants and shrinks yield. Mulching helps cool soil and keeps moisture steady.
Water deeply during heat to keep the soil moist. But avoid overwatering, which invites disease.
Climate plays a big role in how many potatoes one seed potato produces. In the best conditions, you can expect 3 to 10 new potatoes. Meeting these temperature and light needs pays off in more and larger tubers.
How Pest and Disease Management Improves Potato Harvest
Pests like Colorado potato beetles and aphids often attack potato plants. These pests eat leaves and stems, lowering your potato’s ability to grow well.
Watch for holes in leaves or sticky residue on plants, which means aphids may be present. Early detection helps you stop damage before it spreads.
Diseases such as late blight and early blight also hurt potato yields. Late blight causes dark, watery spots on leaves and stems, often leading to plant death.
Early blight shows up as small, dark rings on leaves that eventually turn brown. Both diseases thrive in wet, humid weather, so managing moisture is key.
Here’s a checklist to spot common potato pests and diseases:
- Yellowing leaves with holes, sign of potato beetles
- Sticky, curled leaves, likely aphids
- Dark, wet spots on stems or leaves, late blight
- Brown or black spots with rings on leaves, early blight
- White powder on leaves, sign of powdery mildew
- Wilting plants even with enough water, root rot warning
Start by choosing certified seed potatoes. They’re free from many soil-borne diseases and pests. Avoid grocery store potatoes, they might be treated to stop sprouting or carry diseases.
Plant seed potatoes at the right depth, about 4 inches deep, to keep tubers healthy. Inconsistent watering stresses plants and invites disease, so water evenly and avoid wet foliage.
Use natural methods first: handpick beetles or spray insecticidal soap for aphids. For diseases, remove infected plants quickly to stop spread. Applying fungicides can help, especially if weather is humid or rainy.
Wearing gloves and washing hands after handling sick plants prevents spreading diseases. Regularly check your plants every week during the growing season to catch problems early.
Failing to control these pests and diseases can cut your yield in half or worse. Healthy plants produce more and bigger tubers, often between 5 to 10 potatoes per seed potato.
Keep soil nutrients balanced with compost or fertilizer, as weak plants are more vulnerable. With close attention and timely action, you’ll protect your crop and enjoy a better harvest.
Practices to Maximize Potato Yield from Seed Potatoes
To get the highest potato yield, hill the plants carefully. Keep watering consistent. Harvest at the right time.
Each practice supports healthy tuber growth and maximizes the potato count per plant. You’ll want to follow a clear schedule during the growing season to make this work well.
Hilling to Encourage Tuber Growth
Hilling means piling soil around the potato stems as they grow. This process protects tubers from sunlight and improves root space.
Johnny’s Seeds says unhilled plants can lose up to 40% tuber weight. Hilling helps keep more of the potato.
Start hilling when plants reach 6 to 8 inches tall. Add soil around the base to cover the stems halfway.
Hill the plants one or two more times in the season. Space out hilling by about 2 to 3 weeks.
- Check plant height regularly, looking for 6 to 8 inches tall.
- Gather loose soil or compost from your garden bed.
- Use a hoe or shovel to mound soil around stems, covering lower leaves.
- Leave the top few leaves exposed for photosynthesis.
- Repeat adding soil two more times with 2 to 3 weeks between each.
Skipping hilling exposes tubers to sunlight, turning them green and toxic.
Watering and Feeding Schedule
Consistent moisture is essential for tuber development. Water your potatoes deeply once or twice a week, providing about 1 to 1.5 inches of water. Avoid overwatering to prevent rot and weak plants.
Feed your plants with a balanced fertilizer once they’re about 4 inches tall. Use one with equal parts nitrogen, phosphorus, and potassium for best results. Top-dress with compost if you prefer natural feeding.
About 1 to 2 weeks before harvest, stop watering. Letting soil dry helps potato skins toughen and keeps tubers fresh longer after digging.
Timing and Techniques for Harvesting
Harvest timing depends on whether you want new potatoes or fully mature tubers. For baby potatoes, dig 70 to 90 days after planting. For mature spuds, wait 90 to 120 days until plant leaves yellow and die back.
Allow skins to “set” by stopping water 1 or 2 weeks before harvest. This makes potatoes less prone to damage and storage decay. Gently dig with a spade or fork, taking care not to bruise tubers.
Missing the best harvest time risks tubers splitting or sprouting. Harvest before these problems start. Store harvested potatoes in a cool, dark place around 45°F with good ventilation.
Step-by-Step Action Plan
Follow these steps to grow more potatoes from one seed potato. Use them to get the best results in your garden.
- Before planting: Select firm seed potatoes with several eyes. Check that they’re free from cuts or disease to ensure healthy growth.
- Day 1: Cut larger seed potatoes into pieces, leaving one or two eyes on each. Let them dry for 1-2 days to prevent rot before planting.
- Week 1: Plant seed potatoes 4-6 inches deep and 12 inches apart. Ensure soil is loose and well-drained for good root development.
- Week 2-4: Maintain consistent moisture but avoid waterlogging. Check soil moisture regularly and water when the top inch feels dry.
- Week 4-6: Hill soil around the plants to cover new tubers. This protects potatoes from sun exposure and encourages more tubers to form.
- Week 6-10: Fertilize with a balanced, low-nitrogen fertilizer every 3-4 weeks. Watch the leaves for dark green color indicating good nutrition.
- Throughout growth: Scout regularly for pests like Colorado potato beetles and signs of disease. Treat promptly to protect your crop.
- Harvest time: Harvest potatoes when plants flower or die back. Gently dig around plants to find your full potato yield.
Frequently Asked Questions
How Many Potatoes Can I Expect from One Seed Potato?
One seed potato usually grows one plant, which produces 5 to 10 new potatoes. The exact number depends on variety and growing conditions.
Does Cutting a Seed Potato into Pieces Affect the Number of Potatoes Grown?
Cutting seed potatoes into pieces helps grow more plants from one. Each piece needs at least one eye to sprout.
This method boosts plant numbers in your garden. Each piece grows into a separate plant, leading to more potatoes.
How Much Weight in Potatoes Can I Harvest from One Pound of Seed Potatoes?
You can harvest about 25 pounds of potatoes from one pound of seed potatoes. This estimate assumes proper care, nutrition, and good growing conditions.
How Does the Size of a Seed Potato Impact the Potato Yield?
Larger seed potatoes often produce more and larger potatoes. But size isn’t the only factor. Healthy eyes and proper planting matter too.
Can I Reuse Potatoes from My Harvest as Seed Potatoes?
You can reuse potatoes for seed if they are disease-free and healthy. Certified seed potatoes are best to avoid disease risks.
How Long After Planting Seed Potatoes Can I Expect to Harvest?
Potatoes are usually ready 70 to 120 days after planting. The exact timing depends on variety and growing environment.
Key Points to Remember
One seed potato can grow several potatoes if you care for it properly. Start by picking healthy seed pieces and planting them at the right depth. Check your plants often and act quickly to keep them healthy and productive.