How to Build a Bench Around Tree: Step-by-Step Guide with Tips
Wondering how to build a bench around tree? It means making a seat that wraps around the trunk, giving you a natural, shady spot. You create a circular or polygon shape that fits closely but leaves room for growth.
This bench works well in your yard or garden space. It saves space and highlights the tree nicely. Start by picking durable wood that can handle weather, like cedar or treated lumber.
Measure carefully around the tree before building the bench. This helps the bench fit well and keeps the tree safe.
Watch the angles when cutting boards if you want a smooth curve or hexagon shape. Plan the seat height and width for comfort. That way, your bench will be both sturdy and cozy.
Key Takeaways
- Use weather-resistant wood like cedar or pressure-treated lumber for outdoor durability.
- Measure the tree’s circumference carefully before cutting your bench boards.
- Calculate angles by dividing 360 degrees by the number of seat boards for a circular bench.
- Cut bench ends at a 30-degree angle for a neat hexagonal bench shape.
- Leave space around the tree to allow natural growth and avoid damage.
- Check ground level to support a stable, even bench installation.
What Is a Bench Around a Tree and Why Build One?
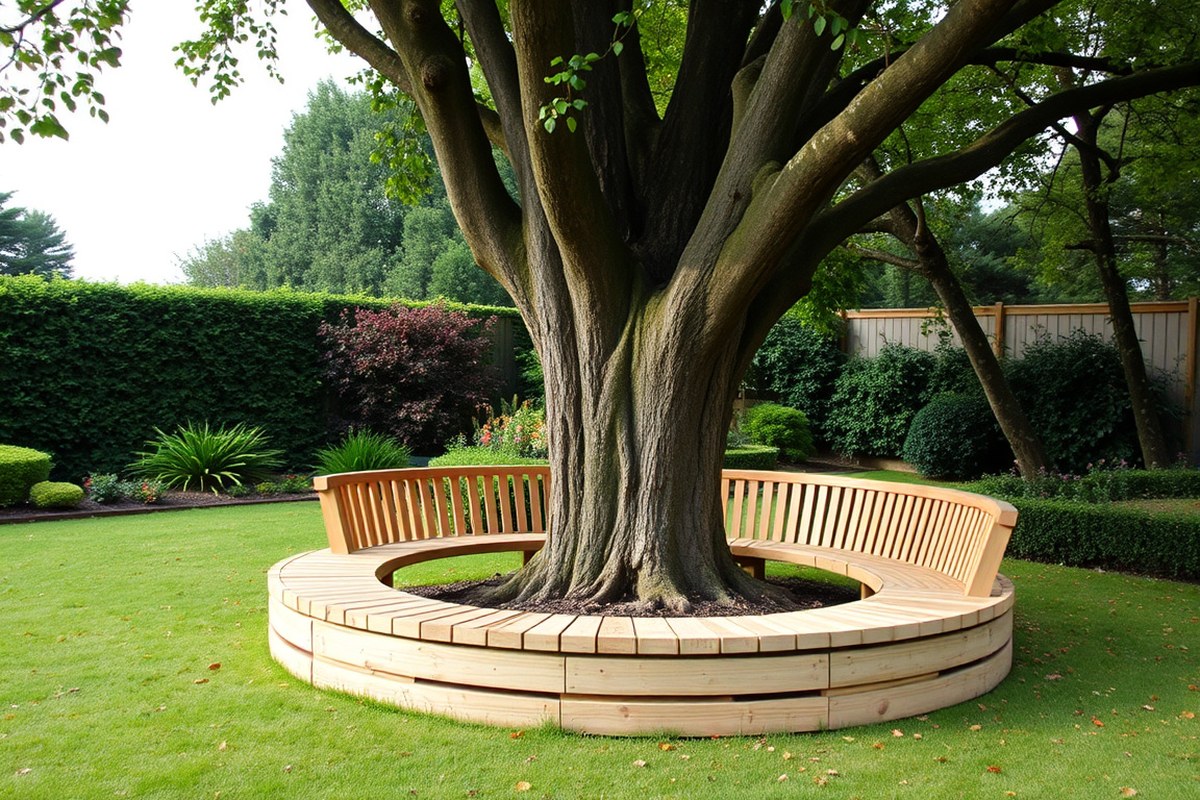
A bench around a tree wraps partly or fully around the trunk. It creates a place to sit close to nature. You can build it yourself in your yard.
It hugs the tree, using the space beneath the branches as a shaded seating spot. You get a spot to sit outdoors while preserving the tree’s root zone and natural form.
Building this kind of bench adds charm and practical use to your garden or yard. It creates a cozy, shady area to relax, read, or chat with friends. Many bench designs wrap in circle or hexagon shapes.
They leave space between the bark and bench to protect the tree. This lets the tree grow without damage.
This bench works as a natural guard for the tree trunk. It stops damage from kids, pets, or lawn tools. The tree stays safe while you enjoy sitting.
You help the tree stay healthy by avoiding soil compaction near the roots. The bench saves space by combining seating with the tree.
You don’t need extra room for separate furniture. This keeps your yard open and useful.
Many people use weather-resistant wood like cedar or redwood for lasting outdoor use. Pallet wood costs less and is easier to use for benches. It helps you build on a tight budget.
You can find pallets at local stores or warehouses. You can assemble the bench in sections, then carry and attach them around the tree. This makes fitting the bench easier, especially around uneven ground.
The appeal also lies in how it looks. A circular bench around the tree feels soft and natural. It matches well with green spaces in your yard.
This design creates a cozy look and vibe. A hexagonal or partial-wrap option adds a sleek geometric style that fits modern garden designs. Plant herbs like lavender and rosemary around the bench base.
They add scent and improve the outdoor feel. This makes sitting near the tree more pleasant.
Set the bench about 6 to 12 inches away from the trunk. This gives space for leaning back comfortably. It also leaves room for the tree to grow.
When the ground is level, building the bench is easier. You avoid extra work to even the soil first. This saves time and effort during construction.
But adding adjustable legs or shims will help on slopes. A good bench will last several years outdoors, providing a welcoming spot without disturbing nature.
How to Choose Materials and Tools for Your Tree Bench
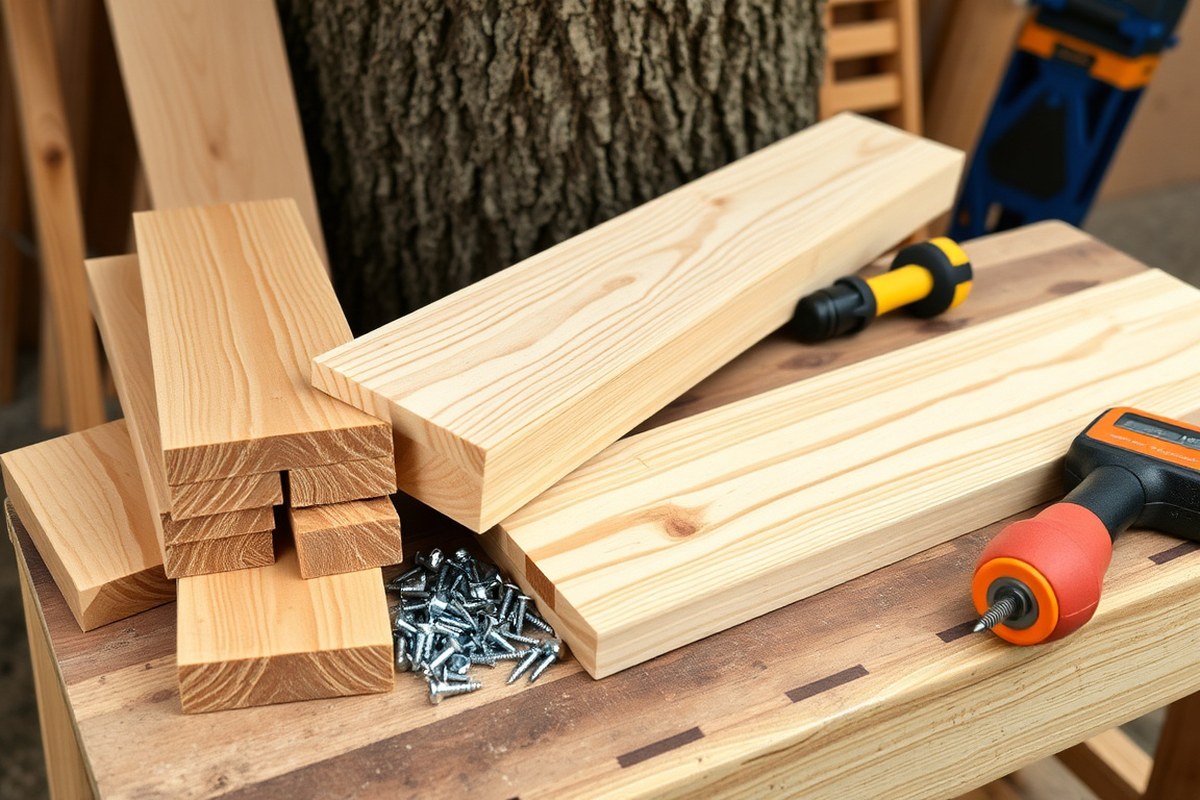
You want wood that can handle weather and won’t hurt your tree. Cedar, pressure-treated lumber, and composite wood all work outdoors. But each has pros and cons.
Cedar resists rot naturally and looks good but costs more. Pressure-treated wood is cheaper and tough but uses chemicals you should keep away from the bark.
Composite wood lasts long and needs no painting. But it can get hot and doesn’t breathe well around the tree.
| Wood Type | Pros | Cons |
|---|---|---|
| Cedar | Rot-resistant, natural look, lightweight | More expensive, may need sealing |
| Pressure-treated | Durable, budget-friendly, easy to find | Chemicals can harm tree bark, may warp |
| Composite | Low maintenance, no sealing, long-lasting | Gets hot, less natural look, heaviness |
Fasteners matter for the tree’s health too. Use galvanized or stainless steel screws or bolts. Avoid nails or anything that rusts fast.
Don’t attach wood tightly against the bark; allow space for the tree to grow. This prevents damage, rot, or choking the tree. Use spacers or adjust the frame so the bench floats slightly away from the trunk.
Essential tools don’t need to be fancy. A circular saw or handsaw will cut your lumber. A cordless drill with matching bits drives screws safely and quickly.
Measuring tape and a carpenter’s square help you keep pieces straight and even. Sandpaper or a random orbital sander smooths edges so no splinters hurt you or the tree.
Having a good level will help with uneven ground around the tree. A pencil and square mark straight cuts. Basic safety gear like gloves and goggles protects your hands and eyes throughout the build.
Never nail the bench directly into the tree. It will stress and damage the bark over time.
How to Plan Your Bench Layout and Measure Around the Tree
Measure the tree trunk carefully for a good bench fit. Plan for its future growth as well. You need a gap between the bench and tree to avoid damage later.
Draw your bench size based on the tree’s shape. Check your yard space to fit it well.
Measuring Tree Diameter and Shape
Start by measuring the tree’s diameter at the height where the bench will sit. Irregular trunks need more careful measuring around the widest points. Use a tape measure or a flexible cloth measuring tape to get the total circumference.
Wrap tape around the tree at the bench height. Notice any bumps or knots that change shape.
For uneven trunks, take several measurements at different spots or angles. This gives a clearer picture of the area your bench will need to clear.
This method helps the bench fit without scraping bark. It stops the tree from growing oddly around it.
Calculating Expansion Gaps for Growth
The tree needs room to grow without pushing against your bench and causing damage. The expansion gap depends on the tree’s growth rate, which varies by species. Use these rules for your gap size:
| Growth Rate | Expansion Gap | Why |
|---|---|---|
| Slow (Oak) | 2, 3 inches | Allows slow growth without rubbing |
| Moderate (Maple) | 3, 5 inches | Handles seasonal trunk expansion |
| Fast (Willow) | 6+ inches | Prevents bench blocking fast growth |
Add a gap to your tree diameter measure. Use this for the bench’s inner edge size. Try a floating design with separate bench pieces.
It helps the bench shift as the tree grows. Check the fit yearly and move pieces if needed.
Sketching Your Bench Footprint
Plan how the bench will wrap around your tree before cutting wood. Sketch the bench’s shape on graph paper or use a digital drawing app. Mark the tree trunk’s center, your measured diameter plus expansion gap, and the bench’s overall width.
Consider the yard space and how many people you want to seat. The bench can be a full circle or just a partial arc. Make sure the bench depth leaves enough sitting space around the trunk.
Try making templates from cardboard to test the shape and angles on the tree trunk directly. This helps spot fit issues before you build.
- Wrap a flexible tape around the trunk at bench height, noting widest and narrowest points.
- Measure and write down the trunk circumference and diameter from the tape measurement.
- Identify your tree’s species to estimate its growth rate and the expansion gap.
- Add the recommended growth gap to your trunk diameter to find your bench’s inner radius.
- Choose bench width based on yard space and seating. Add this width to the tree radius.
- Draw your bench shape with the correct dimensions, including the tree trunk and bench ring.
- Make cardboard templates to check your layout on the actual tree for any odd fits.
- Adjust your plan to allow for uneven ground or a floating bench design if needed.
Which Common Bench Designs Work Best Around a Tree?
Benches around a tree come in several common shapes. Circular, hexagonal, and half-moon are the main types. Each fits different tree sizes and yard layouts better.
Circular benches fully surround the tree. They give a cozy look and provide seating that faces all sides. These benches need more wood, so they cost more and take longer to build.
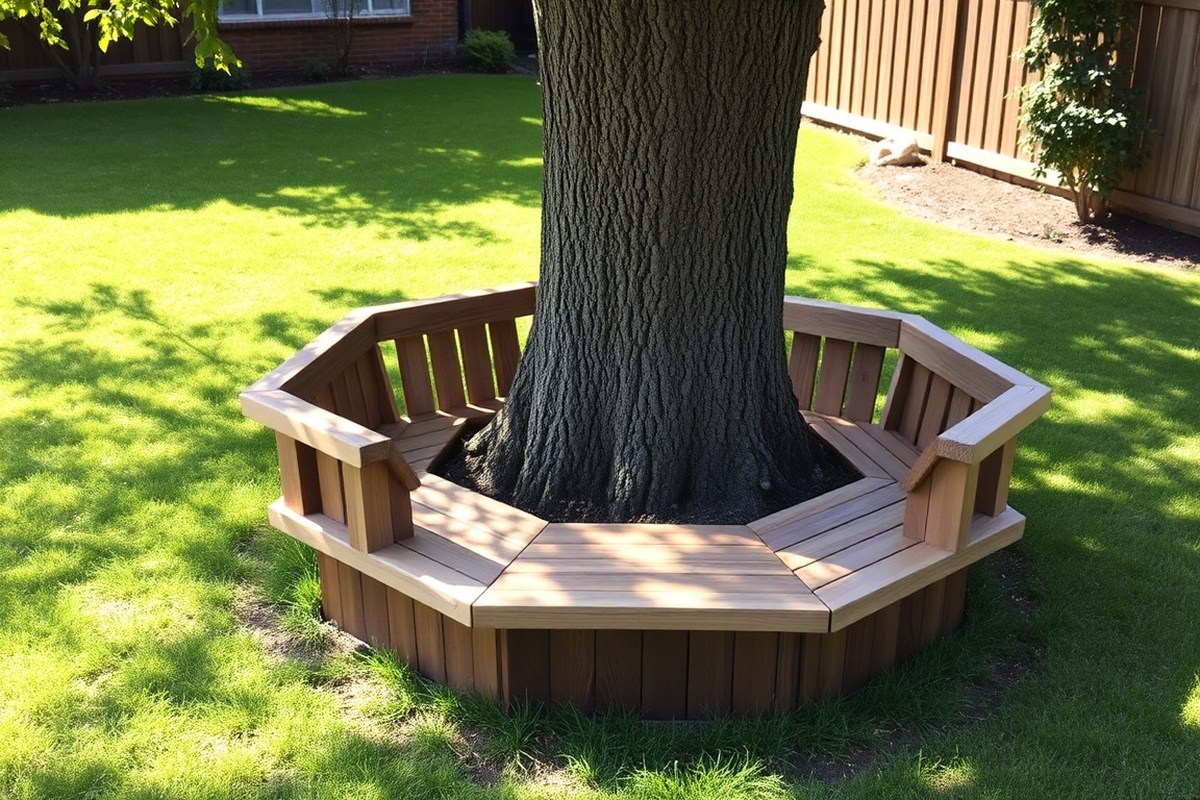
Hexagonal benches use six flat panels joined around the tree. They offer a nice balance of shape and ease of building. The flat panels make it easier to fit cushions and add backrests.
Half-moon benches are built on one side of the tree. These benches are simple and work well when space is tight. You can also keep other sides open for better access or views.
This style fits smaller areas easily. You can still curve the bench edges to follow the tree base.
Adding backrests makes the bench more comfortable but adds design and build complexity. Use vertical supports spaced every 12 to 16 inches under the seat.
For planters, attach boxes on the bench ends or within seat gaps. Secure planters to avoid tipping.
| Bench Type | Seating Capacity | Complexity | Material Use |
|---|---|---|---|
| Circular | 6, 10 people | High | High (curved cuts needed) |
| Hexagonal | 4, 8 people | Medium | Medium (straight boards, angled cuts) |
| Half-moon | 2, 5 people | Low | Low (straight cuts mostly) |
Choose a circular bench for larger trees with enough room around. Use hexagonal designs for medium space and balance of ease and style. Half-moon benches fit smaller yards and narrower spaces well.
To add backrests, cut extra wood slats 12 inches tall. Attach these slats vertically behind the seat boards. Backrests provide extra comfort and support.
Make rectangular planter boxes measuring 12 inches wide and 8 inches deep. Stain or paint them to match your bench.
These add a nice touch to your setup. Just fasten them solidly to the bench.
Step-By-Step Instructions to Build a Tree Bench
Building a bench around a tree means cutting boards at exact angles. You also need to make strong legs that don’t harm the roots. Then carefully put the sections together.
Positioning the bench level and connecting parts securely makes it solid and safe. Here’s how to do each step right.
Cutting Boards at the Correct Angles
Hexagonal benches have 30-degree cuts on each end of the seat boards. This angle lets six boards fit together evenly around the tree. Use a miter saw set precisely to 30 degrees for clean, uniform cuts.
Before fastening, dry fit the boards around the tree. This helps you check fit and alignment.
Some boards might not fit perfectly. Adjust the angle just a bit to get a smooth joint.
Building Supports and Legs Safely
Locate your bench’s legs away from visible surface roots. This avoids damaging roots when you dig or attach legs. Choose spots on firm ground that won’t shift or sink.
To protect roots further, place root barrier mats under the legs. These mats help spread the weight evenly and keep soil compacted less. Make the legs sturdy with supports tied into the seat frame.
Assembling and Positioning Bench Sections
Build each bench section independently, using a square to keep boards aligned. Hold legs in place with scraps when drilling to maintain level height. Make six supports to match the hexagon’s shape.
Set the bench sections around the tree in the best level spots. Join sections by fastening seat planks that connect them solidly. This creates a stable circular or hexagonal bench pattern.
- Measure and mark all seat boards, setting a 30-degree angle for cuts.
- Cut boards with a miter saw, keeping blades clean and sharp.
- Dry fit boards around the tree to check for tight joints.
- Choose leg spots clear of surface roots and stable ground.
- Place root barrier mats under leg positions for root protection.
- Build bench supports using squares and scrap pieces to keep alignment.
- Set bench sections in place around the tree, adjusting for level.
- Fasten seat planks connecting sections to complete the bench frame.
Cutting all boards from the same batch of wood ensures consistent angles and color.
How to Level and Secure Your Bench on Uneven Ground
Uneven ground around a tree can make your bench wobbly or unstable. Checking the land slope first helps you know where to add or remove soil. You will want to avoid hurting roots or compacting soil too much while leveling.
Use a level and tape measure to check slope near your bench. Find the highest and lowest points around the site. Mark these spots for reference.
Remove soil gently where you want to lower the ground. Add clean dirt where you need to raise the spot.
Make sure the bench legs will sit flat. This setup stops your bench from tipping or rocking over time.
Keep the bench steady by placing legs on firm, flat pads. Use compacted soil or small stones for these pads. This prevents damage to nearby roots.
Avoid driving posts deep or hammering near roots. Use 2×4 braces on each leg’s side for support. This spreads the bench’s weight evenly.
It helps keep the frame stable. These braces often have beveled edges to fit snugly.
- Measure the ground slope with a level held near tree base and bench location.
- Mark high and low points using stakes or spray paint to guide soil work.
- Dig carefully around roots, removing soil from high spots for leg placement.
- Add good quality dirt or small gravel to low areas to raise and level.
- Compress added soil firmly without smashing roots or compacting deeply.
- Place each bench leg on a flat, firm surface formed by soil or stone pads.
- Attach 2×4 supports on both bench leg sides, beveling edges for fit.
- Fasten supports using screws into wood only, staying clear of roots and the trunk.
Never nail or screw legs directly into the tree trunk. This practice can hurt the tree health and stability. Using wood supports instead keeps weight off roots and allows for some natural tree movement.
For very rough or uneven ground, use small concrete pads. Place these pads carefully near roots to avoid damage. They create a solid base for the legs.
These pads need to be sized right to avoid pressure points under the soil. Concrete costs more and needs time to cure, but they last well.
Finishing, Protecting, and Maintaining Your Tree Bench
Wood exposed to weather needs a strong finish to last outside. Stain options include oil-based, water-based, and gel stains. Oil-based stains soak in deep.
They also repel water better than others. Water-based stains dry fast and keep color vivid, but may need more frequent touch-ups. Gel stains are thicker and easier to control.
They work well on vertical surfaces. This helps when staining the tree’s curves.
Seal the bench with clear outdoor polyurethane or spar varnish. This protects it from rain. It also blocks UV damage.
Spar varnish moves with wood as it expands from moisture changes, reducing cracking. Apply two to three coats after staining, sanding lightly between each.
Paint is another choice if you want a solid color. But it hides natural wood grain and may peel in sun and rain.
After staining, fill exposed holes with a wood filler matched to your color. This keeps bugs out and smooths the surface. Sealing lengthens the time between maintenance visits by years, but doesn’t stop it entirely.
Reseal or repaint your bench every one to two years. Weather harshness affects how often you must do this. Shade from the tree also changes timing.
- Clean the bench yearly with mild soap and water before any sealing
- Check for cracked wood, loose screws, or spots where finish wore off
- Look for early insect signs like tiny holes, sawdust, or wood tunnels
- Reapply sealer or paint when water stops beading on the surface
- Sand rough or splintered areas lightly before refinishing
- Tighten screws and bolts to keep the bench stable
- Remove leaves and debris to prevent moisture buildup
Well-maintained benches stay smooth and resist mold or rot for years. Too little care lets water seep inside wood fibers and invites insects. Spotting cracks or holes early saves you from costly repairs.
Watch the finish closely, especially on edges facing weather. Act fast if you see fading or peeling. This keeps your bench looking good longer.
Regular care protects the tree’s bark near the bench. It stops damage from trapped moisture. Nails can also cause harm if unchecked.
Landscaping Ideas to improve the Area Around Your Tree Bench
Improving the area around your bench creates a beautiful, inviting space. Use plants, mulch, pebbles, and climbing features to improve soil and look. These touches turn the bench into a charming garden spot.
Selecting Trees and Plants Nearby
Choose plants that thrive in shade or partial sunlight under trees. Ferns and moss work well here, giving a woodland feel. Small herbs like thyme or oregano fit nicely around the bench edges without crowding.
Planting a mix of greenery helps keep the soil moist and the area lively. Low-growing ground covers reduce weeds and protect roots from drying out. Replace any plants that show stress from foot traffic or lack of light.
- Ferns for shade and texture
- Moss for a soft, green carpet
- Thyme or oregano for scent and ground cover
- Hostas for broad leaves and color
- Heuchera for small flowers and rich hues
Leaves from nearby trees add nutrients to the soil if left to decompose. Avoid planting anything that needs full sun unless your tree bench gets lots of light.
Using Mulch and Pebbles for Soil Health
Apply a 2-to-3-inch layer of mulch around your bench to keep soil moist and stop weeds. Organic mulches like bark or compost also feed the soil over time. Refresh mulch yearly to maintain its benefits.
Decorative pebbles can edge the bench or separate plant beds, adding crunch and style. Pebble mosaics can form a pattern or border that improve the bench’s look. These require less maintenance than mulch but won’t improve soil fertility.
Mulch too close to the tree trunk can trap moisture and cause rot. Keep a 6-inch gap.
Combining mulch and pebbles balances beauty and function. Mulch helps plants grow while pebbles protect areas with more foot traffic.
Adding Planters and Climbing Structures
Use planters to add color with flowers or herbs, especially in corners or gaps. Choose lightweight containers to avoid stressing the bench. Secure the planters well to prevent tipping.
A trellis nearby supports climbers like clematis or morning glories, adding height and privacy. Place climbing plants so they don’t attach to the tree trunk, which can harm it. Position trellises a foot or two away from the bench and tree.
- Small pots with annual flowers or herbs
- Raised planters for soil control
- Trellises for non-invasive climbing vines
- Hooks or brackets for hanging baskets
- Regular trimming to prevent plant overgrowth
Choosing the right plants and structures makes your bench a cozy spot. Keep plants healthy and check vines regularly to avoid damage to the tree or bench.
Step-by-Step Action Plan
Follow these steps to build your tree bench successfully. Each phase helps you stay on track and check your progress.
- Day 1: Gather all materials and tools based on your bench design. Check you have enough wood, screws, and protective finish.
- Day 2: Measure the tree’s circumference and mark your bench layout clearly on the wood. Confirm measurements match your plan before cutting.
- Day 3-4: Cut and sand the wood pieces carefully. Make sure edges are smooth and shapes fit around the tree trunk as planned.
- Day 5: Assemble the bench frame and seat sections loosely. Test the fit around the tree and adjust if needed until it sits evenly.
- Day 6: Secure all parts tightly using screws or brackets. Double-check that the bench is stable and not wobbling on uneven ground.
- Day 7: Apply a weatherproof wood finish or sealant. Let it dry fully outside to protect your bench from rain and sun damage.
- After 2 Weeks: Inspect the bench and tighten any loose parts. Remove leaves or debris underneath to keep it clean.
- Ongoing: Every few months, sand your bench lightly. Then apply a fresh coat of finish. This keeps the wood protected and looking good. Keep the area around the tree tidy.
Frequently Asked Questions
How Much Clearance Should I Leave Around the Tree Trunk When Building the Bench?
Leave at least 2 to 4 inches of space around the tree trunk. This prevents damage as the tree grows and allows for air and water flow.
Can I Build a Tree Bench Without a Backrest?
Yes, a backless design is simpler and works well outdoors. It offers flexible seating and lets the tree stand out more.
What Type of Wood Lasts Longest for Outdoor Tree Benches?
Cedar and redwood resist rot and insects the best. They require less maintenance and can handle weather changes.
How Often Should I Check the Tree Bench for Damage?
Inspect your bench at least twice a year, especially after storms. Look for loose fasteners or wood rot to keep it safe.
Can I Paint a Bench Around a Tree Instead of Staining It?
Painting is possible but may trap moisture in the wood. Staining lets the wood breathe and protects it longer outdoors.
Should the Bench Sections Be Preassembled Before Placing Around the Tree?
Yes, assembling sections first saves time during installation. Then attach them carefully on site to fit the tree shape.
Wrapping Up
Building a bench around a tree gives you a nice outdoor spot with natural shade. Start your project by measuring accurately and choosing the best wood. Your next step is gathering the right tools and materials today.