Do It Yourself DIY Planter Box Plans: A Complete Guide for Beginners
Do it yourself diy planter box plans help you create custom boxes for your plants. They give clear steps to build sturdy, attractive planters for your garden or porch. Starting with easy plans saves time and avoids costly mistakes.
First, choose wood that can last outdoors like cedar or treated pine. Then pick tools like a miter saw and nail gun for faster work. These help make cutting and assembly quicker.
They also keep your work cleaner. Planning step-by-step keeps your project on track and ensures a neat finished look.
A simple planter box project usually takes 2 to 4 hours. Materials often cost around $50. This makes it a budget-friendly build.
That’s affordable compared to buying ready-made boxes. You get something made exactly how you want. Just make sure to measure twice and cut once to avoid wasting wood.
Key Takeaways
- Use outdoor-rated wood such as cedar for long-lasting planter boxes.
- Measure all wood pieces carefully before cutting to prevent errors.
- Work with basic tools like a miter saw and nail gun for efficiency.
- Start with beginner-friendly plans to learn basic assembly skills.
- Adding extra nails to the frame strengthens the planter box.
- Include drainage holes to prevent water damage and root rot.
What Is a DIY Planter Box and Why Build One?

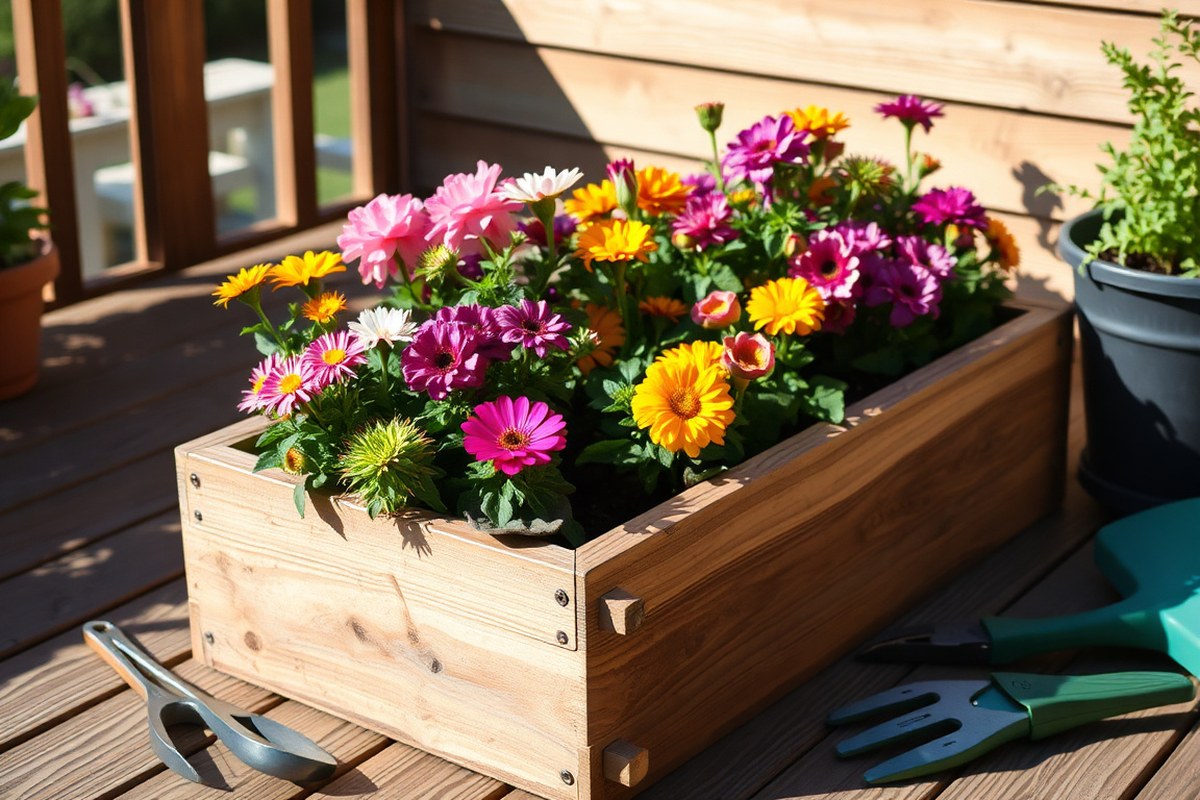
A DIY planter box is a simple wooden container you build yourself. It holds soil and plants for your garden or patio. These boxes come in many shapes and sizes, made to fit your space and style.
Building a planter box yourself gives you control over its size and design. You can pick materials and shapes that suit your budget and taste. Store-bought boxes often come in fixed sizes and styles, limiting your options.
Making your own planter box usually costs less than buying one. For example, basic plans use common 2×4 boards costing around $10 to $20 each. You only need a few boards, screws, and simple tools.
Building a sturdy box costs under $50. This makes it a great DIY project.
DIY planter boxes let you customize features like drainage and height. Adding holes or a drainage layer helps keep plants healthy. You can build taller boxes to avoid bending while gardening.
Try making stackable designs to save space. These ideas fit different needs and places.
You learn valuable woodworking skills, too. Following plans teaches how to measure, cut, and assemble wood. Many free or low-cost downloadable plans guide beginners through each step, making the process easier.
Building your box means you can repair or modify it later. You know how to fix wood cracks or faded paint. Repairing keeps your planter box looking good.
It also extends its life outdoors. This extends the planter’s life compared to some stores’ cheaper, non-repairable options.
One downside is that DIY projects take time, usually a weekend or two. Mistakes can happen if measurements are off or pieces don’t fit well. Patience and careful work help avoid common problems like uneven boxes or weak joints.
Materials matter for durability, with cedar and treated pine being popular choices. Cedar resists rot better but costs more, while pine is cheaper but needs sealing. Pick wood based on your budget and how long it lasts.
Some woods resist weather better and cost more. Think about how often you’ll replace the box.
Choosing the Right Materials and Tools for Your Planter Box

To build a strong planter box, pick the right wood. Use simple tools that beginners can handle well. This helps the box stay sturdy over time.
Choosing affordable yet durable materials helps keep costs low without losing strength. You can follow a simple checklist of materials and tools to get started on your project.
Essential Wood Types for Planters
Use wood that resists moisture and soil to keep your planter box strong over time. Cedar and redwood are popular because they naturally fight rot and insects. Treated lumber is also an option but pick types safe for plants and garden use.
For a basic planter box, 1×4 and 2×2 treated lumber works well. The 2×2 pieces support the frame while the 1×4 slats form the sides. You want wood at least ¾ inch thick to handle wet soil without bending.
Must-Have Tools for Assembly
You only need a basic saw and drill to build a planter box. Power tools are not required. This keeps the project simple and affordable.
A miter saw or hand saw will cut your wood to size accurately. Use a drill with a screwdriver bit to put the box together.
A measuring tape will help you get exact lengths. A square makes sure corners meet correctly.
Use exterior-grade screws about 2½ inches long. Wood glue also helps strengthen joints and keeps slats tight. Finish nails or brad nails can speed up assembly but aren’t necessary.
- Miter saw or hand saw for cutting wood to length
- Power drill with screwdriver and drill bits
- Measuring tape and carpenter’s square for accuracy
- Exterior wood screws, 2½ to 3 inches long
- Wood glue for extra joint strength
- Optional: finishing nail gun and nails for faster assembly
- Safety gear like goggles and work gloves
Using these tools correctly saves time and avoids mistakes. Mark your cuts twice to prevent wasting wood on wrong lengths.
Budget-Friendly Material Substitutes
Cedar and redwood can be pricey. Try pine or fir instead. Apply a good weatherproof finish to protect the wood.
You can buy wood without treatment. Then cover it with an outdoor sealant or safe wood preservative.
This protects the wood from moisture and bugs. This cost-effective combo still protects your planter.
Another way to save is using reclaimed wood. Old pallets or leftover construction wood might work.
But check for chemicals or nails before building. Also, reuse scrap lumber for internal supports or trellis parts.
Protect untreated or low-cost wood well to avoid rot and insect damage.
Buying wood in standard 8-foot lengths minimizes waste. Buying some longer boards and cutting them yourself can be cheaper.
Pre-cut kits might cost more. Cutting your own sizes gives you more control too.
How to Measure, Cut, and Prepare Wood Pieces
Start by measuring and cutting all wood pieces precisely to ensure they fit well together. Use a tape measure and pencil to mark each wood piece carefully. Accurate cuts prevent gaps and make assembly easier.
Taking Accurate Measurements
Measure the inside width and length where the planter box will sit. Most common planter boxes have sides 12 to 18 inches tall.
But adjust the height based on your plants’ needs. Note the exact dimensions before cutting any boards.
Use a tape measure and record each piece’s length to cut. Double-check your measurements before marking wood. Measuring twice helps avoid mistakes that waste wood and time.
Marking Cut Lines Clearly
Mark cut lines with a sharp pencil or fine marker for clear and visible lines. Use a square or straight edge to draw perfectly straight lines across the wood. This helps guide your saw and ensures clean edges.
Keep your markings on the side of the wood that will be hidden. This keeps visible parts looking neat after assembly. Mark each board with its dimension or position to avoid confusion later.
Safe and Clean Cutting Techniques
Use a circular saw or miter saw for straight, clean cuts. A cutting track or guide can keep your saw steady, especially on longer wood pieces. Cut slowly and steadily following your marked line for smooth edges.
Wear safety glasses and hearing protection while cutting wood. Clamp thin boards to a stable surface to prevent shifting during cuts. Sand rough edges lightly after cuts to avoid splinters and improve look.
Follow these steps to prepare your wood pieces for assembly:
- Measure the inside dimensions of your planter box, including height, width, and length.
- Record all measurements clearly on paper before cutting.
- Use a square and pencil to mark straight cut lines on each wood piece.
- Label each piece on the hidden side with its size and location.
- Set up your saw with a cutting guide or track for accuracy.
- Cut pieces slowly, following your marks precisely for clean edges.
- Clamp boards when cutting thinner strips to keep them stable.
- Sand edges lightly to remove splinters and rough spots before assembly.
Step-by-Step Assembly Instructions for Your Planter Box
Put your planter box together step by step to keep it sturdy and neat. Use wood screws that resist rust, like coated or stainless steel.
So your box lasts outside. Tight, straight joins make the box strong and keep soil in place.
Assembling the Frame Base
Start by layering the box parts that will sit on the ground. Make sure the bottom pieces fit snugly inside the long sides for a tight base.
Use 1½-inch exterior wood screws to fasten the corners. Drill pilot holes first to stop the wood from splitting.
The base supports the whole planter, so check it’s square. You can use a carpenter’s square or measure diagonally to confirm both sides are equal. This step ensures your box won’t tip or wobble when filled with soil.
Attaching the Side Panels
Next, attach the side panels vertically to the frame base. Have someone hold the panels in place or use clamps to keep them straight. Attach using 2-inch exterior screws that go into the edges of the base frame.
Use a level on each side to ensure panels stand perfectly vertical. This prevents gaps that soil might spill through later. Countersink screws so they sit just below the wood’s surface.
This reduces splinters. It also makes sanding easier.
Adding Reinforcements and Base Support
Add corner braces inside every corner for extra strength. This is important if your box will be large. Also add them if it will hold heavy soil.
Use metal L-brackets or make wooden braces from scrap pieces. Fasten these with screws, so the box keeps its shape over time.
For a solid base, add 1-inch slats spaced about 1 inch apart across the bottom frame. These slats let water drain while holding soil inside. Secure them with 1¼-inch screws, driving them through each slat into the frame below.
- Align two long sides and one short side to form an L shape.
- Drill pilot holes 1 inch from the edges, then screw the pieces together.
- Attach the remaining short side to complete the rectangular frame base.
- Measure diagonals to confirm corners are square; adjust if needed.
- Clamp or hold one side panel upright along the frame base edge.
- Drill pilot holes and screw the panel to the frame, then repeat for other panels.
- Attach metal L-brackets inside each corner with screws for reinforcement.
- Lay wooden slats across the base inside the frame. Space the slats 1 inch apart. Screw them down securely.
Adding Drainage and Weatherproofing for Longevity
Water pooling inside your planter leads to root rot and damages wood. Drainage holes let excess water escape, keeping soil healthy. Use a 1/2-inch drill bit to make holes evenly spaced across the bottom.
Place at least four drainage holes, about 2 inches from each corner. This prevents water from sitting in one area and helps plants thrive. Make sure you drill straight through the wood.
Don’t make holes too big. Drill enough holes for good support.
- Drill four 1/2-inch holes spaced evenly along the planter bottom
- Raise the planter slightly off the ground with small blocks or feet
- Apply exterior wood sealer or waterproofing stain on all surfaces
- Let each coat dry at least 24 hours before using the planter
- Use multiple coats for better protection in harsh climates
- Seal cuts and edges to prevent moisture from entering wood fibers
Sealing the wood protects it from rain, sun, and temperature changes. Choose an exterior waterproof wood sealer or stain made for outdoor use. Apply at least two coats with a brush, covering every surface and edges.
A typical wood sealer costs around $15 to $30 per quart. Proper sealing prevents cracks and wood rot. It also keeps your planter box looking good for years, even in rain or snow.
Never skip drying time between coats; trapped moisture causes peeling and damage.
Build your planter so moisture can drain freely and air can circulate. Adding wooden feet or blocks underneath helps with airflow. Avoid sealing drainage holes or the planter’s base; they need to stay clear.
Design Variations and Customizations for Different Spaces
Planter boxes come in many styles and sizes to fit different spaces. Balconies often need smaller, lighter boxes. Garden spaces can handle larger, heavier designs with extra features like trellises or storage.
Start by measuring your available space. For balconies, choose planter boxes no wider than 14 inches to keep them manageable.
Garden planter boxes can be rectangular. They can hold large pots or various plants.
You can add a trellis for climbing plants or even hidden storage inside the box. Storage adds utility for keeping tools or soil bags nearby. A trellis attached to the box adds height and privacy without taking extra floor space.
Some designs are easier for beginners. Simple wood planter box plans with straight cuts and basic assembly steps work well.
Cedar boxes resist weather better but cost more. More complex designs with screens or storage need better skill and more time.
| Planter Box Style | Ideal Space | Size/Features | Skill Level | Cost Estimate |
|---|---|---|---|---|
| Simple Cedar Box | Garden or Balcony | Up to 14″ pot size | Beginner | $30-$60 |
| Large Rectangular with Trellis | Garden | Privacy screen, climbs plants | Intermediate | $50-$100 |
| Montreal Planter Box with Hidden Storage | Patio or Balcony | Storage inside, compact design | Intermediate | Plans $8.97 + materials |
Try picking a design that fits the space and your woodworking comfort level. A garden planter with a screen adds privacy and supports vines easily. For balconies, keep it light and simple but add hidden storage if you want extra space.
Adjust size by cutting wood longer or shorter, but keep proportions balanced. Add a trellis by attaching vertical slats or a lattice to the back with screws.
For storage, build a box with a hinged lid right under the planting area. This gives you useful space with little extra footprint.
Common Mistakes and How to Fix Them
One common mistake is uneven corners. This can make your planter box look sloppy and less stable. Fix this by measuring twice before cutting.
Using a miter saw to make 45-degree cuts creates neat corners that fit tightly together. A simple square tool also helps check right angles as you build.
Loose joints often happen when screws don’t hold or the wood splits. Use wood glue along with screws to make joints stronger.
Drill pilot holes before screwing to avoid splitting the wood. Tighten screws just until snug, not over-tightening, which can strip holes.
Blocked drainage causes water to pool and harm plants. Always drill several ¼-inch holes evenly spaced in the planter bottom. Clear any sawdust or debris from these holes.
Drainage slowing? Poke the holes with a stick or wire often.
- Measure cuts carefully before sawing to avoid uneven parts
- Use a miter saw for angled cuts to get tight, clean corners
- Drill pilot holes before screwing to prevent wood splitting
- Apply wood glue for added joint strength
- Check corners with a carpenter’s square
- Drill multiple ¼-inch drainage holes and keep them clear
- Tighten screws just enough to hold pieces firmly
Sometimes the wood may warp or twist, causing gaps at joints. Press pieces together and clamp them while the glue dries to keep everything tight.
Pieces don’t line up? Lightly sanding edges helps the parts fit.
Choosing stable, dry wood also avoids many issues. Wet or green wood will shrink or bend later.
Let your lumber sit in your workspace for at least a day before cutting. This small step helps keep the box square as you build.
Time, Cost, and When to Consider Professional Help
Building a planter box usually takes about 2 to 4 hours. The exact time depends on your experience and the tools you use. Beginner-friendly plans and power tools like a miter saw and nail gun speed things up.
Expect to spend about $50 on materials for a basic planter box. Wood, nails, and weatherproof finish make up most of the cost. Prices can go up if you want larger sizes or premium wood types.
| Item | Typical Cost | Time Needed |
|---|---|---|
| Wood (cedar or pine) | $30, $40 | Cutting: 30, 60 min |
| Nails or screws | $5, $7 | Assembly: 60, 90 min |
| Weatherproofing (stain or sealant) | $10, $15 | Application: 30, 60 min |
| Tools (if needed: rental or purchase) | $0, $50+ | Setup and cleanup: 15, 30 min |
Knowing when to hire a professional can save you time and frustration. Call a pro if you don’t own basic tools or lack woodworking skills. Complex planter boxes, unusual sizes, or heavy customizations often need expert help.
Buying detailed planter box plans might be better if you want a guaranteed fit and step-by-step guidance. Professionals can provide plans tailored to your space and plant needs. This option costs more upfront but can reduce waste and errors.
Always measure twice and cut once to avoid wasting wood and time.
DIY planter boxes are simple enough for beginners with basic tools. You can finish a project in an afternoon with around $50 in materials. Take your time to measure well and apply weatherproofing to extend the planter’s life.
Step-by-Step Action Plan for Building Your Planter Box
Follow these steps to build your planter box from start to finish. Each step includes how to check your progress.
- Day 1: Gather materials and tools. Get wood, screws, drill, saw, and waterproof sealant. Make sure you have everything on your material list before starting.
- Day 2: Measure and cut your wood pieces. Use a tape measure and saw to cut pieces to your plan’s size. Double-check the measurements before cutting to avoid mistakes.
- Day 3: Assemble the planter frame. Screw the sides and bottom pieces together tightly. The box should hold its shape without gaps or wobble.
- Day 4: Add drainage holes. Drill evenly spaced holes in the bottom for water flow. Pour water in to see that it drains well.
- Day 5: Apply weatherproofing. Use a brush to coat all outer surfaces with sealant. Let it dry fully for the best protection.
- Day 6: Customize your design. Paint, stain, or add decorations as you like. Make sure your finishes are dry before use.
- Day 7: Fill and plant. Add soil and plants suited for your space. Check that plants fit comfortably and water drains freely.
- After 2 weeks: Inspect and adjust. Check for loose screws, warping, or water pooling. Tighten or fix anything that doesn’t look right.
Frequently Asked Questions
What Is the Best Wood to Use for a DIY Planter Box?
Cedar is the best wood because it resists rot and insects naturally. It lasts longer outside without needing chemical treatments that might harm plants.
Can I Build a Planter Box Without Power Tools?
Yes, you can use hand saws, hammers, and screwdrivers to build a planter box. This takes extra time.
It helps you avoid buying costly tools. It suits you if you’re starting out.
How Do I Prevent Wood from Warping in My Planter Box?
Sealing the wood with an outdoor-rated sealant on all sides helps prevent warping. Also, avoid placing the box directly on soil to reduce moisture exposure on the bottom.
Can I Use Recycled Wood for a Planter Box?
You can use recycled wood but avoid treated wood with chemicals or wood that’s rotted. Sand and seal recycled wood well to make it safe and durable for your plants.
What Size Planter Box Works Best for Vegetables?
A planter box at least 12 inches deep suits most vegetables for healthy root growth. Deeper boxes help support larger plants and retain soil moisture better.
How Often Should I Water Plants in a DIY Planter Box?
Most planter box plants need watering once a day or every other day in warm months. Check soil moisture by sticking your finger about an inch deep to see if it’s dry.
Key Points to Remember
Building your own planter box is satisfying and practical. Start by picking a simple design that fits your space. Grab your tools today and make your planter box a reality.