How to Setup a Drip Irrigation System: A Complete Guide for Beginners
Wondering how to setup a drip irrigation system for your garden? It’s simple and saves water while keeping plants healthy. Start by planning your layout carefully to cover all plants evenly with water.
Next, gather the right tools like tubing, emitters, and connectors. These parts control water flow and reach every root zone without waste. Make sure your water pressure stays steady around 25 to 30 psi for best results.
Installing the system means laying tubing, adding emitters, and securing parts to avoid leaks. Check your system thoroughly before use to catch any issues early. Drip irrigation uses less water and delivers it right where plants need it most.
Key Takeaways
- Start by mapping your garden to cover all plants evenly with drip lines.
- Use tubing, 1/4″ and 1/2″ fittings, and emitters suited for your crops.
- Maintain water pressure between 25 and 30 psi to keep emitters working right.
- Secure tubing with stakes to prevent shifting and damage during use.
- Test the system fully to ensure no leaks and full coverage before running.
- Place emitters close to plant roots, adjusting spacing as needed for growth.
What Is a Drip Irrigation System and How It Works

A drip irrigation system slowly delivers water directly to plant roots. It uses tubes and small emitters placed close to each plant.
Water flows from a faucet through a filter, pressure regulator, and tubing to the emitters. This keeps water pressure low, usually around 25 to 30 psi, to avoid damaging the system.
The main parts of a drip irrigation setup include a faucet assembly. Tubing and connectors link the system. Various emitters like button or adjustable drippers help water plants.
The faucet assembly controls water flow, filters debris, and prevents backflow. Tubing runs along your garden beds like a backbone. Connectors branch off to each emitter.
This setup saves water by watering only plant roots. It avoids watering the whole soil surface. Compared to traditional sprinklers, drip irrigation can cut water use by up to 50%.
About 90% of applied water reaches the plants, versus 65% to 75% for conventional methods. This means your garden gets more water with less waste.
Water flows steadily and precisely from each emitter, soaking the soil slowly. You can easily add or move emitters. This fixes dry spots or gives thirsty plants more water.
After connecting the system, flush the tubing to clear debris. Check the whole setup for leaks.
Drip irrigation fits many growing situations. It’s great for vegetable gardens, flower beds, container plants, and areas with limited water. Test your water pressure first.
This ensures it supports the full system without drops at the ends. A filtered, pressurized supply helps the system run smoothly and last longer.
Planning Your Drip Irrigation Layout for Best Coverage
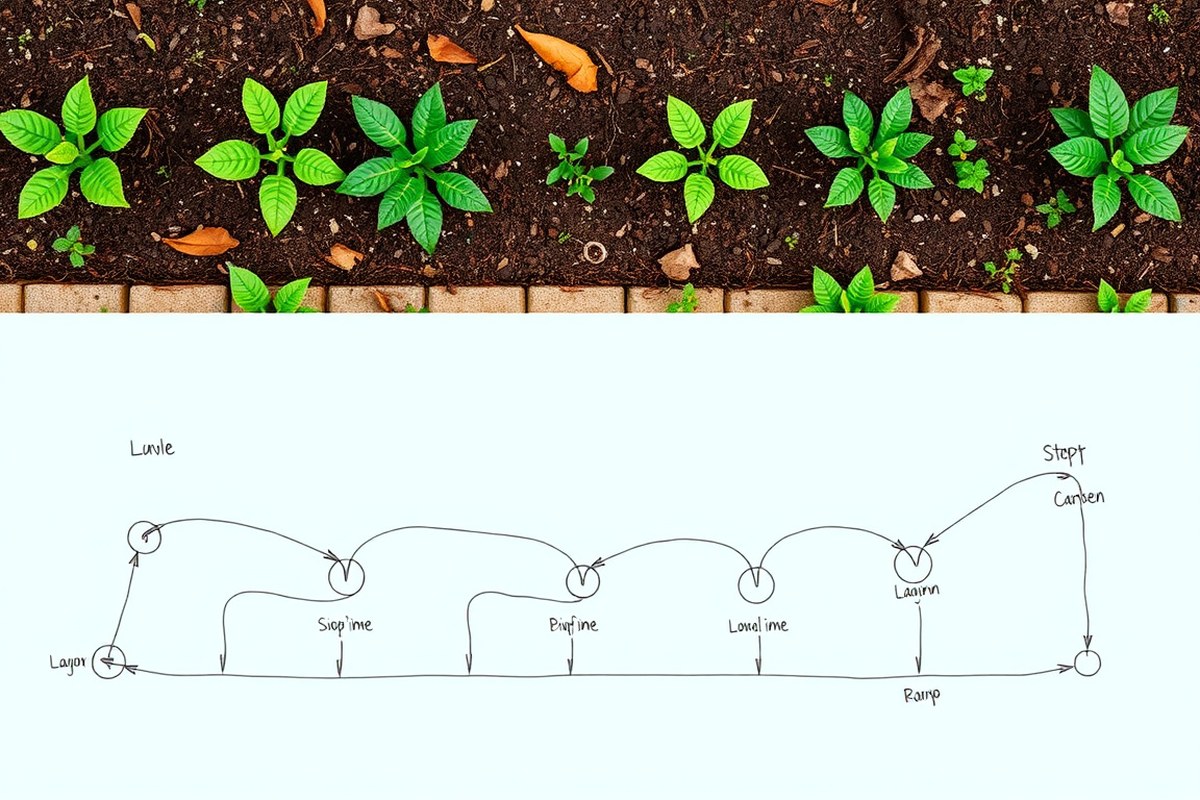
Plan your drip irrigation layout by mapping your garden and matching tubing routes to plants. Place emitters near their roots and space them based on plant type and soil. Proper layout saves water and keeps plants healthy.
Measuring and Mapping Your Garden Area
Begin by measuring your garden’s length and width with a measuring tape. Note specific plant beds, paths, and permanent features like trees or structures. Sketch a simple map showing all these details to guide tubing placement.
Mark where each plant or group of plants is located on the map. This will help you decide where to run tubing and position emitters. Planning with a clear map ensures no plants are missed.
Follow these steps to map your garden for drip irrigation:
- Use a tape measure to get your garden’s dimensions in feet or meters.
- Draw a rough outline of the garden on graph paper or use a digital app.
- Mark all plant beds, pots, and large planting areas on the drawing.
- Label each plant type or group to know their water needs later.
- Show walkways, fences, and other obstacles that tubing must avoid.
- Plan tubing routes that follow rows or bed edges to minimize tubing length.
Don’t guess distances. Accurate measurements avoid wasting tubing and water.
Determining Emitter Spacing for Plant Types
Emitter spacing depends on the plant’s root spread and water need. Place one emitter per plant for large plants like tomatoes or shrubs. For closely spaced plants, use drip tape with emitters 12 to 18 inches apart.
Small plants or young seedlings usually need emitters closer together. Spread larger emitter distances (18 to 24 inches) for deeper-rooted plants like fruit trees. Too wide spacing can leave parts of roots dry.
Choose emitter types too: use drippers that release water directly to a spot for trees. Spray or micro-sprinkler emitters work well for ground cover or delicate seedlings needing broad coverage.
Adjusting Layout for Soil and Climate Variations
Sandy soil drains quickly and needs emitters closer together or with higher flow rates. Clay soils hold water longer, so you can space emitters further apart. Adjust your layout based on this to avoid overwatering or underwatering.
Hot, dry climates increase evaporation. So plan for more emitters or use tubing that delivers water evenly along rows. In cooler, wetter areas, fewer emitters and lower output help prevent root rot.
Lay tubing along soil contours on slopes to prevent water runoff. Secure tubing with stakes to keep it in place during windy or rainy weather.
Tools and Materials Needed to Install Drip Irrigation
Setting up a drip irrigation system needs specific materials and tools to work well. Choosing the right parts keeps water flowing to your plants efficiently. You’ll want to gather tubing, emitters, connectors, and some handy tools before you begin.
Essential Tubing Types and Sizes
Main tubes usually come in ½-inch diameter. This size handles enough water for the entire system. Smaller ¼-inch tubes branch off from the main line to reach individual plants.
Poly tubing is the standard material, flexible but strong. It resists UV rays and won’t crack easily in sun or cold. You’ll cut it with scissors or a utility knife where needed.
Using the correct sizes ensures steady pressure. For example, ½-inch tubing lets water flow with less chance of clogging or bursts. Meanwhile, ¼-inch tubes give you precise watering at the roots.
Emitter and Drip Tape Options
Emitters control water delivery to each plant and come in different flow rates. Choose between ¼ gallon/hour for small plants or ½ gallon/hour for bigger ones. Some emitters let you adjust flow to match your garden’s needs.
Drip tape is a flat hose with built-in emitters spaced regularly. It works well for rows of vegetables or flowers. Pick tape widths that fit your planting rows, usually ½ to ¾ inches wide.
Emitters and tapes place water directly in the root zone, minimizing waste. Regularly spaced emitters mean every plant gets enough water without flooding soil.
Necessary Connectors, Regulators, and Filters
Connectors join tubing sections and attach emitters or tape. Compression-fit connectors require no special tools and let you make quick changes or repairs. Common connectors include tees, elbows, and couplers.
Pressure regulators keep water flowing at about 20 PSI, which drip lines need. Too much pressure can damage tubing or cause leaks. A good filter clears dirt from your water supply, preventing clogs in emitters.
Filters screw onto outdoor faucets and should be cleaned every few weeks. Skip filters only if you use very clean water like well water without particles.
- ½-inch mainline poly tubing
- ¼-inch branch tubing for emitters
- Various emitters rated ¼ to ½ gallon/hour
- Drip tape sized to plant rows (½ to ¾ inch)
- Compression connectors: tees, elbows, couplers
- Pressure regulator (20 PSI output)
- Inline water filter with fine mesh screen
Tools and Accessories for Installation
Scissors or a utility knife trim tubing to length cleanly. Sharp cuts prevent leaks at connectors. You might also want a hole punch for inserting emitters into tubing without damage.
A timer automates watering and saves you trips outside. Some timers also control garden hoses with screw-on adapters. Gloves help keep hands clean and protect against cuts.
Anchor stakes keep tubing flat on the ground and secure emitters. You don’t want tubing to move and disturb watering patterns. Putting stakes every few feet keeps everything neat and stable.
How to Size and Connect Your Drip Irrigation System
Calculate your garden’s water needs by adding up the flow rate of all emitters used. Most drip emitters deliver about 0.5 to 2 gallons per hour each.
Multiply the number of emitters by their flow rate. This gives the total gallons per hour your system must supply.
Check your water pressure using a pressure gauge attached to your garden faucet. Drip systems work best between 15 and 30 psi (1 to 2 bar).
Too high pressure can burst tubing or cause uneven watering. So a pressure regulator is often necessary.
Start connecting your system at the outdoor faucet or hose bib. Screw on a brass vacuum breaker first.
It stops water from flowing back into your home’s water supply. Then attach a filter to catch dirt and debris, protecting your tiny emitters from clogging.
Connect the pressure regulator after the filter. It lowers water pressure to the drip system’s ideal range.
Most regulators drop pressure to about 20 psi. Some come combined with a filter and vacuum breaker, saving installation steps.
Use plastic fittings to attach your mainline tubing to the pressure regulator outlet. Secure connections with clamps or barbed fittings to prevent leaks. Roll out your tubing carefully along your garden rows for even water flow.
A small garden with 20 emitters at 1 gallon each needs 20 gallons per hour total. Your water source must supply that flow at about 20 psi.
Then install a filter and pressure regulator right at the faucet. Hook up the main tubing and add emitters along the line.
In some cases, water pressure is lower than needed. You might add a pump to reach about 20 psi for the system.
Very high city water pressure can damage drip lines. A pressure regulator helps prevent this damage.
Filters cost between $15 and $40 depending on size and type. Pressure regulators range from $10 to $30.
These parts stop clogged emitters and burst tubing. They help your system run longer and save water.
Step-by-Step Installation of Tubing, Emitters, and Connectors
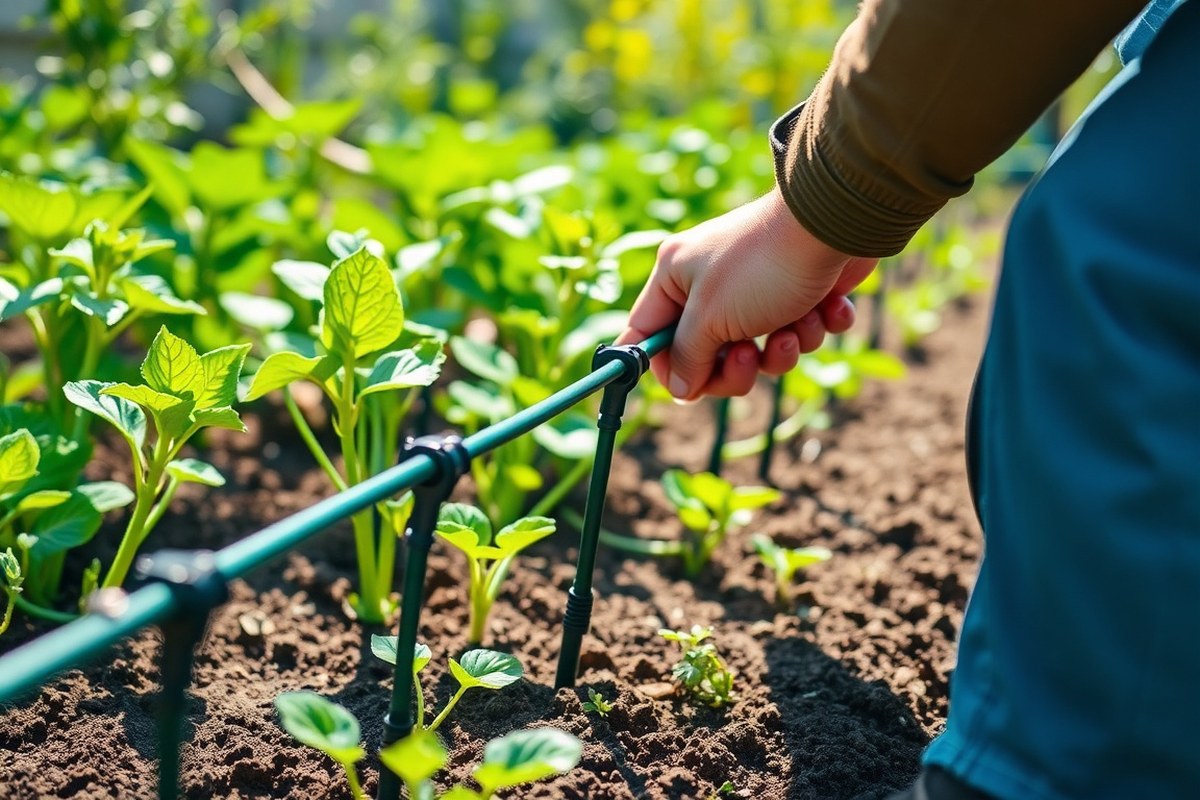
Start by laying out your 1/2-inch mainline tubing along the garden. Use stakes every 3 to 4 feet to hold it flat and in place. This prevents shifting when you add connectors or fill the system with water.
Punch holes in the mainline tubing with a proper punch tool. These holes mark spots to add emitters or branches. Make sure the punch fits your tubing size to avoid cracks or leaks.
Attach emitters or drip tape into the punched holes. Push emitters firmly to create a tight seal that won’t leak. For longer runs, connect laterals using barbed connectors or tees that fit inside the tubing.
Handle corners by gently bending the tubing or using elbow connectors for sharp angles. On slopes, anchor tubing securely with stakes to keep steady pressure and avoid movement. Check tubing for kinks or bends that can reduce flow.
- Measure the garden area and cut enough 1/2-inch mainline tubing, allowing extra length for turns.
- Lay out the mainline tubing around your plants. Use 1/2-inch tubing stakes every 3 to 4 feet to secure.
- Use the punch tool to make holes for emitters. Make holes where you want lateral tubing branches. This tool helps add irrigation parts easily.
- Insert emitters or barbed connectors into the holes, pressing firmly until sealed tight.
- Connect lateral lines to barbed connectors for rows of plants, securing with stakes along their length.
- Use elbow connectors for corners to prevent tubing kinks. Stake tubing on slopes to stop movement.
- Check all connections are snug and tubing lies flat before testing your system.
Use stakes every 3 to 4 feet to keep tubing secure. Loose tubing can kink and reduce water flow.
Testing Your Drip Irrigation System Before Use
Start by flushing the system before attaching emitters. Open the main water valve all the way. Let water run through tubing for about 2 minutes.
This clears out any debris left inside. This clears out dirt or debris that could clog your drip emitters later.
Next, check the pressure using a simple pressure gauge at the water source. Ideal pressure for drip irrigation usually ranges from 15 to 30 psi.
High pressure can burst tubing. It can also cause uneven watering.
Look closely for leaks along all tubing and connectors. Inspect connections by running your hand along the pipes while the system runs. Soapy water can help spot tiny leaks; bubbles form where water escapes.
Signs of improper flow include dry spots in your garden or water pooling near emitters. Also, emitters dripping too fast or too slow indicate blockages or pressure issues. Observe each watering point for steady, slow dripping.
Adjust flow by using inline valves or replace clogged emitters. Cutting the tubing slightly and inserting fresh emitters might be necessary. Using pressure regulators helps maintain consistent flow and prevents high-pressure damage.
- Flush system by running water through tubing for 2 minutes
- Use pressure gauge to verify 15-30 psi at water source
- Check and fix any leaks with soapy water test
- Look for dry spots or pooling water as flow clues
- Adjust flow using inline valves or emitter replacements
- Install pressure regulators to stabilize watering
Repeat this check after the first few uses to catch slow leaks or clogs early. Testing lets you fix small problems before plants suffer. Checking pressure takes 10 to 20 minutes.
It costs around $10 to $20. The price depends on where you buy the gauge.
Automating Your Drip Irrigation System for Convenience
Choose from mechanical or digital timers to automate watering with drip irrigation. Mechanical timers cost less and are easy to set up. They turn water on and off using a dial.
You just set the dial to your watering time. Digital timers offer better control over schedule and watering time.
They usually have several programs for different plants. This lets you match watering to plant needs.
Setting the timer right helps your plants get just the water they need. Program watering during early morning or late evening to reduce evaporation. Set each watering cycle to 15 to 30 minutes.
The exact time depends on your drip emitter rate. Soil type also affects how long to water. For example, sandy soil drains quickly and may need shorter, more frequent watering.
Battery-operated timers cost about $20 to $50, with basic digital models on the lower end. Some timers can connect to your home water supply or garden hose, making installation easier. Look for timers with simple LCD screens or flip controls if you prefer straightforward operation.
Smart timers and controllers add sensors that check soil moisture or weather conditions. These devices adjust watering so your plants don’t get extra water on rainy days. They often link to your smartphone for remote control, which saves time and prevents overwatering.
Solar-powered timers are handy when you don’t have electricity nearby. They use sunlight to charge and can keep your system running without battery swaps. They tend to cost more, around $50 to $80, but reduce ongoing maintenance.
Automating drip irrigation saves water and reduces guesswork on watering. Timers turn the system on and off automatically. This means you don’t have to remember it daily.
Automatic watering keeps plants healthier and more consistent. It also avoids overwatering that can cause root diseases or waste water.
Be careful to check timer settings seasonally. Plants need less water in cooler months.
So adjust or pause timers to avoid water waste. Also, prepare to override automation during extreme weather or if your plant setup changes.
Adding a timer or smart controller lets you adjust your watering schedule. You can customize how often and how long to water plants. This helps meet your garden’s specific needs better.
It can lower your water bill and save hours of manual watering each week. Start with a basic digital timer if you’re new to automation.
It’s an easy way to try drip irrigation control. This helps you learn without too much complexity.
Maintaining Your Drip Irrigation System to Prevent Problems
Check and clean your drip irrigation system every month during growing seasons. Regular upkeep prevents clogs and uneven watering. Seasonal shifts call for quick system tweaks and winter care to protect your setup.
Routine Monthly Inspection
Look over the entire system every 30 days while plants grow actively. Check for leaks, damaged tubing, or disconnected emitters causing water waste. Scan for uneven watering zones where plants might get less or no water.
Take time to inspect where tubing meets emitters. Dirt and tiny particles often collect here and block water flow. Keeping the whole layout visible helps catch problems before they start hurting your plants.
- Ensure all emitters deliver water evenly.
- Inspect tubing for holes, cracks or signs of wear.
- Verify filter is clean and free of debris.
- Tighten any loose connectors or fittings.
- Look for wet spots that suggest leaks or burst tubing.
- Test water pressure to stay within recommended ranges.
Use a checklist or notebook to track inspections and repairs. This habit helps spot patterns or recurring issues quickly. Regular checks extend your system’s life and save water.
Flushing and Unclogging Procedures
Flush your drip irrigation tubing at least twice a year to clear inside dirt and buildup. Remove end caps and let water run through for several minutes until it flows clean. This removes sediment or algae stuck in the lines.
Emitters clog easily with sediment, algae, or mineral deposits. To unclog, soak clogged emitters in vinegar or replace them with new ones. Avoid pressing holes with sharp objects or your system may leak or burst.
Use a water filter upfront to reduce clogging risks and protect your emitters.
- Turn system off before cleaning emitters.
- Soak clogs in a solution of one part vinegar to three parts water.
- Rinse emitters thoroughly after soaking.
- Push flush plug off the line to flush dirt out.
- Replace emitters that won’t unclog after cleaning.
Keeping filters clean and flushing lines regularly prevents buildup. This supports consistent water output and plant health.
Seasonal Adjustments and Winterizing
Adjust watering schedules as plants grow or weather changes. Longer days or higher heat call for increased watering times. In fall, reduce watering gradually to match slower plant growth.
Winterizing your drip irrigation system is key to avoid freeze damage. Drain all water from tubing and store detachable parts indoors if possible. Cover fixed components with garden fabric or foam insulation tubes for extra protection.
- Reduce run times in cooler months to avoid overwatering.
- Remove and clean filters in early spring and fall.
- Blow out lines with compressed air or completely drain them.
- Disconnect timers or controllers to conserve batteries.
Seasonal care reduces wear and protects your system during harsh weather. Unprotected water left inside tubing can freeze and crack pipes.
Common Issues and Quick Fixes
Uneven watering often means blocked emitters or pressure problems. Check emitters for clogs and clean or replace as needed. Verify your system’s pressure matches manufacturer guidelines, too low or too high pressure causes poor performance.
Leaks or burst tubing show up as puddles or soggy soil patches. Repair small holes with drip tape patch kits or replace sections of damaged tubing. Tighten or swap any loose or cracked connectors quickly to stop water loss.
- Replace clogged emitters after cleaning if output stays low.
- Use a pressure regulator to maintain steady water flow.
- Seal leaks with approved waterproof tape or patch kits.
- Check timer settings if system isn’t watering as scheduled.
- Clear any visible debris near the filter and inside the valve.
Early detection and fast fixes keep your garden healthy and irrigation efficient. Small repairs prevent more costly damage and water waste.
Estimating Time, Costs, and When to Hire a Professional
Installing a drip irrigation system usually takes 2 to 4 hours for a small garden. The time depends on how large and complex your layout is.
Your garden with many raised beds or pots needs more work. Setup takes longer in these cases.
Costs mostly come from tubing, emitters, connectors, and a pressure regulator. Prices start around $30 for a simple system. Larger or automated setups cost over $200.
Extra tools like a hole punch and filter may cost $10 to $30 each. But save time during installation.
| Component | Typical Cost Range | Installation Time |
|---|---|---|
| Main tubing (100 ft.) | $15 – $40 | 30 – 60 minutes |
| Emitters (20 pcs) | $10 – $30 | 15 – 30 minutes |
| Connectors and fittings | $10 – $25 | 15 – 30 minutes |
| Pressure regulator | $10 – $30 | 10 – 20 minutes |
| Filter | $10 – $30 | 10 – 15 minutes |
| Automation timer (optional) | $30 – $80 | 10 – 30 minutes |
Hiring a professional makes sense if your garden is large, uneven, or you want full automation. Pros handle water pressure tests, system design, and troubleshoot leaks faster. Also, they ensure your system meets any local water use rules.
Extra costs may come from water source adapters. You might also pay for trenching tubing.
Adding automation or backflow preventers raises costs and installation time. Avoid surprises by planning your setup parts list and layout carefully in advance.
Step-by-Step Action Plan
Follow these steps to set up your drip irrigation system today. Each phase helps you move closer to efficient watering.
- Before you start: Draw your garden layout first. Then measure plant beds. This helps you figure out tubing length. Check your plan matches your garden’s size.
- Day 1: Gather all tools and materials like tubing, connectors, and emitters. Confirm you have everything by checking off your shopping list.
- Day 2: Lay out the main tubing along your plant rows without attaching emitters yet. Make sure the tubing reaches every plant area.
- Day 3: Cut tubing and add connectors and emitters near each plant base. Run your fingers along to feel if each emitter is secure.
- Day 4: Connect the tubing to your water source. Turn the water on and look for steady drips without leaks.
- Day 5: Check if some plants get too much water. Adjust emitter flow or swap clogged ones. Watch plants for signs of too dry or too wet soil.
- Week 2: Add a timer to automate watering. Set it to water early morning or late evening for best results.
- After 4 weeks: Inspect the system weekly for clogs or leaks. Fix any issues quickly to keep plants healthy.
Frequently Asked Questions
How Do I Connect My Drip Irrigation System to the Main Water Supply?
Start by attaching a backflow preventer to your faucet for safety. Then connect the main tubing securely from the faucet to your garden’s layout.
What’s the Best Way to Avoid Clogs in Drip Emitters?
Flush the system after installation to remove debris. Regularly check and clean emitters to keep water flowing well.
Can I Expand My Drip Irrigation System Later?
Yes, it’s easy to add more tubing and emitters as your garden grows. Use connectors that fit your existing tubing for a secure setup.
How Often Should I Check My Drip Irrigation System for Leaks?
Inspect the system at least once a month to catch leaks early. Look for wet spots or dry areas, which tell you if water’s not flowing right.
Is It Better to Use a Drip Irrigation Kit or Build One Myself?
Kits are good for beginners since they have all parts included. DIY lets you customize but needs more planning and parts buying.
What Do I Need to Know About Automating a Drip Irrigation System?
Automating with a timer saves time and water by watering on a schedule. Choose a timer compatible with your system’s water pressure and flow.
The Bottom Line
Drip irrigation saves water and helps your garden thrive with proper setup and care. Start by planning your layout carefully to fit your plants. Try installing a drip line on one bed first.
This helps you get comfortable with it. Watch how your plants respond.