Should I Kill Hammerhead Worms? The Complete Guide with Safe, Proven Methods
Should I kill hammerhead worms when I find them in my garden? Yes, you should. These worms harm earthworms that keep soil healthy.
So getting rid of hammerhead worms protects your garden’s ecosystem. Catch them early to stop their spread effectively.
Hammerhead worms can regrow from small body parts. So you must kill each one completely to prevent more.
Avoid slicing or crushing them as their fragments can become new worms. Treat each worm individually using proven methods that permanently kill them.
The best way to kill a hammerhead worm is using salt and vinegar. Put the worm in a sealed bag with these. Then, freeze it for 48 hours.
This method ensures the worm dissolves fully and cannot regenerate. After freezing, safely discard the sealed bag in the trash to avoid any chance of spreading.
Key Takeaways
- Hammerhead worms damage earthworms essential to healthy soil.
- Kill hammerhead worms promptly to stop reproduction and spread.
- Do not cut or crush worms; fragments will regrow new worms.
- Use salt and vinegar in a sealed bag, then freeze worms 48 hours.
- Dispose of the frozen, sealed worm bag in regular trash afterward.
- Handle each worm individually; avoid using pesticides or salt on soil.
Should I Kill Hammerhead Worms When Found?
Yes, you should kill hammerhead worms when you find them. They eat earthworms, which your garden needs to stay healthy. Earthworms help break down dead plants in the soil.
They also help air reach plant roots. Without them, soil loses these natural benefits.
Hammerhead worms produce toxins in their skin that can irritate your skin and hurt pets. Kids and pets might get sick from touching these worms. They can feel nausea or start vomiting.
Keep them away from these worms. Keeping them away from your family and animals is important.
Killing hammerhead worms helps protect your garden’s soil health and prevents spreading toxins. Put each worm in a sealed bag to kill it. Freeze the bag for up to 48 hours.
This will make sure the worm is dead. You can cover the worm with salt and vinegar.
This mix stops the worm quickly. It works as another way to kill it.
Avoid using broad pesticides or spreading salt on the garden ground. These methods can harm beneficial worms and plants.
Handle all hammerhead worms carefully and do not leave their dead bodies on soil or compost. So pets and wildlife don’t contact them.
Hammerhead worms live in moist mulch, leaf litter, and garden beds where earthworms thrive. Removing them right away stops more damage and keeps your soil lively. Doing this also stops the worm from regrowing from small pieces if it breaks apart.
How to Identify Hammerhead Worms Accurately

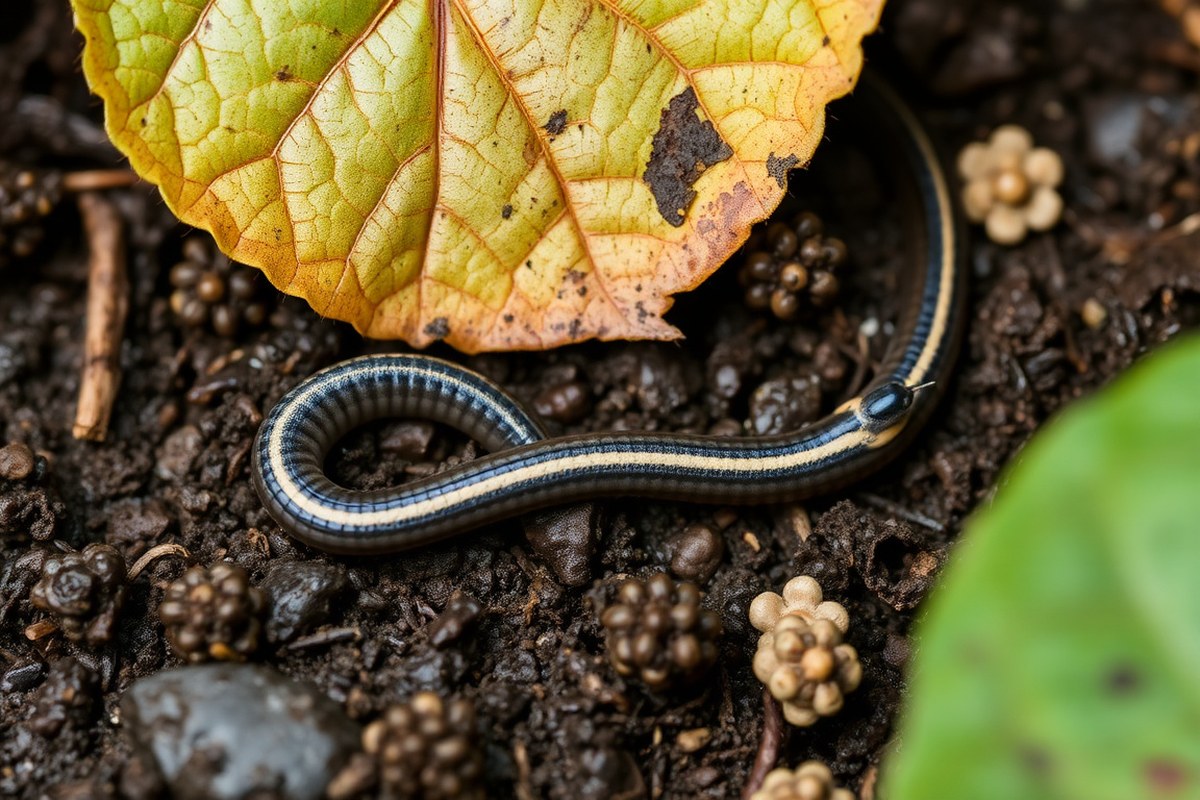
Hammerhead worms stand out by their flat, ribbon-like bodies and hammer-shaped heads. Unlike earthworms, they lack segments and have a broader head section. Spotting these features helps you tell them apart from native flatworms and earthworms.
Body Shape and Head Structure
Hammerhead worms have a wide, flat body that looks like a ribbon. Their head is unique, shaped like a hammer or half-moon. Earthworms, by contrast, are cylindrical with visible ringed segments all along their bodies.
Native flatworms are flat but usually have a different head shape. Hammerhead worms’ broad, arrowhead-like heads make them easier to identify even at a glance.
Texture and Movement Differences
Hammerhead worms move slowly, gliding over surfaces using mucus. Their skin looks shiny and smooth. Earthworms move in a more wriggly, segmented way and feel soft to the touch.
Flatworms don’t burrow like earthworms either. You’ll often find hammerhead worms on soil surfaces or under rocks rather than deep in soil.
Garden Habitats That Attract Hammerhead Worms
These worms prefer moist, shady areas of your garden. Look for them under logs, rocks, leaf litter, or dense bushes. They thrive where earthworms and slugs, their prey, are present.
Reducing damp spots and removing debris can make your garden less inviting to hammerhead worms. Strong drainage and less mulch help too.
Checklist: How to Spot Hammerhead Worms vs. Earthworms or Natives
- Look for a wide, flat, ribbon-like body
- Check for a broad, hammerhead-shaped front end
- Note the lack of body segments or rings
- Observe slow, gliding motion with a shiny surface
- Search in moist, shaded places under objects
- Compare to round, segmented, wriggling earthworms
- Check if the worm hides on the surface rather than burrowing
Always handle these worms carefully to avoid spreading parts that can regrow. Recognition helps you act correctly and protect soil health.
Be cautious: Hammerhead worms can regrow from body fragments. So never cut or crush them without following safe disposal steps.
Safe Handling and Protective Measures
Handling hammerhead worms requires care to avoid skin contact with their mucus. Always wear gloves and use tools when collecting or killing them. These steps reduce the risk of toxin exposure or irritation.
Why Gloves and Tools Are Essential
Hammerhead worms produce toxic mucus containing tetrodotoxin, which can irritate your skin. Wearing gloves creates a barrier to keep your hands safe from this substance. Tools like tongs or sticks prevent direct contact when picking up the worms.
Disposable nitrile or latex gloves work best because they are strong and waterproof. Using a sealable container to hold the worm also stops mucus from spreading. Avoid handling the worms with bare hands to keep skin irritation or toxin exposure away.
How to Avoid Contact with Worm Mucus
The mucus is slippery and hard to see, so avoid touching any slime trails. Use gloves or a paper towel to scoop the worm into a sealed bag or container. This approach prevents accidental skin contact with the toxic slime.
After handling, carefully remove gloves without touching their outer sides. Dispose of the gloves in the trash right away to stop spreading any toxin. Wash your hands well with soap and water, even if you never touched the worm directly.
To kill the worm, place it inside a plastic bag with salt, vinegar, or rubbing alcohol. Seal the bag tightly and dispose of it in your trash. Spritzing the worm with vinegar before placing it in the bag can help kill it faster.
When to Seek Medical Advice After Handling
Some people may react to hammerhead worm mucus with skin irritation or an allergic reaction. If you notice redness, swelling, or pain after contact, call your healthcare provider. They can advise treatment or test for toxin effects.
Pets might get sick if they lick or eat the worm’s mucus. Look out for symptoms like drooling, vomiting, or unusual behavior in dogs or cats. Contact your veterinarian quickly and show them a photo or sample of the worm, if possible.
- Put on disposable nitrile or latex gloves before touching the worm.
- Use tongs, a stick, or a paper towel to scoop up the worm carefully.
- Place the worm in a sealable plastic bag or container immediately.
- Sprinkle salt, pour vinegar, or add rubbing alcohol to the bag to kill the worm.
- Seal the bag tightly to contain the worm and any mucus.
- Dispose of the sealed bag in your household trash right away.
- Remove gloves carefully without touching their outside surface.
- Wash your hands thoroughly with soap and warm water for at least 20 seconds.
Step-By-Step Guide to Killing Hammerhead Worms Effectively
To kill hammerhead worms effectively, use salt, vinegar, rubbing alcohol, or freezing. Avoid squishing or cutting them, or you might make more worms. Handle worms carefully with gloves and keep them sealed until disposal.
Using Salt and Vinegar in a Sealed Bag
Salt and vinegar can kill hammerhead worms if applied properly inside a sealed bag. The salt draws water out of the worm’s body, while vinegar’s acidity attacks it. Using a bag prevents spreading the worm or any parts inside your garden.
To kill a hammerhead worm, pick it up with gloves or tweezers. Put the worm into a sealable plastic bag. Add 1 to 2 tablespoons of salt or 1/4 cup of vinegar.
Seal the bag to keep the worm contained. Seal the bag tightly to keep the mixture in contact with the worm and avoid contamination.
- Wear protective gloves or use tweezers to avoid direct contact.
- Place the worm carefully inside a sealable plastic bag.
- Add 1 to 2 tablespoons of salt or 1/4 cup of vinegar into the bag.
- Seal the bag tightly, squeezing out extra air if possible.
- Leave the bag airtight for several hours, preferably overnight.
- Dispose of the sealed bag in the trash according to local rules.
Freezing Method Details and Timelines
Freezing is an effective way to kill hammerhead worms without chemicals. Seal the worm in a bag first. This stops it from spreading or drying out.
Then you can put it in your freezer safely. The worm should stay frozen for at least 48 hours to ensure it dies completely.
Store the worm in a sealed plastic bag before placing it in the freezer. You can reuse the same bag you collected it in. After 48 hours, the worm will no longer be alive and can be disposed of safely.
Rubbing Alcohol and Sanitizer as Alternatives
Rubbing alcohol or hand sanitizer also works well to kill hammerhead worms. The alcohol dries out the worm and prevents it from surviving. Add enough rubbing alcohol to cover the worm fully inside a sealed container or bag.
Place the worm in a small jar or sealable bag. Pour about 1/4 cup of rubbing alcohol over it. Seal the container to keep it closed.
Seal the container and wait several hours until the worm is dead. Use this method if you want to preserve a specimen, since alcohol keeps it intact.
Why Pesticides Aren’t Recommended
Using pesticides or chemical sprays isn’t advised for hammerhead worms. No pesticide is specifically labeled for hammerhead worms.
Improper use can harm your garden and beneficial insects. Many pesticides are also ineffective because hammerhead worms have tough, slimy skin.
Instead, stick to physical and simple chemical methods like salt, vinegar, and alcohol. These methods target worms directly without risking harm to other plants or animals nearby. Always follow label directions for any chemical you use around your garden.
How to Collect and Dispose of Hammerhead Worms Safely
Use a sealable plastic bag or container with a tight lid. This helps keep the hammerhead worm secure. It stops it from escaping while you handle it.
This prevents the worm from escaping and spreading in your garden. Using a glass jar or a sturdy plastic container works well for this task.
After catching the worm, use a killing method right away. You can apply a killing agent or another proven way. This helps make sure the worm dies quickly.
Then, leave the worm sealed in the container or bag for at least 24 hours. Wait to be sure the worm is fully dead.
Some worms can still split and live if not fully killed. This wait helps prevent that.
- Use a sealable bag or container to trap the worm securely
- Apply a killing method immediately after collection
- Leave the worm sealed for a minimum of 24 hours
- Do not open the container until you confirm the worm is dead
- Dispose of the sealed bag or container in the regular trash
- Wear gloves during handling to avoid contact with toxins
- Clean tools and hands thoroughly after disposal
Sealing the container tightly is important to avoid accidental contact with the worm’s toxins. The toxins can cause skin irritation or harm pets if they come into contact with it. It also helps stop any baby worms from escaping if the worm was still alive.
Even after killing, keep the worm sealed for several hours. Ideally, leave it sealed for a full day. This stops any chance of survival before disposal.
This time frame guarantees the worm cannot regenerate or escape later. After waiting, throw the whole sealed bag or container in the trash.
Make sure it won’t reach your compost or garden again. This prevents spreading the worms.
Always keep hammerhead worms sealed during disposal to prevent spreading their toxic slime.
Common Mistakes That Make Hammerhead Worm Problems Worse
Cutting or crushing hammerhead worms is one of the worst things you can do. These worms can regenerate from body fragments, turning one worm into several. Experts warn that slicing them up often makes the problem worse by increasing their numbers.
Hammerhead worms reproduce asexually through fragmentation. Cutting a worm into parts can cause each piece to grow a new worm. This means breaking the worm apart spreads their population instead of reducing it.
To avoid this, never chop or crush hammerhead worms. Instead, use approved killing methods that destroy the entire worm without leaving fragments behind. You can soak the worm in saltwater.
Another option is slug bait. These baits must say they are safe for this pest.
Sometimes people squash the worm with a tool and think they kill it. But if small parts survive, those pieces can regenerate and start new worms. This mistake often leads to bigger infestations over a few weeks.
Catch a hammerhead worm without harming its body. Keep it in a sealed container.
Dispose of it according to local rules. Keeping it whole helps prevent more worms from appearing.
Handling hammerhead worms gently takes extra care but pays off in control results. Avoid cuts or tears during collection or removal to prevent fragments surviving. This small step can make a big difference in managing these invasive pests.
How to Reduce Hammerhead Worms Returning over Time
Hammerhead worms like dark, cool, and moist places that feel like their tropical home. Keeping your garden dry and sunny helps stop them from settling. Removing thick mulch and large piles of leaves can reduce those hiding spots.
These worms eat earthworms and slugs. Controlling their food sources can make your garden less attractive. Hammerhead worms may struggle to survive when slug or earthworm numbers drop.
- Water plants early in the day to let soil dry by evening.
- Clear away leaf litter and debris regularly.
- Avoid over-mulching; use thin layers if needed.
- Encourage natural predators of slugs and earthworms.
- Use physical barriers like copper tape around garden beds.
- Handpick and remove slugs to reduce their numbers.
- Turn soil occasionally to expose hiding earthworms.
Making these changes takes effort and some time. But you can see fewer hammerhead worms over months. Watch for more sunlight reaching the soil and less dampness.
Missing leaf clearance or thick mulch keeps worms coming back. Lower prey numbers help because hammerhead worms depend on earthworms or slugs for food.
Gardens near forests or shady spots may struggle to stay dry. Dry, bright spaces can be tough to keep in these areas. You might need to check often and remove worms quickly.
Using these methods lowers the chance hammerhead worms come back. It also benefits your plants by reducing pests like slugs.
When and How to Report Hammerhead Worm Sightings
You don’t always need to report hammerhead worms to local authorities. In many places, no formal reporting system exists.
Some states, like Virginia, have no official channel for these reports. So you can skip notifying them unless asked.
Still, reporting sightings can help track the spread and guide research. University programs and state agriculture departments sometimes gather data this way. For example, people in Kentucky can email photos and locations to reportapest@uky.edu to help keep track of these worms.
When you choose to report, include the date, precise location, and clear photos. Add a brief description of the worm’s size and appearance. This info helps experts confirm the species and monitor its spread.
National groups like the National Invasive Species Information Center offer resources. They don’t always accept direct reports from the public. You may need to check their website for details.
Contact your state’s agriculture department or cooperative extension office to see if they want reports. These agencies sometimes study or track invasive worms and can offer guidance on sending samples safely.
Don’t handle hammerhead worms with bare hands when collecting photos or samples. Wear gloves to avoid skin contact.
Reporting takes just a few minutes if you prepare a photo and location details. It costs nothing but your time and helps experts learn where these worms move each season. Photos taken on rainy days help a lot.
Hammerhead worms often appear after rains following dry spells. So try to snap pictures right after rain.
Living outside states with clear reporting options means you should try online databases. These platforms accept invasive species reports from across the country. It’s an alternative to missing local options.
These platforms compile sightings to show trends across regions. Just check that your photos are sharp and your location details accurate before sending.
Step-by-Step Action Plan to Control Hammerhead Worms
Follow these steps to reduce hammerhead worms safely and effectively in your garden. Track your progress by checking worm activity and plant health.
- Before you start: Put on gloves and protective eyewear. Confirm identifying features like a flat, hammer-shaped head.
- Day 1: Collect visible worms carefully using a stick or paper towel. Place them in a sealed container with salt water to kill them.
- Day 2: Dispose of the sealed container in the trash away from soil or garden beds. This prevents accidental spread.
- Week 1: Check moist areas under rocks and pots daily for new worms. Remove them as soon as you see any.
- Week 2: Remove dense ground cover and leaf litter where worms hide. Less shelter means fewer places to survive.
- Week 3: Report sightings to local invasive species authorities if your area has reporting systems. This helps track and control them.
- After 4 weeks: Monitor your garden weekly for at least a month more. Fewer worms and healthy plants mean your efforts are working.
Frequently Asked Questions
Is It Safe to Kill Hammerhead Worms in Your Garden?
Yes, killing hammerhead worms is safe if you handle them properly. Wearing gloves prevents skin irritation from their mucus.
Can Hammerhead Worms Regrow After Being Cut?
Yes, they can regrow from any body piece because they are unsegmented. Avoid cutting them to prevent spreading.
Should You Use Pesticides on Hammerhead Worms?
No, pesticides won’t work and can harm your garden’s beneficial insects and plants. Stick to physical removal methods instead.
Is It Necessary to Freeze Hammerhead Worms After Collecting Them?
Yes, freezing for up to 48 hours ensures the worm dissolves completely and can’t regrow. This is safer than tossing them in the trash.
Does Salt Alone Kill Hammerhead Worms Effectively?
Salt helps kill them but works best combined with vinegar. Apply both in a sealed bag for complete effectiveness.
Can Hammerhead Worms Survive Dry or Sunny Garden Spots?
No, they prefer cool, moist, and shady spots that mimic their tropical homes. Dry areas are less attractive to them.
Before You Go
Hammerhead worms cause problems and spread easily, so handle them with care. Start by safely collecting and killing any worms you find today. Reporting sightings can help protect your local environment from this invasive pest.