How to Get Rid of Bushes in Yard: 8 Proven Methods for Lasting Results
Knowing how to get rid of bushes in yard fast makes yard work easier. The best approach depends on bush size and root depth.
Small bushes respond well to cutting and digging. Bigger ones might need chemicals or machines.
Start by cutting the bush down to a manageable trunk height. Make a clean cut about 1 to 2 inches above the soil. This helps with effective herbicide treatment.
Cut carefully and evenly for best results. Applying herbicide soon after cutting stops regrowth and kills the roots deep down.
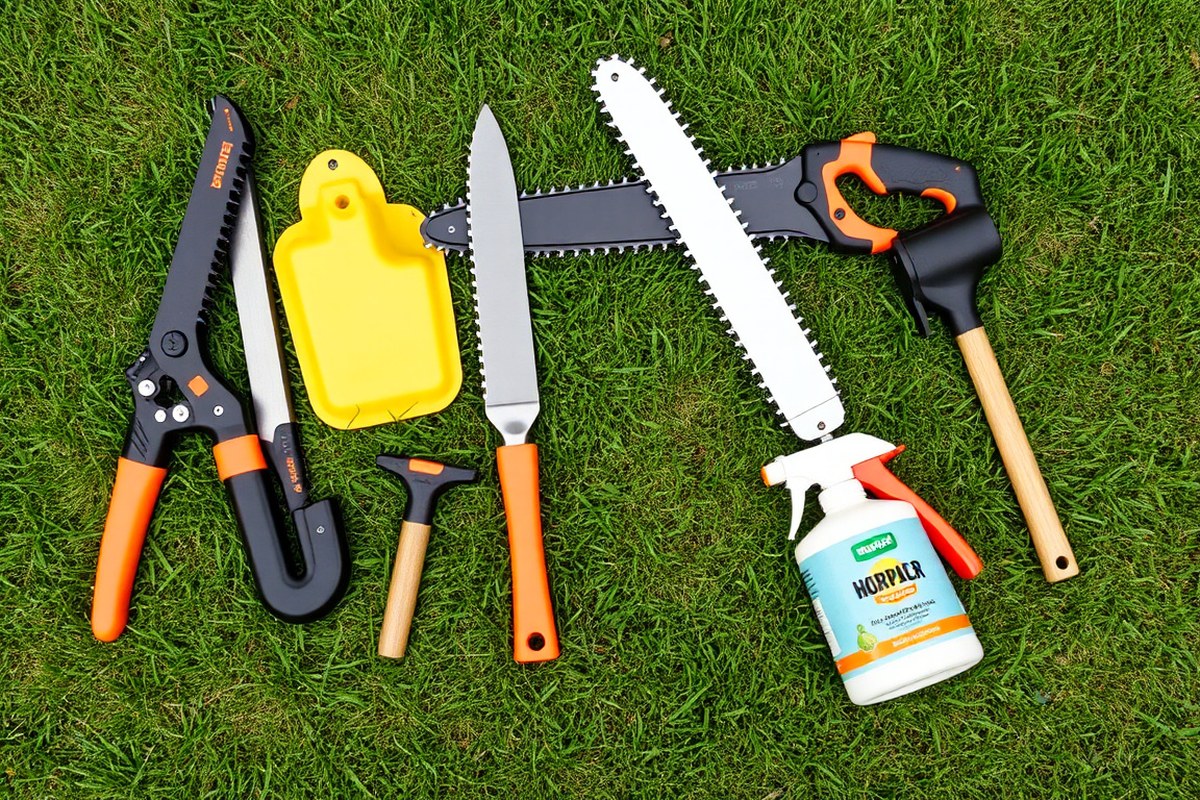
Safety gear is essential for protection when cutting or using herbicides. Gloves, eye protection, and long sleeves keep you safe during the work. Choosing the right tools also makes the job quicker and less tiring.
Key Takeaways
- Cut bushes 1 to 2 inches above ground for effective removal.
- Apply herbicide within 5 minutes of cutting to prevent regrowth.
- Use bypass loppers for stems under 1.5 inches thick.
- Dig roots down 10 to 14 inches to remove stubborn bushes.
- Rent a stump grinder for large stumps, costing $150 to $200 per day.
- Specialized root shovels cut roots easier than standard shovels.
1. Eight Effective Ways to Get Rid of Bushes in Your Yard
Removing bushes can be done in three main ways: manual, chemical, and mechanical. Each method suits different bush sizes and root depths. Small bushes with shallow roots often respond well to manual cutting and digging.
Large bushes with deep roots need chemical herbicides to kill fully. These herbicides work down to the roots. They stop the bush from coming back.
Mechanical removal uses machines like brush cutters or excavators. This works well for very big bushes. It also works for groups of bushes close together.
You should match the removal method to your bush size and roots. This makes the job easier and faster. It also helps avoid extra work.
The table shows the methods with their uses and timing. It explains what each method does best. It helps you know when to use each.
| Removal Method | Description | Suitable For |
|---|---|---|
| Cutting and Digging | You cut the bush and dig out its roots to remove it. This gets rid of the plant fully. It stops new growth from the roots. | Small to medium-sized bushes with shallow roots. |
| Chemical Removal | Using herbicides to kill bushes, including roots. | Larger bushes or those with deep root systems. |
| Mechanical Removal | Using machinery to cut or uproot bushes. | Very large bushes or multiple bushes in the same area. |
Manual removal tools cost roughly $60 to $140. This process takes a few hours for bushes smaller than 4 feet. It’s a hands-on way to remove bushes.
It works best in soils like sandy or loam. Chemical treatments can be cheaper but require careful timing and safety gear. Herbicide application takes at least 30 minutes.
After that, the chemicals need weeks to kill the roots. You must wait for the full effect.
Mechanical renting for machines costs roughly $150 to $250 and suits massive or stubborn bushes. This works faster but needs experience to avoid injury. Combining methods often helps, for example, cutting the bush then applying chemicals to stop regrowth.
2. Preparing Your Yard and Safety Gear Before Removal

Clear out the work area before you start removing bushes. Remove rocks, toys, and other debris that could get in the way or cause accidents. Trim back nearby plants or grass so you can see and reach the whole bush easily.
Wear the right safety gear to protect yourself from cuts, scrapes, and irritants. Gloves are a must to shield your hands from thorns and splinters. Sturdy boots with good grip help you avoid slipping on uneven or wet ground.
Eye protection like safety glasses prevents debris from getting into your eyes. Use earplugs or earmuffs to protect your hearing when using power tools. A long-sleeve shirt and pants keep your skin safe from scratches and insect bites.
- Sharp pruning saw or loppers for cutting branches
- Shovel or spade to dig out roots
- Rake to clear loose debris after cutting
- Trash bags or tarp to collect cut branches
- Heavy-duty wheelbarrow for hauling debris
- Stump grinder rental for large or stubborn stumps
- Herbicide spray if you plan to prevent regrowth chemically
Set up tools and safety gear within easy reach before you begin work. Working near power lines or under trees means extra caution is necessary. Large bushes require extra help to prevent injury from heavy lifting.
Wear gloves and eye protection every time you cut or dig to avoid injury.
In rough or muddy yards, check the weather forecast and wear boots with strong treads. Clear visibility and dry weather make the work safer and easier. Plan breaks if the bush removal takes more than a couple of hours to avoid fatigue.
3. Identifying Bush Types and Root Structures
Recognizing the type of bush and its root system helps you pick the best removal method. Some bushes have shallow roots you can pull out fast. Others have deep, tough roots that need digging or chemicals to remove.
Common Yard Bush Types
Many yards have popular bushes like boxwood, holly, or spirea. Boxwoods have small, dense leaves and slow-growing roots.
Holly bushes have spiny leaves and thicker stems with moderately deep roots. Spirea features clusters of flowers and shallow roots that spread quickly.
You can often identify a bush by its leaf shape, size, or flower color. Look for leaves that are glossy, needle-like, or broad and flat. This helps you guess the bush type and root style before removal.
Some small bushes have soft, shallow roots you can yank out by hand. Larger, woodier bushes usually have bigger roots that extend deeper underground.
Shallow vs Deep Root Systems
Shallow root systems spread just a few inches below ground. You can dig around these roots with a spade or pull younger bushes by hand. These are easier and cheaper to remove because the roots don’t go deep.
Deep roots can go 10 to 14 inches or more into the soil. You’ll need tools like a root saw or a mattock. Use them to cut and pry the bushes from the ground.
These tools help remove roots efficiently. Removing deep roots takes more time, effort, and sometimes chemicals to kill leftover fragments.
Cutting roots cleanly is key. Drive a sharp blade deep, slice through roots, then pivot to break them free. This technique lowers damage to your grass and helps stop new growth from stray roots.
Recognizing Invasive Species
Invasive bushes like autumn olive or bush honeysuckle spread aggressively through root suckers. You might see new shoots popping up far from the parent bush. These clones come from root fragments left behind after removal.
Invasive species usually have widespread lateral roots that make manual removal tricky. You may need chemical herbicides for a complete kill. Removing these bushes without harming your lawn takes care and sometimes professional advice.
Also check local rules before removing bushes. Some native or protected species may have specific removal restrictions. Being aware keeps you legal and protects your yard’s natural balance.
4. Manual Cutting and Digging Techniques
Manually removing bushes means cutting the bush down and digging out the roots. You need sharp tools to cut and strong tools to dig out the root ball. Handling larger root systems takes extra effort and some special techniques.
Cutting the Canopy and Trunk
Start by cutting the bush canopy down to a short trunk cluster. Aim to leave 18 to 24 inches of the main trunk above the soil. This handle gives you use to pull or dig later.
Use sharp pruning shears or a saw to make a clean cut near the base. A clean slice prevents damage and makes later herbicide application easier. Cutting right at the soil line can cause regrowth or disease.
Digging Around the Root Ball
Dig a trench around the stump before trying to remove it. The trench should be about a 24-inch radius for a 2-inch thick trunk. This exposes the lateral roots that hold the bush firmly.
Use a sharp, narrow root shovel for cutting roots, not a wide garden shovel. A root shovel reduces effort by cutting roots sharply instead of moving lots of soil. After cutting, pry the root ball up with a mattock or pick mattock for better use.
Removing Large Root Systems
Large bushes like yews have deep, dense root balls that resist simple digging. Use a chisel or mattock to slice vertical cuts along the root ball sides. This breaks the anchor roots holding the bush deeply in place.
You can also use a heavy-duty weed wrench or uprooter tool to pull the root ball. Attach a come-along winch to a sturdy tree or truck hitch. Use it to pull out large bushes after loosening the roots.
This method makes removing tough bushes easier. These methods reduce heavy digging and speed up removal.
- Cut the trunk cluster to 18, 24 inches above soil.
- Make clean, straight cuts near the base of stems.
- Dig a 24-inch radius trench around the stump base.
- Use a root shovel or mattock to cut roots in the trench.
- Pry the root ball upward with a pick mattock.
- For large bushes, slice vertical cuts around the root ball.
- Pull root ball out using a weed wrench or winch if needed.
- Chop canopy into 4-foot sections for disposal.
5. Safe and Effective Chemical Herbicide Application
To kill bushes and stop them from growing back, apply herbicides quickly after cutting. The best results come from using the right herbicide. Apply it to the fresh cut within 5 to 10 minutes.
Acting quickly helps the herbicide work better. Follow safety steps to protect yourself and the environment during this process.
Selecting the Right Herbicide
Choose a herbicide designed for woody plants or brush control. Products with triclopyr or glyphosate are common choices for killing bushes effectively. Check the label to ensure it targets the specific type of bush you want to remove.
Herbicides come in liquid or concentrate forms. Concentrates are cost-effective but you must dilute them correctly. Some ready-to-use sprays work well for small stumps and roots.
| Herbicide Type | Effective Against | Application Notes |
|---|---|---|
| Glyphosate | Many woody bushes and roots | Apply directly to fresh cuts, avoid contact with desirable plants |
| Triclopyr | Broadleaf bushes, difficult-to-kill roots | Better for resprouting plants, follow label for dilution ratios |
Cut-Stump Application Process
Cut the bush close to the ground and apply herbicide immediately to kill the roots. Timing is important. Apply the herbicide within 5 to 10 minutes after cutting for best absorption.
Use a brush or spray bottle to apply herbicide. Put it on the outer edge of the cut surface. Make sure to cover the whole edge carefully.
Cover the entire cut area but avoid dripping. This method helps the herbicide move into the roots and stops regrowth.
- Cut the bush stem close to ground level using a saw or loppers.
- Have your herbicide ready in a spray bottle or brush applicator.
- Within 5 to 10 minutes, apply herbicide directly on the fresh cut’s outer edge.
- Cover the entire cut surface thoroughly without soaking the ground.
- Optionally, treat around the stump to kill any leftover roots.
- Wait at least 30 days before planting sod or new grass near treated spots.
Do not wait longer than 10 minutes after cutting to apply herbicide. It won’t work as well.
Safety and Environmental Considerations
Wear gloves, eye protection, and long sleeves while handling herbicides. Avoid wind or rain during application to keep chemicals from drifting. Follow all label directions for personal safety.
Keep children and pets away from treated areas until the herbicide dries fully. Dispose of leftover chemicals according to your local hazardous waste rules. Prevent chemical runoff by not applying near water sources.
Note that some herbicides stay active in soil for weeks. This impacts how soon you can plant other plants like sod or flowers nearby. Waiting at least 30 days helps avoid damage to new plants.
6. Using Mechanical Tools for Large Bushes and Stumps
Big bushes and tough stumps need more power than you can give by hand. That’s when renting mechanical tools like stump grinders or brush cutters makes sense.
These machines speed up work and save your energy. They work well on wide shrubs or deep roots.
Stump grinders have a rotating blade that chips away wood. They turn the stump into small wood chips. This process removes the stump down to soil level or below.
Rent a grinder if the stump is over 12 inches wide. It helps finish the job fast on the same day. It costs about $80 to $150 per day to rent one, depending on your location.
Brush cutters are another good option for thick areas where stump grinders can’t reach. These tools have metal blades to cut thick bushes and roots. They need less effort than hand tools.
They work best on bushes under 6 inches thick. These bushes are too big for shears or loppers.
- Check for underground utilities before digging or grinding to avoid accidents.
- Wear safety glasses, ear protection, long sleeves, and gloves when using machines.
- Clear the area of rocks or debris to protect the grinder blade.
- Rent from a well-reviewed local store with clear return policies.
- Start slow, holding the grinder steady and moving it side to side over the stump.
- For dense or inaccessible bushes, use a brush cutter to clear around the stump first.
- Dispose of wood chips properly by composting small twigs or hauling away large wood chunks.
Your bush in a tight spot or no machine rental? Other options can make the job easier. Cut back thick parts with pruning or hand saws.
This reduces size before the final removal step. Transplanting some bushes might work, too, if you want to keep them.
Keep in mind that using these machines comes with some learning curve and risk. You have to control the equipment carefully to avoid injuries or damage. Hiring a pro costs more but gives fast, clean results.
It can be worth the extra expense. Otherwise, mechanical tools can be a DIY’s best friend for clearing large, stubborn bushes.
7. Disposal, Soil Restoration, and Preventing Regrowth
After removing bushes, you need to clean up the cuttings and prepare the soil. Proper disposal stops pests and diseases from spreading. Preparing soil helps new plants grow strong and healthy.
You need to stop the bush from growing back. This happens when roots or shoots stay in the ground. Remove these parts to prevent regrowth.
Use a sharp handsaw to cut the stump close to the ground. Make the cut about 1 to 2 inches above soil level. This keeps the stump clean and reduces rot.
Next, fill the hole with a mix of 60% native soil and 40% compost. Pile the soil about 2 inches higher than the nearby ground. This extra soil settles over six months and helps plants grow.
- Gather all cut branches and leaves from the removal site.
- Use a yard waste bag or compost bin for green material disposal.
- Make a clean horizontal cut on the stump, 1, 2 inches above ground level.
- Mix 60% native topsoil with 40% compost to create soil for filling.
- Fill the hole where the bush was with the soil-compost blend.
- Form a small mound about 2 inches above the surrounding soil level.
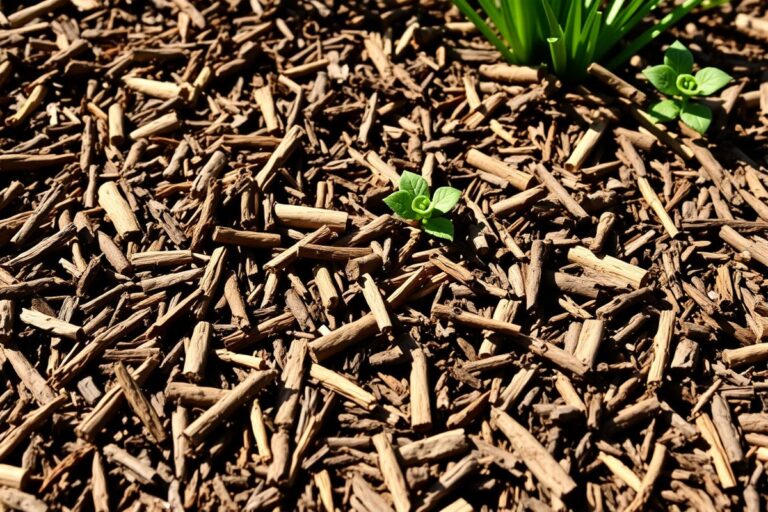
- Apply mulch on top to retain moisture and block new shoots.
- Check the area weekly for signs of sprouting and remove any shoots promptly.
Proper cleanup usually takes a couple of hours for average-sized bushes. The soil mix costs roughly $20 to $30 per cubic yard if bought locally.
Mulching prevents sunlight from reaching roots, reducing regrowth chances. Checking regularly allows you to remove new shoots quickly, stopping bushes from growing back.
Poor cleanup can attract insects or allow rot, affecting nearby plants. Filling the hole with just native soil may cause it to settle unevenly. This leaves dips that collect water and cause damage.
Not cutting the stump low enough can let shoots grow back fast. Removing all bush parts and using a soil mix prevents these problems.
8. When to Hire a Professional vs DIY Bush Removal
You decide to remove bushes yourself or hire a pro based on size. Location and your digging skills matter too. These factors help you choose the best option.
Small bushes with shallow roots you can dig up in a few hours fit DIY. Bigger bushes or those near power lines require professional help for safety and proper removal. Pros handle complex root systems and avoid damage to utilities, which reduces risks you might miss.
Cost-wise, DIY can save money upfront, usually $0 to $100 for tools and herbicides. Hiring a service costs between $150 and $600 per bush, depending on size and stubbornness. Professionals achieve thorough removal faster, often in one visit.
You might spend more time and effort doing it yourself, risking incomplete removal or yard damage. Weigh your time, safety, and skill against the cost of a pro.
Use a simple rule: small bushes and safe spaces mean DIY. Be sure you’re confident cutting and digging. If so, try it yourself.
For large, tricky bushes near utilities or steep terrain, call a professional. For any hazardous location, call your utility company first to check before digging. Pros lower injury and electrical risks during bush removal.
They prevent mistakes like leaving roots or hurting other plants. Hiring helps avoid costly problems.
| Factor | DIY | Professional Help |
|---|---|---|
| Bush Size | Under 4 feet tall, small root ball | Over 4 feet, deep or spreading roots |
| Location | Away from utilities, open space | Near power lines or water pipes |
| Tools Needed | Hand saw, shovel, herbicides | Heavy-duty cutters, stump grinders |
| Safety Concerns | Low; wear gloves and goggles | High; trained to handle risks |
| Cost | Mostly tools, $0-$100 | $150-$600 per bush |
| Time | Several hours per bush | 1-2 hours per bush |
Always call local utilities before you dig near power or gas. This stops injuries and fines. Check first to stay safe and legal.
Step-by-Step Action Plan to Remove Unwanted Bushes
Follow these steps to clear bushes safely and effectively. Check results regularly to stay on track.
- Before you start: Wear gloves, protective glasses, and sturdy shoes. Have tools and herbicides ready if needed.
- Day 1: Cut down branches using pruners or saws. Clear debris so you can see stumps and roots.
- Day 2: Dig around the roots with a shovel or mattock. Loosen soil to remove the entire root ball.
- Week 1: Apply a chemical herbicide to stumps if you want to prevent regrowth. Follow the label instructions carefully.
- Week 2: Monitor the area for new shoots. Remove any new growth by digging or cutting it back.
- Week 3: Fill holes with topsoil. Add mulch or plant grass seeds to restore the area.
- After 1 month: Inspect the area for any missed roots or shoots. Remove these promptly to avoid repeat growth.
Frequently Asked Questions
What Is the Best Time of Year to Remove Bushes from Your Yard?
The best time is during late winter or early spring before new growth starts. This timing makes it easier to see the roots and reduces stress on surrounding plants.
Can Removing Bushes Damage Nearby Plants or Lawn?
Yes, digging or applying herbicides can harm nearby plants if you’re not careful. Protect surrounding areas by clearing debris and applying treatments precisely.
How Can I Stop Regrowth After Cutting Down a Bush?
You should dig out most roots to stop bushes from growing back. Applying herbicide to the cut area can kill roots and reduce sprouts.
How Long Does It Usually Take to Remove a Medium-Sized Bush?
It often takes between 30 minutes to an hour depending on root depth. Using proper tools and techniques speeds up the process and reduces effort.
Is It Safe to Burn Bush Debris in My Yard After Removal?
Burning yard debris is risky and often restricted by local laws. Check local regulations before burning and consider municipal yard waste pickup options instead.
Can Wildlife Be Affected by Removing Bushes in My Yard?
Yes, bushes provide shelter for birds and small animals. Try to relocate wildlife carefully or remove bushes in stages to reduce impact on local wildlife.
The Bottom Line
Removing unwanted bushes takes clear steps and patience. Start by cutting and digging, then monitor growth. Stay consistent, and your yard will look fresh fast.