How to String a Weed Trimmer: Complete Steps, Tips, and String Selection Guide
How to string a weed trimmer often puzzles many first-timers and pros alike. Match the string to your trimmer’s spool size first. Wind the string evenly around the spool.
Avoid leaving any gaps while winding. Use 20 to 25 feet of line. But follow your trimmer’s specific instructions for length.
Start by unplugging or turning off the trimmer to prevent accidents. Remove the spool or get the bump head, depending on your model. Pay attention to the winding direction printed on the spool to avoid tangles.
Cut the string neatly, leaving about 4 to 6 inches sticking out after loading. This length ensures smooth feeding during use without breaking easily. Use quality, correctly sized line to avoid frequent replacements and damage.
Key Takeaways
- Always turn off or unplug your trimmer before string replacement.
- Check your trimmer’s spool label for the correct string diameter.
- Cut 20 to 25 feet of string for most trimmer spools.
- Wind string tightly and evenly in the spool’s marked direction.
- Leave 4 to 6 inches of string extending from the spool’s edge.
- Use slightly thicker string for tougher, thicker grass cutting.
How to String a Weed Trimmer Step-by-Step
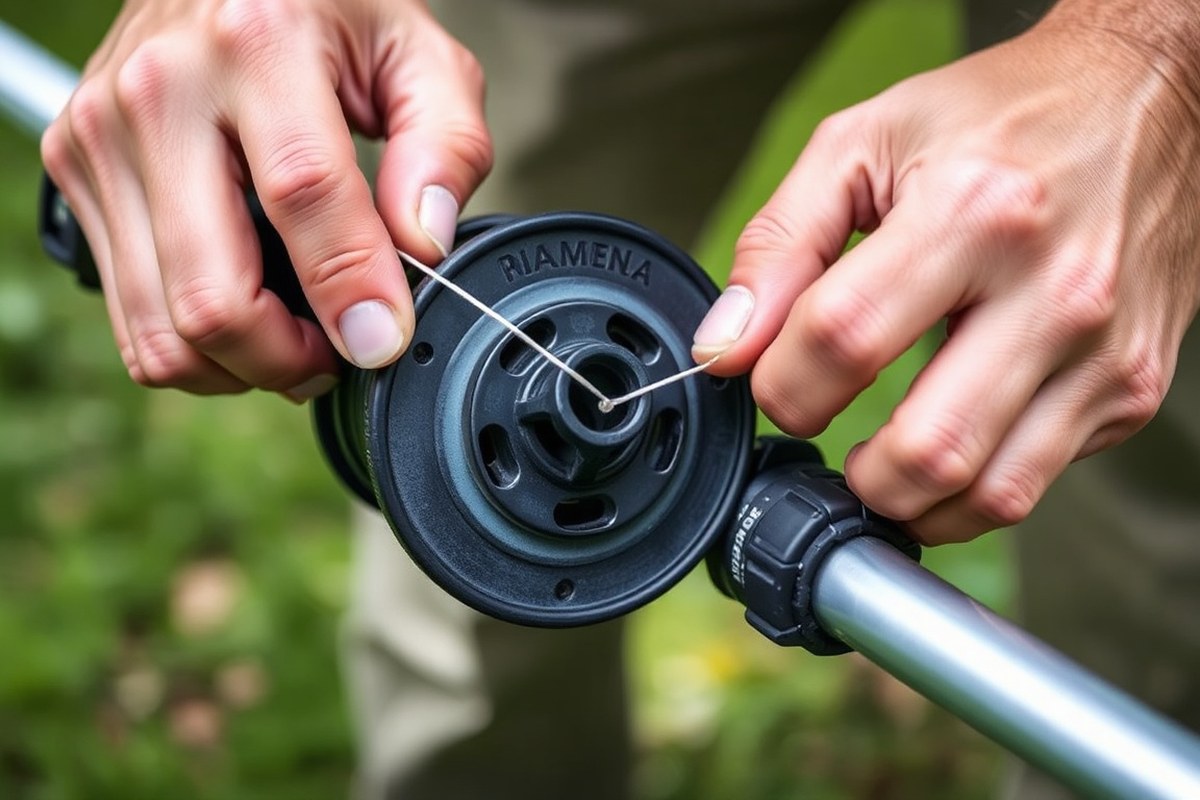
Replacing the string on your weed trimmer is a simple but careful task. Start by clearing out all old string and debris from the spool. Clean the spool area well so the new line feeds smoothly without getting stuck.
You’ll need about 10 to 20 feet of new trimmer line for most models. Check your trimmer or spool for the correct line diameter before buying new string.
Follow the arrows stamped on the spool to wind the line in the right direction. Too tight or twisted winding can cause jams or poor feeding.
- Turn off and unplug your trimmer. Make sure the power is off before you begin.
- Remove the spool from the trimmer head. Some models require popping off the head, others just pull the spool free.
- Pull out all the old string from the spool. Clear leftover bits and clean any dirt inside the spool compartment.
- Cut a new length of line between 10 and 20 feet. Use the recommended diameter for your trimmer model.
- Insert one end of the string into the hole or slot in the spool. Leave about 6 inches free after threading it through to secure it.
- Wind the string tightly around the spool following the arrow direction. Avoid overlapping lines or winding too loosely.
- Leave about 6 inches of line unwound at the spool’s outer edge. This helps the string feed properly once reinstalled.
- Replace the spool in the trimmer head and secure it firmly. Pull on the loose ends to test the line feeds freely.
Winding the string in the wrong direction makes it feed poorly or jam. Tight winding stops the line from advancing when you bump the head.
Leaving enough loose line helps the string extend easily during use. Avoid tangling or knotting by keeping the string neat as you wind.
Some trimmers need you to thread the line straight through eyelets or slots on the spool. Others let you load pre-wound spools to skip winding.
Check what type you have before starting. This step-by-step approach will get your trimmer cutting efficiently in minutes.
Choosing the Right String Type and Size for Your Trimmer

Choosing the right trimmer string helps your weed trimmer work better and last longer. The string’s thickness fits your trimmer’s motor power. It also matches the plants you cut.
The shape helps with cutting different types of plants. Let’s explore the main string sizes and shapes to find the best fit for you.
Common Trimmer Line Diameters and Uses
Trimmer lines come in different thicknesses, measured in inches. Thinner lines suit light trimming around flower beds.
Thicker lines tackle tough weeds and brush. Your trimmer’s manual usually lists the correct diameter to use.
| Size (Gauge) | Best for | Trimmer Type |
|---|---|---|
| .065″, .080″ | Light residential work, grass, and thin weeds | Light-duty electric/battery trimmers |
| .085″, .105″ | Medium to heavy residential, thick weeds, light brush | Standard gas-powered trimmers |
| .110″ and up | Commercial landscaping, heavy brush, thick stalks | Professional heavy-duty trimmers |
Using the right diameter keeps your trimmer running efficiently. Too thick a line can overload your trimmer, while too thin won’t cut well. For most homes, lines between 0.065 and 0.095 inches work best.
Check your trimmer’s user manual or measure the old line’s diameter before buying new string.
String Shapes: Round, Square, Star, Twisted
Trimmer strings come in several shapes, each offering different cutting styles. Round lines last longest and load easily.
Square and star lines cut tougher plants faster but wear out quicker. Twisted lines make smoother cuts and less noise.
| Line Shape | Best For | Pros | Cons |
|---|---|---|---|
| Round | Regular grass | Durable, easy to load | Less cutting power |
| Twisted | Thick weeds | Less noise, cleaner cut | More expensive |
| Square/Star | Heavy brush | Sharp edges cut thick stems | Wears faster |
Choosing the line shape depends on what you trim most. Round line suits everyday lawn grass.
Star or square shapes work better on dense brush or woody stems. Twisted line fits yards with mixed vegetation and noise concerns.
Matching String to Trimmer Type and Vegetation
Using the right string matches your trimmer’s power and vegetation type. Light electric trimmers do well with thinner lines under 0.080 inches, ideal for grass and thin weeds. Gas-powered trimmers handle thicker lines from 0.085 to 0.105 inches for tougher jobs.
Heavy-duty commercial trimmers need lines 0.110 inches or more to cut dense brush. Soft, fine grass can be cut with round 0.065 inch line. But thick weeds call for star-shaped or twisted line in 0.095 inch or larger size.
Always check your spool’s capacity and trimmer specs before buying. Overloading your spool with too thick or long a line can cause jams and damage. Following these rules will keep cutting smooth and your trimmer happy.
Don’t mix string sizes or types unless your trimmer manual says it’s safe. Weird combos can cause feed problems.
Tools, Materials, and Safety Precautions Before You Begin
You need a few simple tools and safety gear to string a weed trimmer. Always turn off the trimmer before starting and protect your eyes and hands. Securing the trimmer properly helps you avoid accidents and damage.
Essential Tools and Materials Checklist
Having the correct tools on hand speeds up your work. Use a new spool that matches your trimmer’s size and model. Keep scissors or pruning shears nearby to trim the string neatly.
- Replacement spool or string suitable for your trimmer
- Scissors or pruning shears
- Gloves to protect your hands
- Small screwdriver or pliers (sometimes needed to remove spool cover)
- Cloth or rag to clean spool housing
These tools usually cost less than $20. Scissors or shears are often already at home.
Gloves and string are affordable additions you can easily buy. Using the recommended string size saves wear and tear on the trimmer head.
Personal Protective Equipment Recommendations
Protect your eyes, hands, and body because trimmer strings can snap back. Safety glasses or goggles shield your eyes from flying debris and snapped strings. Gloves prevent cuts from sharp spool edges and the string itself.
Wear long sleeves to protect your arms. Closed shoes keep your feet safe from cuts. These clothes help avoid bruises from flying grass and rocks.
Keep ear protection on hand if your trimmer is loud during testing or trimming. Safety gear is cheap and quick to wear, helping you avoid injuries.
Safe Handling and Positioning Tips
Make sure your trimmer is turned off and unplugged or has the battery removed. This prevents the trimmer from starting accidentally while you work. Place the trimmer upside down on a flat surface, like grass or a soft mat.
Position the trimmer so the cutting head faces upward, giving clear access to the spool. Hold the trimmer steady before you begin. You can wedge the handle against a strong object.
Or ask someone to hold it firmly for you. For some models, remove the spool by unscrewing the cap or pressing release tabs carefully.
Common Problems and How to Fix Stringing Mistakes
String jamming often happens when you overfill the spool or use the wrong diameter line. Overfilling leaves no room for the string to move freely, causing it to tangle. Using brittle or low-quality string can also snap easily and jam the feed mechanism.
Winding the string in the wrong direction is another common mistake. The spool has an arrow showing the correct winding direction.
Winding the string in the wrong direction stops it from feeding right. Always follow the loading arrows exactly to avoid feeding problems.
Broken lines usually mean the string is too thin for the trimmer. Uneven tension while winding can also cause this problem. Try to keep the winding even and firm.
Keep the tension steady to prevent tangling and snapping. High heat or debris on the spool can also dry out the line, making it brittle.
- Do not overfill the spool; leave space for string movement.
- Match the string diameter with your trimmer’s recommendation.
- Follow the arrow marked on the spool when winding the string. This helps the string feed smoothly during use.
- Secure the string end in the spool notch before winding.
- Keep tension even and consistent when wrapping the line.
- Clean dirt from the spool and trimmer head regularly.
- Use quality string designed for your trimmer type.
The spool may not fit properly if the line isn’t through the spindle hole. Make sure the string goes through that hole before placing the spool.
Missing this step can block the spool from seating fully. Also, make sure no loose debris or string bits block the spool’s rotation.
Some trimmers take pre-wound spools. These clip on easily and reduce winding mistakes.
With manual winding, taking your time helps. Secure each end before wrapping and align line ends evenly to prevent tangles.
Differences in Stringing Gas, Battery, and Electric Trimmers
Stringing a weed trimmer differs by power source and spool style. Gas trimmers usually handle thicker line for tougher jobs. Battery and electric models often use thinner line but can share line types if specs match.
Gas trimmers tend to need heavier, thicker string because of their powerful engines. Their spools are often larger, so stringing might take a bit more effort.
Electric and battery trimmers usually have smaller, lighter spools and use thinner line. That makes stringing easier and lighter to handle.
| Trimmer Type | Recommended Line Size | Stringing Complexity | Common Spool Style |
|---|---|---|---|
| Gas | 0.080″ to 0.095″ (2.0 to 2.4 mm) | More effort due to larger spool | Single or dual-hole bump-feed spool |
| Battery | 0.065″ to 0.080″ (1.65 to 2.0 mm) | Moderate; smaller spool easier to handle | Bump-feed spool or fixed-length spool |
| Electric (corded) | 0.065″ to 0.080″ (1.65 to 2.0 mm) | Moderate; similar to battery trimmers | Usually bump-feed or simple spool |
Before stringing, always cut power to avoid accidents. Gas trimmers need the engine off. Battery trimmers need the battery removed.
Corded models must be unplugged. This prevents unexpected spool spin that can cause injury.
Gas trimmers can take thicker line optionally, helping with thick weeds and tough brush. Line thicker than 0.095″ is rare and might cause strain.
Battery and electric trimmers often recommend 0.065″ or 0.080″ for best balance. Using too thick line risks overloading the motor or tangled spools on smaller models.
Spool designs vary by trimmer but share common types. Most gas trimmers have dual or single-hole bump-feed spools. This lets you tap the spool on the ground to release more string.
Electric and battery trimmers use bump-feed spools too. But some have fixed-length spools you replace when done. Knowing your spool type helps with proper threading and avoiding tangles.
Always disconnect power before stringing to avoid injuries from accidental spool spin.
Battery trimmers often feel lighter to string because their smaller spools hold less line. This also means you may need to reload string more often. Gas trimmers’ bigger spools hold more line.
So fewer reloads but more effort each time. The exact threading process changes slightly by spool design. But cutting power first is the most critical step.
How Often to Replace the Trimmer String and Signs You Need It
Replace your trimmer line based on how often you use it. For average homeowners, expect to change it every few weeks during heavy use. Light use may stretch that to a couple of months.
Watch for signs like the line breaking frequently or getting noticeably shorter during mowing. When the trimmer doesn’t cut weeds cleanly, replace the string.
The trimmer head also feels unbalanced when the string needs changing. Dull or worn lines struggle with thicker or woody vegetation, which wears the string out faster.
Some signs to look for include:
- Line snaps repeatedly during normal use
- The string becomes uneven or frayed
- Trimmer loses cutting power or efficiency
- Line is much shorter than when you last replaced it
- Visible damage like kinks or brittleness on the line
Vegetation type plays a big role. Thicker weeds, brush, or tough grass demand more from the string.
You’ll replace your line more often if you trim woody plants with an ordinary nylon line. A tougher string might last longer there.
Maintaining your string helps it last longer between replacements. Keep the trimmer head clean by removing debris after each use. Don’t push the trimmer too fast into thick patches.
Doing this wears down the line quickly. Take it slow and steady for longer string life.
When you add new string, choose the correct diameter and type for your trimmer. Using the wrong string causes more breaks and faster wear.
Typically, 0.065 to 0.080 inches thick is common for home use. Follow your manual or the line packaging instructions closely to match the size.
Tips to Make Your Trimmer String Last Longer
The key to making your trimmer string last longer is the way you use it. Avoid running the trimmer at full throttle because high speeds wear down the string faster. Keep the cutting head at the right angle.
It should be about 30 degrees to the ground. This helps lower unnecessary string breakage.
Using the proper cutting technique helps too. Trim in smooth, sweeping motions instead of chopping directly into tough vegetation. Hitting hard surfaces like concrete or rocks will snap the string quickly.
So keep the line just above those areas. Try cutting wet grass only when you must.
Dry string breaks less often than wet string. It resists breaking better when dry.
- Cut 3 to 4 feet of string for each spool fill to avoid rapid wear.
- Soak new string in water before use to make it more flexible.
- Store string in a cool, dry place to prevent brittleness.
- Replace string once it shows visible wear or stops cutting well.
- Choose brands made specifically for string trimmers for durability.
- Wear close-toed shoes when trimming for safety.
- Turn off the trimmer before adjusting or replacing the string.
String selection influences how long it lasts. Pick quality types made for your trimmer model.
Thicker string lasts longer but needs the right spool size. Some brands offer improved wear resistance or have a twisted design that resists bending and snapping.
Handling the string properly before and during use also matters. Soak new string in water to soften it, which reduces breakage.
Store leftover string in a dry spot away from heat. Those small habits make your trimming jobs last longer and reduce trips to replace string early.
How to Handle Different Spool Designs When Stringing
There are three main spool types for weed trimmers: two-hole, single-hole, and pre-wound spools. Each type holds string differently, so the stringing steps vary. Knowing the spool you have helps you string your trimmer quickly without messing it up.
Stringing a Two-Hole Spool
Two-hole spools have two separate holes for threading each end of the string. This design keeps the string tight and balanced during use. It usually requires winding the string evenly in opposite directions on both sides.
Follow these steps to string a two-hole spool:
- Cut two lengths of string, about 8 to 12 feet each, depending on your trimmer manual.
- Insert the first end of string into one hole and pull it through halfway.
- Insert the second string end into the other hole, pulling it through evenly.
- Wind each string end tightly and evenly in opposite directions along the spool grooves.
- Leave about 6 inches of string loose before securing each end under the notches.
- Place the spool back in the trimmer head and secure the cover.
- Pull each string end outside the trimmer guard through the feed holes.
Make sure you wind the strings without overlapping or tangling to avoid jamming during use.
Working with a Single-Hole Spool
Single-hole spools hold one continuous string threaded through a single hole. The string winds in just one direction. This makes it easier to use.
However, it can tangle if you don’t wind carefully. You need one long string, often around 15 to 20 feet.
Here is how to string a single-hole spool properly:
- Cut a string about twice the length of the spool slot circumference.
- Insert one end of the string through the hole and pull about 6 inches out.
- Wind the string tightly in the direction shown on the spool, usually with an arrow.
- Keep the string neat as you wrap to prevent overlaps and tangles.
- Secure the string end under the holding notch on the spool.
- Thread the loose end through the trimmer’s eyelet or feed hole.
- Replace the spool and cover, making sure the string extends evenly on both sides.
Avoid winding the string in the wrong direction. It can cause the feed mechanism to jam.
Using Pre-Wound Replacement Spools
Pre-wound spools come with the string already wrapped and ready to install. These spools save time and are perfect when you want a fast replacement. Not every trimmer model supports them, so check your owner’s manual first.
To install a pre-wound spool, follow these simple steps:
- Remove the old spool from the trimmer head.
- Place the new pre-wound spool onto the spool holder inside the trimmer head.
- Pull the string ends through the feed holes on the trimmer head.
- Secure the spool cover back onto the trimmer head until it clicks in place.
- Test the string feed by gently pulling the ends outside the guard.
Do not try to rewind pre-wound spools. They are sealed and designed for single use.
Step-by-Step Action Plan for Stringing Your Weed Trimmer
Follow these clear steps to string your weed trimmer quickly and correctly. This plan helps you keep your tool ready to cut efficiently.
- Before you start: Gather your new trimmer line, screwdriver, and gloves. Check the spool type and size to match your trimmer model.
- Step 1: Remove the spool cap carefully. Press any release tabs and twist gently if it feels stuck.
- Step 2: Measure the line to the right length. Usually around 10 to 20 feet. Cut it once you have the right length. This prevents overfilling and tangles.
- Step 3: Put one end of the line into the spool’s hole. Wind it evenly around, following the arrows on the spool. Keep the line tight to avoid jams.
- Step 4: Secure the line in the notches provided on the spool. Leave about 6 inches of line free before reattaching the spool to the trimmer head.
- Step 5: Snap the spool cover back into place. Pull the line gently to check it feeds freely without resistance or slip.
- After a use session: Inspect the line length before storing. Replace or rewind as needed to avoid weak strands that break easily.
Frequently Asked Questions
Can I Use Braided Line for My String Trimmer?
Most string trimmers require nylon line, not braided. Braided line wears too fast and can damage the trimmer head.
How Tight Should I Wind the New String on the Spool?
Wind the string evenly and snug but do not over-tighten it. Too tight can cause jamming or poor string release.
Can I Reuse Leftover String from My Old Spool?
It’s not recommended because old string can be brittle or tangled. Using fresh line prevents breakage and feeding problems.
What’s the Best Way to Dispose of Used Trimmer Line?
Used trimmer line should go in the trash, not compost or yard waste. Line can take years to break down and harms the environment.
Do I Need to Remove the Spool Every Time I Replace the String?
Usually yes, to wind the string properly. Some models allow you to refill without removal but check your manual.
Is It Normal for the String to Break Quickly After Restringing?
Quick breakage often means string too thin or wound loosely. Use the right string size and wind it tight and even.
Final Thoughts
Stringing your weed trimmer properly keeps it cutting smooth and saves frustration. Give your spool a close look each time before you start trimming. That simple check helps you catch small problems before they slow down your work.