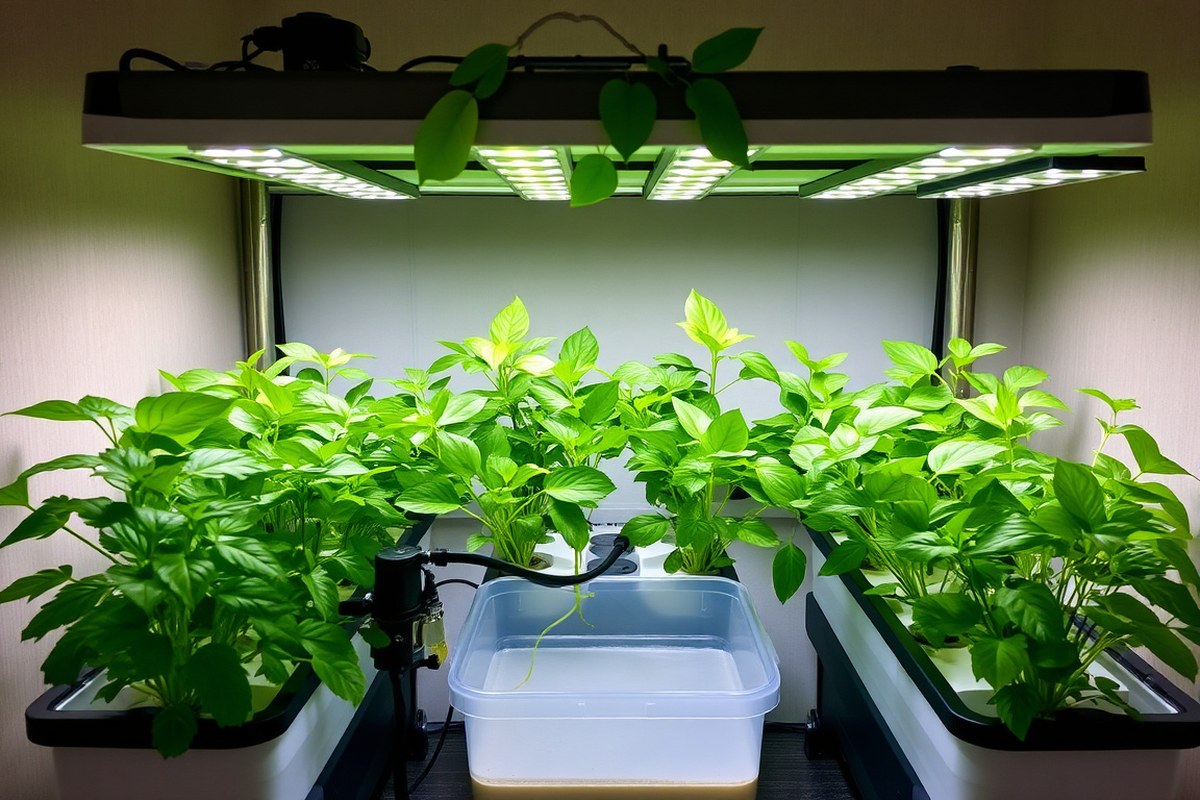
How to Make a Hydroponic System: Step-by-Step Guide for Beginners
You can start a hydroponic system with a simple plastic container. Add a pump and tubing to move water directly to plant roots. This setup is cheap and easy to build at home.
The system recycles nutrient-rich water, using up to 90% less water than soil gardening. Choose a food-grade container holding at least 5 gallons. Drill holes 6 to 8 inches apart on the lid for your plants.
Use a drill bit that fits your plant pots. Run the pump for 30 minutes to check water flow before adding plants. Indoor hydroponics need good lighting.
LED grow lights typically provide 14 to 18 hours of light daily. Proper light and water help plants grow faster and stay healthy.
Key Takeaways
- Pick a 5-gallon food-grade container as the base for your system.
- Space holes 6 to 8 inches apart to allow plants enough room.
- Circulate water with a pump, running it at least 30 minutes initially.
- Use LED grow lights to provide 14 to 18 hours of daily light.
- Recycle nutrient water to save up to 90% compared to soil gardening.
- Germinate seeds in rock wool cubes for healthy root development.
How to Build a Simple Hydroponic System at Home

Building a simple hydroponic system at home takes just a few materials. You also need some basic tools. It doesn’t have to be complicated.
The Deep Water Culture (DWC) method suits beginners well. It has a simple setup. You can find all supplies easily.
You need a water container and net pots for the plants. Also, use an air pump to oxygenate the water.
That’s all it takes. But electricity isn’t mandatory if you choose a floating raft design.
Gather all materials in advance to avoid delays. Most items can come from a home improvement store or online.
After assembling the system, test it before planting to ensure water levels and oxygenation work correctly. Testing prevents root rot and poor growth caused by stagnant water.
- Collect materials: Find a large bucket or plastic container. Get net pots, clay pellets, an aquarium air pump, tubing, an air stone, and nutrient solution.
- Prepare the container: Drill holes in the container lid to fit the net pots snugly. Make sure the holes hold the pots above the water line.
- Install the air pump: Connect the air stone to the tubing. Put the air stone at the container’s bottom. Connect the other end to the air pump outside.
- Fill with water: Add water until it just touches the net pots’ bottoms. Avoid covering the plant stems completely. Mix in the nutrient solution following package instructions.
- Insert plants: Put seedlings with roots into the net pots. Add growing medium like clay pellets around roots for stability.
- Power on the system: Turn on the air pump to start oxygenating the water.
- Test and observe: Watch water circulation and aeration for 24 hours. Ensure water isn’t stagnant and the pump works quietly with bubbles visible.
Keeping the water oxygenated stops roots from suffocating. Low oxygen causes yellow leaves and slow growth. You may adjust water levels if roots seem too wet or dry.
The whole setup should cost about $30 to $50 depending on supplies and size. Testing first cuts down the risk of losing plants from setup errors. A well-working system has clear water, lively roots, and healthy seedlings.
Choosing the Best Hydroponic System Type for Beginners
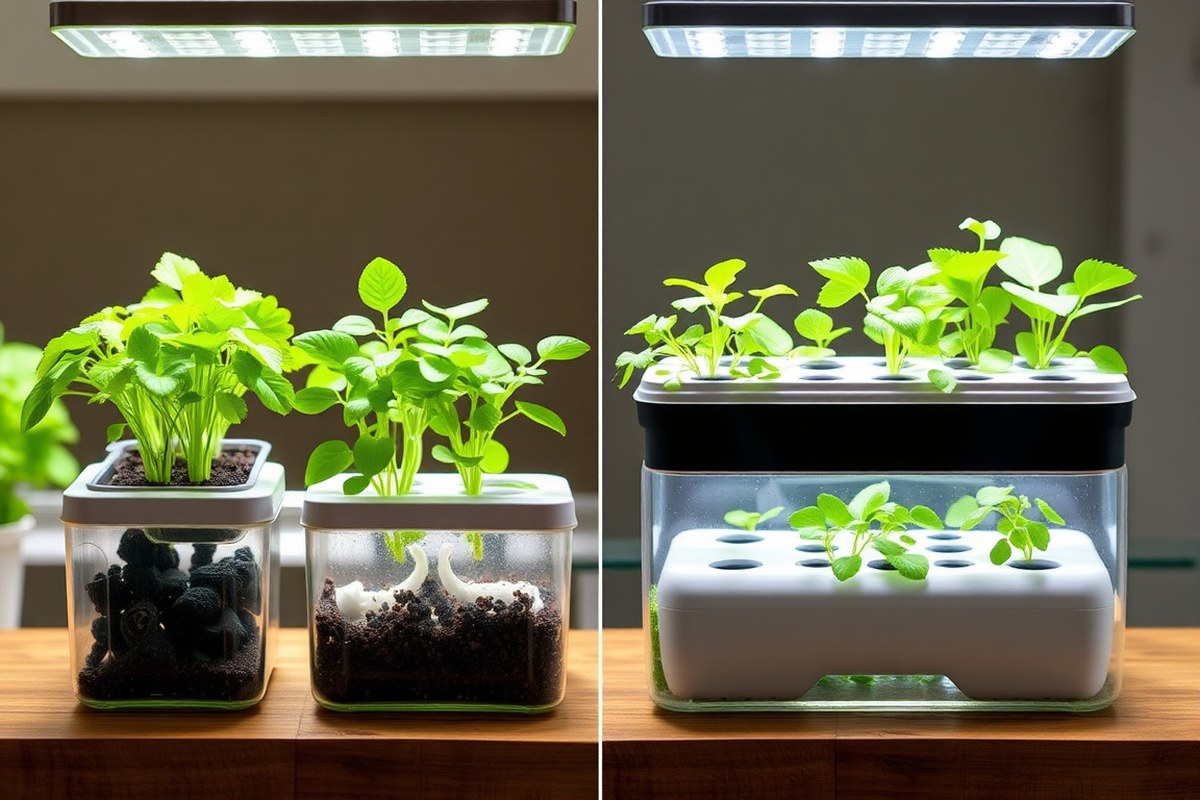
The easiest hydroponic system for beginners is the Deep Water Culture (DWC) or wick system. These types cost less and need little maintenance.
You can build a simple setup without electricity. But others like Nutrient Film Technique (NFT) usually require more care and power.
Deep Water Culture (DWC) Features
DWC holds plant roots in oxygen-rich, nutrient-filled water. The setup is simple and low cost, usually $50 to $100 for basic kits. You need an air pump to oxygenate the water, which costs extra.
It fits well in small spaces indoors and works great for leafy greens and herbs. The opaque reservoir blocks light to prevent algae, keeping water clean longer.
Roots are fully submerged, so watch the oxygen levels carefully. DWC struggles without a power source for the air pump.
Nutrient Film Technique (NFT) Explained
NFT flows a thin nutrient film over plant roots in tilted channels. Roots get nutrients in a flowing stream, not fully submerged in water. NFT needs a water pump and steady electricity to keep the solution moving.
This system costs more, about $300+, and is better for commercial or experienced growers. It uses less water but requires constant monitoring of pumps and nutrient flow.
NFT is good for small spaces. But it can cause problems. Pump breaks or power cuts make it worse.
Wicking and Kratky Methods Overview
Wicking uses a cloth to pull nutrients to plants without pumps or electricity. It’s cheap and easy but suits only small, light feeders like herbs or lettuce. Kratky is a no-pump DWC variation where roots grow in stagnant water.
Both methods need less maintenance and electricity, making them ideal for beginners or low-resource setups. Kratky is a good hands-off option for indoor gardening.
These methods cost less than $50. They fit tiny spaces well. But plant size and growth are slower than pumped systems.
Aeroponics Basics and Suitability
Aeroponics sprays roots with nutrient mist in air-filled chambers. This method offers fast growth and efficient nutrient uptake. However, aeroponics costs more and needs complex pumps and timers.
It suits advanced growers who want to maximize growth in small spaces. Beginners may find aeroponics hard to maintain because equipment failures quickly harm plants.
Expect higher startup costs and technical work. It’s not recommended without experience or steady electricity.
| System Type | Cost Range | Electricity Needed | Space Required | Maintenance | Best For |
|---|---|---|---|---|---|
| Deep Water Culture (DWC) | $50 – $100 | Yes, for air pump | Small to medium | Low to moderate | Leafy greens, herbs |
| Nutrient Film Technique (NFT) | $300+ | Yes, for water pump | Small | High | Commercial, advanced users |
| Wicking | Under $50 | No | Small | Low | Herbs, small plants |
| Kratky (No-pump DWC) | Under $50 | No | Small | Low | Leafy greens, beginner |
| Aeroponics | $300+ | Yes | Small | High | Advanced growers |
The choice depends on your budget, available space, and skill level. DWC or Kratky works best if you want low cost and simple care. Avoid systems that rely heavily on pumps if your electricity is unstable.
Use an opaque reservoir for DWC systems to block light and stop algae growth.
How Hydroponic Systems Nourish Plants Without Soil
Hydroponic systems feed plants by delivering water packed with nutrients directly to their roots. Instead of soil, roots get a carefully balanced nutrient solution dissolved in water.
This setup removes many problems roots face in soil. It helps plants drink in nutrients more easily.
Oxygen also plays a key role in hydroponics. Roots need oxygen to stay healthy and grow well. Deep Water Culture systems use air stones to add oxygen bubbles.
This stops roots from drowning. Good oxygenation keeps roots strong and supports better nutrient absorption.
Roots get perfect water, nutrients, and oxygen in hydroponics. That helps plants grow faster than in soil.
They avoid competition for resources and stresses like compacted soil or pests. On average, plants in hydroponics can grow 25% to 50% faster, showing quicker growth and maturity.
To nourish plants correctly, mix hydroponic nutrients into water following label instructions. It’s important to measure carefully to avoid underfeeding or burning the plants.
Fresh, oxygen-rich nutrient solution gives roots what they need. It speeds up plant growth well.
Preparing and Maintaining Nutrient Solutions for Optimal Growth
You need to mix your nutrient solution carefully and check its pH often. Keeping nutrients balanced helps your plants take up what they need. Adjusting pH to between 5.5 and 6.5 keeps nutrients available to most crops.
Nutrient Components and Ratios
Start with a commercial hydroponic nutrient mix for best results. These mixes combine nitrogen, phosphorus, potassium, and trace minerals suited for plant growth. The correct ratio depends on the plant’s growth stage and type.
For example, leafy greens like lettuce require more nitrogen for leaves. Fruiting plants such as tomatoes need more potassium and phosphorus. Here’s a basic way to prepare a nutrient solution for a 5-gallon reservoir:
- Fill the reservoir with 5 gallons of clean, room temperature water.
- Measure and add 10 grams of a balanced hydroponic nutrient mix designed for leafy crops.
- Stir the solution thoroughly until all nutrients dissolve.
- Check the pH before adding plants or adjusting further.
Using a pH Test Kit Effectively
Test your solution’s pH daily at first, then every couple of days. A pH between 5.5 and 6.5 helps plants absorb nutrients properly. To adjust pH:
- Dip the test strip or probe into the nutrient solution.
- Compare the color change on the strip to the kit’s chart or read the meter.
- PH above 6 can cause nutrient issues in hydroponic setups.5, add small amounts of pH down solution (usually phosphoric acid).
- PH below 5 may lead to nutrient deficiencies in your plants.5, add pH up solution (often potassium hydroxide).
- Mix well and retest after a few minutes to confirm.
Schedule for Monitoring and Replenishing
Change your nutrient solution every two or three weeks to avoid salt buildup and nutrient imbalances. Add fresh solution or top up every few days to maintain stable levels. Keep a maintenance checklist for nutrient health:
- Test pH every 2 days.
- Top up nutrients if water level drops or plants grow rapidly.
- Replace the entire nutrient solution every 14 to 21 days.
- Inspect plants weekly for signs of nutrient deficiency or excess.
- Clean the reservoir and clear any algae or residue buildup before refilling.
Lighting and Environmental Requirements for Indoor Hydroponics
Hydroponic plants need strong, consistent light to grow well indoors. LED grow lights use less energy. They also give off very little heat.
That’s why they are the best choice. Position the lights above your plants, following the manufacturer’s distance recommendations to prevent leaf burn.
Most plants require 12 to 16 hours of light daily. A timer can help keep this schedule steady without extra work.
Some leafy greens do fine with 12 hours. Fruiting plants like peppers benefit from closer to 16 hours.
Temperature and humidity also matter for healthy growth. Aim for 65 to 75°F during the day and no lower than 60°F at night.
Humidity should stay between 40% and 60% to avoid fungal issues or dried-out leaves. Proper ventilation helps keep fresh air moving and balances moisture.
Using fans or small vents will keep the air flowing inside your hydroponic space. Your room can get too warm.
Use a small air conditioner or open a window. Plants grow slower when temperature falls below 60°F. Growth also slows if humidity is too high or too low.
Place your grow lights on a timer. So they turn on and off automatically every day.
Selecting Plants and Preparing Seedlings for Hydroponics
Choosing the right plants and preparing seedlings properly is important for your hydroponic success. You want plants that grow well with water and nutrient solutions.
Seedlings that can easily adapt to soilless growing media. Starting seeds in the right way ensures strong roots ready for your system.
Ideal Plant Varieties for Beginners
Lettuce, spinach, and herbs like basil and mint thrive in hydroponic setups. These plants grow fast and don’t need a lot of space, making them perfect for newcomers. Tomatoes and peppers also work well but require more light and support.
Plants with smaller root systems do best in simple hydroponic systems. Leafy greens are less finicky and show results quickly, which keeps your motivation strong. Avoid large or deep-rooted plants at first since they can be tricky to manage indoors.
Germinating Seeds Without Soil
Start your seeds in rock wool cubes or starter plugs. Both hold moisture well. They also let roots grow easily.
Keep the cubes moist but not soaking wet to avoid rot. Once roots reach about 2 inches, they’re ready to transfer into your hydroponic system.
Check seedlings daily for consistent moisture and warmth around 70 to 75°F. Use a spray bottle to mist them gently instead of pouring water. This stops the seeds from drowning and helps strong root development.
Choosing the Right Growing Medium
Your growing medium holds plants upright and delivers nutrients to roots. Coconut coir, vermiculite, and perlite hold water well. They also let air flow to roots.
That’s why many gardeners use them. The wick action in these media moves nutrient solution efficiently, which keeps roots healthy.
Fill the space around seedlings gently with your chosen medium. Keep the top surface below the pot’s rim. This stops spills from happening.
It also prevents extra moisture buildup. Good drainage and aeration in the medium help avoid root diseases.
- Coconut coir: natural, holds water, pH-neutral
- Perlite: lightweight, excellent drainage
- Vermiculite: holds moisture well, good aeration
- Rock wool: ideal for seed germination and seedlings
- A mixture of perlite and coco coir for balance
Common Problems in Hydroponics and How to Fix Them
Watch your system for pH imbalances, nutrient deficiencies, root rot, and pests. PH levels outside the 5.5 to 6.5 range block nutrient uptake.
Check pH with test strips or a digital meter every two or three days. Adjust pH up or down using food-grade pH up or pH down solutions following package instructions.
Nutrient deficiencies show as yellow or spotted leaves and stunted growth. Change your nutrient solution every 1 to 2 weeks to keep nutrients balanced. Replace the solution sooner when a deficiency shows.
Check the pH again after replacing it. Clear symptoms show which nutrient is missing.
Yellow leaves signal nitrogen lack. Brown leaf edges mean potassium deficiency.
Root rot can kill plants if roots stay wet without oxygen. Run your air pump 24 hours a day to aerate the water and keep roots healthy. Clean your entire system and replace the nutrient solution every two weeks to stop harmful bacteria.
Dark roots that smell bad need trimming right away. Change the water immediately after cutting them.
- Keep the air pump running nonstop to avoid stagnant water
- Test and adjust pH levels every few days
- Change nutrient solution every 1-2 weeks
- Watch leaves for nutrient deficiency signs
- Clean system parts regularly to stop disease buildup
- Inspect plants often for pests like aphids or spider mites
- Remove any damaged roots or leaves promptly
Pests like aphids or spider mites can damage plants quickly. Spray affected leaves with a mild soap solution or use insecticidal soap safe for edible plants.
Prevent pests by keeping your grow area clean and avoiding standing water outside the system. Check your plants daily during early growth stages for any small insects or sticky residue.
Identifying problems early saves time and money. Keep your system clean to avoid problems. Watch nutrient and pH levels regularly.
Make sure there is good airflow around the plants. Healthy roots look white and firm. Yellowing leaves or slimy roots mean it’s time to take action.
Maintaining and Expanding Your Hydroponic System over Time
Check your hydroponic system daily to keep it running well. Watch the water level closely and top it up with pH-balanced water when it goes low. This helps plants get steady nutrients and avoids stress caused by drying out or too-strong solutions.
Every three to five days, test the nutrient solution’s pH and strength. Keep pH between 5.5 and 6.5 to help plants absorb nutrients properly. Use a pH meter or test strips to check levels.
Adjust with pH up or down products if needed. Keep the pH balanced for healthy plants. Measure electrical conductivity (EC) to track nutrients.
Refill or replace the solution as it drops. This helps keep plants healthy and strong.
| Task | Frequency | Details |
|---|---|---|
| Check water level | Daily | Top off with pH-adjusted water as needed |
| Measure pH & nutrient strength | Every 3-5 days | Keep pH 5.5-6.5; adjust nutrient levels |
| Replace nutrient solution | Every 1-2 weeks | Completely drain & refill for best growth |
| Clean system components | Monthly or before refilling | Prevent algae and blockages |
Swap out nutrient solutions every one to two weeks to avoid buildup of salts and contaminants. Drain your reservoir, rinse it, and fill it with fresh, balanced nutrient mix. This keeps plants growing strong and prevents nutrient lockout, which slows growth and causes yellowing leaves.
Expanding your hydroponic garden means adding more growing sites or upgrading equipment. Start by increasing your reservoir size or adding more containers and plants. Space them so roots have room and light can reach all leaves.
You can also add an automated nutrient dosing system. It saves time and reduces mistakes. Upgrade your lighting or air circulation as your garden grows.
Larger setups need more light and airflow. This helps plants grow well and stay healthy.
Keep a simple journal or use an app to track maintenance. This helps you spot problems early. Regular checks keep your plants thriving.
Step-by-Step Action Plan to Start Your Hydroponic Garden
This plan walks you through each phase to get your hydroponic system running smoothly. Follow these steps and watch your plants grow without soil.
- Day 1: Assemble your simple hydroponic system using the chosen materials. Confirm water flows properly and pipes drain as planned.
- Day 2: Mix your first nutrient solution following the product guidelines. Test the pH to keep it between 5.5 and 6.5 for best results.
- Day 3: Plant your seedlings or seeds in the system’s net pots. Check they fit snugly and their roots can access the solution easily.
- Week 1: Set up your grow lights about 12 inches above plants. Make sure lights run 14 to 16 hours daily to mimic sunlight.
- Week 2: Monitor water temperature and keep it between 65 and 75°F for healthy roots. Adjust heater or room conditions if needed.
- Week 3: Look for any yellowing leaves or slow growth. Troubleshoot common problems like nutrient imbalance or light issues early on.
- After 1 Month: Consider expanding your system by adding more plants or tanks. Check that your existing setup handles the extra load without stress.
Frequently Asked Questions
Can I Use Household Items to Build a Hydroponic System?
Yes, many household items like buckets and storage bins work well. They help keep costs low and make the project simple and fun.
What Type of Water Should I Use in My Hydroponic System?
Use clean, pH-balanced water for best plant health. Tap water often works but check the pH and adjust if needed.
How Often Should I Change the Nutrient Solution in Hydroponics?
Change the nutrients every 1 to 2 weeks to avoid buildup. Fresh solution keeps plants nourished and diseases at bay.
Can I Grow Fruiting Plants Like Tomatoes in Hydroponics?
Yes, tomatoes and peppers do well if given proper support and nutrients. They might need more space and light though.
What’s the Best Way to Monitor Plant Health in Hydroponics?
Regularly check leaves for color and spots and roots for firmness. Early detection helps fix problems before they get worse.
Do Hydroponic Systems Need Ventilation or Fans?
Air circulation helps prevent mold and strengthens plants. Small fans or open windows work well for airflow.
Wrapping Up
Hydroponics lets you grow plants efficiently without dirt. Start small and watch your system make healthy plants. Next, try adjusting light or nutrient levels to see how your garden responds.