How to Use a Garden Hoe: Practical Tips and Techniques That Work
Learning how to use a garden hoe makes weeding faster and easier. A hoe helps you clear weeds without bending over or pulling by hand. Start by picking the right hoe for your garden tasks.
Use it with shallow strokes near the soil surface. This helps control weeds without digging too deep.
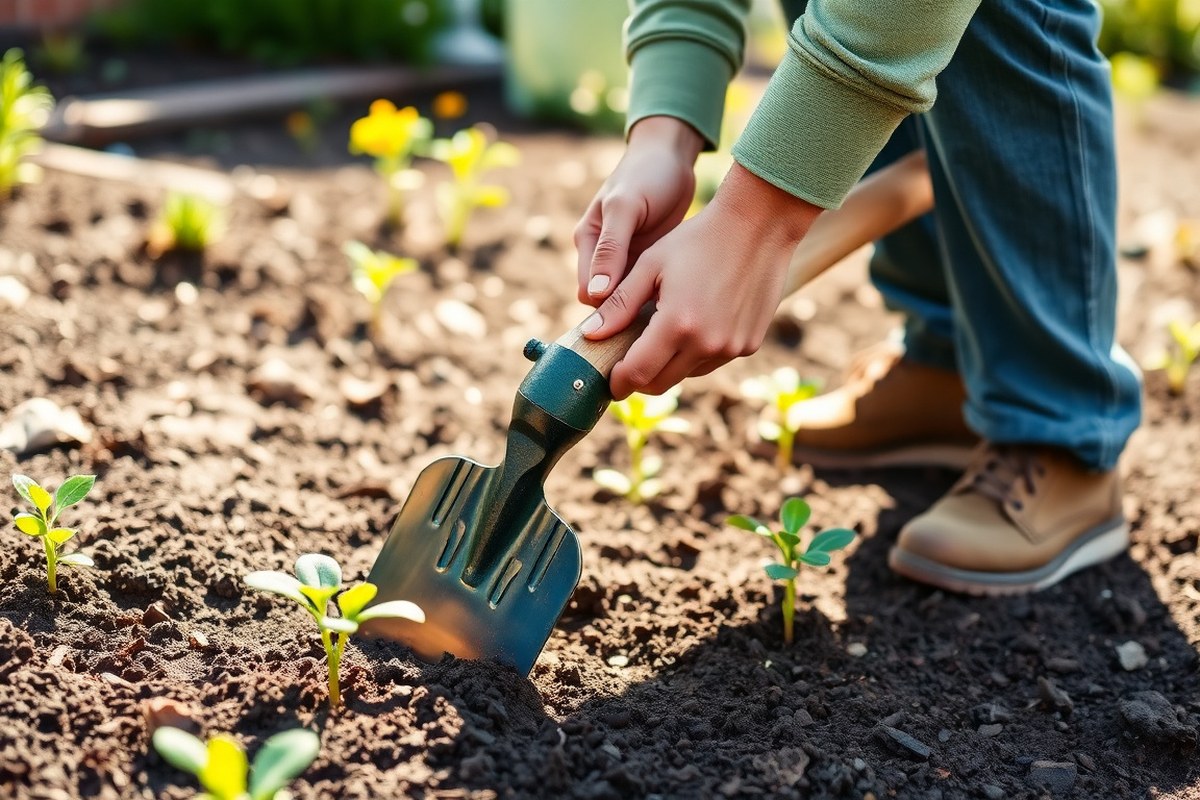
Prepare your soil by watering lightly 12 to 24 hours before hoeing. This softens the soil just enough to let you cut the weeds’ roots without making mud. Hold the hoe blade about half to one inch deep.
Chop weeds gently at this depth. Avoid cutting too deep to protect your plants.
Switch hands every 10 to 15 minutes to avoid arm fatigue, especially in bigger gardens. Use short, smooth pushes or pulls depending on the hoe type. This keeps your work steady and helps prevent back strain while you work.
Key Takeaways
- Pick a hoe type that matches your plants and soil conditions.
- Use a draw hoe with a chopping motion for breaking tough soil.
- Scuffle hoes work best on young weeds, especially in carrot and salad beds.
- Water the garden lightly one day before hoeing to soften soil.
- Keep your hoe blade depth between half and one inch for best results.
- Switch your hoe between hands every 10 to 15 minutes to reduce fatigue.
How to Use a Garden Hoe Effectively for Weeding

Using a garden hoe to remove weeds saves you time and effort. It’s best to keep the blade shallow to avoid hurting plant roots. Position the blade correctly.
Use smooth motions to remove weeds. Avoid disturbing your garden soil.
- Hold the hoe with both hands, one near the middle and one at the end. This grip gives you control and helps avoid back strain. Keep your back straight as you work.
- Angle the hoe blade at about 45 degrees to the soil surface. This angle lets the blade cut weeds just under the soil without digging too deep. Avoid going deeper than 1 inch to protect nearby roots.
- Use a back-and-forth slicing motion for small weeds. This motion cuts weed roots cleanly with little soil disruption. For larger weeds, push the blade forward then drag it back toward you.
- Start at the garden bed’s edge and work across in rows. Keep the hoe moving steadily but without force. Aim to remove young weeds before they root deep.
- Hoe frequently, about every one to two weeks during the growing season. This keeps weeds from coming back and saves you from heavy work later. Check for new sprouts after rain or watering.
- Adjust your stance often to avoid straining your back and legs. Stand with feet shoulder-width apart and shift weight between legs. Pause if you feel tired or stiff.
- Rinse or tap off soil from the hoe blade during use. This keeps the blade sharp and effective. A clean blade cuts weeds more easily and helps you finish faster.
For weeds near plants, a collinear hoe’s thin blade lets you weed carefully around stems. Stirrup hoes work best on larger areas to skim soil and chop weeds without digging. Use lighter pressure in garden beds with many plants to protect roots while clearing weeds.
Types of Garden Hoes and Their Best Uses
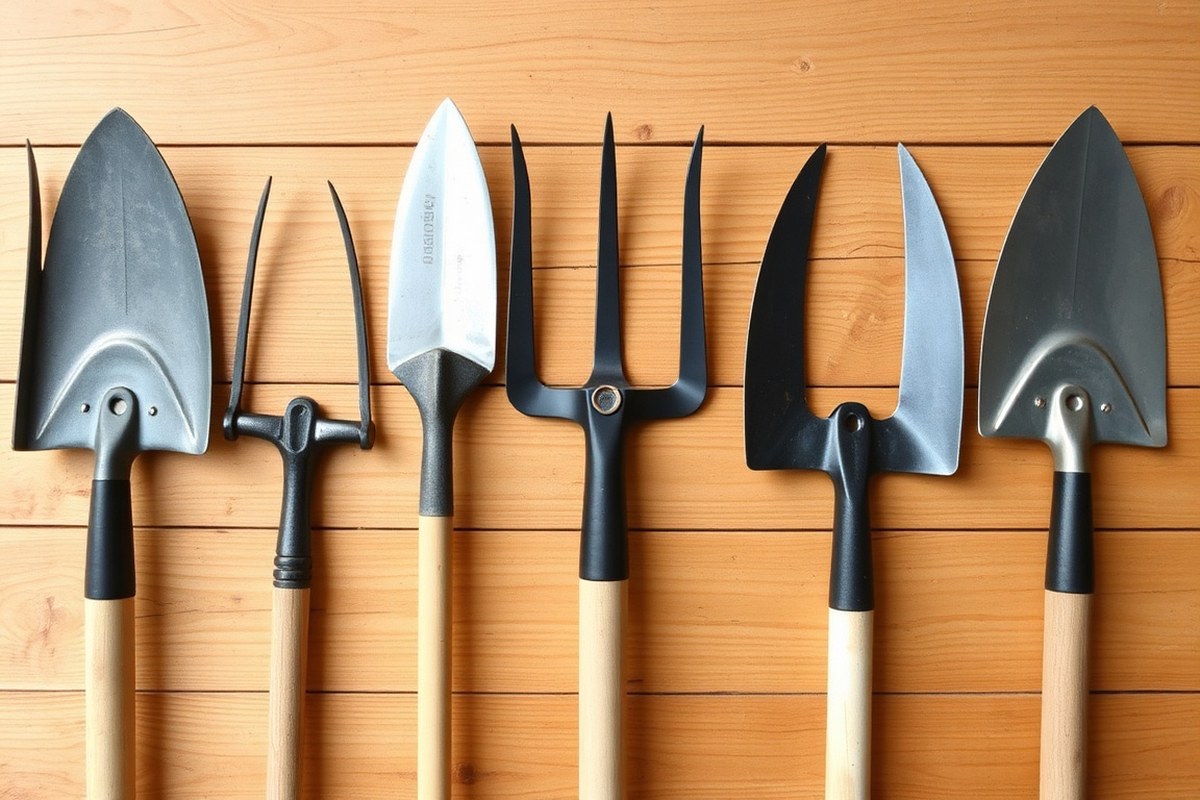
Garden hoes come in various types, each suited for specific tasks. Choose a hoe based on soil type and weed size. Also think about the task you need to do.
A heavier hoe works better for tough soil and big weeds. Lighter hoes are easier for surface weeding and light cultivation.
A draw hoe has a flat blade set at a right angle. You use it for digging, chopping, and shaping soil. It works well in compacted dirt and removes heavy weeds or creates planting rows.
The Dutch hoe has a flat blade set across the handle. It slices weeds just under the soil with a push-pull move. This keeps weeds down without hurting nearby plants.
Scuffle hoes, also called stirrup hoes, have a looped blade that moves back and forth. They’re ideal for light cultivation and cutting small seedlings under the soil surface. These hoes work best in sandy or loose soil.
They disturb weeds without turning the ground too much. This helps keep soil structure intact.
| Hoe Type | Description | Best For | Handle Length & Blade Angle |
|---|---|---|---|
| Draw Hoe | Flat, square blade at right angle | Heavy weeds, digging, soil shaping | Long handle; blade perpendicular to handle |
| Dutch Hoe | Flat, rectangular blade, horizontal | Slicing surface weeds using push-pull | Long handle; blade at low angle for slicing |
| Scuffle Hoe (Stirrup) | Looped blade, oscillates back and forth | Light cultivation and surface weed cutting | Medium handle; blade parallel for scuffling |
| Collinear Hoe | Narrow, angled blade for precise cuts | Weeds in tight spaces and close weeding | Shorter handle; blade set for detailed work |
Collinear hoes have a narrow blade angled precisely to cut weeds close to plants. They fit well into tight spaces like between rows or containers. The short handle gives more control for delicate tasks.
You want a hoe with a long handle for more use and less bending. Heavy blades need strong handles, often wooden or steel, to withstand pressure. Lighter hoes often have shorter handles and smaller blades.
They use less energy during long weeding sessions. This makes them easier to handle.
Try out different hoes at your local garden shop. Look for one with good weight and balance. Find the tool that feels best for you.
Choosing the Right Garden Hoe for Your Needs
Choosing the right garden hoe depends mostly on your garden size, plant spacing, and daily tasks. Small gardens with close plants need a different hoe than large, open plots. Pick a hoe blade that matches your bed size.
Choose a handle length that fits your plants. This helps you work more easily and safely.
Assessing Garden Size and Plant Arrangement
Long-handled hoes suit large gardens. They help you keep your back straight and cover more ground quickly. For raised beds or small patches, shorter handles give better control and less swing distance.
Plant spacing shapes your hoe choice. Wide rows let you use broad blades that cut and break soil in one sweep. Tight, close plants need narrow blades to avoid damaging them when you hoe around stems.
Check your garden beds for these features:
- Garden width and length
- Raised bed height and bed size
- Average distance between plants or rows
- Presence of delicate seedlings
- Uneven or compact soil spots
Matching your hoe to these points saves work and protects plants from accidental injury. Narrow beds or tight spaces call for smaller, sharper hoes you can maneuver easily.
Matching Tasks to Hoe Blade Shape and Size
Different hoe blades fit various tasks. Wider blades are better for breaking soil and cutting weeds in open spaces. Triangular or pointed blades work well in tight spots or close to plants.
For raised beds, small or medium blades are best. You can work close to roots without disturbing them. Also, a sharpenable blade helps you keep it effective against tough weeds.
Common blade options to consider:
- Wide flat blade for cultivating and soil breaking
- Pointed blade for tight spots and precise weeding
- Hoe with a sharpenable steel blade for long-term use
- Adjustable-width blades for multiple tasks
- Swivel or oscillating blades for uprooting stubborn weeds
A sharpenable blade lasts longer and makes your job easier when cutting roots. Dull blades tear plants and waste energy.
Handle Length and Material Considerations
Handle length affects your hoeing comfort and efficiency. Long handles let you stand upright while working large plots. Short handles fit raised beds where space is tight.
Most long handles range from 48 to 60 inches. For raised beds, handles of 24 to 36 inches often work best. Check your own height and how far you can reach comfortably.
Handle materials matter too:
- Wood handles feel natural and provide good grip
- Fiberglass handles resist weather and last longer
- Metal handles offer durability but can be heavier
- Ergonomic grips reduce hand strain during long use
- Non-slip coatings help in wet or sweaty conditions
Try different handle lengths before buying. The right size prevents back strain and lets you hoe longer without fatigue.
Budget and Durability Factors
Cost varies from $10 for basic hoes to $50 or more for heavy-duty models. More expensive hoes usually have better steel blades and durable handles. They stay sharper longer and resist breaking.
Buying a cheap hoe can mean sharpening often or replacing it sooner. A durable hoe saves money over time, especially if used weekly. Look for rust-resistant blades and reliable attachment points.
Consider your planting season too. Choose a mid-range hoe for occasional use. It’s a good fit without spending too much.
Keep the hoe clean and dry after use to extend its life regardless of cost. Dirt and moisture damage blades and handles quickly.
Proper Stance and Grip for Comfortable Hoeing
Stand with your feet shoulder-width apart to keep balance while hoeing. Keep your back straight and bend your knees slightly.
Use your legs to move the hoe rather than leaning forward or hunching over. This reduces back pain and helps you last longer during weeding sessions.
Grip the hoe handle with both hands for steady control. Keep one hand close to the handle’s top and the other just under the blade. This hold helps you steer the hoe clearly and use the right strength.
Switch hands regularly, about every 10 to 15 minutes, to avoid muscle fatigue. Changing your hand placement keeps your arms and shoulders from getting tired.
Notice any strain on one side? Stop to rest or swap hands earlier.
Keep a relaxed grip on the handle to reduce hand cramps and joint stress. A hoe with a well-balanced, comfortable grip helps with this. Choose one that fits your hands well and feels light enough to swing without tiring quickly.
Avoid locking your elbows or tensing your shoulders during hoeing. Keep your elbows slightly bent and your arms relaxed. Using good posture helps lower tiredness during long gardening sessions.
Long-handled hoes let you stand upright while working and keep your spine aligned. Avoid short hoes that make you bend over too much. Standing tall lessens pressure on your lower back and knees, making gardening easier.
In tight spaces, you might need to lean forward briefly. When that happens, do it from your hips, not your back. This technique helps keep your back safe and stops aches after long weeding sessions.
Hoeing Techniques for Different Weeds and Soil Conditions
Changing your hoeing method helps you handle different weeds and soil. Small, young weeds need a light, slicing motion.
Tough weeds or hard soil require stronger pulls and deeper strokes. Knowing when to hoe wet or dry soil also makes a big difference.
The Scuffle Technique for Surface Weeds
The scuffle hoe works best on small, newly sprouted weeds. It uses a push-pull action that cuts weeds just below the surface. This method prevents damage to your soil and leaves young weeds too weak to grow back.
Use the stirrup-shaped blade to lightly skim the soil. The blade should cut roots near the surface without digging deeply. This keeps soil disturbance minimal and stops young weeds from reclaiming your garden.
- Hold the hoe with a comfortable grip and stand upright.
- Push the blade forward lightly into the soil surface at about 15 degrees.
- Pull the blade back toward you, slicing through weed roots close to the soil.
- Keep a rhythmic back-and-forth motion covering all weedy areas.
- Stop when you see the soil surface freshly cut and weeds uprooted.
The scuffle technique won’t work well on established weeds with deep roots.
Draw Hoe for Breaking Up Soil and Heavy Weeds
The draw hoe is great for old, tough weeds and hard soil. It cuts by pulling the blade toward you, letting you slice deeply. This tool also helps create rows or mound soil for crops like potatoes.
This method requires more effort but gives precise control near crops. Using the hoe’s corners lets you work close without harming plants. It is best for dry or firm soil that doesn’t crumble easily on its own.
- Grip the hoe firmly, bending your knees slightly for balance.
- Place the blade at a 20-degree angle to the soil surface.
- Pull the hoe blade toward you with a steady force to slice roots.
- Use the tool’s corners near plants for accuracy.
- Lift the loosened soil or weeds aside after cutting.
Don’t use the draw hoe on wet or muddy soil. It clogs and tears roots ineffectively.
Adjusting Depth and Angle for Soil Type
In soft, moist soil, hoe at a shallow depth of about 1 inch. This stops disturbing deeper roots and encourages better weed control. Dry or crusted soil needs a deeper cut.
Cut 2 to 3 inches deep. This helps break up the soil.
The blade angle affects how the hoe moves through soil. Hold it at 15 to 20 degrees for slicing. Higher angles dig more but may pull up soil you want to keep undisturbed.
You can hoe wet soil, but avoid working right after heavy rain or watering. Wet soil clumps, making the process messy and less effective. Wait for the soil to dry slightly to crumbly but still moist for best results.
Hoeing Close to Plants with Precision
Use the draw hoe’s corners or a smaller hoe type for delicate work near plants. This helps you clear weeds without damaging roots or stems. Always work slowly and watch where the blade moves.
Hand-pulling very close to sensitive plants is safer when you need precision. Hoe lightly just outside the root zone, then remove any remaining weeds by hand. This protects your plants and stops accidental harm from heavy tool use.
- Choose a hoe with a narrow or pointed blade for tight spots.
- Approach plants gently, keeping the blade angle low.
- Sweep or pull soil away from the plant base carefully.
- Remove loosened weeds by hand if close to roots.
- Inspect the area to avoid missing small weed shoots near plants.
Always slow down near plants; a sharp blade can cut roots if you rush.
Maintenance and Cleaning to Keep Your Hoe in Top Shape
Maintenance and Cleaning to Keep Your Hoe in Top Shape
Clean your garden hoe after each use to remove dirt and debris. Sharpen the blade regularly with proper tools to maintain efficiency. Store your hoe carefully to prevent rust and damage.
Cleaning Dirt and Debris After Use
Right after you finish hoeing, scrape off clumps of soil. Use a stiff wire brush or a putty knife to clear dirt stuck on the blade. Dry the blade with a cloth to stop moisture from causing rust.
Try not to leave mud on the hoe overnight. Moist soil can trap moisture, which encourages rust and dulls the blade. Cleaning while the blade is still warm and dry helps prevent buildup.
Sharpening Techniques with Files and Stones
Sharpen your garden hoe blade with a metal file or sharpening stone. Hold the hoe steady and use smooth, even strokes along the blade’s edge. Match the angle of the original bevel, usually around 30 to 45 degrees.
Sharpen your hoe every few uses or when it starts cutting less cleanly. For average home gardeners, this could mean every 5 to 10 hours of use. Use a fine-grit sharpening stone after filing to smooth the edge and prevent nicks.
- Use a flat file for quick sharpening
- Choose a sharpening stone for finer edges
- Sharpen at the original blade angle
- Wear gloves for safety during sharpening
- Work in a well-lit, stable area
- Wipe blade clean after sharpening
Keeping the blade sharp makes hoeing easier and reduces strain. A dull blade tears weeds instead of cutting them, which is less effective.
Regular Inspection and Rust Prevention
Look over your hoe each time before you use it. Check for cracks, chips, or loose handles that could cause injury. Early fixes prevent bigger problems later.
Rust can form if moisture stays on the hoe. After cleaning, put a thin coat of oil on the metal. Vegetable or machine oil works well for this step.
It helps stop rust and keeps the hoe ready to use. This keeps rust away and helps the blade slide through soil.
Proper Storage Tips
Store your garden hoe in a dry spot to avoid rust and wood handle damage. Hanging it on a wall hook keeps the blade off the floor and away from moisture. Avoid leaving it outdoors or in damp sheds.
Store the hoe outside only with a cover or toolbox. This protects it from rain and sun damage. Without cover, metal parts can rust quickly.
Periodically check stored tools for rust spots or loose handles. A clean, dry space preserves your hoe and keeps it ready for work.
Safety Tips to Prevent Injury While Using a Garden Hoe
Wear sturdy gloves to protect your hands from blisters and cuts. Sturdy shoes with good grip keep your feet safe from slipping and dropped tools. Eye protection is smart if dust or debris flies while you hoe.
Hold the hoe firmly with both hands and keep your movements steady. Never swing it wildly or near power lines. When carrying it, point the blade down.
Hold the handle close to your body. This way, you avoid hitting anything.
- Wear gloves, closed shoes, and eye protection
- Hold the hoe with two hands and move smoothly
- Carry the hoe blade-side down, handle close to body
- Keep your back straight and knees slightly bent
- Stop if you feel sharp pain or extreme tiredness
- Avoid leaving the hoe lying flat on the ground
- Store the hoe blade-side up in a dry, ventilated spot
Stand with your back straight and bend at the knees when hoeing. This posture helps reduce strain on your lower back.
It also eases tension in your shoulders. Using a hoe with a handle length that fits your height helps avoid bending too much.
Recognize signs of over-exertion like sharp pain, dizziness, or extreme fatigue. Take breaks, drink water, and stretch your muscles. Don’t push too hard; too much pressure can harm plants and compact soil.
Timing and Duration: When and How Long to Hoe Your Garden
Work your hoe when soil feels dry and crumbly. Usually wait a day or two after rain or watering. This timing helps soil break up easily.
Soil should not be damp or muddy. Wet soil clumps and sticks to your tool. This makes hoeing more difficult.
Dry mornings or sunny days are best for hoeing. This breaks up weeds and loosens soil gently. It keeps your garden clean without mud.
After rain or watering, wait for soil to dry a bit. It should feel loose but not dusty. Then it’s ready for hoeing.
This balance helps you cut weeds just below the surface without disturbing the soil too much. Avoid hoeing right after watering or during rain when soil is wet and sticky. The tool won’t glide well and will clump soil.
Timing hoeing sessions depends on garden size and weed pressure. For a small bed, hoe for 15 to 30 minutes every two or three weeks. This usually keeps weeds under control.
It saves lots of time. Larger gardens may take 30 to 60 minutes or more per session.
This is needed when weeds grow fast in spring and summer. Plan extra time then.
Repeat hoeing every few weeks during growing seasons to keep new weed seedlings from spreading. Increase hoeing to once a week when weeds grow fast from frequent rain or irrigation. This helps stop weeds before they spread.
It keeps the garden tidy. In dry times or with good soil cover, hoe less often.
Once a month may be enough. This saves effort when weeds grow slowly.
Quick sessions focusing on cutting weeds about half to one inch below the surface work best. Avoid deep digging, which damages roots of your plants and disrupts soil texture. Use a long-handled hoe to keep your back straight.
This posture lets you work longer without getting tired. It also helps you move smoothly.
Hoe your garden when soil is dry and crumbly. Avoid working in wet or muddy soil. Wet soil makes your tools less effective.
Using a Garden Hoe for More Than Just Weeding
A garden hoe can do more than just weed. You can create seed drills, aerate soil, and prepare planting beds with it. Some hoes, like the draw hoe, are great for loosening soil and making furrows.
The Dutch hoe works best for seed drilling. Its flat blade forms shallow trenches easily. This helps plant seeds neatly in the ground.
After sowing, the draw hoe’s flat side can cover seeds with soil. Cultivating hoes have wider heads that break soil quickly.
They prepare beds well. You can also use them for aerating soil.
Light soil aeration happens when you carefully chop the soil surface with the hoe. You shouldn’t dig too deep because hoes aren’t made for heavy digging. Using the right hoe for these tasks saves time and reduces strain.
Here’s how to use your garden hoe for these tasks:
- Clear the garden bed of large debris and weeds to work on bare soil.
- Use a cultivating hoe to chop the soil surface gently. Aim for 1 to 2 inches deep.
- To make seed drills, turn over a Dutch hoe and drag its side to form 0.5-inch-deep furrows.
- Place your seeds evenly along the trenches you created.
- Flip your draw hoe so the flat side faces down. Drag it over furrows. This covers seeds with soil evenly.
- Lightly press the soil with the blade to ensure good seed-to-soil contact.
- Water the newly planted bed gently to settle the soil without washing seeds away.
This method works well in small to medium-sized garden beds. Avoid heavy clay soil for furrows because it clumps and won’t close easily. For very hard soil, use a pick or spade first, then finish with the hoe.
Seed drills made this way help plants grow in straight rows and get even water. Breaking soil with a hoe also prevents compaction, letting roots breathe. Just remember, hoes aren’t for deep digging or turning huge amounts of soil.
Quick-Start Action Plan for Using Your Garden Hoe
Follow these steps to start using your garden hoe confidently and see results soon.
- Day 1: Choose the best hoe for your garden size and soil type. You’ll know it’s right if it feels comfortable and effective during a quick test swing.
- Day 2: Practice your stance and grip in a small garden area. Notice if you can keep your back straight and avoid wrist strain.
- Week 1: Start hoeing near your plants early in the morning. Hoe late in the afternoon too for cooler weather. This helps keep you comfortable while working. Check that weeds are uprooted without damaging your plants.
- Week 2: Try different hoeing techniques on various weeds and soil patches. Confirm effectiveness by seeing fewer weeds after several days.
- After Each Use: Clean and dry your hoe to prevent rust and damage. When the hoe stays sharp and clean, it works better and lasts longer.
- Monthly: Inspect your hoe for loose handles or worn blades. A secure and sharp hoe will feel safe and easy to use.
- Seasonal Task: Use your hoe to mix compost into soil before planting season. You’ll notice improved soil texture and easier planting.
Frequently Asked Questions
How Often Should You Take Breaks While Using a Garden Hoe?
Take breaks every 10-15 minutes or after finishing a garden bed. Switching hands during breaks helps avoid muscle strain and keeps you comfortable.
Can Using a Garden Hoe Help Prepare Soil for Planting?
Yes, a garden hoe helps break up soil and create furrows. This prepares the garden bed for planting seeds or seedlings effectively.
What’s the Best Way to Store a Garden Hoe When Not in Use?
Store a garden hoe in a dry, sheltered place to prevent rust and damage. Hanging it up keeps the blade sharp and the handle in good shape.
How Sharp Should the Blade of a Garden Hoe Be?
A garden hoe blade should be sharp enough to cut weeds easily without digging too deep. Regular sharpening improves efficiency and reduces effort.
What’s the Proper Way to Clean a Garden Hoe After Use?
Clean the hoe with water to remove soil, then dry it thoroughly. Removing plant residue prevents disease and keeps the tool in good condition.
Can a Garden Hoe Be Used on Rocky Soil?
Using a garden hoe on rocky soil is possible but requires care. Avoid striking large rocks to prevent damage to the blade and handles.
The Bottom Line
Using a garden hoe well makes weeding and soil work easier and faster. Try out your hoe soon and adjust your technique as you go. Your garden will thank you with healthier plants and fewer weeds.